The financial tile will show you the financial details for all the Current/upcoming and historical enrolments. You can see the enrolment number, program code, total invoiced amount, total paid amount, balance amount and total commission.
You can also generate the Student Statement of Account from the Print Icon.
After selecting the generate button the report will be visible on the report dashboard, from where you can download the report whenever you want.
This tile will give you an overview of the basic information of the student. You can upload the student profile picture here and edit the details of the student.
Basic Information
You will see some basic information about the student displayed in this tile. It will show the gender and the age of the student in the first line. In the second line, it is displaying the date of birth of the student. It will display the mobile number and primary email address of the student further.
Upload Student Profile Picture
For uploading or changing the student profile picture, you need to bring your cursor near the thumbnail of the picture and the system will show two icons as shown below.
To upload the student profile picture by clicking the picture using the system upload, click on this icon.
To save the student profile picture after uploading the picture from your computer, click on this icon.
Printing letters in bulk from listing screens is a helpful feature that allows you to quickly generate and distribute various letters to students, such as warning letters, course progress letters, course completion letters, poor academic progress warning letters, and other types of letters. The process involves logging into the relevant dashboard, selecting the appropriate listing screen, filtering the data to include only the desired students, selecting those students, generating the letters, reviewing and editing them as necessary, and then printing them in bulk or downloading them as PDF files. This method saves time and is an efficient way to communicate important information to a large group of students.
You can individually generate the letters from the dashboards that we have such as:
Select the checkboxes against the student number. (You can select more than one student)
Select the Burger Menu on the right hand side corner of the screen.
In the burger menu, select the Print letter option which will open a pop window on the screen.
Select the template from the dropdown that you have customised for print letters and hit the generate button.
Note – Once you select the generate button, the system will direct you towards the Report Dashboard where you can see your report in queue or underprocessing. Give it a refresh to check if the report’s done, and then you can download the word and PDF versions.”
Contact logs are like notes for an RTO. TEAMS allows you to create contact logs for students, employers, and agents. You will see this option on all the listing screens and in the communication tile. You either can create a contact log in Bulk by using the listing screens or you can make it individually for a student or agent by using the communication tile on different dashboards that we have such applicant/student dashboard, application/enrolment dashboard, agent dashboard, etc. No matter what screen you choose to create the contact log/s, the steps to use this functionality are the same everywhere. This post will explain how you can use the “Create Contact Log” option.
Select the “Create Contact Log” option.
This will open a popup window.
Update the contact date. This is the date when you are entering the contact log and this is a mandatory field that cannot be left blank.
The user Name field is automatically loaded by the system. This is the user’s login name who is currently entering the contact log.
Select your Log type. This is to identify what kind of notes you are going to create. This is a user code and you can create the User Code as a log type as required, such as Late Fees, Financial support due to COVID, etc.
If you wish to show the contact log that you are going to create in the student portal, then select the tick box:
Type in your notes in detail for the contact log by selecting the “Notes” icon. It will open a popup message box for you to type in your notes manually.
Select the Notes icon again to close the popup message box.
If you are entering the notes for a specific subject, then select that subject from the “Subject” dropdown.
TEAMS gives you the option to send out email/s to students, employers and agents. You will see this option on all the listing screens and in the communication tile. You can either send the emails in Bulk by using the listing screens or you can send individual emails by using the communication tile on different dashboards. No matter what screen you choose to send out the email/s, the steps to use that screen are the same everywhere.
How to send emails
Select the “Send an Email” option from the Burger Menu
The system will redirect you to the “Compose Email” screen. Use a comma between email addresses to CC the mail to them.
Select an email template if you’ve added any in your TEAMS. If you do not have an email template, you can leave this field blank.
If you have selected the email template, the subject field will be updated manually. However, if not, you can update the subject manually.
The sender address is automatically entered by the system (it is always the user’s email address). If you have linked a specific sender address with an Email Template, that email address will be listed in the dropdown menu, along with any email address you have linked as default at the organisation level. If there are no email addresses updated at the Email Template or Organisation Level, then you will only see the user’s email address in the Sender field, no other email addresses will be visible. Note – When you are using the Application or Enrolment Dashboard to send out emails and the agent is linked with the application/enrolment, you will see some more tick-boxes. If you select “Send email to the agent only”, then the system will send out the email to the linked agent only and if you tick “CC to Agent”, then it will be sent to the student and agent. And if you aren’t ticking any of the above tick-boxes, then the email will be sent to students only.
To attach a document from your computer or Network, select the Attach button
IMPORTANT: Do not change the fields that are in curly braces. Those are called merge fields to populate the data by TEAMS and if you remove anything from them, the system won’t print the data when you send out the email to the student or the agent.
Note – If you are sending emails individually from the student’s communication tile then the system will allow you to attach the documents generated from the student level only.
Select the “Send” button to send out the email and your email will be sent.
The Compliance section in the main menu offers a range of icons that provide access to various screens and reports related to monitoring data in compliance with government requirements. These icons enable you to generate NAT files for AVETMISS submission and perform other necessary compliance-related tasks.
By selecting the appropriate icon, you can quickly navigate to the desired screen or report and efficiently manage your compliance obligations. Whether it’s tracking student progress, monitoring attendance, or ensuring compliance with regulatory requirements, the Compliance section provides a one-stop-shop for managing all compliance-related activities.
Dashboard > Marketing > New Application > Subject Delivery Dates
While creating the application when you are on the New Application – Subject Delivery Dates screen, you will see the default amount for each of the subjects under the Amount Column. The system has fetched the amount either from the Program Subject or Subject level where the user has already set up the fee. A user can also edit the amount if he wishes to enter a different amount other than fetched by the system.
IMPORTANT – The system will always fetch the fee amount from the program level and if it can not find any fee set up at the program subject level then it will fetch it from the subject level.
On the Application – Invoice Preview screen, the system will generate the invoices for the Subjects as shown below:
Note: The invoice date will always be the Subject’s Start date and by default, the invoice due date is also the same. If you wish to change the invoice due date, kindly contact our support team.
After the application is created, the user can check the financials on the Applicant Dashboard.
If you have any queries, please do not hesitate to contact us on 1300 85 05 85 or email us via support@rtosoftware.com.au
Main Dashboard > Finance Menu > Financial Dashboard
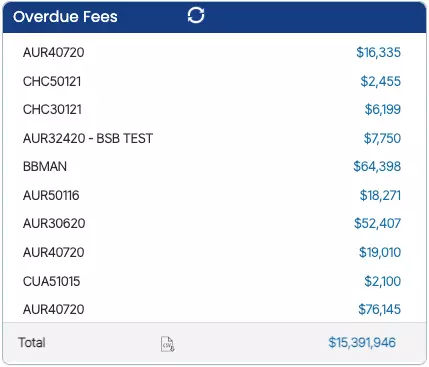
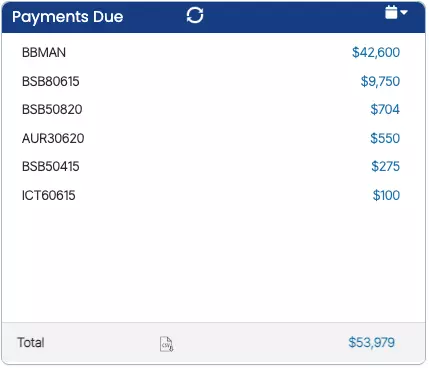
The dashboard is divided into tiles, each representing a different category of information. These tiles contain various bits of data that can be explored in more detail by drilling down into them. Additionally, the system allows for sending bulk emails and SMS messages to students, specifically related to information such as overdue fee warnings. This feature enables effective communication and notification regarding important matters to ensure smooth operations within the system.
To cater to the needs of our clients, who often require access to data presented on the listing screens in the form of downloadable reports, we have introduced a new feature. On the listing screens, you will find a icon that enables users to easily download reports for various sections.
This includes the Main Dashboard Tiles, which provides access to the Continuing Listing Screen, the Finishers tile for the Finishers listing screen, and the Starters Tile for the Starters listing. Similarly, you will also find this convenient download icon available for the Financial Dashboard tiles. This enhancement simplifies the process of obtaining data reports, allowing clients to utilise them for various purposes with ease.
When you select the Cancel icon, a popup will show on the screen. This popup will show you the list of all the critical checks that the system will go through before cancelling any enrolment. If all the critical checks have a green tick in front of them, that means that you are eligible to cancel the enrolment. But, if the check status shows the red cross instead of a green tick then it means that you have to fix it and then only you will be allowed to cancel the enrolment
When all checks result in a green tick then you can cancel the enrolment. Just enter the Cancellation Date, Cancellation Reason and Note.
IMPORTANT: There are some checks you can fix before cancelling if those results in a fail. For example, Enrolment flagged as started or Enrolment flagged as finished. One can easily unstart or unfinish the enrolment from Enrolment Dashboard and then you can cancel the enrolment. By cancelling enrolment, the system will also cancel all the invoices which do not have any transactions related to them. The compliance tile will be hidden after cancelling an enrolment. Also, you will not see any action button on any of the tiles.
 Icon.
Icon.
 of the picture and the system will show two icons as shown below.
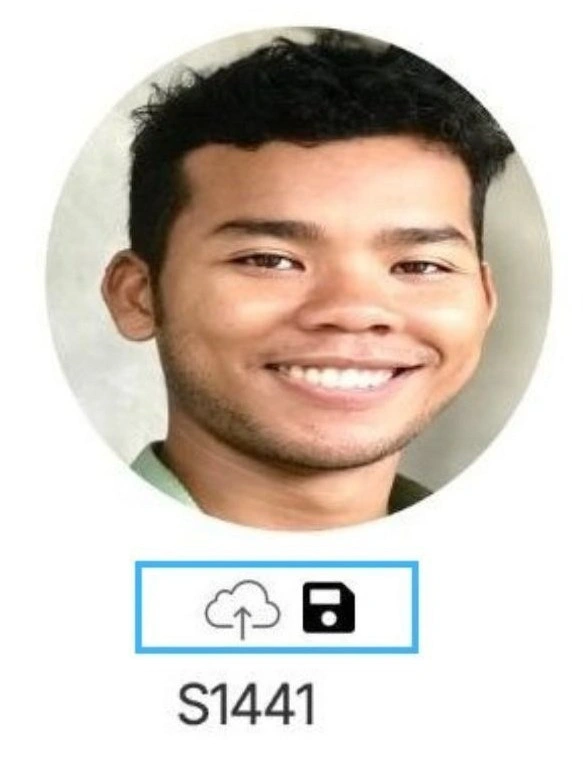


 Not sure how to set up the subject fee. Kindly, read the post