There are three ways to set up invoicing method in TEAMS:
Program Based – By default this is set as it is the standard version in the system.
Subject Based – if you prefer to only raise invoices based on subjects then select this option instead.
IMPORTANT: if you select this option, you will have further set up to do and the system will NO LONGER raise program based invoices as it currently does.
Both – If you want the option to do either, then select this, you will also have further setup to do.
Program Based – If this setting is turned on, the system will generate the invoices from the Program level for all the campuses.
Subject Based -If this setting is turned on, the system will generate the invoices from the Program Subjects level if the Fees are set up for the Subjects, otherwise the system will fetch the fees from the Subjects level.
Both: If this system setting is turned on then you need to select the radio button (Program Based or Subject Based) as desired on the settings tab, whether you want the system to generate invoices for Programs or Subjects for the specific Campus from the campus entry screen as shown below:
We have introduced a new feature called Recalculate on the New Application – Invoice Preview screen. If the existing instalment plans do not apply to any special case. Then Yes now you can make those changes for such special cases in the application process itself.
You can edit the dates, add the number of instalments as you need and also can edit the amount of all the instalments. But make sure the total amount you selected/entered at the fee selection step is equal to the total of all the invoices amount at the invoice preview screen.
Note: if you have selected any instalment Plan while selecting the Fees on the Application Fee Selection screen and you wish to change the No. of invoices and Recalculate them on the Application – Invoice Preview screen then the Instalment settings initially chosen will be ignored. As part of the Recalculation, new invoices will be recreated and dates and amounts will be distributed proportionally.
Steps to follow while Recalculating Invoices:
Step1 – After selecting all the applicable fees at the fee selection step, then on the Invoice Preview screen, the system will show you the label No. of Invoices with a box in which you can enter the number of invoices/instalments you want to create.
Step 2 – On selecting the Recalculate Button the system will create the number of invoices you entered in the box. If you had already selected any instalment plan at fee selection step but in this step, you wish to change that plan by entering the different number of invoices and clicking on the recalculate button. The system will show a prompt message on top of the screen where you can choose OK to continue with the changes you made or select Cancel if you want the existing instalment Plan.
Step 3 – The system will recreate the new invoices as per the numeric value entered. You can edit the Invoice dates and Invoice due dates of all the invoices accordingly. Also, you can edit the amount of all the invoices.
Note: The system will only split the tuition fee equally in all the invoices and all other fees will be linked to the first invoice/instalment only
IMPORTANT: When creating/editing application/s, then either use instalment plans or re-calculate your invoice/s based on above explanation, so that the system can work efficiently for you.
We have moved the VET tick box from the Program > AVETMISS Settings screen to the Programs > Settings tab to make it easier to set a program as a VET one as shown below:
Where you are using FEE HELP in the system and you select this tick box, in the FEE HELP section of the screen it will only show you the VSL option not the Higher Ed option as you can see screen shot below:
Main Dashboard > Finance Menu > Financial Dashboard
The dashboard is divided into tiles, each representing a different category of information. These tiles contain various bits of data that can be explored in more detail by drilling down into them. Additionally, the system allows for sending bulk emails and SMS messages to students, specifically related to information such as overdue fee warnings. This feature enables effective communication and notification regarding important matters to ensure smooth operations within the system.
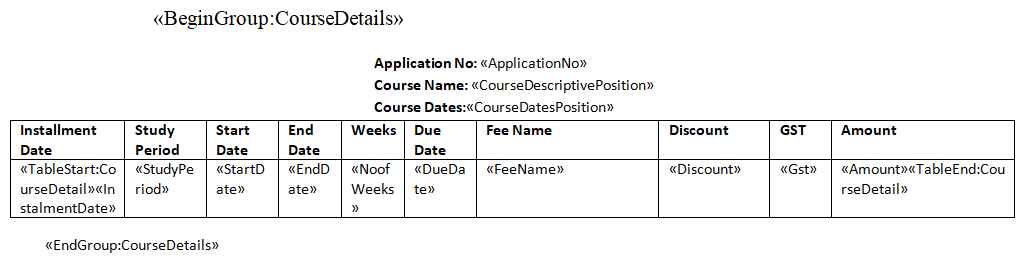
This report is used to generate the outstanding/ pending commission invoices for the agent, where you have used the Agent Pending Payments process.
If you wish to send the invoice from TEAMS for their pending payments; this is approved pending commission invoices to be paid, you can use this report to generate the invoice/s.
How to generate the report?
This is a word report and can be generated either from the Pending Payment Welcome screen
or from the final confirmation step of Pending Payments as shown below.
To know more about the Pending Payment process, click here Pending Payments.
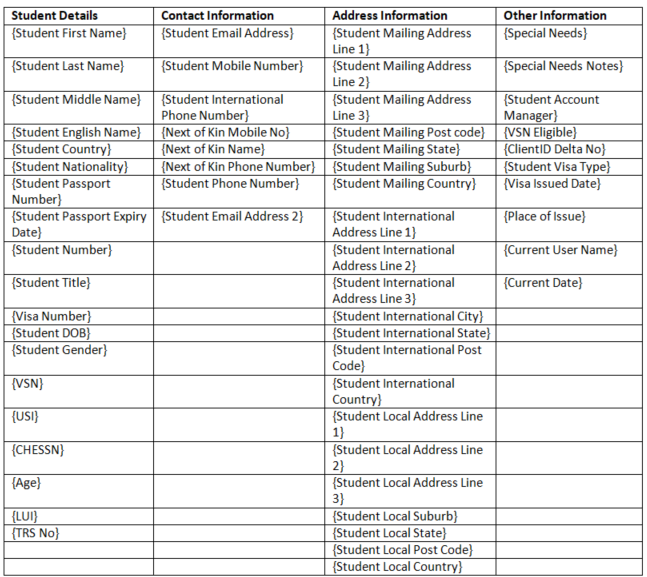
This report template can be copied and you can then create as many customised templates that the system can generate for you. To know more about the tables used in the template, you can download the master template from the Report Templates Screen.
FEE HELP is a loan scheme that helps eligible students enrolled in a fee paying place to pay their tuition fees. There are two versions of FEE HELP that are:
VSL – VET Student Loans
HED – Higher Education Loan Program
No matter what version of FEE HELP you wish to manage in TEAMS; you may wish to manage both, there are a number of steps you must complete for the system to know that you wish to manage FEE HELP. These steps are as follows:
To setup FEE HELP in TEAMS you need to complete the following steps:
Typically if you have notified TEAMS support that you wish to use FEE HELP in TEAMS, they will have turned this on for you. If you do not see options in screens such as Programs, Subjects, UoS (Unit of Studies), Applicant, Application, Student & Enrolment for FEE HELP then it may not have been turned on. To do this you need to go to the Site Settings screen under the main menu of System Admin > Organisation > Site setting. If you do not have access to this, you must speak to someone at your college that does.
On the site setting screen there is a tick box called “Is Fee help Approved” which should be selected.
Once you turn on the Fee Help approved tick box, you then need to select what version you want to use and report on from TEAMS. The options are VET student loan or HigherED or select both if relevant.
Once you have selected SAVE, all the fields related to the FEE HELP version you selected will be visible on their respective screens.
Once the above steps are completed you need to setup FEE HELP settings in the following screens:
Programs
Subjects OR
Unit of Studies (only if you are using them for a program that is for FEE HELP)
A . Program
From the main menu select the Academic Menu icon and then select the Programs icon where you will be taken to the list of Programs in TEAMS. Search and select the edit icon in the Action column for the program that you wish to setup and it will take you to the Program screen. In the Setting tab will be a field for FEE HELP Availability and there are radio buttons for:
VET Student loan (VSL)
Higher Ed FEE HELP
Neither
As shown below:
IMPORTANT: A program can only be one of the FEE HELP options it cannot be both.
By default, the option of neither will be selected, select the option that you want and then SAVE the change.
After doing the above step you then need to update the FEE HELP settings for the program by following these steps:
Click on the burger menu and select the FEE HELP option.
The system will open a dialogue box (floating window) for FEE HELP Program settings as shown below:
You need to set the settings for the program and then select the SAVE button in the bottom right-hand corner of the screen.
That is all the settings you need to do for each of your FEE HELP programs, you then need to move on to setting up your Subjects and/or Unit of Studies, based on how you have setup your programs. Please speak to support for further assistance if you are unsure what level to set up.
B .Subjects
From the main menu select the Academic Menu icon and then select the Subject icon where you will be taken to the list of Subjects in TEAMS. Search and select the edit icon in the Action column for the Subject that you wish to set up and it will take you to the Subject screen. In the Details tab, there will be a field for FEE HELP Availability and there are radio buttons for:
VET Student loan (VSL)
Higher Ed FEE HELP
Neither
As shown below:
IMPORTANT: A subject can only be one of the FEE HELP options it cannot be both.
By default, the option of neither will be selected, select the option that you want and then SAVE the change.
After doing the above step you then need to update the FEE HELP settings for the Subject by following these steps:
. Click on the burger menu and select the FEE HELP option.
The system will open a dialogue box (floating window) for FEE HELP Subject settings as shown below:
You need to set the settings for the Subject and then select the SAVE button in the bottom right-hand corner of the screen.
Then go to the burger menu again to select the Funding Fee setup for the subject.
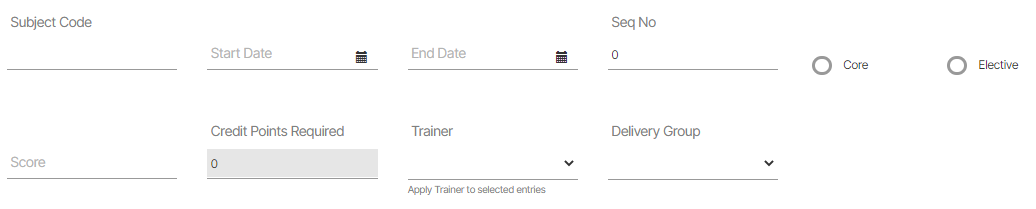
The system will take you to the Subject Funding fee setup screen. On the funding fee setup screen you can add multiple entries with the different combinations of Enrolment type/funding source code/state/delivery type by clicking on the Add button.
The system will open a dialogue box (floating window) for Subject Funding Fee setup settings as shown below:
You need to set the settings for the Subject and then click on SAVE button in the bottom right-hand corner of the screen.
C.Unit of studies
From the main menu select the Academic Menu icon and then select the Unit of Studies icon where you will be taken to the list of Unit of Studies in TEAMS. Search and select the edit icon in the Action column for the Unit of Studies that you wish to set up and it will take you to the Unit of Studies screen. In the Details tab, there will be a field for FEE HELP Availability and there are radio buttons for:
VET Student loan (VSL)
Higher Ed FEE HELP
Neither
As shown below:
IMPORTANT: A Unit of Studies can only be one of the FEE HELP options it cannot be both.
By default, the option of neither will be selected, select the option that you want and then SAVE the change.
After doing the above step you then need to update the FEE HELP settings for the Unit of Studies by following these steps:
Click on the burger menu and select the FEE HELP option.
The system will open a dialogue box (floating window) for FEE HELP Subject settings as shown below:
You need to set the settings for the unit of Studies and then select the SAVE button in the bottom right-hand corner of the screen.
Then go to the burger menu again and select the Funding Fee setup for the Unit of Studies.
The system will take you to the UoS Funding fee setup screen. On the funding fee setup screen you can add multiple entries with the different combinations of Enrolment type/funding source code/state/delivery type by clicking on the Add button.
. The system will open a dialogue box (floating window) for UoS Funding Fee setup settings as shown below:
You need to set the settings for the UoS Funding Fee Setup and then select the SAVE button in the bottom right-hand corner of the screen.
That is all the settings you need to do for each of your FEE HELP Programs, Subjects and Unit of Studies.
If you still have any queries, please do not hesitate to contact us via support@rtosoftware.com.au or 1300 85 05 85.
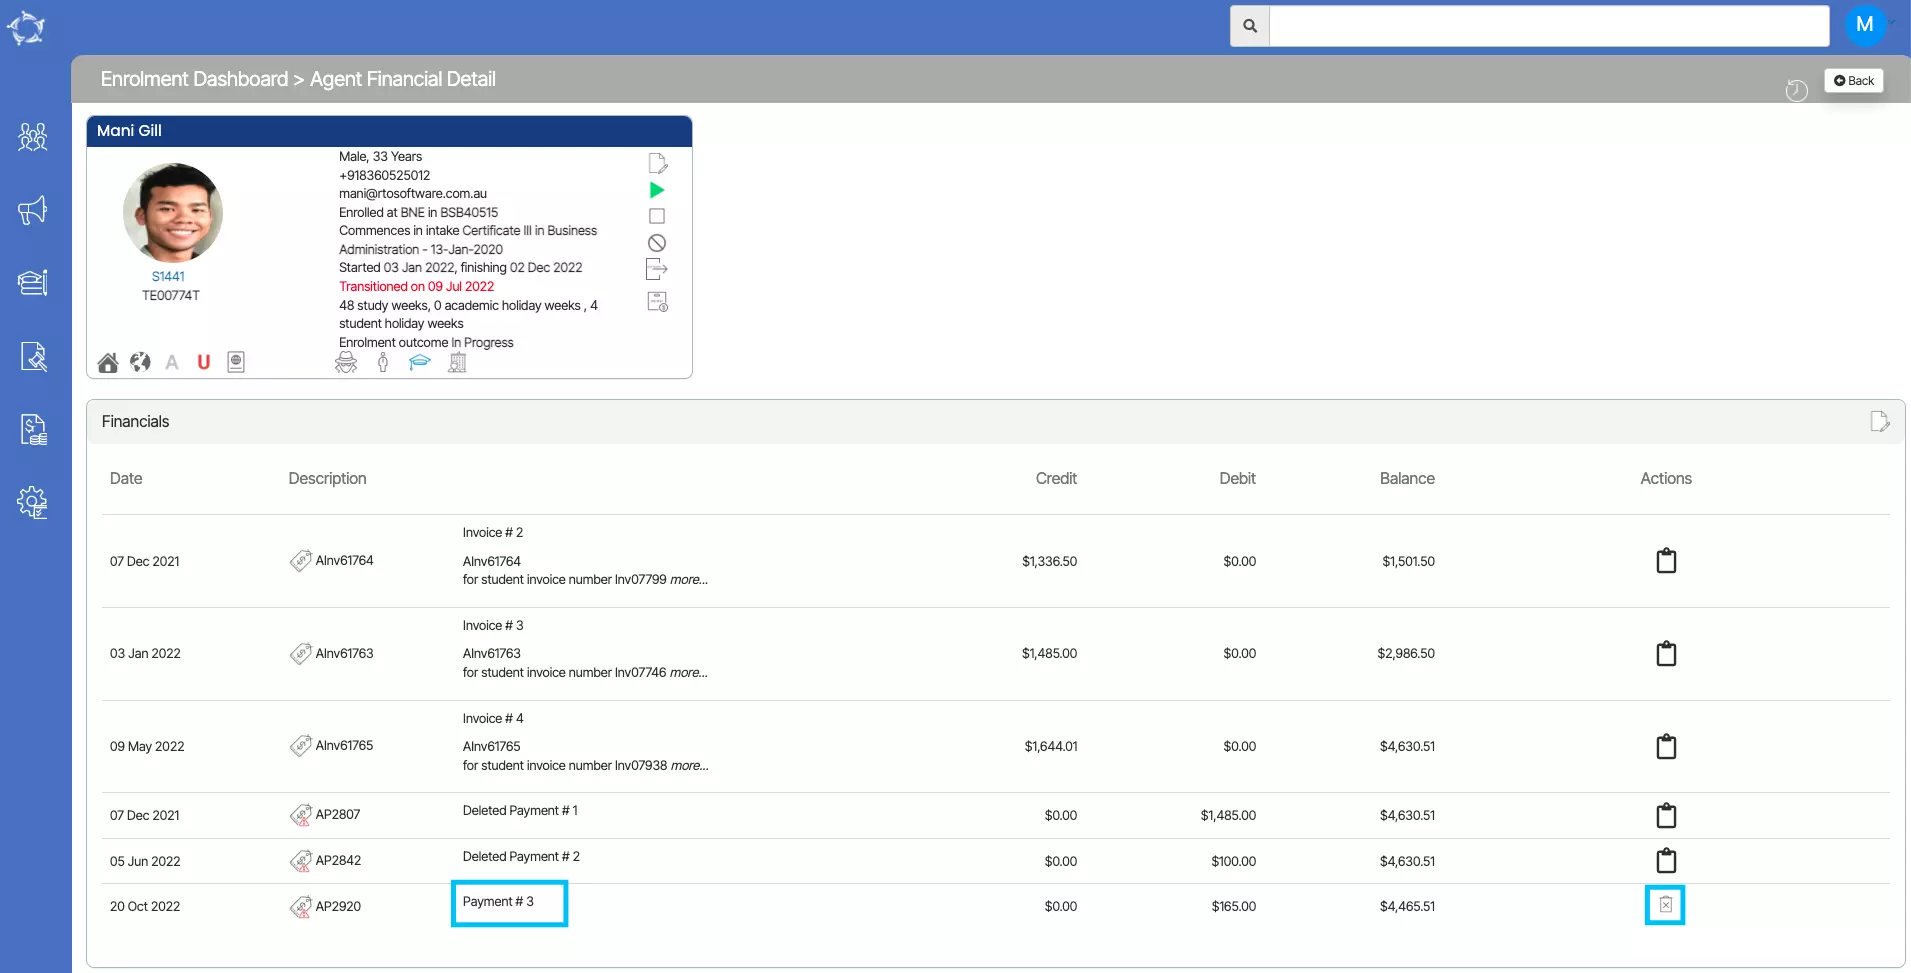
We have added a delete icon on the Agent Financial screen and now you can delete agent payments made for the students/enrolments.
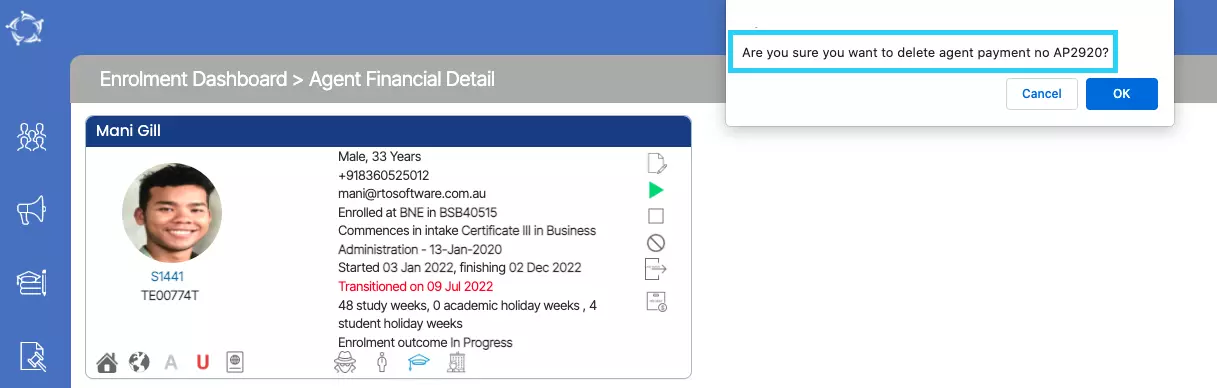
Once you select the delete icon, a pop-up will appear on your screen to confirm to delete the agent payment with the payment number. You can select OK to continue or Cancel to leave.
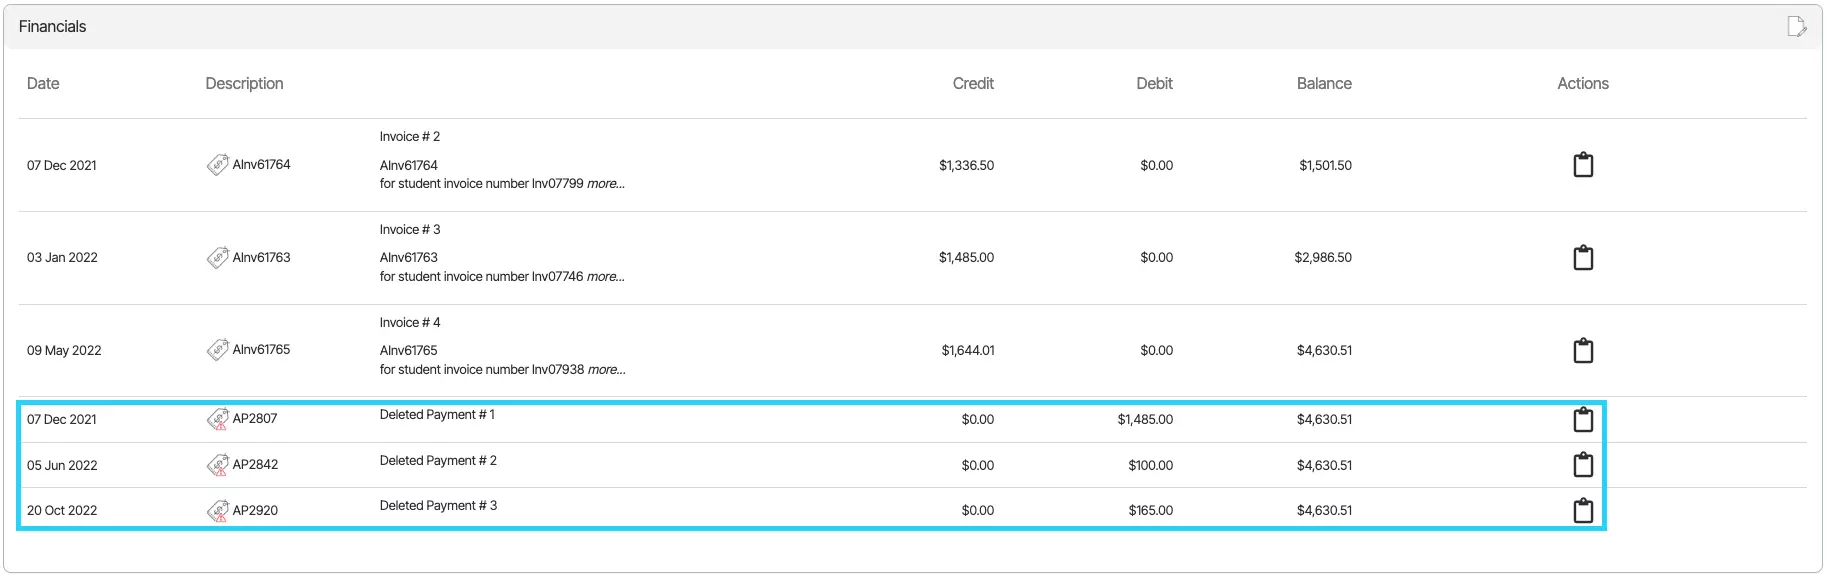
When you select OK, you will see the deleted payment details in the grid.
In the past we were displaying all financial tile in the main dashboard. There were 10 tiles in total including financial tiles. So now to make it more easy to understand. We will be showing 7 tiles only i.e. excluding all financial tiles.
Reduced Page Load Time
Now no more delays in loading main dashboard tiles. As the financial tiles were taking a bit more time then others to get loaded when you login to TEAMS. Now by excluding this financial tiles, main dashboard becomes feature rich.
Privacy
If any user does not have access to Finance menu, will get no access to these tiles too. So yours financials are secured within the users having permissions to financials.
How to access
Previously we were displaying main dashboard with 10 tiles including financials tiles.
But now we will be displaying all other tiles except financial tiles which are:
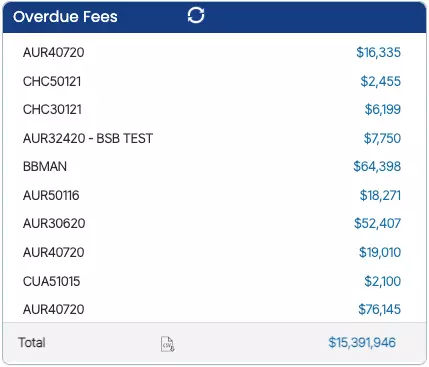
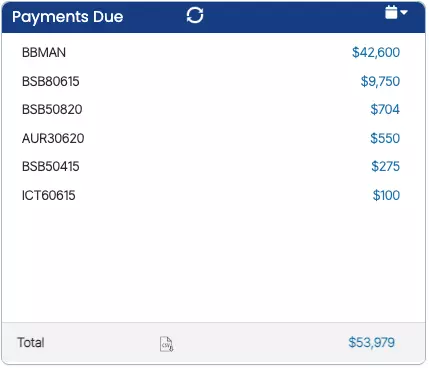
>Overdue Tile >Payment Received Tiles >Payment DueTile
Here is the new look of Main Dashboard
Now how to access three financial tiles? All financial tiles have been moved to New Financial dashboard. Follow the below steps to open financial dashboard from main dashboard.
1.Follow the path to open Financial Dashboard
Main Dashboard > Finance > Financial dashboard
Once you will open the financial dashboard, you will get access to all three financial tiles in the same way we were displaying at main dashboard in the past. The working and logic of the tiles is same only the access point is changed. Below is the glimpse of the New Financial dashboard.
Business Rules
If a user does not have access to Finance menu, will get no access to financial dashboard and financial tiles too. As these tiles have been moved under Finance menu so who ever wants to get access to these tiles then finance menu item permission has to be given to them.
The provided tile offers the ability to track and monitor the fees received for individual programs within a specified date range. By utilising this feature, users can easily identify the amount of fee collected for each program during the selected timeframe. Furthermore, the tile conveniently displays a comprehensive summary of the total payments received for all programs combined, conveniently located at the bottom of the tile.
How the system will select enrolments?
The system uses today’s date as an ‘as at’ date to find any enrolment that has a receipt with a receipt date less than today’s date but falls into the month and year selected in the calendar options.
Each program code listed has a number on the right hand side of it, which is the total sum of payment received for all the enrolments for the selected date range. The number is a hyperlink that opens the Payment Received Listing screen, where you will be able to send bulk Emails or SMS to the students or enter contact logs against the enrolments.
To save your time, we are showing the total of all payments received for all programs at the end of this tile.