We have made some changes under the Starters listing screen and added the new column Finish Status in the grid.
Also, we have changed the column name from Enrol Status to Start Status which will show the status of the enrolments.
We have made some changes under the Starters listing screen and added the new column Finish Status in the grid.
Also, we have changed the column name from Enrol Status to Start Status which will show the status of the enrolments.
Student Dashboard > Historical Enrolments Tile
This tile will show you all the historical enrolments of the students along with the basic details of the enrolments. It will show you all the past enrolments whose end date is less than today’s date.
IMPORTANT: – It is not necessary that you will be seeing all the icons above the bar. It will show you only 3 historical enrolments. However, if you want to see more than 3 historical enrolments you need to click on the arrow placed at the right corner of the Historical Enrolment of the tile.
Select to know more about the Icons
Select to know more about the Burger Menu
If the enrolment is flagged as started but not finished, then it will show you the Arrived. weeks x of Y.
If the enrolment is not flagged as started then the system will show you the status as Not Started.
If the enrolment is flagged as started and finished, then the system will show you the status as Finish

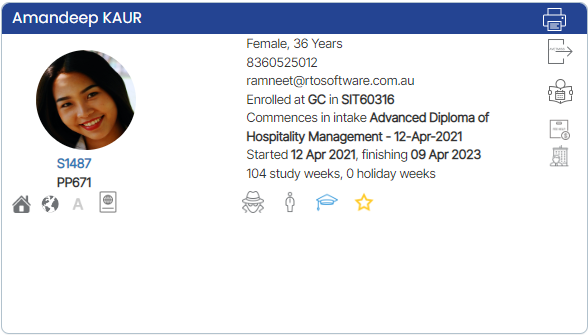
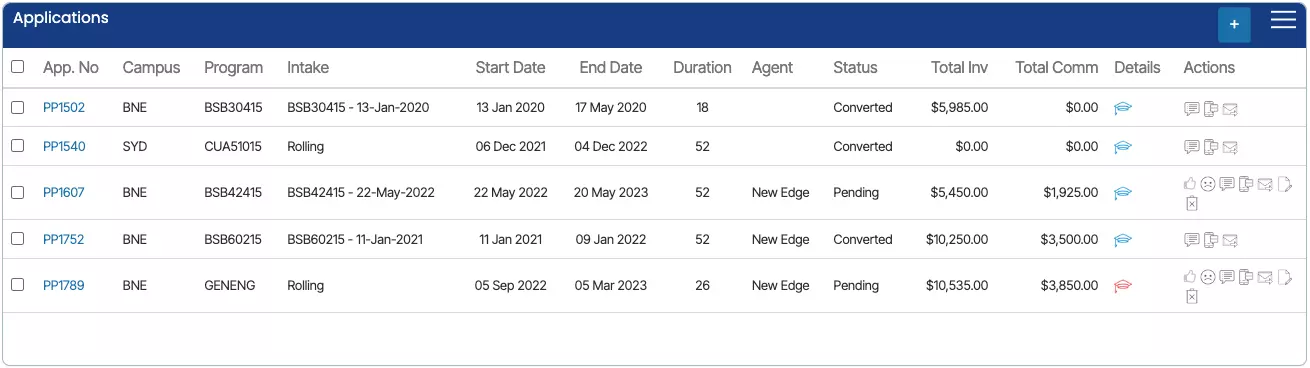
This screen will show you the basic information about the applicant on the application dashboard. Like all dashboards, it is comprised of a number of different tiles that will allow you to navigate to different screens and information linked to the application.
Here are all the tiles present on an application dashboard. You can learn more about each tile by selecting the image of the tile.
These tiles are common tiles in all the dashboards.
Earlier, the system used to print certificates individually for each enrolment. However, we have introduced a new feature Print Certificates in bulk from the Continuing and Finishers listing screens.
Once you generate the certificates, the system will show you a number of enrolments and generated certificates in the word and pdf versions on the Report Dashboard.
The orientation date is a period before the start of an academic year for your college students.
You can add the orientation date while creating an application or you can add the orientation date at the enrolment level on the edit enrolment screen. You need to select the “Does this Enrolment require Orientation?” tick box and it will show you the Induction/Orientation field to add the orientation date from the calendar.
Note: Once you added the orientation date, it will show you a star icon ![]() as yellow with a tooltip showing the orientation date on the Application Dashboard and Enrolment Dashboard.
as yellow with a tooltip showing the orientation date on the Application Dashboard and Enrolment Dashboard.
These screens allow you to add or edit addresses for the applicant or student. You can add the following address details such as:
AVETMISS Address
Local Address
Mailing Address.
IMPORTANT – If the Applicant or a Student is flagged as AVETMISS then the Street name, Street number and Suburb are mandatory fields to select under the AVETMISS Address.
Note – Once the Applicant is converted to a student, then you won’t be able to make any changes to Addresses from the edit applicant address screen. However, you make changes from the Student dashboard > Edit Address screen.
Also, If the Local Address and Mailing Address is the same as the AVETMISS Address then you can copy the AVETMISS address by selecting the Copy AVETMISS Address and Copy Address tick boxes.
| AVETMISS Address | Current Local Address | Mailing Address | |||
|---|---|---|---|---|---|
| Building/Property Name | The building/property details of an address in AVETMISS 8 format. eg. “Stuart Apartment” is not a mandatory field. | Copy AVETMISS Address | You can mark this option if the current local address is as same as the AVETMISS address. It will update the address in all the fields automatically. | Copy Address | You can mark this option if the mailing address is as same as the AVETMISS address. It will update the address in all the fields automatically. |
| Flat/Unit Details | The level/unit details of the address in AVETMISS 8 format. eg. “Apartment 234”, or “Level 8”. Non-mandatory field. | Address Line 1 | If the current local address is different from the AVETMISS address you can add it manually in this field. | Address Line 1 | If the mailing address is different from the AVETMISS address you can add it manually in this field. |
| Street Number | The street number of the address in AVETMISS 8 format. eg. “101”, “240-248”.Non-mandatory field. | Address Line 2 | If the current local address is different from the AVETMISS address you can add it manually in this field. | Address Line 2 | If the mailing address is different from the AVETMISS address you can add it manually in this field. |
| Street Name | The street name of the address in AVETMISS 8 format. eg. “Queens street”, or “Palm Lane”. Mandatory field. | Address Line 3 | If the current local address is different from the AVETMISS address you can add it manually in this field. | Address Line 3 | If the mailing address is different from the AVETMISS address you can add it manually in this field. |
| AVETMISS Suburb | It is a usercode dropdown field. you can select a suburb in this field. If you do not find a suitable suburb you can ask us, and we will add it. | Suburb | It is a usercode dropdown field. you can select a suburb in this field. If you do not find a suitable suburb you can ask us, and we will add it. | Suburb | It is a usercode dropdown field. you can select a suburb in this field. If you do not find a suitable suburb you can ask us, and we will add it. |
| State | It is a read-only field, It will auto-populate when you select the suburb. | State | It is a read-only field, It will auto-populate when you select the suburb. | State | It is a read-only field, It will auto-populate when you select the suburb. |
| Postcode | It is a read-only field, It will auto-populate when you select the suburb. | Post Code | It is a read-only field, It will auto-populate when you select the suburb. | Post Code | It is a read-only field, It will auto-populate when you select the suburb. |
| Country | It is a read-only field, It will auto-populate when you select the suburb. | Country | It is a read-only field, It will auto-populate when you select the suburb. | Country | It is a read-only field, It will auto-populate when you select the suburb. |
This screen allows you to Add/Edit the overseas information of the students. You can add the overseas information from the below screens.
Applicant Dashboard > Overseas icon
Student Dashboard > Overseas Icon
Note – Once the applicant is converted to a student then you won’t be able to add/edit any details at the applicant level. However, you can do the changes from the edit student screen.
Main Dashboard > Academics > Allocate Subjects/UoS
This screen provides the functionality to assign a subject to multiple enrolments simultaneously while specifying the start and end dates for the subject. Additionally, it allows you to select one or multiple subjects that are already linked to the enrolment, which can be deleted or removed as the new subject that you are allocating will replace them.
The first step of this screen involves selecting various filters to narrow down the search for subjects that need to be allocated to enrolments. These filters include subject code, subject dates, campus, program, intake, and timetable. Depending on the radio button selected for Subjects and Units of Competency (UoC), the appropriate filter options will be displayed.
After selecting the appropriate filters, you must select the Apply button to view the grid displaying the student enrolments that have the subject linked to them. This grid will show all the relevant enrolment details, such as the student’s name, enrolment number, and enrolment dates. To allocate the subject to a specific enrolment, users must select the tick box against the desired enrolment and click on the “Next” button. This step is essential to ensure that the correct subject is allocated to the appropriate enrolment and to avoid any errors or confusion. By selecting the appropriate enrolment, users can proceed to the next step and complete the subject allocation process.
During the second step of the process, you will be presented with the option to update the start and end dates for the Subject/Unit of Study that you have selected for enrolment. This will be presented to you in the form of two radio buttons, Yes and No.
When you choose to update the dates for selected subjects, the system will prompt you to enter the new Start Date and End Date in the provided fields. After entering the dates, you will need to select the Apply button. Once you do this, the screen will refresh and display two tabs: Subject/UoS dates cannot be updated and Subject/UoS dates can be updated. These tabs will show you a grid of enrolment for the subjects that you can and cannot update the dates for.
If you select No, it will indicate that you do not wish to make any changes to the subject dates. Once you have made your selection, you can proceed further by selecting the Next button.
IMPORTANT – There are enrolments you have selected that cannot have the Subject/Uos {Code – Name} deleted as it has a final result. The system will continue to complete the previous steps of allocating the Subject/UoS to the enrolments and where applicable updating start and end dates. However, you will need to go to the Training Plan and Results screen for the enrolment and delete this Subject/UoS manually.
The final step in this process involves deciding whether you want to delete a Subject/UoS from the selected enrolments. You will be presented with Yes and No radio buttons to choose from. If you select Yes, a drop-down list of subjects will appear on the screen. You can then choose the subject you wish to delete and select the Finish button. This will complete the deletion process and remove the selected subject from the enrolments.
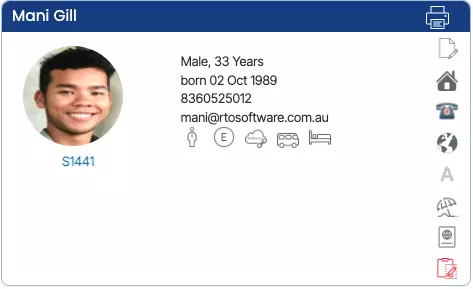
An applicant is a person who has applied to your college to study one or many programs (courses) and requires an Offer Letter (quote) to be sent to them as to how much it will cost them etc. Some colleges may call applicants potential students or leads.
For CRICOS colleges you would process their application and issue an Offer Letter to the student or their agent. Whereas for a domestic college, you may process the application and send them some form of costing or quote with a Welcome Letter.
The Applicant dashboard is similar to the Student Dashboard in that it is a summary for the applicant. Each tile in the dashboard will give you summary information such as what they have applied for, a financial summary for each application, and where you can access any documentation or communications you have had with the applicant.
Other than the Financial tile, all the other tiles will allow you to navigate to different screens and information linked to the applicant or do transactions directly from the tile for the applicant.
You can learn more about each tile by clicking on the image of the tile.
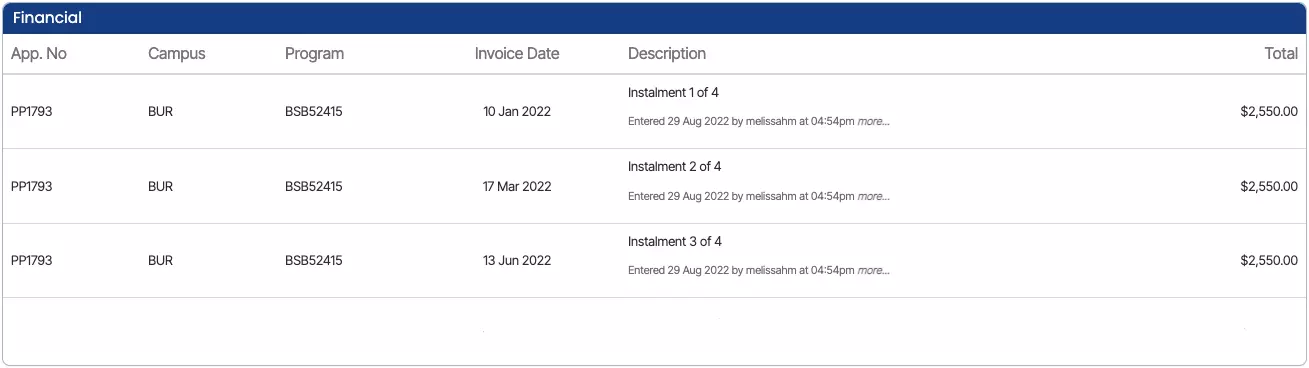
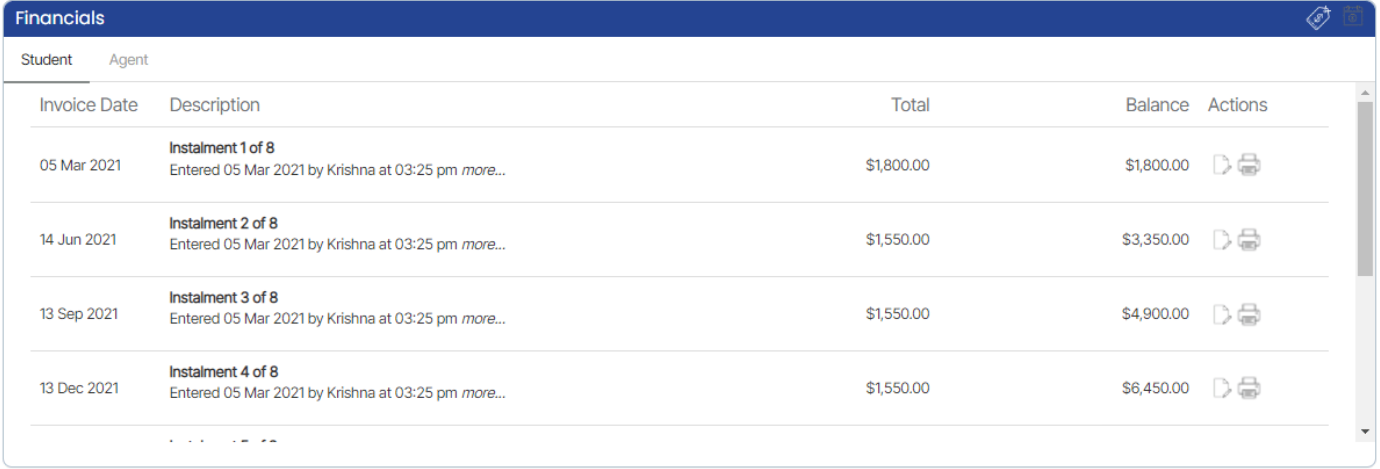
This tile will display a summary of the instalments (invoices at the enrolment level) for each application.
This is the Application Invoice Preview screen where you can view all the student invoices and agent invoices details including invoice notes. You can also add the bonus to the agent from this screen.
Note – DO NOT close your browser while you are walking through the steps of this process, as you will lose what you have entered. When you select the NEXT button in each step of this process the system does not save what you have done to the database. It allows you to go back in the process to change what you have selected, however, it is not until the final step where you select the FINISH button that the system will fully save everything to the database for you.
IMPORTANT – In the Agent details screen, there is a tick box for Apply GST. Whether this is selected or not, when an agent is linked to an application, you will have the option to either select or unselect the Apply GST tick box against all or individual agent commission invoices that the system will raise for you.
Also, there is a difference between raising an agent bonus invoice from the Agent Dashboard to raising it in the new application process. From the Agent Dashboard you DO NOT have to link the bonus invoice to one or many enrolments, however from the new application process, the system will automatically link it to the application program that you link the bonus invoice to.
Once you are happy with all the data entered on this screen, you need to select the Finish button to complete the application process.