MainDashboard > Academics > Program > Program Entry Burger Menu > Timetables
This screen will show you the timetables in the grid that are allocated to the Program. You can add the timetable from the add button or delete the timetable for the delete icon under the actions column.
To link the timetable to a program, you need to type in the timetable code in the magic search field and once you type in the first three initials of the timetable code or name, it will show you suggestions to select the timetable.
When you select the desired timetable from the suggestions, you then need to select the +Add button and once you hit the add button, the selected timetable will get linked to a program as shown below:
When you select the documents option, you will taken to the subject document scree. You will see documents in the grid that are already linked with the Subjects. You can add documents for the subject by selecting the +Add button.
When to select the +Add button, a popup window will appear where you can select the document from your local system to upload save.
Explanation of the fields below:
Fields
Explanation
Upload Date
This will show you today’s days which will be auto populated.
Notes
You can write notes for your own reference by selecting the notes icon.
Documents
Tick this box if you want to make the document public on the student portal.
Main Dashboard > Marketing Menu > Commission Templates > +Template Button
Overview
A commission template specifies the percentage amount that will be paid to the Agent for their services. The Commission Template entry screen will let you create the template as per your need. You need to enter the template name and mark the template as Active.
The system will let you create two different types of Commission Templates:
Same for all Programs
The system will allow you to create a commission template that will be the same for all the programs and you can select the template when creating the student application. You can choose from the two different commission types that are explained below:
Fixed Amount for all Programs: By selecting the Fixed Amount for all Programs radio button, You can enter a fixed amount of commission that will be set as the default amount whenever the respected commission template is selected while creating the application or linking agent to an enrolment.
Fixed Percentage for all Programs: By selecting the Fixed Percentage for all Programs radio button, You can enter a fixed percentage of commission that will be set as the default whenever the respected commission template is selected while creating the application or linking agent to an enrolment.
Define individually for each Program
The system will allow you to create a Commission Template individually for a specific program when the Define individually for each Program radio button is selected. Enter the Commission Template name and select the save button first. Then you need to select the +Program Commission button from where you can choose the specific program for this commission template.
Note: You can either select the Agent commission Type or Program from the Program Commission screen. The system will not allow you to select both fields at the same time for the commission template.
The field name and Explanation of the field are given below:
Field Name
Explanations
Agent Commission Type
This is a user code in TEAMS and you can select the Agent Commission Type from the dropdown field.
Program
Select the Program for the commission template from the dropdown field.
Main Dashboard > Marketing Menu > Commission Templates
Overview
A commission template specifies the percentage amount that will be paid to the Agent for their services. The Commission Template welcome screen will show you some basic information about the Commission Template and will allow you to search, edit and create commission template for the agent. You can edit the commission template by selecting the icon.
You can create new commission templates by selecting the +Template button.
Each CRICOS RTO that has collaboration with agents, needs to monitor the agent performance in order to make up their mind in taking certain decisions. On the Agent Dashboard, we have a bar graph that can give you a vast amount of information to keep a check on the agent performance.
This bar graph will display the agent performance for the current financial year. On the right top side of the bar graph, you can see the calendar option. From there, you can change the date range as per your requirement.
The horizontal line of the bar graph will display the months based on what calendar option you select. The vertical line of the bar graph will display the count and that count again varies depending upon the calendar option. The vertical colourful bars in the bar graph will present the data with a tooltip. Once you will move your cursor over the bar, you can see a tooltip based on which colour bar you have moved your cursor to. Each colour represents a different purpose. You can see the colour classification on the right side of the bar graph.
As you can below, the tooltip says Converted Applications 17 for the month of Oct 2022. It means for October month, there are just 12 applications to process for that agent, hence the height of the bar is till count 17.0. So from these colourful bars, you can easily read how many total applications linked with the agent, how many converted, commenced, completed, and did not commence & canceled.
Financials
Just below the bar graph, we have the financials area for that agent. This is easily readable from the labels just below the figures. This gives you the Tuition Fee’s data based on the calendar option you select.
Moreover, there is a more button in this section that will directs you toward the Agent Financial Transaction screen.
When you select the documents option from the burger menu, a document screen will open where you can add documents for the campus by selecting the +Add button.
Upon selecting the +Add button, a popup window will open on the screen from where you can select the document which you want to upload for the campus.
Explanation of the fields
Fields
Explanations
Upload Date
It will be today’s date and will get auto-populated in the field
Notes
You can write any notes for your own reference.
Document Type
This is a user code in TEAMS and based on the User Code created in TEAMS, you can select the document type.
Document Name
It will show the name of the document which you have selected.
Public Document
Tick this box if you want to make the document public.
Reference Material
If the document is for reference then you can tick this box. Also, you can write the title of the material.
Display in SRC Workplace
Tick this box if you want to display the document in SRC Workplace.
Enrolment Dashboard > Classes and Attendance Tile > Attendance Icon
This screen will allow you to mark the attendance for enrolment. You can also send an email and SMS to the student’s enrolment and also view the list of marked attendance.
The screen will show you different tiles as explained below:
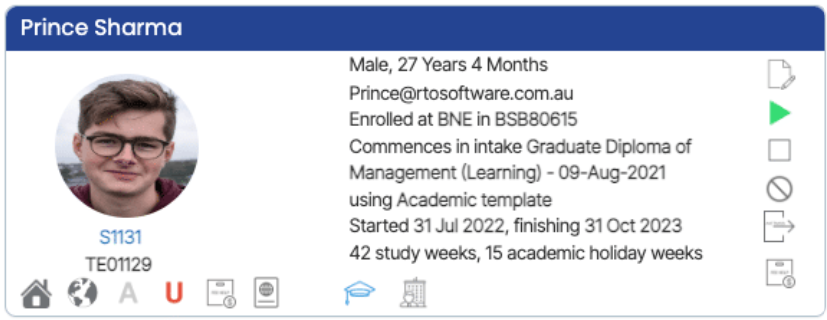
This tile will show you the basic details of the enrolment and all the icons in this tile are read-only.Please note – This screen will not allow you to make any changes in the profile tile
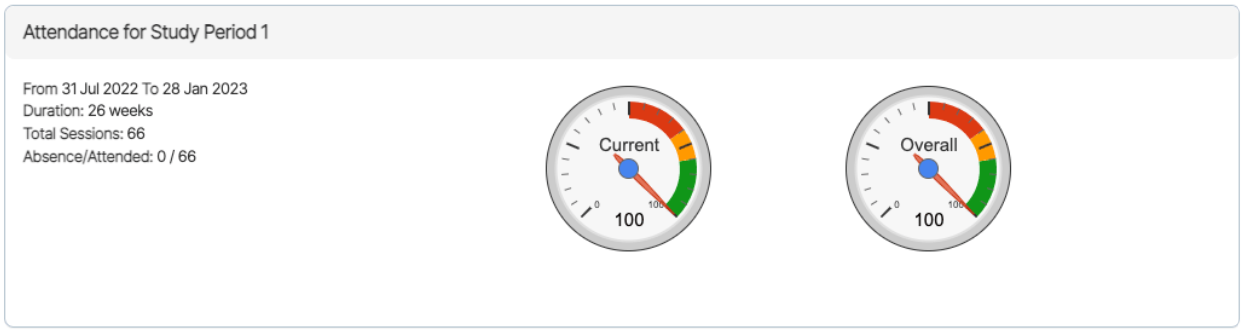
This tile will show you the current study period of enrolment with start and end dates, duration in weeks, total sessions, and marked attendance. It will also show you the current and overall attendance percentage.
This tile will show you a drop-down where by default the current study period will be selected and if you mark the attendance for the past classes then you can choose the study period as per your requirements. Also, you can send an email and SMS to the student from this tile. You need to select the study period to mark the attendance for the student.
This tile will allow you to mark the attendance for enrolment with the selected class date and class name as shown below.
Fields
Explanations
Class Date
Select the class date from the calendar icon
Class Name
When you select the class date then the system will show you all the Classes that are linked to the enrolment within that date range.
Absent Hours
These are the absent hours that are attended by the student.
Absent Minutes
These are the absent minutes that are attended by the student.
Attended Hours
When the absent hours or absent is selected, the system will calculate the total attended hours and will show it as a read-only field.
Attended Minutes
When the absent hours or absent is selected, the system will calculate the total attended minutes and will show it as a read-only field.
Approved
If the student’s sick leave is approved then select the approved tick box.
Sick
This tick box is selected, when the student has applied for sick leave.
When you select the Documents option, you will be taken to the Program Entry > Documents screen. If you have already uploaded documents for the program, it will show you in the grid.
You can also +Add documents by selecting the Add button in the right hand corner of the screen.
Explanation of the fields below:
Fields
Explantations
Upload Date
This will show the date, the day you upload the document
Notes
You can write notes for your own reference by selecting the notes icon.
Document Type
This is a user code in TEAMS and based on the user, you ca
Document Name
It will show the name of the document which you have selected.
Public Document
Select this box if you want to make the document public on the student portal.
Reference Material
Select this box if the document is for reference. Also, add the reference title.
Display in SRC Workplace
Tick this box if you want to display the document in SRC Workplace.
This screen will show you all the intakes that are linked to the program. You can add intake by selecting the +Add button. When you select the “+Add” button, a popup window will appear on the screen where you need to select the Intake code (Intake name and Start date will automatically appear) and then save.
Explanations of the field below:
Select the Intake code – It is a magic search field, where you can type the intake code and then you can select the intake from the suggestions.
Intake Name – It is a read-only field, which will be auto-populated when you select the intake code.
Start Date – It is a read-only field, which will be auto-populated when you select the intake code.
Programs > Edit Programs > Program Entry > Burger Menu
the presence of a burger menu icon in the right-hand corner of the screen while editing a program may vary depending on the specific program or functionality you are referring to. The burger menu icon is typically represented by three horizontal lines stacked on top of each other.
When you select the burger menu, you can see different options under the burger menu as shown below:

 icon.
icon.