Finishers Listing Screen

Main Dashboard > Finishers Tile > Finishers Listing screen

Overview

In this listing screen, we are showing the list of all the students finishing in the date range selected in the Continuing Tile on the dashboard.

This screen is divided into two sections.
1) Filters/Parameters
2) Listing Grids

Filters/Parameters:

To open this screen, you would have selected the link for a specific program code or at the bottom of the Finishers Tile you would have selected the link for the total number count. Based on what you selected the system will open the screen and populate the information in this section. For example, it will show you the start and end dates that were used in the tile as well as the campus/s and program/s that were displayed or selected in the tile.

Select here to know more about the filters/parameters

Listing Grid

In this grid, we are displaying the list of all finishers. We are showing columns Stud No, Student Name which will display the student-specific information and Enrol No, Enrolment Type, CampusProgram, Intake/dates, Enrol Status and Agent will show enrolment-specific details. All of these columns are self-explanatory.

Select here to know about the Icons under the Actions column and Burger Menu

Note – There is a Page Limit dropdown after the filter’s sections which will allow you to specify the number of students you want to view on a single page.

How to select students?

Use tick boxes to select students if you wish to send email/SMS, create a contact log, print letters and start enrolments in bulk. After selecting the students, pick the option from the burger menu and you are one step away to finish your heap of work in one go.

Or if you wish to select all students at once, use the tick box present right beside the Stud No column.

Previous/Future Program column – This column will show you the student’s previous program and future program with a separator. If a student is enrolled in just a single program then you will not show anything in the column for that student.

Finishers Tile

IMPORTANT – Staying informed about the latest developments in our software is vital for optimising your experience and maximising the benefits of using our system. To view the latest updates and modifications on the Finishers Tile and Finishers Listing Screen, click on the History icon history of changes, to the right of the breadcrumbs. Upon clicking this icon, you will gain access to a detailed log of all the recent changes made to the software.

Overview

This tile displays all the finished students for each program within the selected date range.

The ‘Finishers Tile’ displays the program codes and their respective student counts against them, separated by a “/” sign.
The number on the left denotes the number of enrolments that have been marked as ‘Finished’.
The number on the right is the number of students whose end dates have passed, but they have not been marked as ‘Finished’

IMPORTANT: These figures may not be accurate due to the failure by staff to flag an enrolment as Finished. To get an accurate report, make sure to aptly mark your student enrolment statuses.

Learn More about the Calendar option

How to use the Finishers Tile:

Every program has its respective student count displayed against the program code. Each count is a hyperlink that will take you to the Finishers listing screen for that specific program.

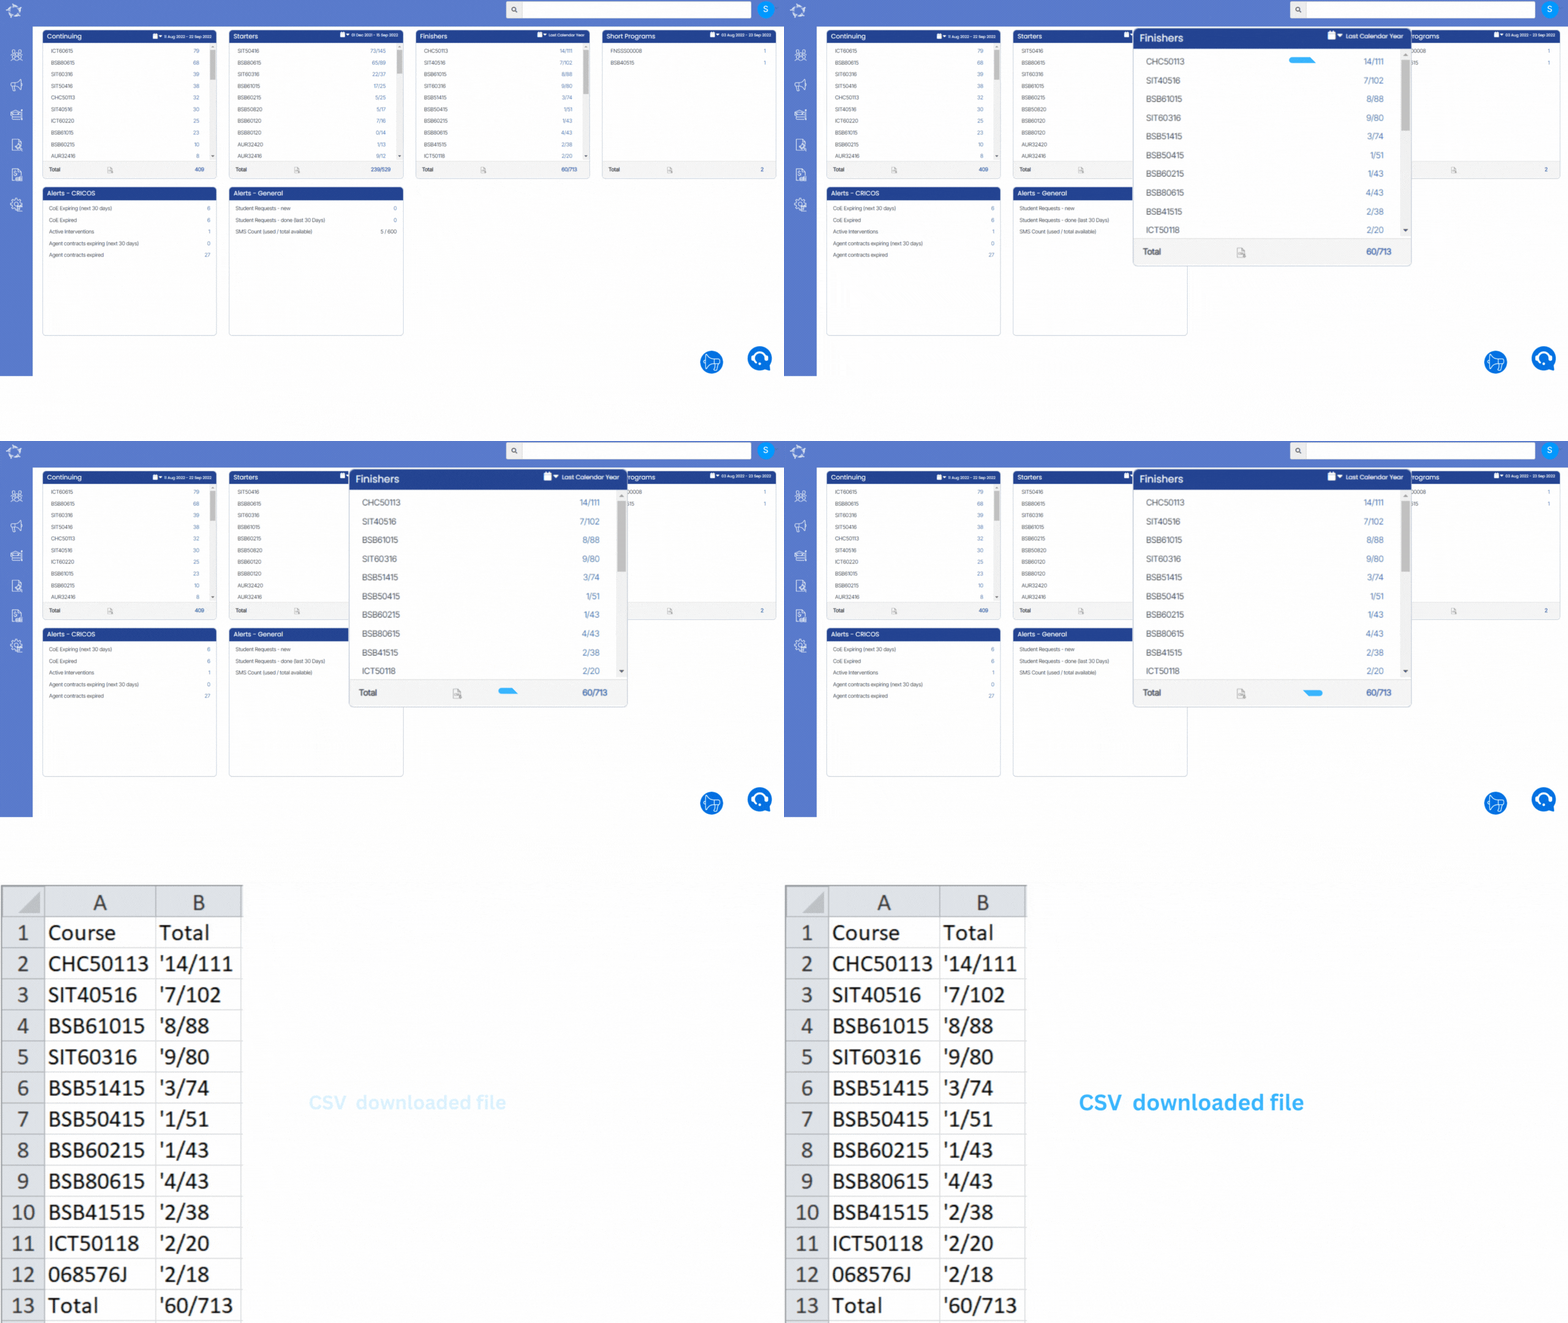
The total count of all programs is displayed at the bottom of the tile. You can click on the  icon to download the counts in a CSV file.
Change – Agent Commission Payment Screen > two new columns

Dashboard > Marketing > Agent Dashboard > Pending Payment Icon

We have added two new columns on the agent commission payment screen that you use to record your post-deducted commissions. The new columns are:

  • Commission to be Paid
  • Balance Commission to be Paid

Explanation:

Comm. to be Paid: This column will show you the commission which is truly due on the paid amount.

Example: If a student’s invoice for tuition fee is $6,600 and total commission is $1,980. And the student just paid $5,000 out of $6,600. In such case, this newly added column will show you the commission due to be paid on $5,000. This way, it will be easy for everyone to see the commission according to how much tuition fee a student paid instead of doing the calculations manually.

Bal. Comm. to be Paid: This column will show you the proportionate balance commission to be paid. Now, if I will continue with the above example where total commission is $1,980 and student paid only $5,000. On $5,000, the commission is $1,500. And let’s say, you have paid $1,000 commission to the agent out of that $1,500. The Bal. Comm. to be Paid column will show the proportionate balance i.e $500. See the below screenshot:

  1. Student Inv Amount – This column will show you the total Tuition Fee for the student’s invoice that the system calculates commission on.

  2. Student Rec Amount – This column will show you the paid Tuition Fee for the specific student invoice.

  3. Ag Inv Amount – This column will show you the total agent commission for the student’s invoice. It will calculate the commission based on the commission rate updated for the agent. Referring to the same example as highlighted in the screenshot where total Tuition Fee is $6,600 and commission rate for the agent is 30%. Hence why the commission is $1,980 ($6,600 * 30/100).

  4. Comm. to be paid – This column will show you the total agent commission to be paid. Referring to the same example as highlighted in the screenshot where student has paid $5,000 out of $6,600 and the commission on this $5,000 would be $1,500. The system will look at the commission rate that was used to calculate the original agent commission, such as 30% in the above example and calculates what the proportionate amount of the commission is due to be paid.

  5. Comm. Paid – This column will show the commission which has already been paid to the agent either by a pre-deducted (student’s receipt) or post-paid using the commission payment screen. If there is no commission paid, then you will see $0.00 in this column.

  6. Bal. Comm. to be Paid – This column will show you the proportionate balance commission to be paid. So using the example above, it is column 4 – column 5. However, if there was no commission paid and the amount in this column will be equals to column 4 which means $1,500.

  7. Balance – The column will show you the total pending commission for the agent’s commission invoice. So using the example above, it is column 3 – column 5.

Important Posts

Agent Pending Payments

How to Upload/Change an applicant/student’s profile picture

To upload or change an applicant profile picture, you need to bring your cursor over the thumbnail of the picture and the system will show two icons as shown below.

To upload the profile picture by clicking the picture using the system camera, click on this icon.
To upload the profile picture by uploading the picture from your computer, click on this icon

After you have selected your picture, click on the save button to save it for the applicant/student.

The system will refresh the screen and your picture will be uploaded.

Note: Make sure you are cropping a picture like a passport size copy before you upload it in TEAMS.

If you have any queries, please do not hesitate to contact us on 1300 85 05 85 or email us via support@rtosoftware.com.au

Enrolment Dashboard > Edit Agent Commission Invoices

Sometimes, it happens that agents change the commission rates in between of a student’s enrolment. They might change it from 30% to 35% depending upon agent to agent. And there might be the cases where you have already paid to the agent some of commission as per the initial commission rate and the remaining commission will be paid as per the incremented commission rate. Not just that, there might be some other scenarios, where you have to change the commission amount for a student’s enrolment. Of course, you will be updating the agent commission rate from the agent entry screen, so that all the future applications can be processed with the new commission rate. However, for the existing enrolments where the commission amount is calculated based on the previous commission %, you would need to edit them manually to have proper track of commission amounts.

We didn’t have the facility to edit the commission amount from the enrolment dashboard, however, now we have the edit facility for you to edit the agent commission invoices.

On the Enrolment Dashboard > agent’s financials screen, you will see a new icon.

Once you click on the icon, it will direct you towards the edit agent commission screen where you will be able to edit the amount manually for each agent’s invoice.

To edit any agent’s commission amount, click on the icon to expand the invoice details.

It will show you each invoice’s details as below screenshot, so that you can edit the commission amount.

Change the commission amount from Comm. Excl and GST from Comm. GST columns.

Other fields will be read only fields and you won’t be able to edit anything for those fields. The last column Comm. Amount will be auto calculated by the system based on the commission and GST amount you update.

You can even make the commission notes as well from the notes icon.

Important

You won’t be able to edit the commission amount if there is already a commission payment made against that invoice. Same is the case where you might have created the negative invoice for a student’s invoice. In such cases, the system will not allow you to edit the amount.

If you try to update the commission amount less than what you have paid to the agent for that invoice, the system will throw an error as:

However, you can update the commission amount more than what you have already paid to the agent for that invoice.

After you are done changing all the commission amounts, click on the Save button and your agent commission invoices will be updated.

Report Dashboard Changes

Earlier, you were only able to see the report name on the Report Dashboard but now with this new change, you will be able to see the name of the Template used to print that report with the report name.

Once the report gets generated, the system will show you the Template Name and Report Name as shown below:

Date Format

As you know that TEAMS supports the date format as DD MMM YYYY i.e. 01 Jan 2022 for all of our clients. See below the example screenshot:

Based on our recent client interactions where a client wants DD/MM/YYYY format i.e. 01/01/2022 on every screen. We have done a system setting for it without impacting our clients who wants the current date format as DD MMM YYYY.

According to this system setting, if it’s set to the format as DD/MM/YYYY, then for that client on every screen, the date format will show as DD/MM/YYYY only.

Even the date entering fields will support DD/MM/YYYY format for those clients.

Note: By default, the date format will be DD MMM YYYY but if you wish to get it changed, please contact support.

Documents Log > New Look

Student Dashboard > Documents Tile

Documents log screen is used to upload and check documents for a student that you and any other user have uploaded. We now have changed its look for you.

How it was before:

How it is now:

You will be able to see the documents in more sorted way. Also, the document type when you upload a document will be mandatory field for you to select. This way, the system will group all the documents according to the document type.

Moreover, now the system will show you processing bar when you upload a document.

Audit Log > New column

Student Dashboard > Show Audit History icon > Audit Logs

Audit logs are used to view changes/updates that any TEAMS user has done on the screens. We recently have added a new column namely Object Details on this screen.

You will be able to see the student number, enrolment number, student name and application number. This way, it’s helpful and easy for you to search for the changes/updates.