The Agent Portal is a separate login area for your Agents to access and view information for the applicants/applications and students/enrolments that they are linked to. Typically they may call or email you with questions about the applications or students and their studies, information regarding their commission invoices etc, now they will be able to log in to the portal to get the information themselves. Your agents will only be able to log into the portal if you give them access to it by setting up their login details and the link to access it.
Before you can get your agents to access the portal, you need to understand how it works, how to set it up and how you give them access. This and other posts will help you understand this.
Important: The Agents can only log in to the Agent Portal if their Username and Password are set up on the Agent entry screen. Read more. We will provide you a URL which will be something like https://agents-teamscode.rtosoftware.com.au.
This screen will show you the Program details along with the subjects and their delivery dates. The system will show the subject dates according to the option selected for the Populate subject dates using the New Application – Choose Programs screen.
Note –DO NOT close your browser while you are walking through the steps of this process, as you will loose what you have entered. When you select the NEXT button in each step of this process the system does not save what you have done to the database. It allows you to go back in the process to change what you have selected, however, it is not until the final step where you select the FINISH button that the system will fully save everything to the database for you.
Once you select the Drag down button, the system will expand the screen and you will be able to see the subjects linked to the program.
In a similar fashion to how the changes were made in the receipt process for any overpayment by a student, you now will be able to enter a pre-deducted agent commission amount more than what is raised for a specific student invoice.
IMPORTANT: While creating the receipt for the student, the system will only allow you to add an overpaid amount for the agent commission if it is less than or equal to the student invoice amount.
For example, If there is $1925 pending for the agent commission and you are going to record a receipt for one agent where the student invoice is $1000 and you are paying $1200 for the agent commission. In such a scenario, the system will not allow you to save your overpayment. However, if the paid amount by the student is $1000 for the agent commission which is equal to the student’s pending invoice ($1000) then the system will save your overpayment and will balance out the commission accordingly for the other invoices.
We have made some changes to allow more flexibility to the Agent commission invoice section of the new application process. Changes we have done include:
selecting or unselecting to pay commission on a specific fee that you are raising against the applicant/student’s invoice/s
selecting or unselecting whether the system should calculate GST on the agent’s individual commission invoices and
raising an agent bonus invoice that will then link to the application
The above options show different steps of the new application process. You can find them as follows:
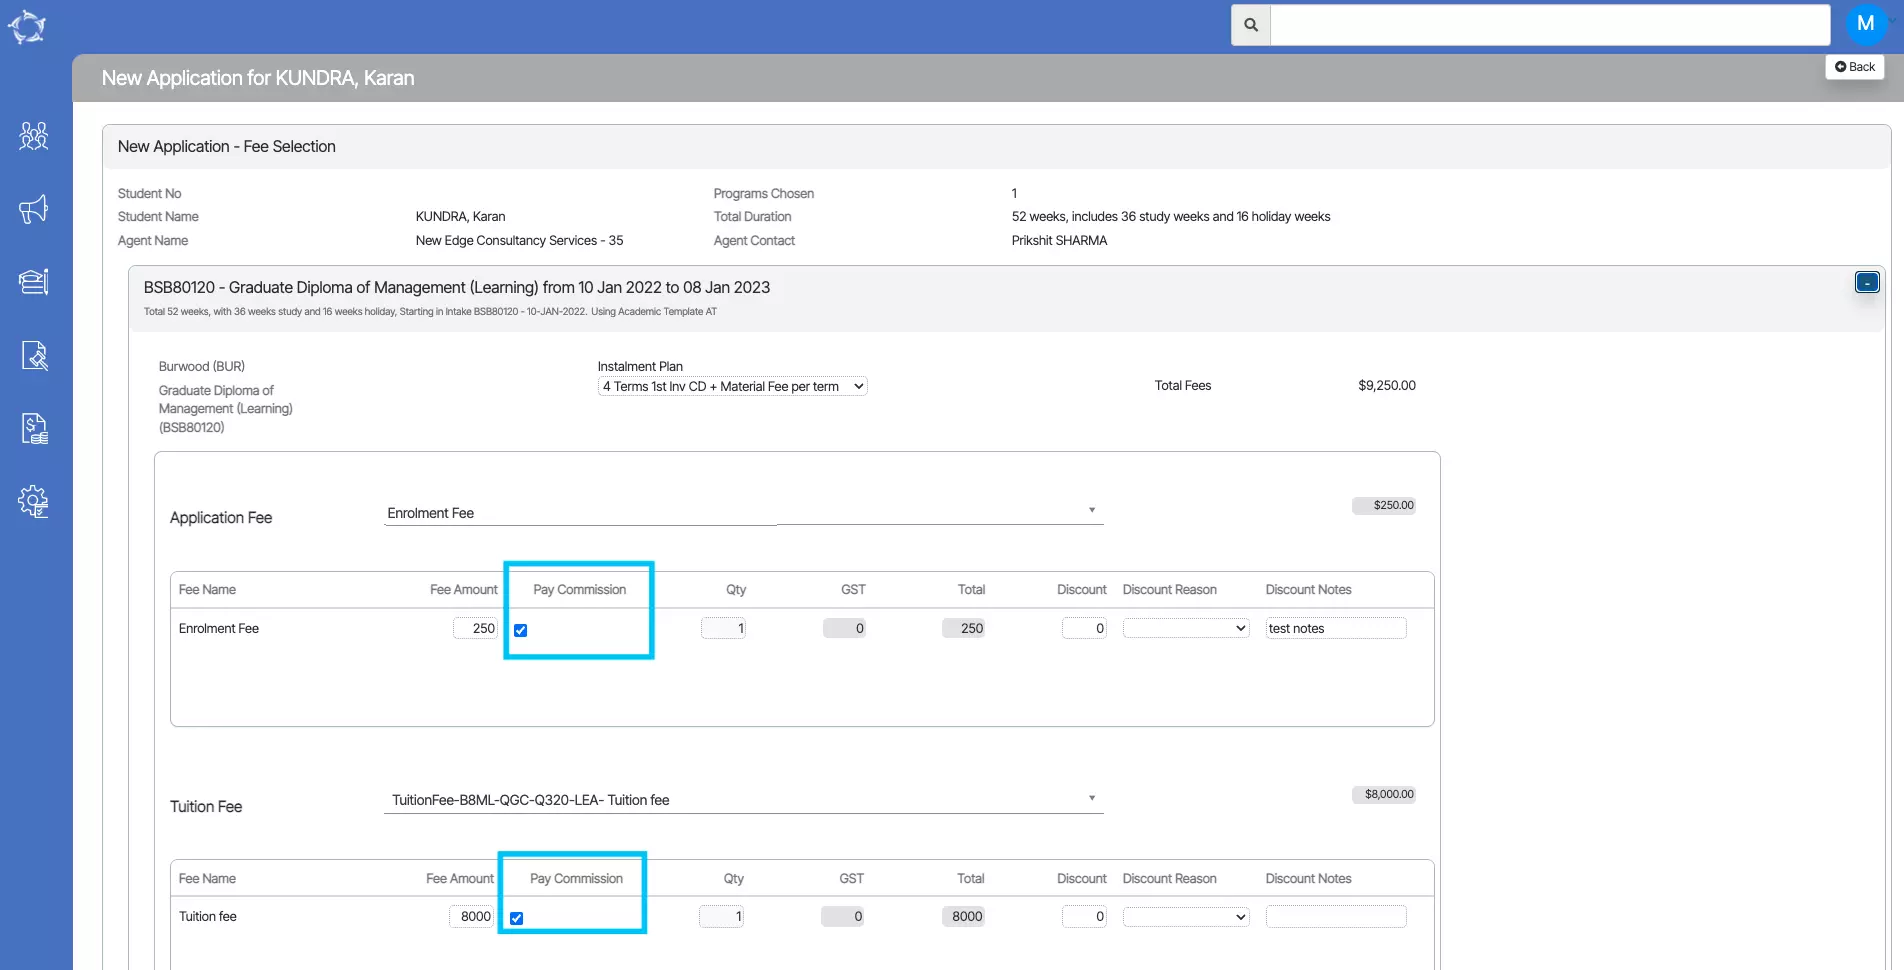
Selecting or unselecting to pay commission on a specific fee that you are raising against the applicant/student’s invoice/s
In the Agent details screen, there is a tick box for Pay Commission. Whether this is selected or not, when an agent is linked to an application, you will have the option to either select or unselect the Pay Commission tick box against a student’s fee that you are raising for the application. If you select it, then the system will calculate the commission on that fee and if you unselect it will NOT calculate the commission for the agent for that fee.
This option is available in the New Application > Fee Selection step as below:
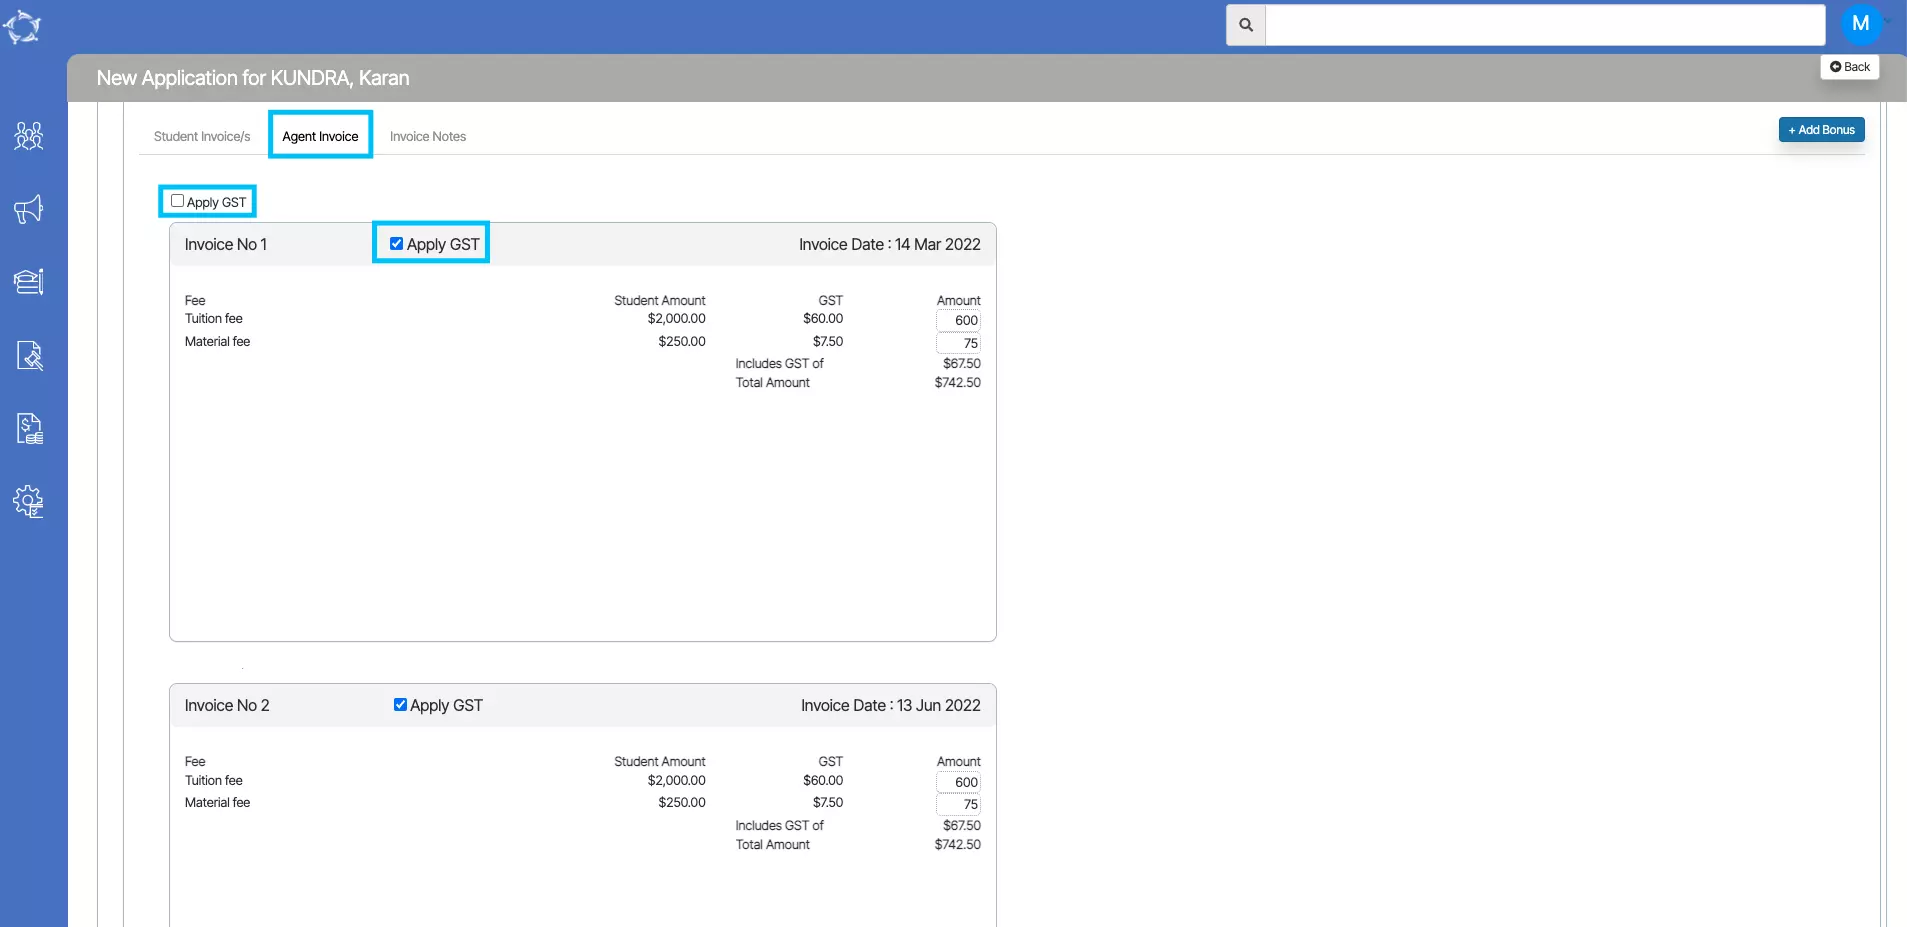
Selecting or unselecting whether the system should calculate GST on the agent’s individual commission invoices
In the Agent details screen, there is a tick box for Apply GST. Whether this is selected or not, when an agent is linked to an application, you will have the option to either select or unselect the Apply GST tick box against all or individual agent commission invoices that the system will raise for you.
This option is available in the New Application > Invoice Preview steps on the Agent Invoice tab as below:
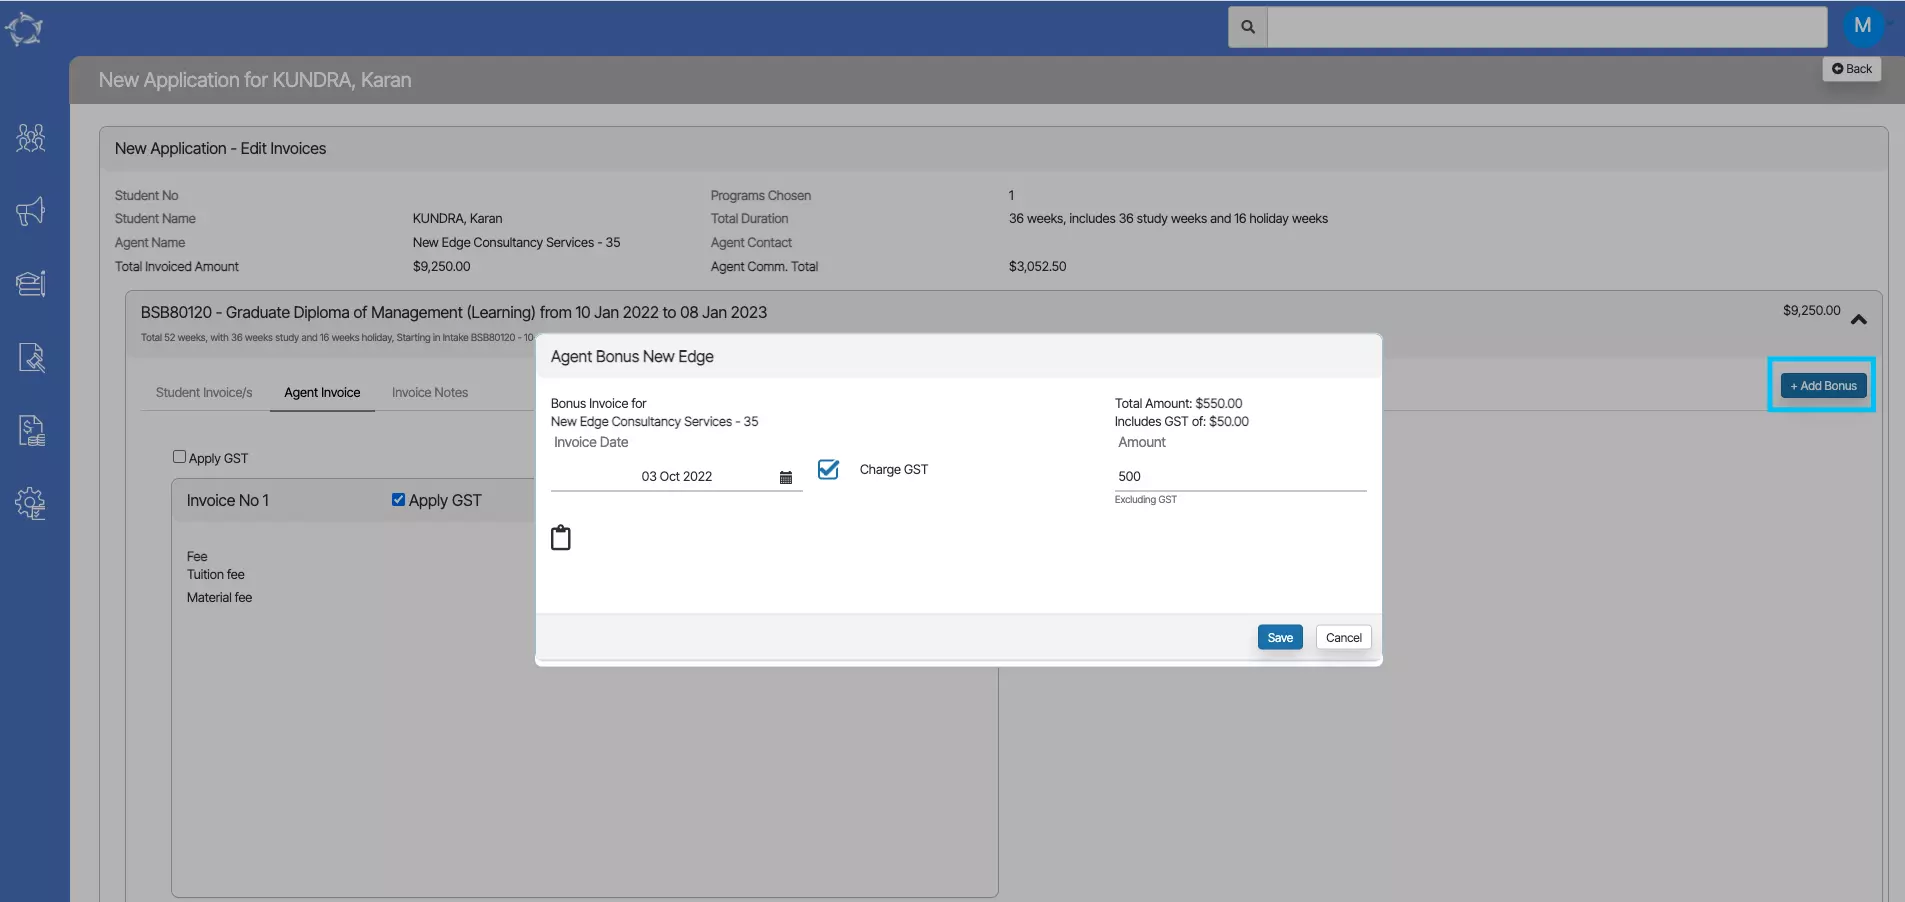
Raising an agent bonus invoice that will then link to the application
If you wanted to raise an agent Bonus Invoice you would do this from the Agent Dashboard > Profile Tile > Bonus Invoice icon. However, we have introduced this option in the New Application > Invoice Preview steps on the Agent Invoice tab as shown below.
IMPORTANT: there is a difference between raising an agent bonus invoice from the Agent Dashboard to raising it in the new application process. From the Agent Dashboard you DO NOT have to link the bonus invoice to one or many enrolments, however from the new application process, the system will automatically link it to the application program that you link the bonus invoice to.
This option is available in the New Application > Invoice Preview steps on the Agent Invoice tab > +Add Bonus button is shown below.
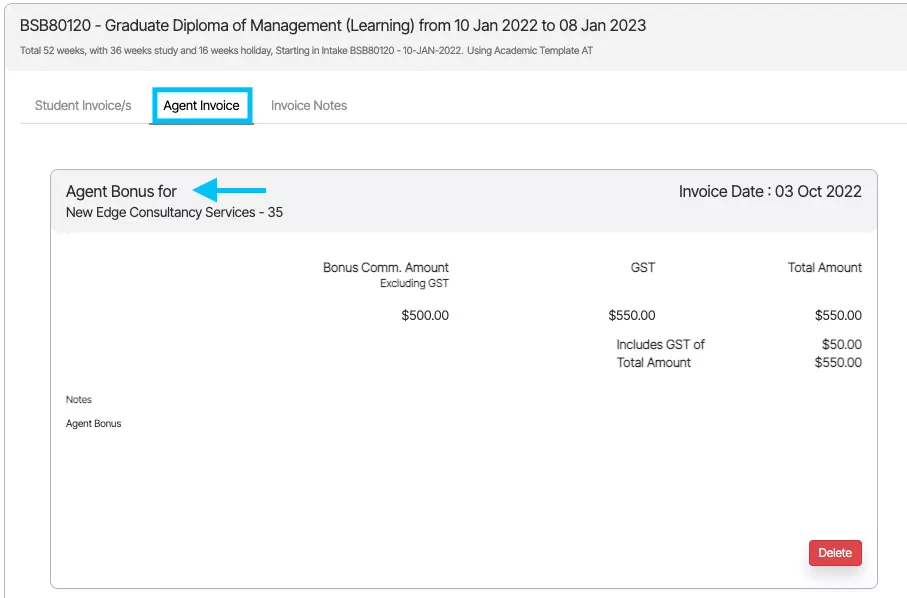
Once you have added the Bonus, the screen will refresh and you will be able to see the Agent Bonus invoice for the agent.
Note – You can delete and recreate the agent bonus from the same screen.
We have introduced a new tick box called “Send email to agent only” on composing email screen, which will be available only for application objects.
On compose email screen, upon the selection of “Send email to agent only” tick box, it will load the Agent name and the email address of the agent next to tick box as shown in the below screenshot:
We have introduced a new feature called LiveCaller which will allow you to make a voice call or live chat directly with our support staff. The LiveCaller icon will be available from the main dashboard in TEAMS.
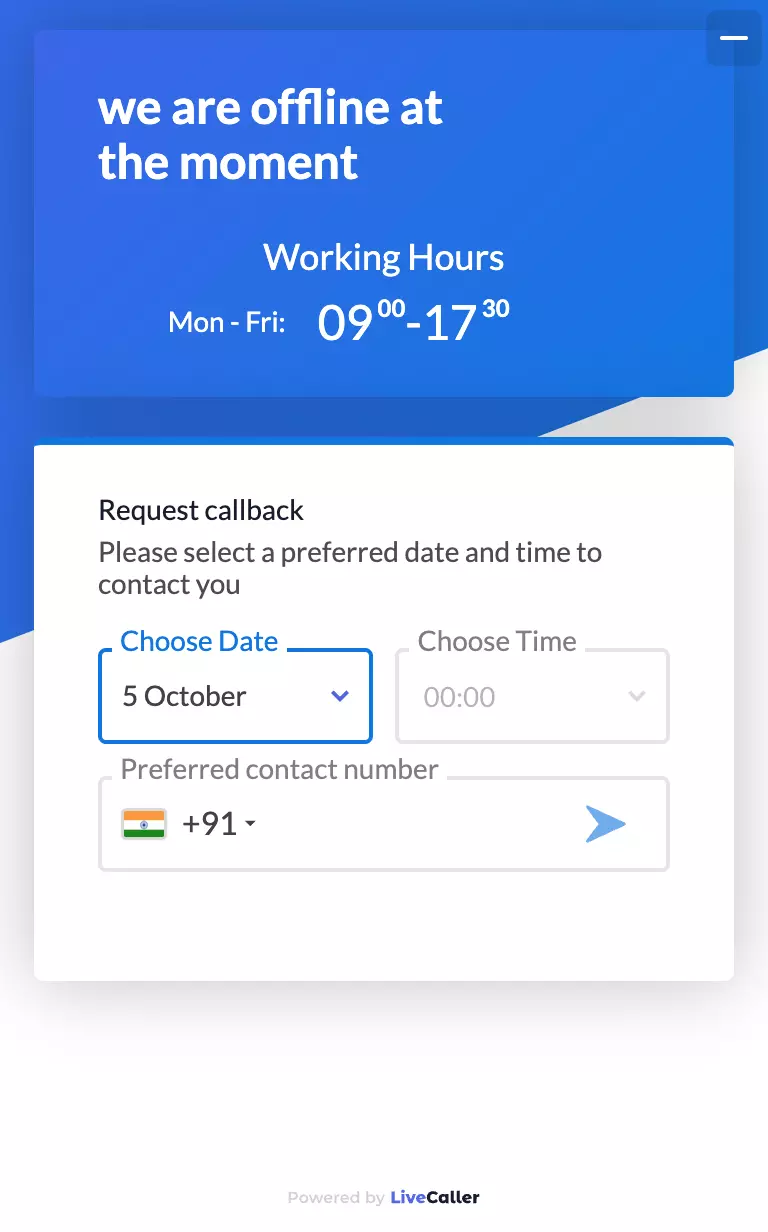
Note – if you are trying to use LiveCaller outside our working hours you will have an option to request a callback. You can enter a preferred date, time and number for us to call you back. If you send the callback request, then one of our support staff will call on that preferred date and time if it is during our working hours. If not, they will contact you to arrange a different date and/or time. Please Note our working hours are Monday to Friday. 09.00am – 5.00pm Queensland time.
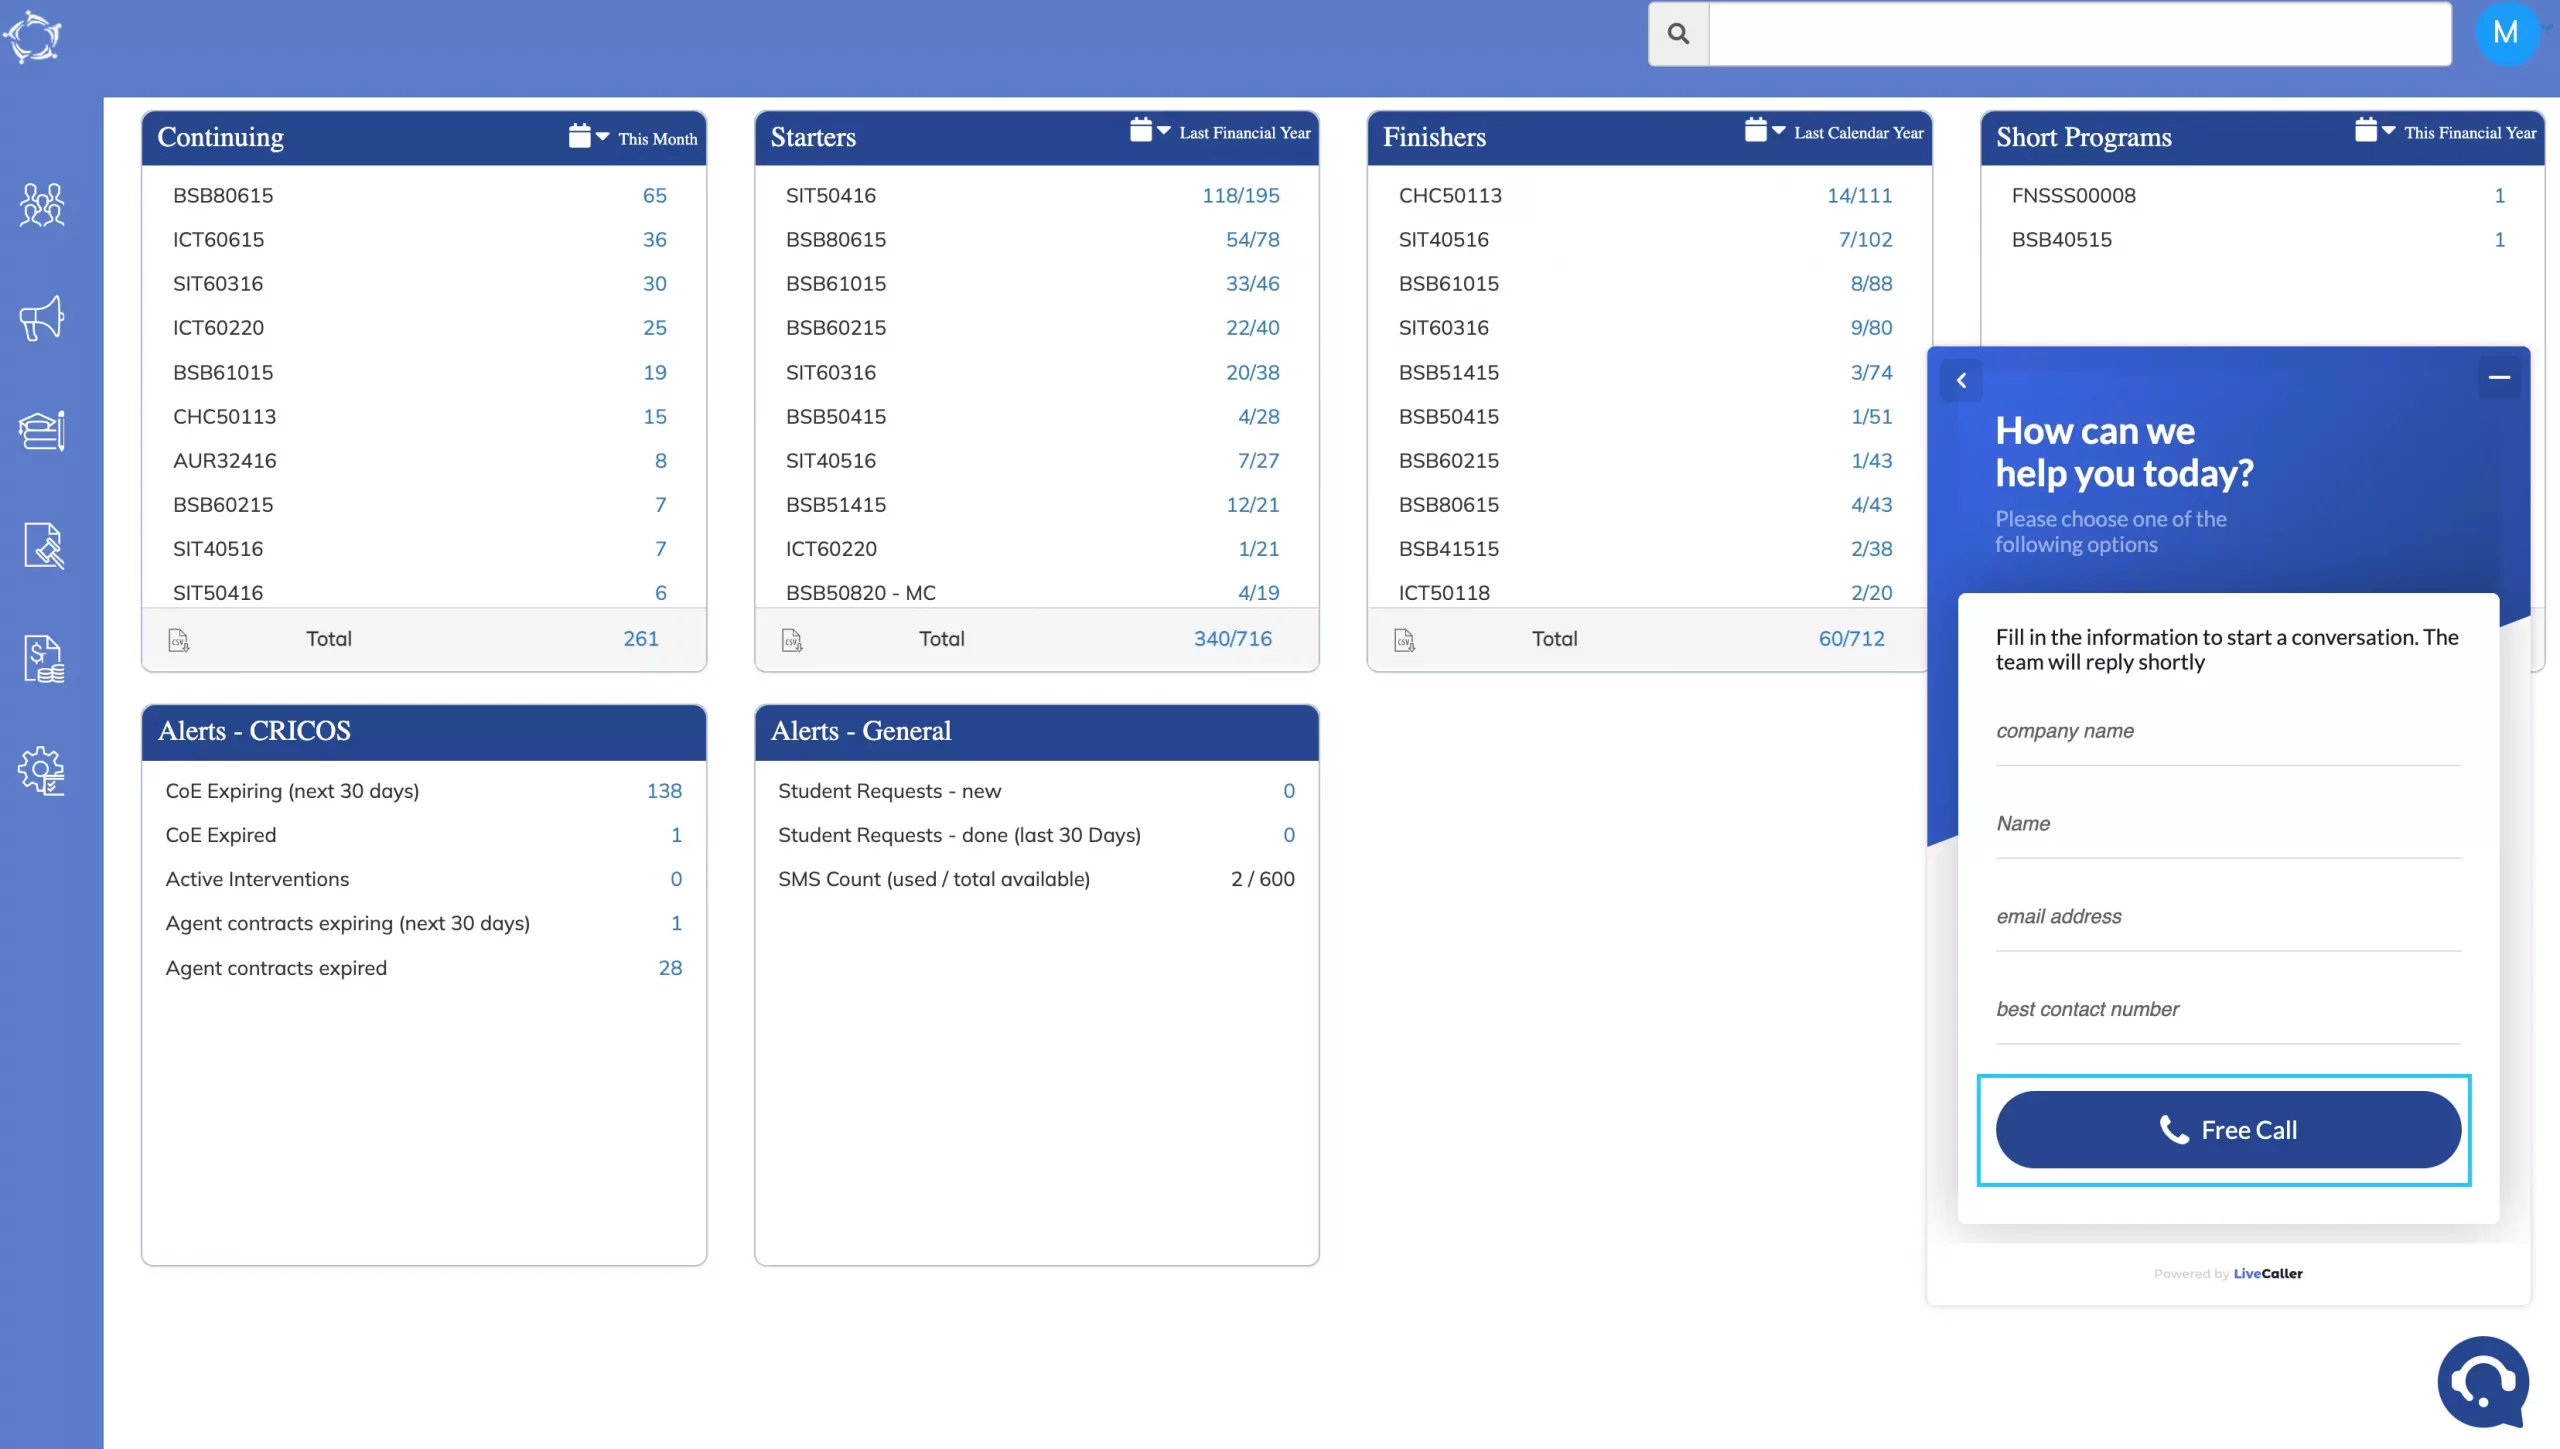
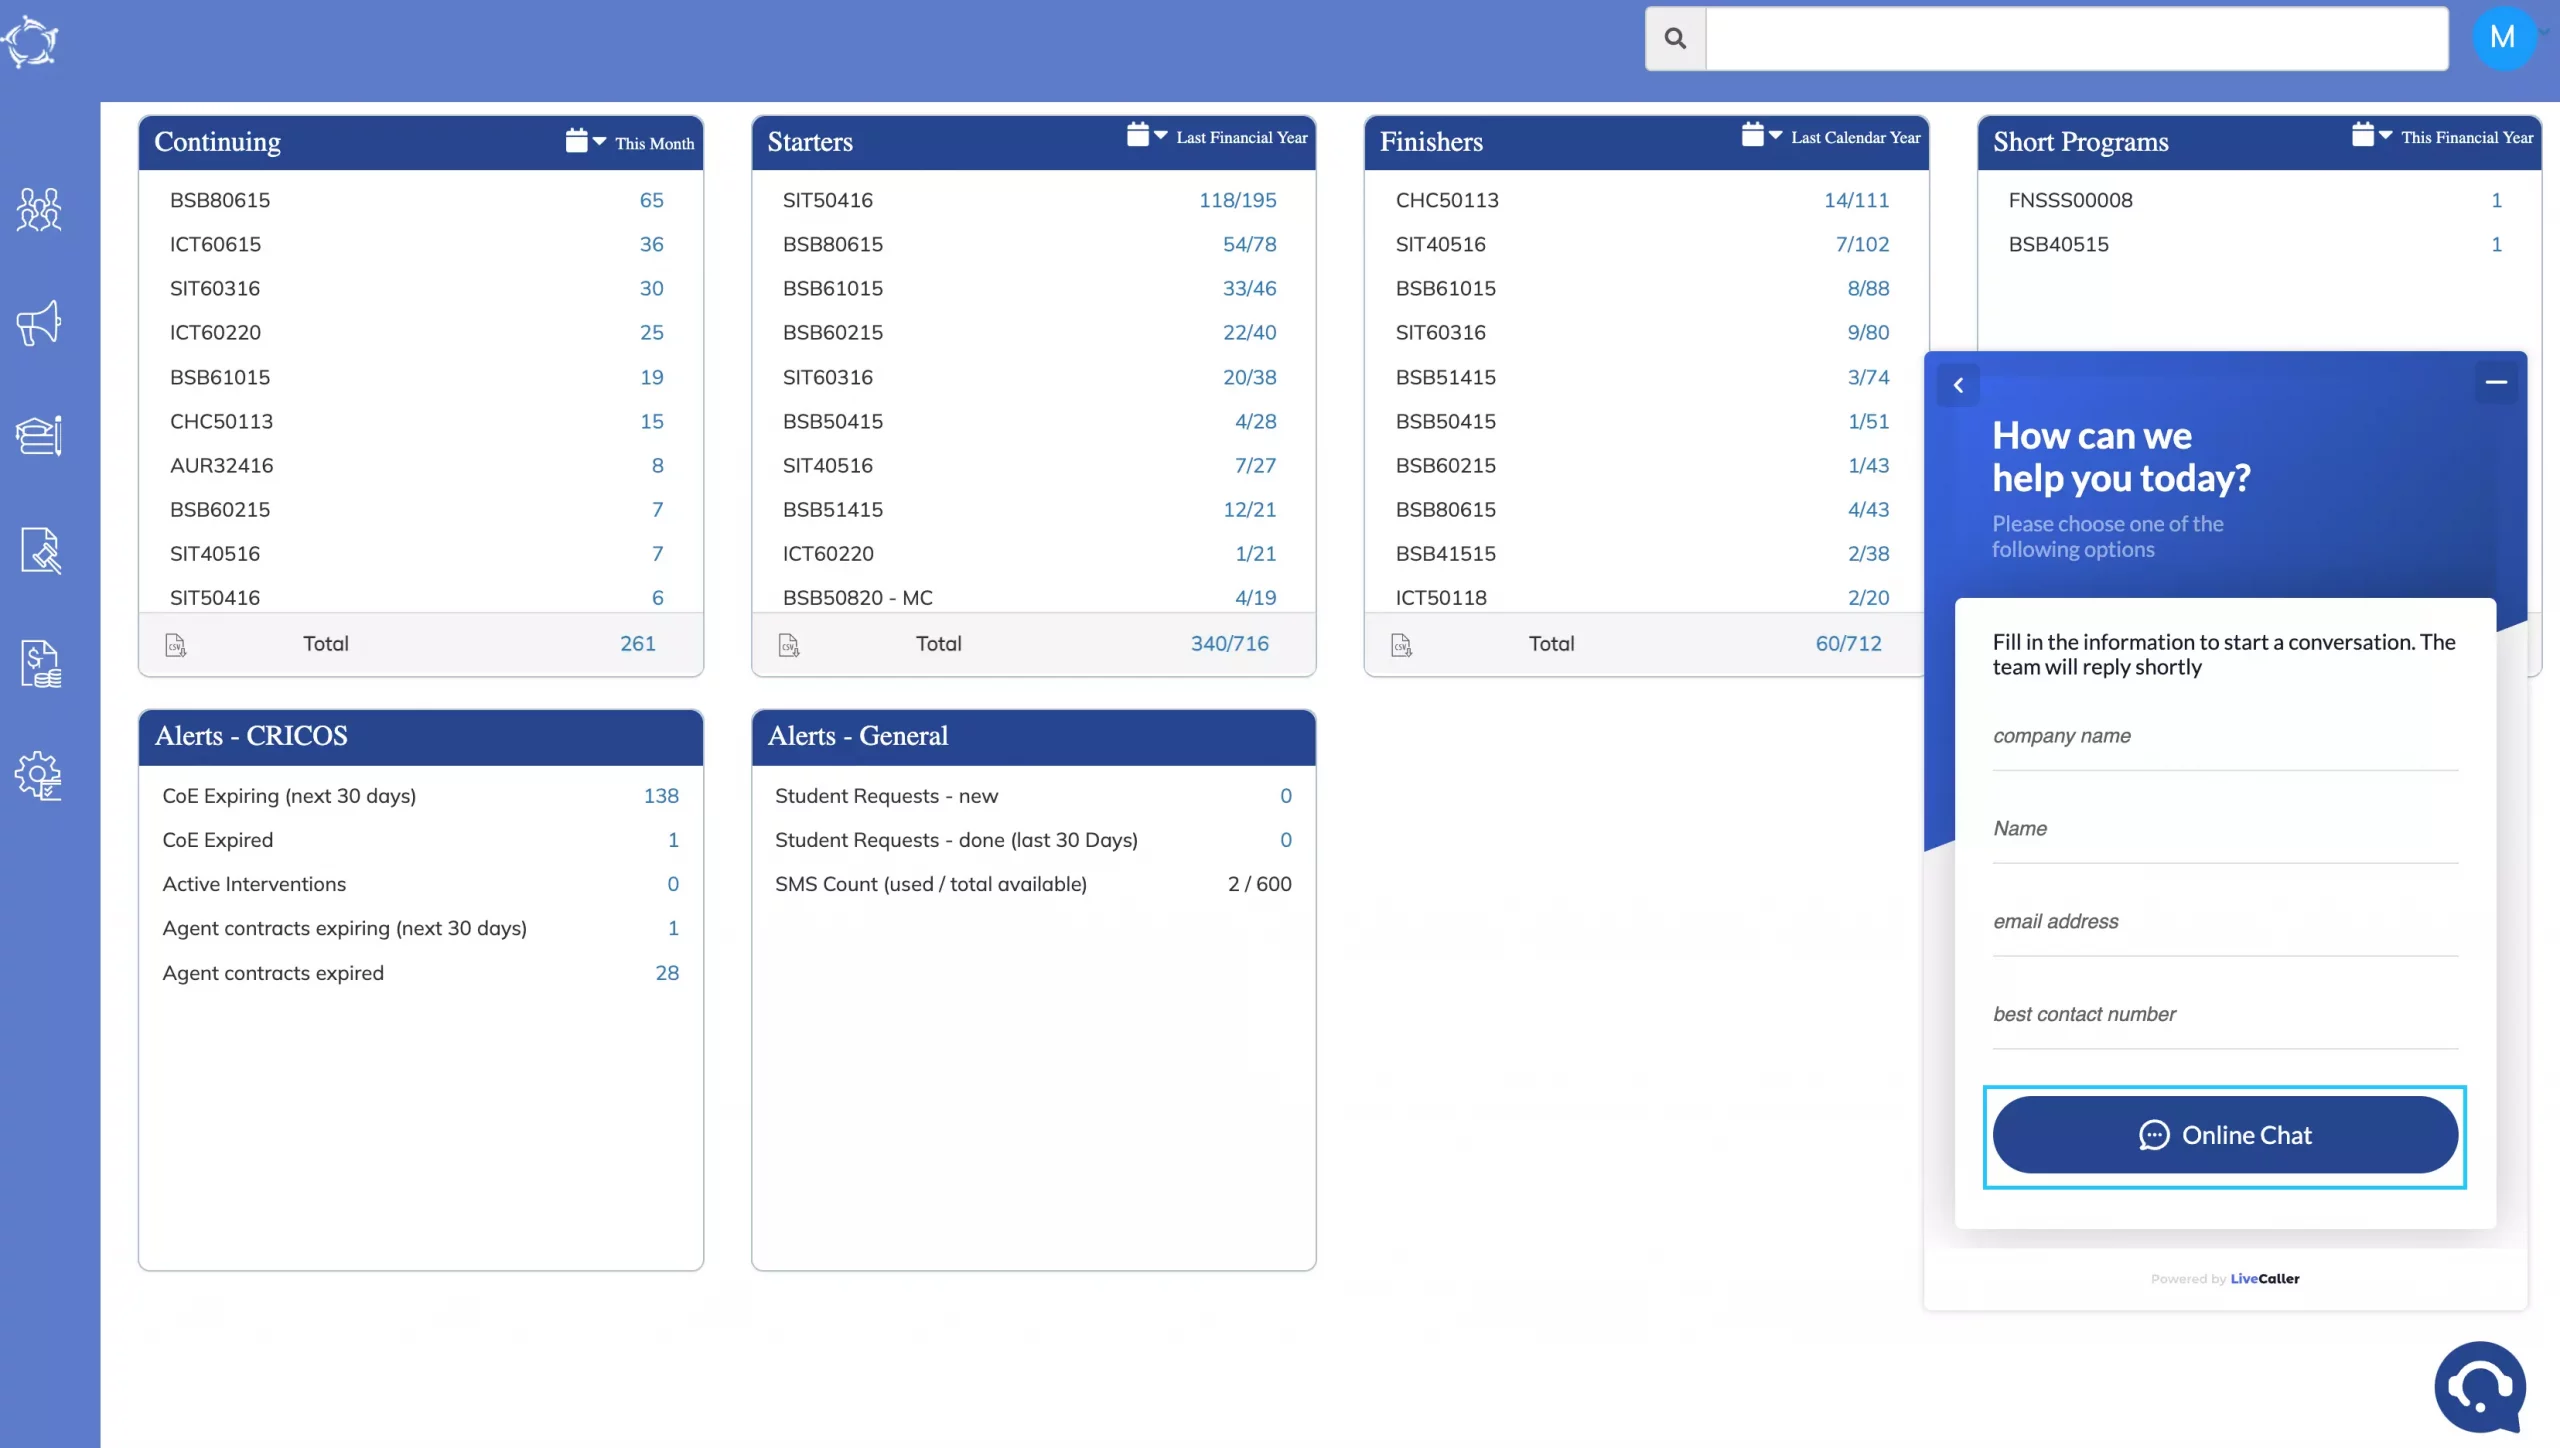
When our support staff are online and you select the LiveCaller icon, you will see two options for Voice Call and Live Chat. You can choose to either start a call or chat with our team.
IMPORTANT – When you use LiveCaller for the first time you will be asked to enter your company name, name, email address and best contact number (please enter your direct line number or mobile number, where possible) so that our support staff knows who they are talking to. You should not be asked to do this again unless you change the device (laptop, desktop etc) that you start chat or call with our support staff.
IMPORTANT: For a Voice Call, you will be asked to grant permission for LiveCaller to access your microphone. If you do not grant this permission our staff will not be able to hear you.
The user’s account will get locked if they have repeatedly added the incorrect password while logging in.
You can unlock the user’s account from the user entry screen (Main Dashboard > System Admin > User) and once you are on the user welcome screen, you need to search for the user by his/her name and then select the Apply button.
The screen will refresh and will show you the user name in the grid and from there you can select the edit button to unlock the user’s account.
Once you select the Edit button, you will lead to the user entry screen where you can see the ‘Account Locked’ check box is selected. You need to Unselect this check box.
IMPORTANT: If the user’s email address and a mobile number have not been updated on the user entry screen, then the system will not allow you to unlock the user’s account and you will not be able to save the screen. It is important to update the email address and mobile number of the user.