UPDATE – Thursday, 11 August 2022

IMPORTANT: A new TEAMS update is scheduled.

Your TEAMS site will be updated on

Thursday, 11th of August, 2022

This is an important preview email
of what’s coming on your site soon

As you know, we have been continually improving and adding new features to TEAMS. We strongly believe in making software that helps our clients gain better efficiencies and improve their operations.

Note: You may need to alert other team members within your college as the changes may affect their role or department. 

Please spend a few minutes going through our What’s New and Newsletter emails. It will not only help you maximise the time and cost savings, it may be absolutely vital for your College’s Compliance with the latest regulations.

We strongly recommend that you take your time and read this (and future update email/s)

You may need to discuss new upcoming features with the relevant decision makersor team members. Each of the changes outlined also have hyperlinks that you can click to take you to our help website for further detailed explanation.

With all that in mind, please review some of the key points outlining the list of changes below –

Major Process Changes

Report Related Changes

General / Small Improvements

Please review the changes and if something doesn’t make sense of you would like further clarification after reviewing it, please feel free to contact our Support team. 

There are a number of new initiatives and changes in the pipeline for the next update (due 25th August).

Remember, we are always open for feedback and a big thank you to so many of you who have been actively participating in helping us bring these new improvements to life. Your input and engagement are key in helping us improve and we really appreciate it.

Any questions, please feel free to reach out to us and we look forward to serving you to the best of our ability.

All the best from all of us here at RTO Software.

Follow us on Facebook and Instagram

If you have any further questions,
please feel free to contact our support staff on
1300 85 05 85 or support@rtosoftware.com.au
Remember – these changes go live on Thursday, 11th August 2022. 


Have a great day!

Buttons

In TEAMS, we have many buttons on different screens for you to work effortlessly. This post will explain to you all the buttons that we have and their purpose.

Buttons

Their use

To save a screen or popup window

To cancel/close the screen without saving

To apply the filters

To clear the applied filters

To close a popup window or screen

To generate word reports.

To go back to the previous screen

To go to the next step

To add data in the grid

To add a user from the User screen (System Admin > User) and please note that not every user can add another user in TEAMS. You might have to contact our support team to add new users in TEAMS.

To add an employer in TEAMS from the employer screen (System Admin > Employer). If you cannot see this screen, it means you do not have permission.

To add a school in TEAMS from the school screen (System Admin > School). If you cannot see this screen, it means you do not have permission.

To add a classroom in TEAMS from the classrooms screen (System Admin > Classrooms). If you cannot see this screen, it means you do not have permission.

To add a trainer in TEAMS from the trainers screen (System Admin > Trainers). If you cannot see this screen, it means you do not have permission.

To add an account manager in TEAMS from the account manager screen (System Admin > Account Manager). If you cannot see this screen, it means you do not have permission.

To add an email template in TEAMS from the email template screen (System Admin > Email Template). If you cannot see this screen, it means you do not have permission.

To add an SMS template in TEAMS from the SMS template screen (System Admin > SMS Template). If you cannot see this screen, it means you do not have permission.

To add a user code in TEAMS from the user code screen (System Admin > SMS Template). If you cannot see this screen, it means you do not have permission.

To add a notification template in TEAMS from the notification template screen (System Admin > Notification Template). If you cannot see this screen, it means you do not have permission.

To create a quiz in TEAMS from the quiz screen (System Admin > Quiz). If you cannot see this screen, it means you do not have permission.

To create some automations in TEAMS from the automated action screen (System Admin > Automated Action). If you cannot see this screen, it means you do not have permission.

To create other automations in TEAMS from the automated system actions screen (System Admin > Automated System Actions). If you cannot see this screen, it means you do not have permission.

To create instalment plans in TEAMS from the instalment plan screen (Finance > Instalment Plan). If you cannot see this screen, it means you do not have permission.

To add a new campus in TEAMS from the campus screen (Academic > Campus). If you cannot see this screen, it means you do not have permission.

To add a new program in TEAMS from the program screen (Academic > Program). If you cannot see this screen, it means you do not have permission.

To add a new UoS in TEAMS from the unit of studies screen (Academic > Unit of Studies). If you cannot see this screen, it means you do not have permission.

To add a new subject in TEAMS from the subject screen (Academic > Subjects). If you cannot see this screen, it means you do not have permission.

To add academic calendar in TEAMS from the academic template screen (Academic > Academic Template). If you cannot see this screen, it means you do not have permission.

To add a GTP in TEAMS from the group training plan screen (Academic > Group Training Plan). If you cannot see this screen, it means you do not have permission.

To add a timetable in TEAMS from the timetable screen (Academic > Timetable). If you cannot see this screen, it means you do not have permission.

To create a class for a timetable from the timetable step 2 screen.

To finish a process in TEAMS. For instance, class allocation process, timetable creation process etc.

To delete a class for a timetable.

To delete the current and onwards classes for a timetable.

To add an intake in TEAMS from the intake screen (Academic > Intake). If you cannot see this screen, it means you do not have permission.

To have a list of all the enrolments after updating the filters on screens like Subject Dates (Academic > Subject Dates), Results (Student Management > Results) etc. and these screens are permission based.

To create a new application.

To attach documents from TEAMS's document log while sending email/s.

To attach documents from your computer/network while sending email/s.

To send emails/SMS from TEAMS.

To add a new enquiry in TEAMS.

To add a new agent in TEAMS from the agent welcome screen (Marketing > Agent). If you cannot see this screen, it means you do not have permission.

To open another screen for financial items depending upon the screen you are on.

To add a new pending commission payment for an agent. This is based on the system setting for your RTO. If you cannot see this, it means, the system setting is not turned on for your RTO. This is accessible from Marketing > Agent Dashboard > Profile section.

To create a new commission rate template for an agent from Commission Templates screen (Marketing > Commission Templates). If you cannot see this screen, it means you do not have permission.

To have the list of classes for a timetable from the attendance step 1 screen if there is more than one class for a timetable. This is also used to have a list of enrolments to mark the attendance after updating the date range on the Attendance & Results screen. This is visible from Student Management > Attendance.

This is to load classes for the selected timetables on the filters/parameters screen for ASQA class roll report (Student Management > ASQA Class Roll).

To add holidays for a student.

To create a USI for a student.

To verify a USI for a student.

To cancel an enrolment.

To update some of the mandatory AVETMISS settings in bulk for students, enrolments, subjects and programs.

To see/view old AVETMISS fileds settings that are no longer used from Enrolment Dashboard > AVETMISS settings.

To load subjects while transitioning a student's enrolment from one program to another program.

To allocate a student into a class from Enrolment Dashboard.

To load classes to allocate for a student's enrolment within the selected date range from Enrolment Dashboard > Class Allocation Screen.

Grids

In the system, where you need to view multiple rows of similar data it will be displayed in grids. There are two types of grids that you will see in the system that are as follows:

Type 1: Read only Grids

Read only grids allow you to view data and do transactions but you cannot directly edit the entry from the grid. You will find these types of grids in our listing screens such as the one below for the Continuing Listing screen that shows you a list of your current students at the college.

Type 2: Editable Grids

This type of grid allows you to edit the data directly from the rows in the grid or select the Edit Icon in the action column for the row and the system will display a popup screen for you to edit the information and save the changes.
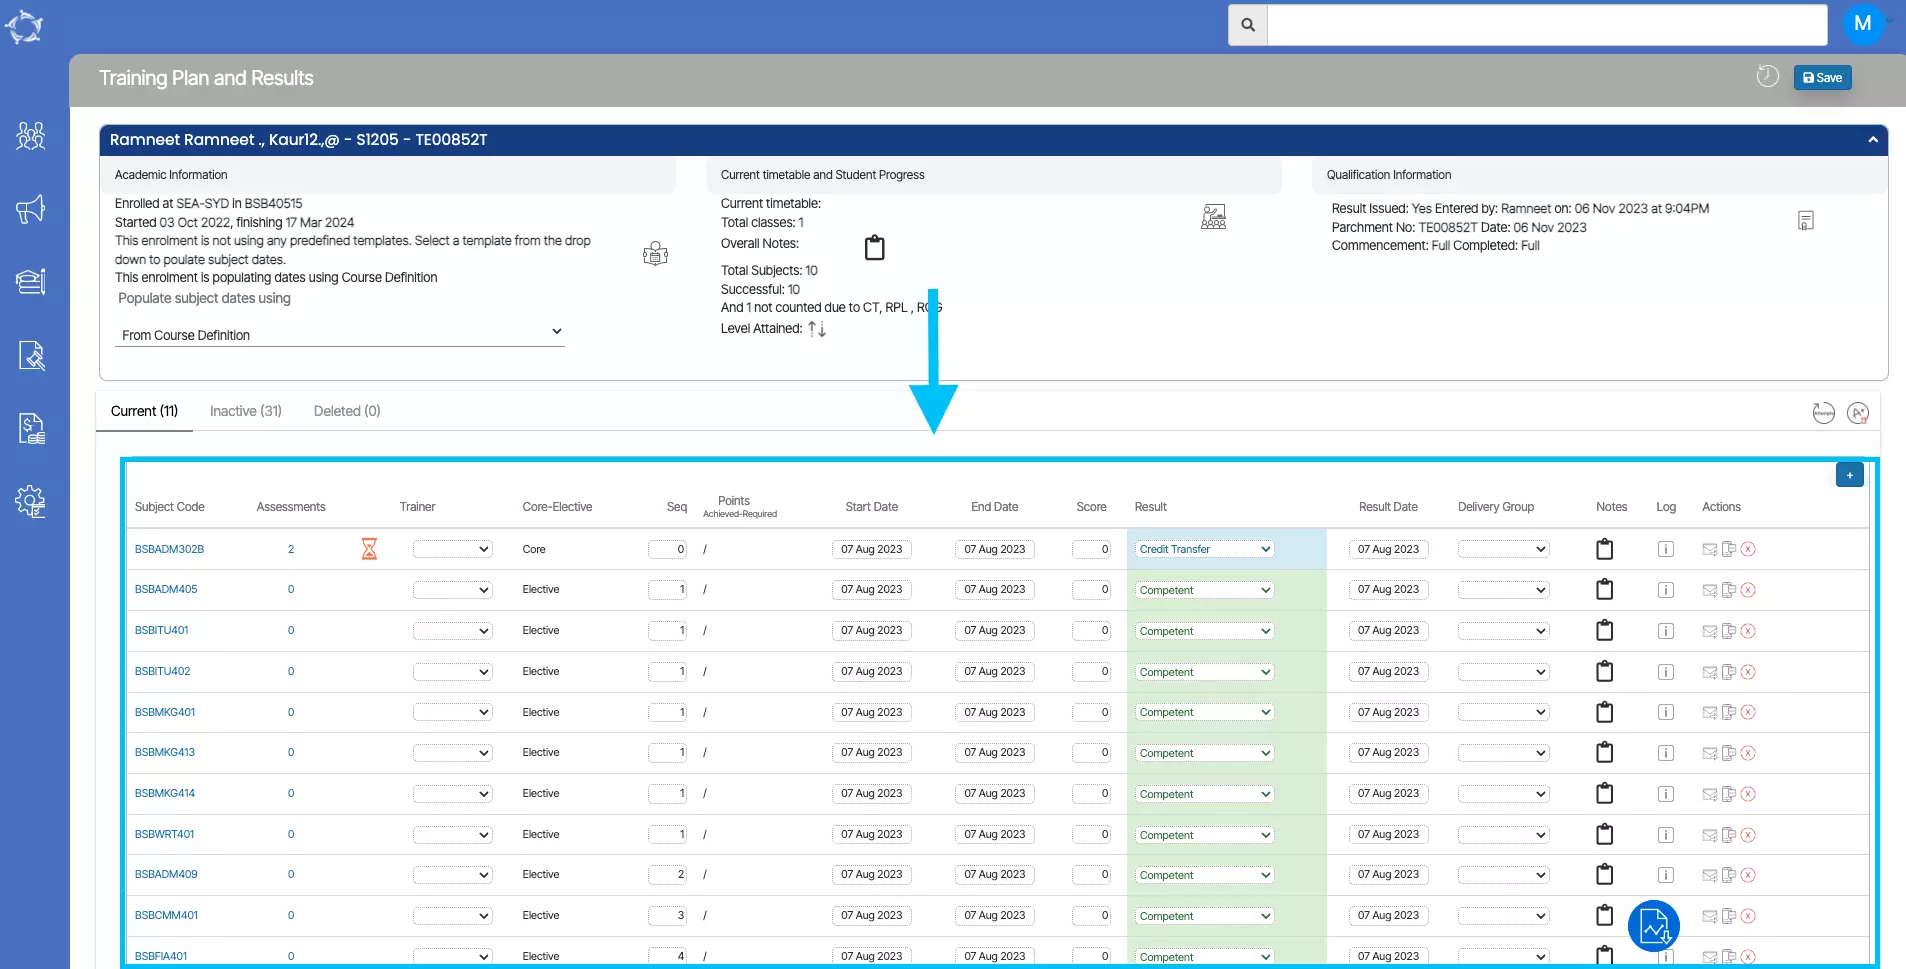
Below is a screenshot of the grid in the Training Plan and Results screen. This grid allows you to edit the data in the grid itself, however, you must remember to select the Save button at the top of the screen once you have finished editing the data in the grid.

Below is an example of the editable grid where you edit the row and the system displays a popup window as shown in the example screenshot below for the Intervention Process screen.

For both grid types, there will be specific columns in them based on what screen and type of data you are looking at. The columns are Details and Actions.

Details Column in grids

This column will generally be seen in List screens such as the Starters Listing screen where you will see a list of students and their enrolments as shown below.

Student Profile Tile

This tile will give you an overview of the basic information of the student. You can upload the student profile picture here and edit the details of the student.

Basic Information

You will see some basic information about the student displayed in this tile. It will show the gender and the age of the student in the first line. In the second line, it is displaying the date of birth of the student. It will display the mobile number and primary email address of the student further.

Upload Student Profile Picture

For uploading or changing the student profile picture, you need to bring your cursor near the thumbnail of the picture and the system will show two icons as shown below.
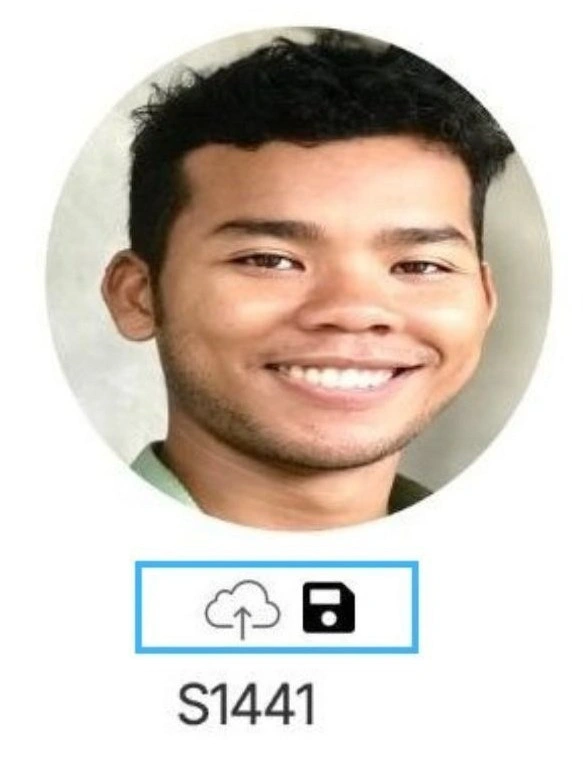
To upload the student profile picture by clicking the picture using the system upload, click on this icon.
To save the student profile picture after uploading the picture from your computer, click on this icon.

Vertical Icons

Horizontal Icons

Special Needs Required

How to setup Subject Fees for Programs and Subjects?

Dashboard > Academics > Subjects

  • To set up fees for the Subjects, you need to go to the Subjects > Subjects Entry screen > Details tab. Here you can enter the Subject fee in the Default Amount field.

Dashboard > Program > Burger Menu > Subjects

  • To set up fees for the Subjects at the Program level, then you need to go to the Program Burger Menu and select Subjects from the pop up.
  • Once you have selected the Subjects option, it will take you to the Program Subjects screen and there you need to select the Edit icon under the Actions column for the particular subject, you wish to enter the subject fee.
  • Upon selecting the edit icon, the floating window will open on the screen, where you can add the amount for the subject and select Save.

When to add the fee at the program subject screen?

If for any subject which is common in two or more programs but the fee for each program is different for that subject. Then in such a case, you can add that program-specific fee for the subject at the program subject screen.

Business Rules

The system will fetch the fee amount from the program subject screen. If the fee amount field is blank there then the system will fetch it from the subject entry screen.

Read Only Fields

There are some fields in most of the data entry screens having grey background. Those are called read only fields. We are having two versions of read only fields in our system.

  1. System Generated
  2. User Created

System Generated – Read only fields

This fields are generated and auto populated by the system. There are system settings which are setup during initial setup of the site. These settings helps system to generate ready only fields.

Examples of system generated read only fields are Student Number, Invoice Number, Receipt Number

User Created – Read only fields

This fields are auto populated by the system once these are entered by the user on their entry screens. Let me illustrate it with example, A user enters USI on USI entry screen.

Now once the USI is entered here by the user. The system will auto populate it on other screens as read only field. This helps us in maintaining data accuracy and reduce entering same data again and again by user. For example USI number is a read only field on student entry screen and it will fetch the data from USI entry screen.

Using TEAMS

Dashboards

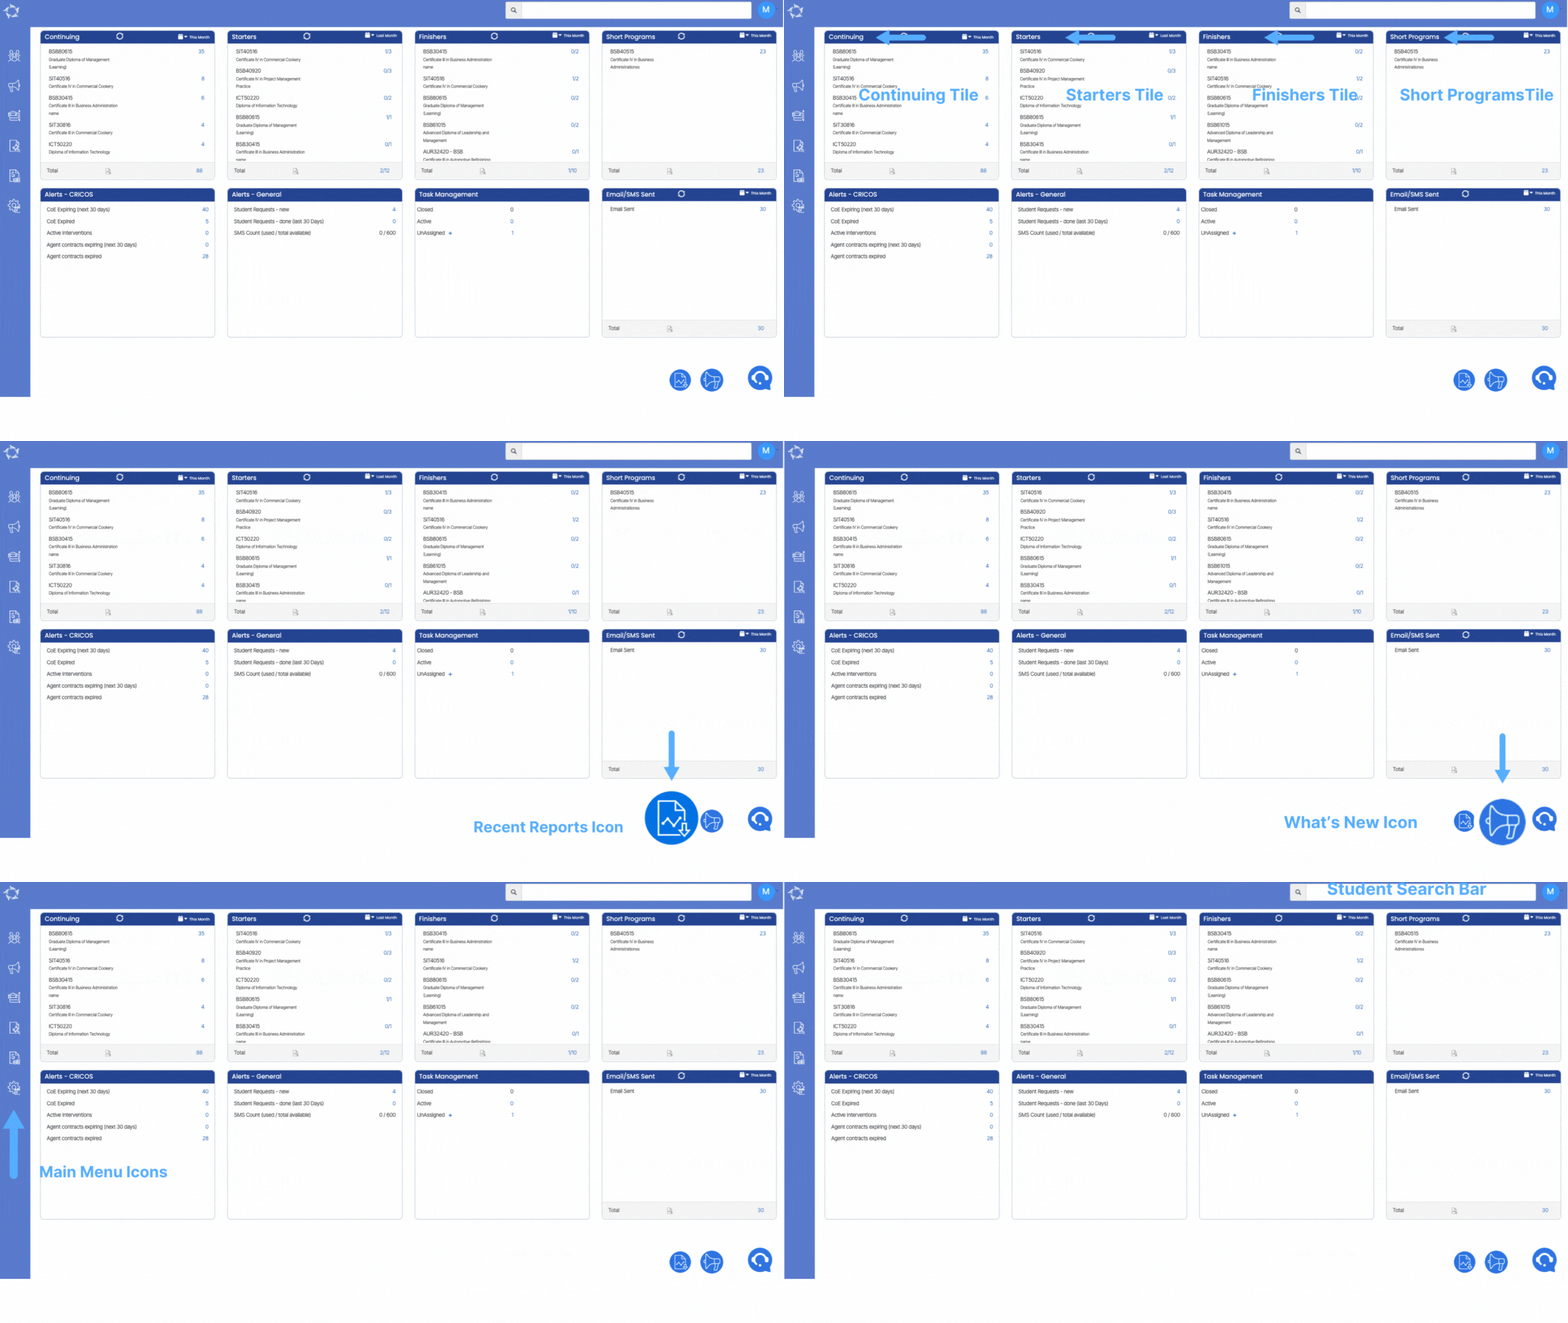
After you log in, you will see the Main Dashboard. It has Menus on the left and is comprised of Tiles on the right. You also have a search bar on the right (top section) which can you can use to search for an individual Student or Applicant. Once you the student or applicant you wish to view and navigate to the Student or Applicant Dashboard, you will see a list of their enrolments and/or applications and be able to navigate and view them in the Application or Enrolment Dashboards.

Menus are arranged according to different sections and you can navigate to all the individual screens/reports and other Dashboards from there.

Main Navigation Menu

The main menu is on the left hand side of the screen in a vertical fashion. You will see a number of icons in white and they will allow you to navigate throughout the system. These main menu icons include:

The Basics

In the system, there are many items that you will see regularly such as the Documents and Communication Tiles, drop downs, mandatory fields and other items that help you use TEAMS effectively. Our TEAMS Basics post will explain in more detail all that you need to know about these areas.

No SAVE button on the screen?

If you are entering data and you cannot see a SAVE button, this could be due to one of two reasons –

1. You do not have permissions to add or edit data. You should talk to your manager to confirm if you have permissions in the system to do this.
2. There is a small number of screens in the system where it will auto save what you enter or edit. These screens include:

Attendance
New Enquiry (Student & Employer types) > Preferences screen

TEAMS Basics

This post will show you some basic fields, icons and options that we have in TEAMS which are available on many screens. So this generic post will explain them

Mandatory fields

The fields that have an asterisk sign beside them cannot be left blank

Calendar Options

The calendar dropdown menu has different options, as shown in the picture above. If you wish to select a specific date-range, select the “Custom Range” option and specify the start and end dates, then click on “Apply“.

Burger Menu

You will see the Burger menu on all the listing screens and on the communication tile.

You will see the Burger menu on other entry screens as well and they will have options other than mentioned above.

Read only fields

The greyed-out fields are populated by the system; you cannot enter any data in these fields.

Date fields

The date fields in TEAMS have to follow the DD/MM/YYYY or DD MMM YYYY format. You can also select the date directly from the calendar.

Important Icons, Buttons and Grids

Buttons
Grids

There are many icons, buttons and grids in the system. Please see this post for information on each important icon, button and grids and what they do.

Report/Screen Filters

Filters, or parameters, can be used to narrow down the data displayed on the screen, or in the reports you generate. While this may sound like grouping, filtering is different because it allows you to qualify data and display only the data that matches the parameters you select.

Report Filter – Group By

All CSV reports have a “Group By” dropdown, which helps you group your reports based on the options that you select from the dropdown menu.

Report Filter – Sort By

On all our csv reports, you will see a Sort by parameter. This will help you to sort your reports in ascending or descending order based on the option that you select from the Sort by dropdown. Choose the suitable option from the dropdown to sort your report

Example: If you have selected Sort by option as Program with Asc radio button, then the system will sort the programs in ascending order in the generated report.

Documents Tile

Every dashboard in TEAMS has a Documents Tile, be it student dashboard or agent dashboard. Documents tile works the same way on every dashboard. Click on the Documents Tile icon to learn more.

Communication Tile

TEAMS has a Communication Tile on every dashboard, be it a student dashboard or agent dashboard. Communication tile works the same way on every dashboard. Click on the icon above to learn more.

Audit Log

It’s vital for every software to keep a record of all the new entries or changes done. Audit log helps to provide records of all the activities that users are doing on a screen. Learn more about Audit Logs from this post.

Dropdowns

TEASMS has dropdowns for fields and filters for reports. Some dropdowns are standardised, while some can be customised. Learn more about dropdowns by clicking on the icon above.

Merge fields

Merge fields are special fields that we use in TEAMS for different MS Word reports, and Email and SMS templates. Click on the icon above to learn more..