Below is the list of the changes on the Starters Listing Tile.
| Date Updated | Changes Made |
|---|---|
| 2022 Sep 22 | New Filters- Requires Homestay and Requires Airport Pickup/Drop off |
Below is the list of the changes on the Starters Listing Tile.
| Date Updated | Changes Made |
|---|---|
| 2022 Sep 22 | New Filters- Requires Homestay and Requires Airport Pickup/Drop off |
We have introduced a new tick box called “Send email to agent only” on composing email screen, which will be available only for application objects.

On compose email screen, upon the selection of “Send email to agent only” tick box, it will load the Agent name and the email address of the agent next to tick box as shown in the below screenshot:

There are a few rules that will stop an enrolment from being exported in the AVETMISS export files which are listed below.
Firstly, there are two different types of AVETMISS exports in the system that are:
Here are some of the latest changes that we have made on the Enrolment Financial Details
| Date Updated | Changes Made |
|---|---|
| 30 Nov 2023 | Improvements in Cancel Receipt functionality |
| 30 Nov 2023 | New Functionality – Cancel Multiple Invoices in Bulk |
| 21 Sep 2023 | Enrolment Financial Details Screen – Invoices Sorted by Due Date |
| 07 Sep 2023 | Edit Invoice – New Invoice Notes field |
| 07 Sep 2023 | Fee Selection – Fee Type and Fee Name Changes |
| 24 Aug 2023 | Raise New Invoice – Invoice Notes New Option |
| 24 Aug 2023 | Student Financial Detail Screen – New Qty and Rate Column |
| 12 Jan 2023 | Added Reference in the refund |
| 02 Dec 2022 | New Refund & Cancel, transfer & Cancel Check Box |
| 20 Oct 2022 | Edit Multiple Invoices |
| 01 Sep 2022 | Enrolment Financials – Edit Multiple Invoices |
| 01 Sep 2022 | Student Financial Detail Screen – Label changed from Date to Due Date |
Here are some of the latest changes that we have made in the Enrolment Dashboard > Agent Financial details screen.
| Date Updated | Changes Made |
|---|---|
| 12 Jan 2023 | New Feature Pre-Deducted – Agent Financial screen |
| 03 Nov 2022 | ED – Agent Financial Details – new payment information |
| 11 Aug 2022 | Enrolment Dashboard > Edit Agent Commission Invoices |
| 21 Jul 2021 | Delete Agent Payment |
To link subjects to an enrolment, go to Enrolment Dashboard > Result and progress tile > Training Plan and Results Icon. Once you select the icon, the system opens the Training Plan and Results screen.
This screen is about the subjects linked to the enrolment, their start and end date, results and result date. This screen is visually distributed in 2 sections where you can edit the dates, and results, link the trainers, mark the assessments and many more. To link subjects, you need to go to the second section which is called the results grid.

Now, to link subjects to the enrolment, you need to select the ![]() Subject Icon. When you select this icon, it will expand the screen and you will be presented with all the subjects related fields in the grid itself.
Subject Icon. When you select this icon, it will expand the screen and you will be presented with all the subjects related fields in the grid itself.
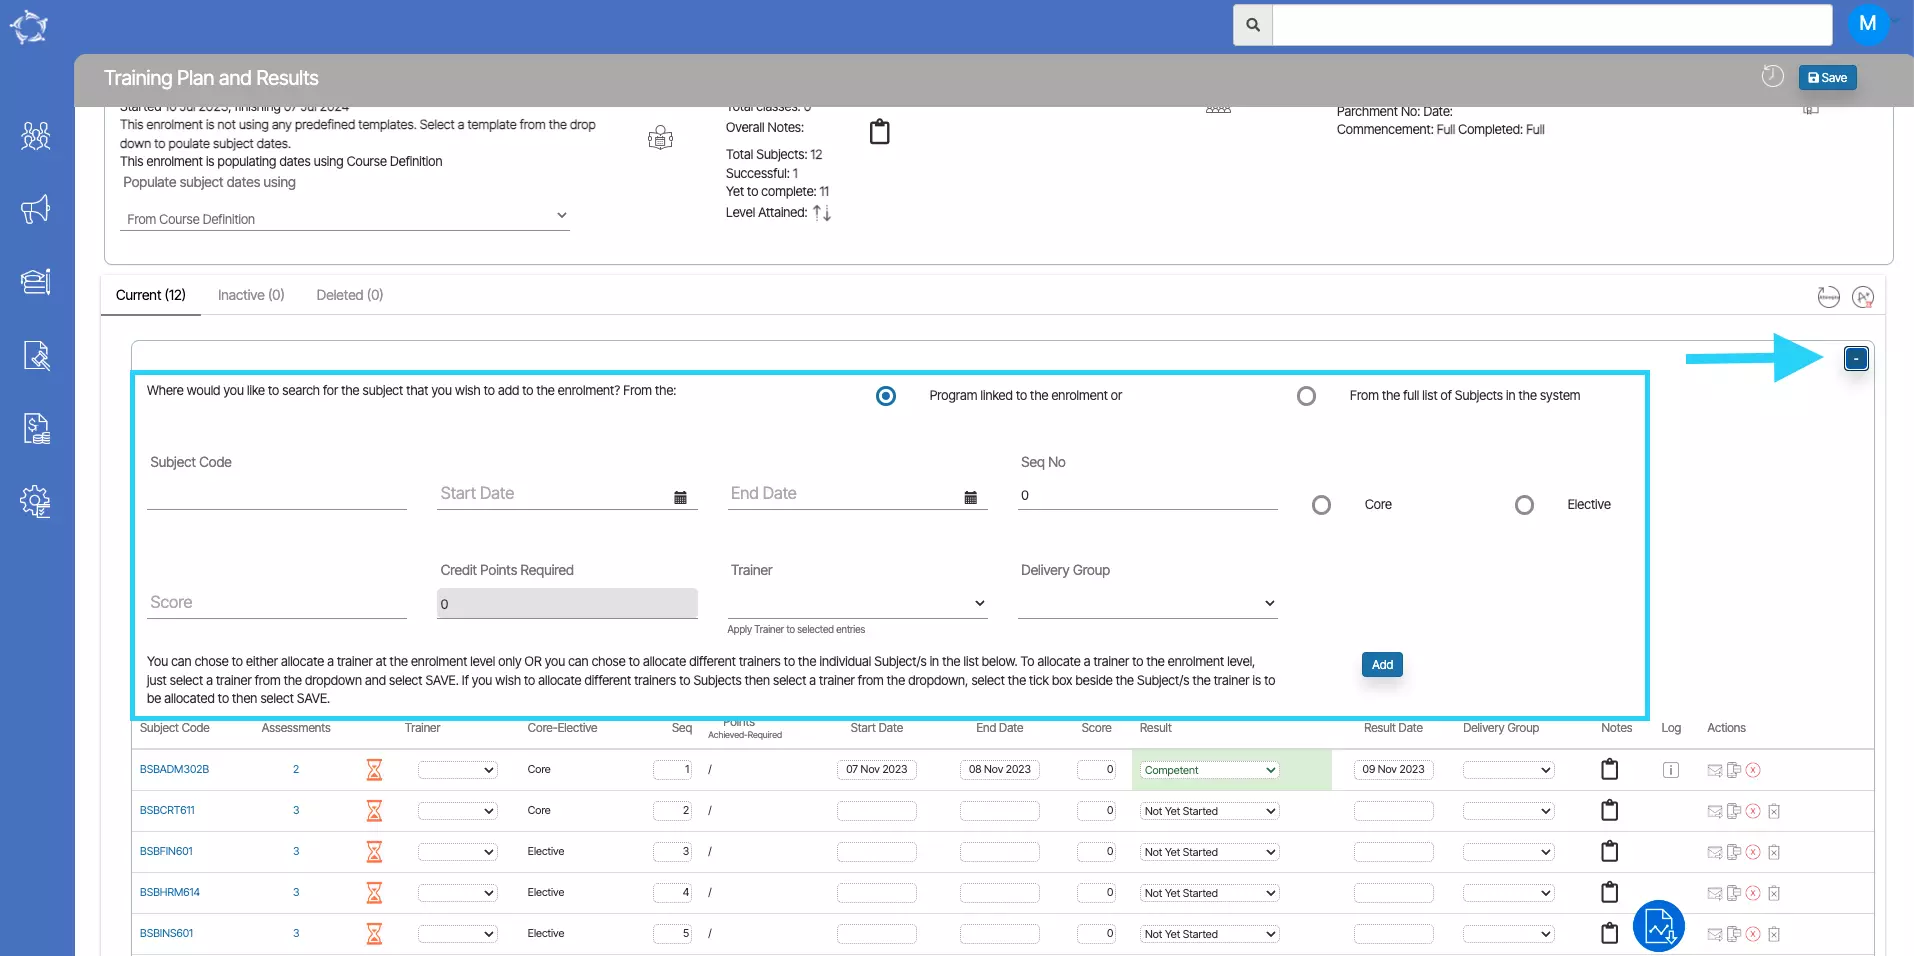
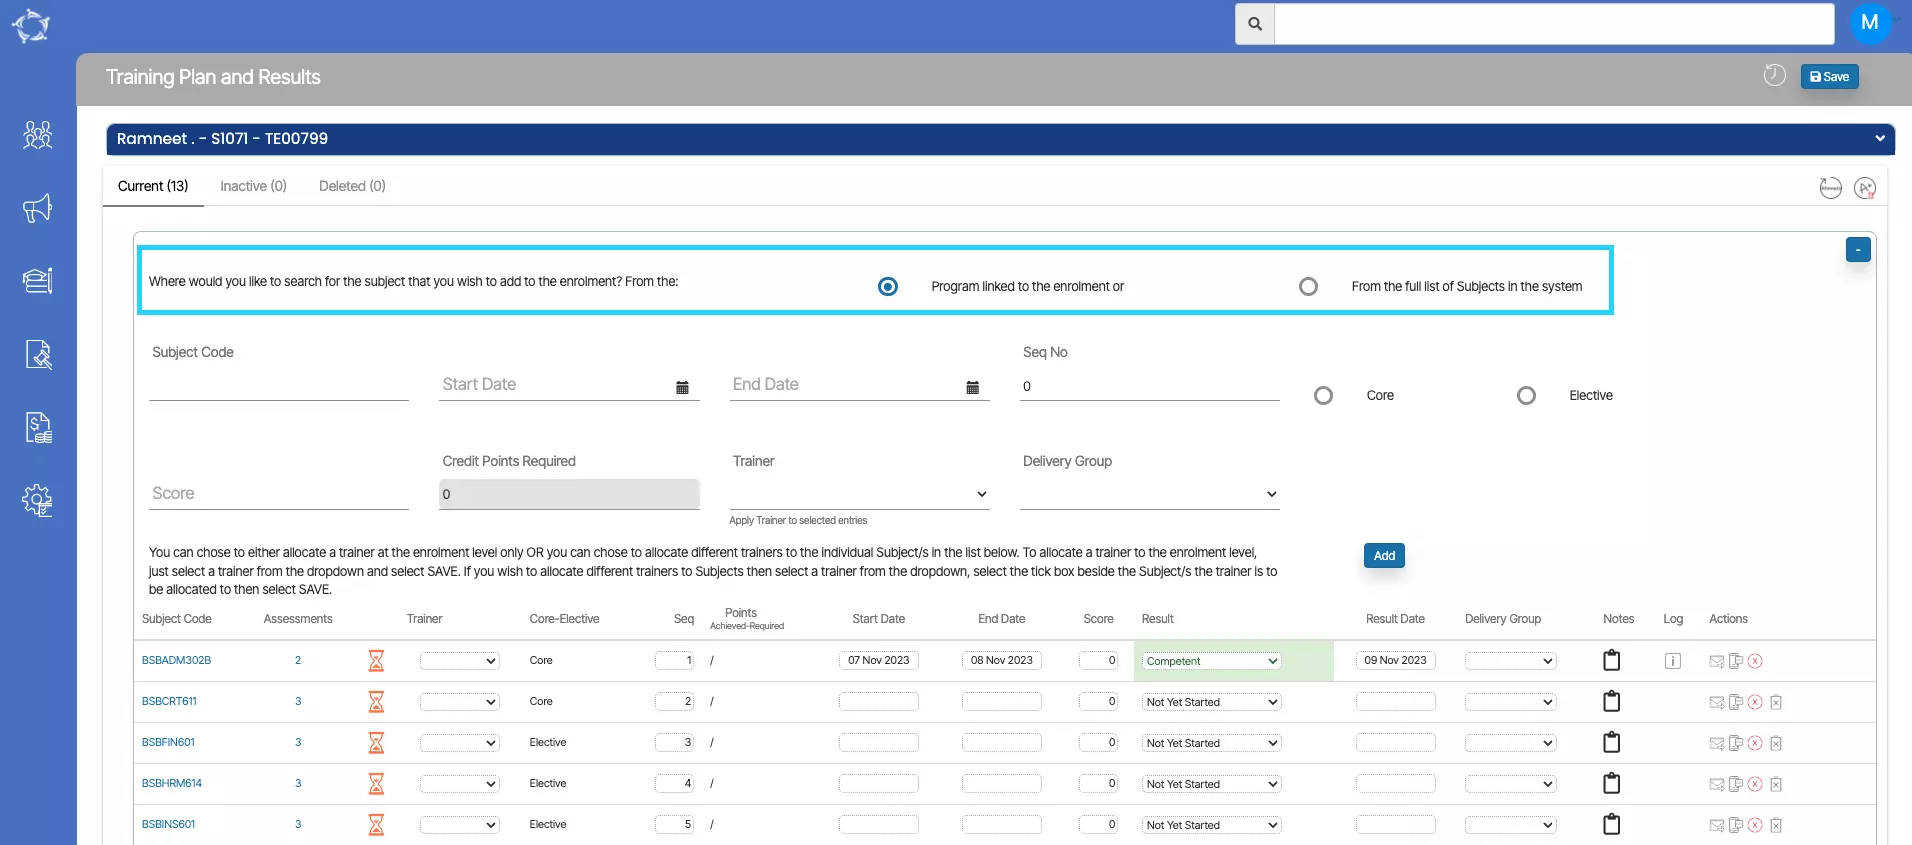
Subject Code – search the subject with the subject code which will show you all the suggestions under the search field. Select the correct one.
Start Date and End Date– Select the subject dates from the calendar. Please make sure that the dates that you are selecting, should lie between the enrolment dates.
Seq No – Add the sequence number of the subject.
Core/Elective – Select any of the one radio buttons as it is mandatory to mention if the subject is code or elective.
Score – When you add a score, the credit points required field will be auto-populated.
Trainer – you can select the trainer and delivery group from the dropdown. You can choose either to allocate a trainer at the enrolment level only OR you can choose to allocate different trainers to the individual Subject/s. If you wish to allocate different trainers to Subjects then select a trainer from the dropdown.
Delivery Group – Select the delivery group from the dropdown.
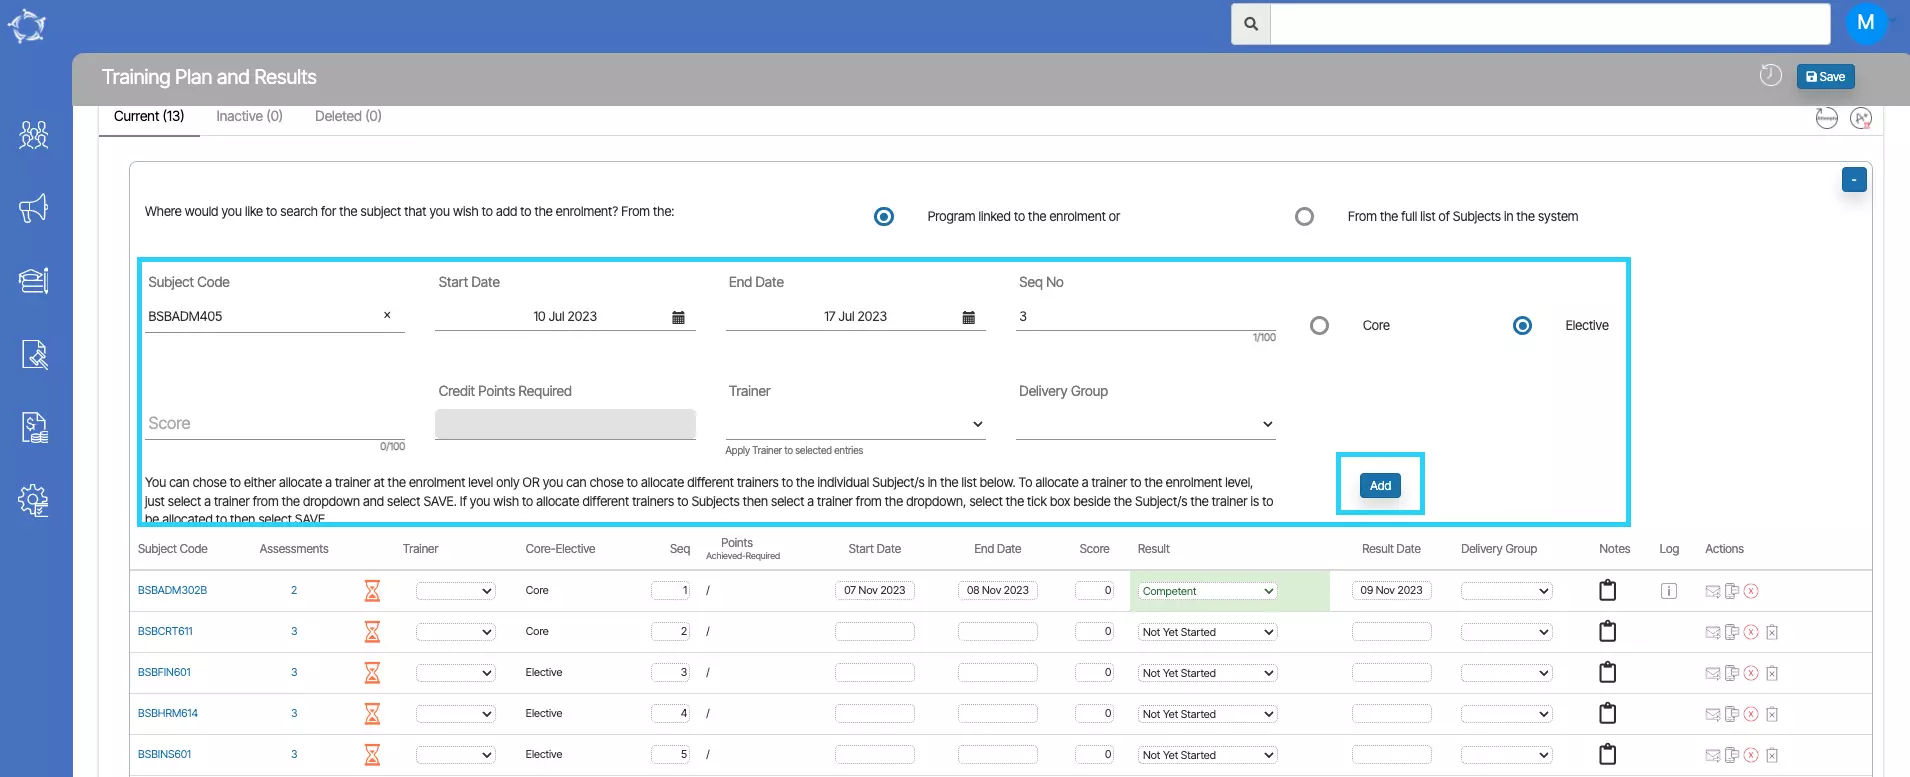
Once you have updated all the above steps, select the Add button. Upon selecting the button, the system will refresh the screen and update the subject in the grid.
We have made some changes in the transitioning enrolment process and now when you transit any enrolment, the system will show you the letter T at the end of the enrolment number which will indicate that the enrolment is a transitioned enrolment.
IMPORTANT – Generally, the enrolment number is the Parchment number unless you are using any other number as a parchment number. So the new Parchment number after the transition will have postfix T.
Rules – From the Compliance perspective, you cannot issue a certificate for two different competencies with the same parchment number. To ensure the same, the enrolment number and parchment number are changed after the transition.
We have added three new columns Discount, Discount Reason and Deposit Due for you in the edit invoices grid while editing the multiple invoices.
Note – The discount column will allow you to give a discount on the total amount for a particular invoice, and once you add the discount, the system will calculate the total amount of the invoice accordingly.
We have added a new feature in the system to record a receipt when there is any overpayment by the student. This will allow you to enter the receipt amount more than the invoice amount in the Enrolment Dashboard > Student Financial > Receipt Screen.
Note – Once the receipt is overpaid then the system will show a receipt icon in red.
IMPORTANT – While creating the receipt, the system will not let you enter the overpaid amount if it is not equal to or more than the total pending amount for all the invoices.
For example – if there is $3000 pending for a student’s enrolment with $1000 each invoice and you are going to record a receipt for one invoice and the student has paid you $2000. In such a scenario, the system will not save your overpayment. However, if the paid amount by the student was $3000 which is equal to the student’s total pending balance then the system will save your overpayment and will balance out everything.

Below is the list of changes on the application listing screen.
| Date Updated | Changes Made |
|---|---|
| 2023 Oct 19 | Listing Screens – New Page Limit Option |
| 2022 Nov 03 | Applications Listing – new filter Use Application dates |
| 2022 Sep 22 | Change – Application Listing Screen – CSV download |
| 2022 Sep 22 | Change – Application Tile Listing – Requires Homestay and Requires Airport Pickup/Drop off |