Here are some changes that we have recently made to the Application Dashboard.
| Date Updated | Changes Made |
|---|---|
| 27th July 2023 | Pin Payment Integration |
| 18th May 2023 | Application Dashboard – New Agent & Delete Icons |
| 17th Nov 2022 | Visa/CoE Details Changes |
This is the tag we use to approve any post (old and being edited etc) through revisions. Once the majority of all existing/old posts have gone through our edit process and have this tag, we will then bulk remove it from them.
Here are some changes that we have recently made to the Application Dashboard.
| Date Updated | Changes Made |
|---|---|
| 27th July 2023 | Pin Payment Integration |
| 18th May 2023 | Application Dashboard – New Agent & Delete Icons |
| 17th Nov 2022 | Visa/CoE Details Changes |
We are pleased to inform you about the recent improvements we have implemented in the Class Allocation Step 2 screen. Previously, the system sorted enrolments in ascending order within the grid, but we have now made a significant change to enhance user experience.
With this latest update, the sorting feature has been specifically applied to the Student’s Name column. As a result, when viewing the grid, the student’s names will be arranged in ascending order, making it much easier for you to navigate and manage class allocations.
We’ve made a significant improvement to the system’s functionality by introducing a new feature in the student search bar. Previously, the system only allowed searching by one last name but now you can easily search for students using their last names with enhanced flexibility.
For instance, if a student’s last name is “Matthews Kobler,” you can now search for them using either “Matthews” or “Kobler” as the last name or even both together, like Matthews Kobler and the system will accurately retrieve the relevant results. Embracing diversity in students’ names, the system adapts to different scenarios, enabling you to find the right students with ease and precision.
In TEAMS, setting up Program Structure involves a series of essential steps and guidelines. Firstly, creating and defining the subjects that will be offered within the system. Then, establishing the overall program framework, outlining the program and subjects. Next, linking specific subjects to the corresponding program ensures a well-organised curriculum for each student. To account for breaks and time off, public holidays are incorporated into the system.
Additionally, configure intakes, allowing students to enrol at specific times throughout the year. Financial aspects are also managed within TEAMS, with the ability to set up fees and instalment plans for students’ convenience. For offering group training, you need to create group training plans to accommodate such arrangements. Lastly, the program is linked with the campus, ensuring seamless communication and data management between different locations. By following these steps and guidelines, TEAMS facilitates an efficient and structured student management system, enhancing the overall educational experience.
It is recommended, to create a Subject and update the subject’s AVETMISS settings before you set up a program in TEAMS.
a) Go to the Main Dashboard > Academic Menu > Subjects
b) When you select the Subjects icon, the system will present you with a Subject Welcome Screen. This screen will show you all the active subjects that are already present in your database. To know more, select here – Subject Welcome Screen
c) For adding a new subject, select the +Subject Button from the subject Welcome Screen.
d) Once you have successfully created the subject and saved it, the system will show you a Burger Menu Icon. You need to select the AVETMISS Settings option to update the Subject AVETMISS settings for a subject.
Once you have completed Step 1, you need to set up the Program and its settings along with the Program AVETMISS Settings.
a) Go to the Main Dashboard > Academic Menu > Programs
b) When you select the Programs Icon, the system will present you with the Program Welcome Screen. You need to select the +Program Button to create a new program in the system.
c) Once you have successfully created the Program along with the settings, the system will show you a Burger Menu Icon. Now from there, you need to select the Subjects option to link the subjects to the program.
d) Once you have successfully linked the subjects with the relevant fields, you then need to select the Program AVETMISS Settings option from the Burger Menu Icon to update the Program’s AVETMISS Settings.
It is recommended that if you are creating Intakes then you need to create Public Holidays in the system as a prior step.
NOTE – Before you create Intakes, you need to understand how your site is set up by our Onboarding team. Whether they have created your Academic Template or not. If your Academic template is not set up then you need to go to Main Dashboard > System Admin Menu > Term Breaks icon to create the Term Break in the system.
If you have a setup of Academic Template then you can simply create Intakes. Once you have created the Intakes, please make sure that you are linking the Intake with the Program. To link the Intake, you need to go to the Program Entry Screen > Burger menu > Program Intakes. Select the Program Intakes option to link the intake with the Program
After the above steps, you need to set up fees for a program. To create fees, you need to go to Main Dashboard > Finance Menu > Fee Icon. Once you selected the Fees Icon, the system will take you to the Fee Welcome Screen and there you need to select the +Add Button to create a fee in the system. Please note – You don’t have to link fees to the programs because while creating fees, the screen lets you select the Object Type such as Programs, Campus, Subjects etc. So If you are creating the fee for a program, Object type > Program, automatically links the fee with the program you selected.
Now again, you have to understand what TEAMS has set up for you. If you are using the pattern for the invoices while creating the Application then you don’t have to use the instalment plans. If our team has already created the instalment plan for you then you simply need to go to the Instalment Plan Welcome Screen and from this screen, you need to select the edit icon under the Actions column from the grid. Once you select the Edit Icon, the system will take you to the Instalment Plan Entry Screen. On this screen, you can search and link your new program from the Program field. You can also create a new Instalment Plan for your program from the Instalment Plan Entry Screen.
If your Academic Template is already set up and you want to make some changes then please it is recommended you contact our support team and they will guide you and help you with the academic template.
If your Timetables are already set up and you know the dates of the units that the student will study then you need to create Group Training Plans. Please note that you will only create group training Plans if your Academic template is not set up. So when you create GTP and while creating the Application when you select the GTP, the unit’s date will automatically get populates exactly as per your timetable.
Once all the above steps are done, this is the final step, you need to link the program to the campus. When you are on the Campus Welcome Screen, you need to edit the campus from the Edit Icon under the Actions Column from the grid. This will take you to the Campus Entry Screen and there you need to select the Linked Programs option from the Burger menu on the right hand side of your screen.
We are excited to announce the addition of a new feature, version 1, on our Main Dashboard: the “Email Sent” tile. This tile provides a convenient overview of the total count of emails sent to all the parties within TEAMS, including Students, Enrolments, Applicants, Agents, and more.
By clicking on the number in the “Email Sent” tile, you can access the “Email Sent” listing screen, which presents a comprehensive list of all the emails sent to various parties by default. This list includes essential information like the Message Date, Recipient Type, Template Name, Email Subject, and the respective Username of whoever initiates the email. Additionally, you have the flexibility to preview the content of the emails by clicking on the “View” icon under the actions column.
To streamline the search for specific emails, you can choose from a list of filters on the listing screen to pull up a targeted list of emails that match the selected criteria. For added convenience, a CSV report can be downloaded by selecting the CSV icon, allowing users to export the data as needed.
This new function aims to enhance your experience and provide a quick access to important email-related information, making communication and data management within TEAMS more efficient and user-friendly.
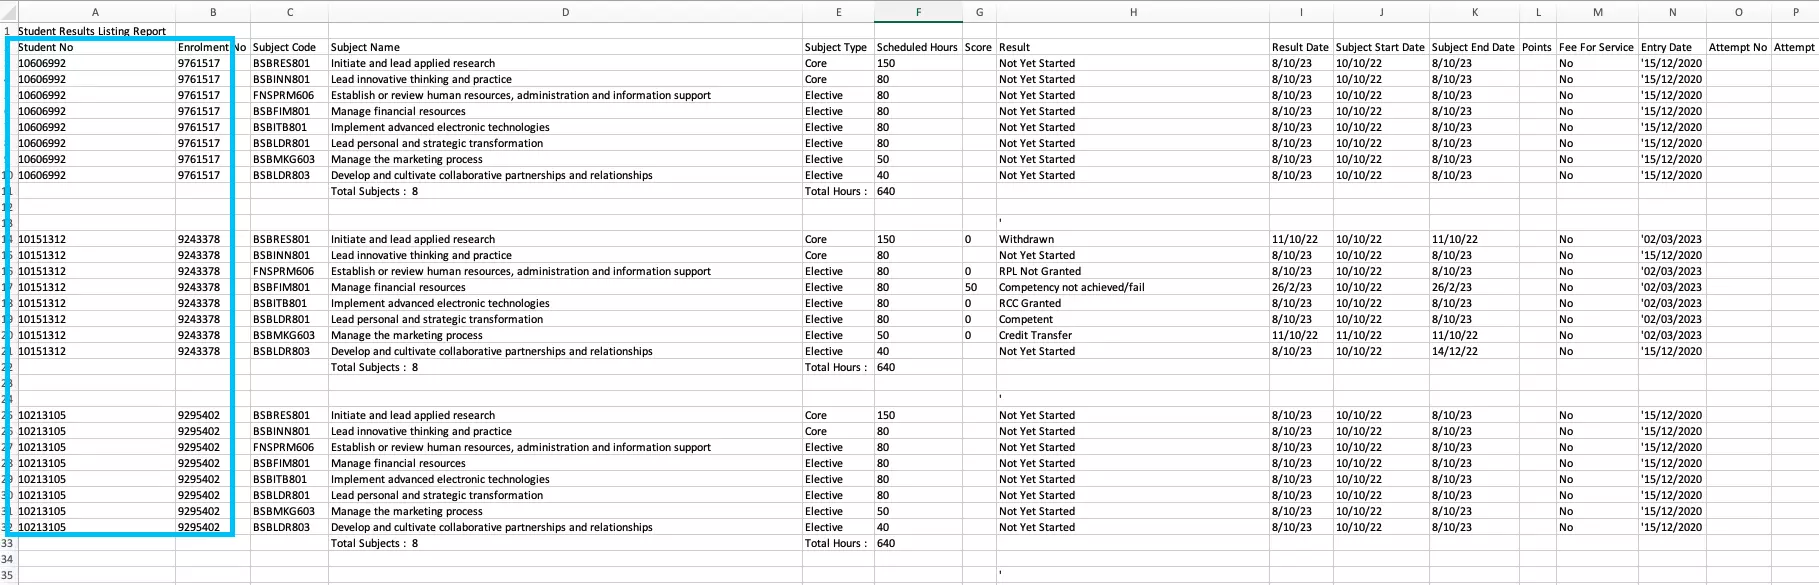
We are excited to introduce a significant improvement to our system that will greatly enhance the reporting capabilities for student and enrolment data. In the past, the system displayed student numbers and enrolment numbers in their respective columns, but only for the first row of each subject within an enrolment. For instance, if a student had five subjects, the report would only show the student number and enrolment number in the first row for the first subject.
With our latest update, we have introduced a new system setting that brings unprecedented clarity to your reports. Now, you can access student numbers and enrolment numbers for all the linked subjects within an enrolment. This means that for the example above, the report will now show the student and enrolment numbers for all five subjects, providing a comprehensive view of each student’s enrolment details.
We are excited to announce a recent enhancement to our Applicant Dashboard’s Financial Tile – the addition of a new column called “Invoice Due Date.” This column will provide you with even more transparency and convenience in managing your financial information.
With the Invoice Due Date column, you can now easily view the due dates for the invoices at a glance. This will help you stay on top of your financial obligations and avoid any potential late payment issues. By having this crucial information readily available, you can plan the payments more effectively and ensure a smooth and timely financial process.
In this recent update, we are excited to introduce improvements to the invoices recreation feature in TEAMS. Previously, you were limited to viewing the dates and amounts for invoices on the recreation screen. However, with our latest enhancement, we have added a new capability that allows you to make changes directly to the invoices.
Now, you have the flexibility to edit both the date and the amount associated with each invoice, providing you with greater control and convenience in managing your invoicing processes. This enhancement aims to streamline your workflow and make it easier for you to handle any necessary adjustments to invoices, ultimately enhancing the overall user experience and efficiency within TEAMS.

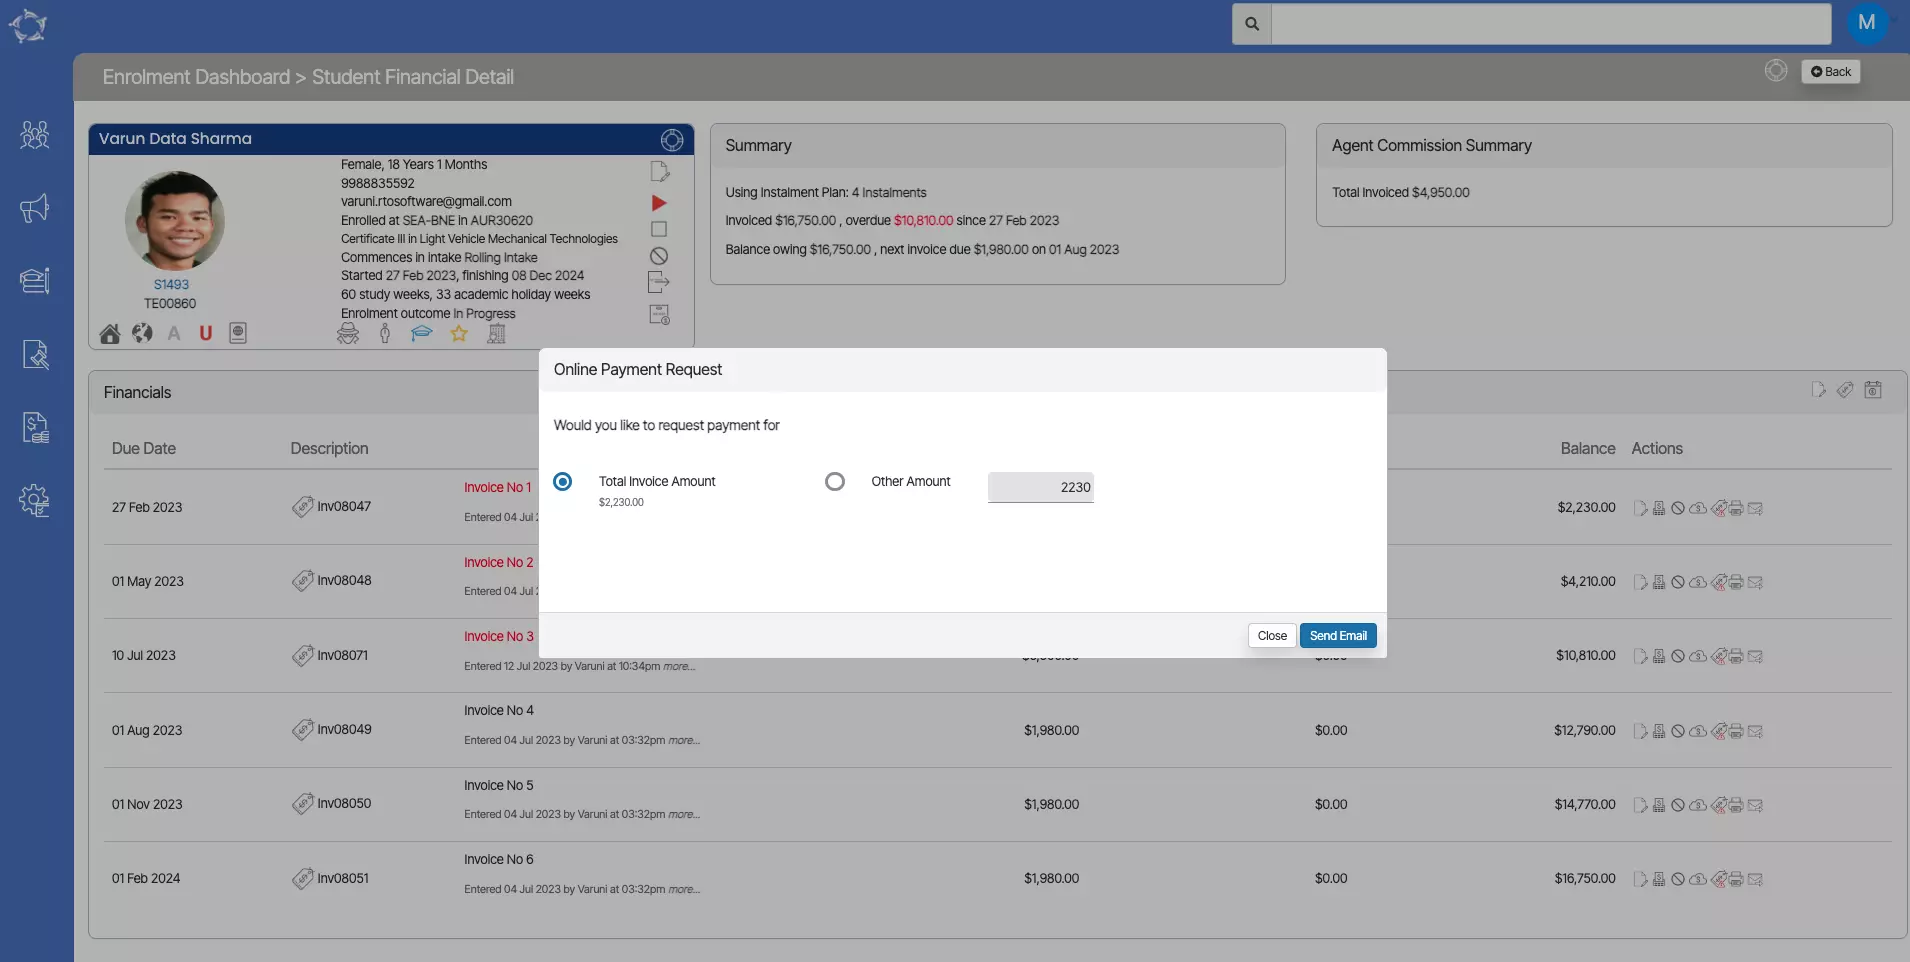
1. When you are on the Application Dashboard or Enrolment Dashboard > Student Financial Screen, you need to select the pin payment icon  as shown below from the student financial screen.
2. Upon selecting this icon, the system will show you a pop window namely Online Payment Request where you will be presented with two radio buttons:-
Total Invoice Amount – This radio button will show you the total amount of the invoice.
Other Amount – This radio button will allow you to add payment amounts as per your need.
3. Once, you have selected your desired radio button, select the Send Email button and then you will be directed to Compose Email screen. When you are on the Compose Email screen. Select the Template type for the pin payment that you have customised from the email template entry screen. As you can see below the email template type has been selected as Payment. once you have selected it select the send button to send the email.

4. Once the email has been sent to students, they will receive a unique link as you can see in the below email screen shot.

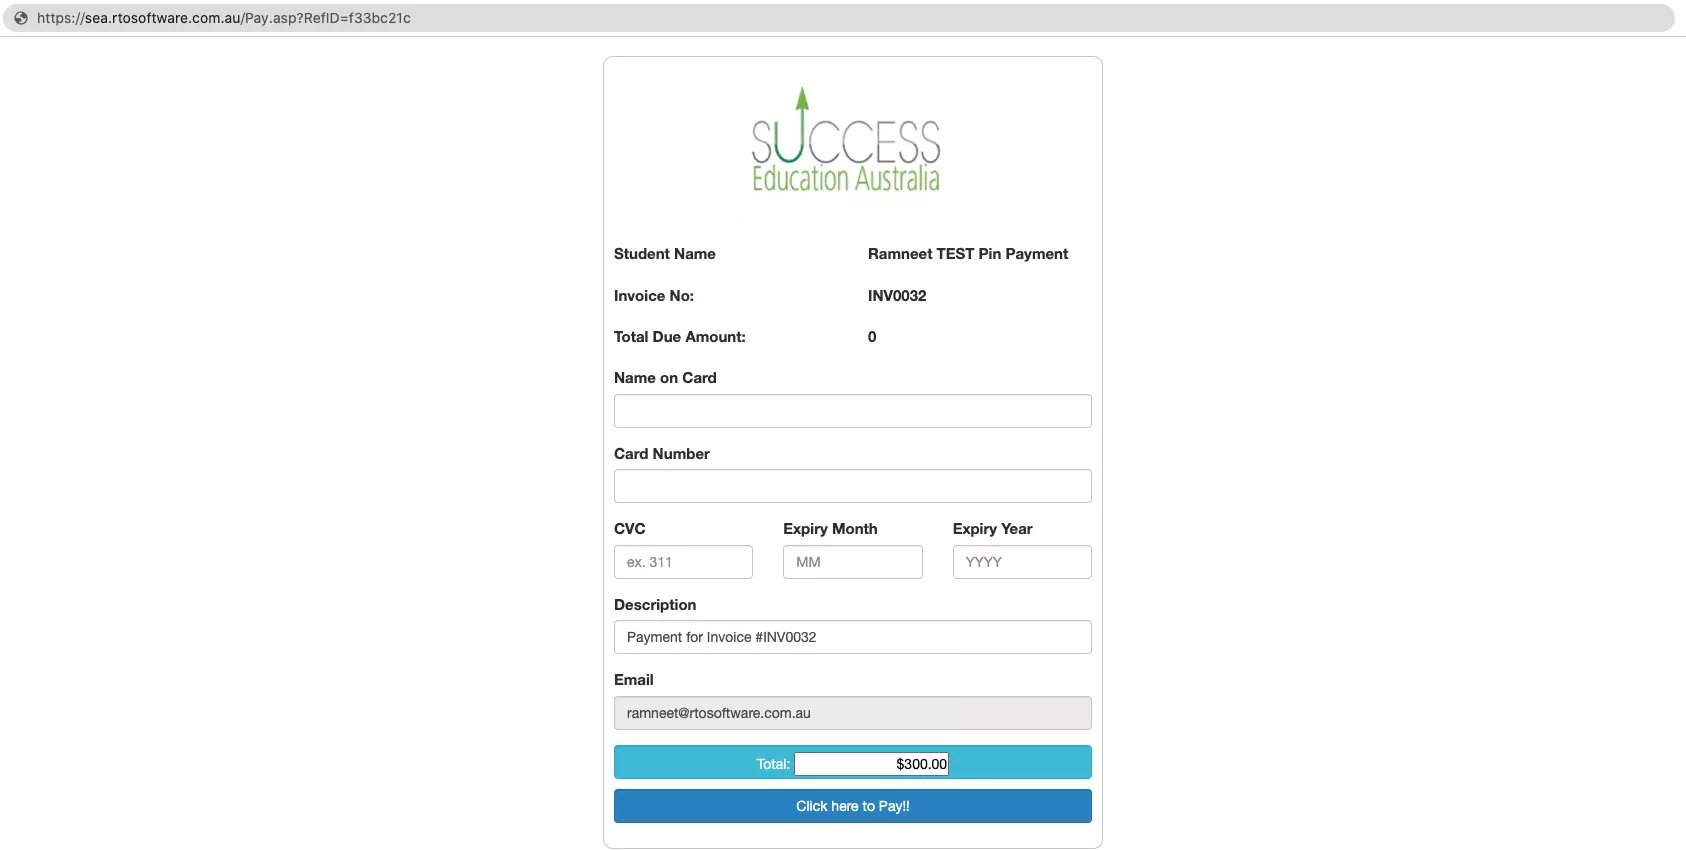
5. This is how the browser will open when the student selects the link.
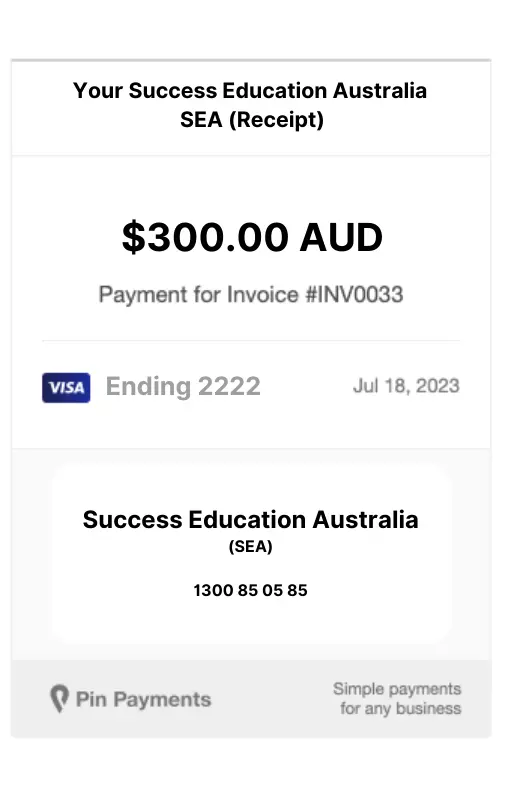
6. Once the Student paid the invoice online then you will receive a receipt as below:-
To set up an Email Template for Pin Payments you need to follow the below steps
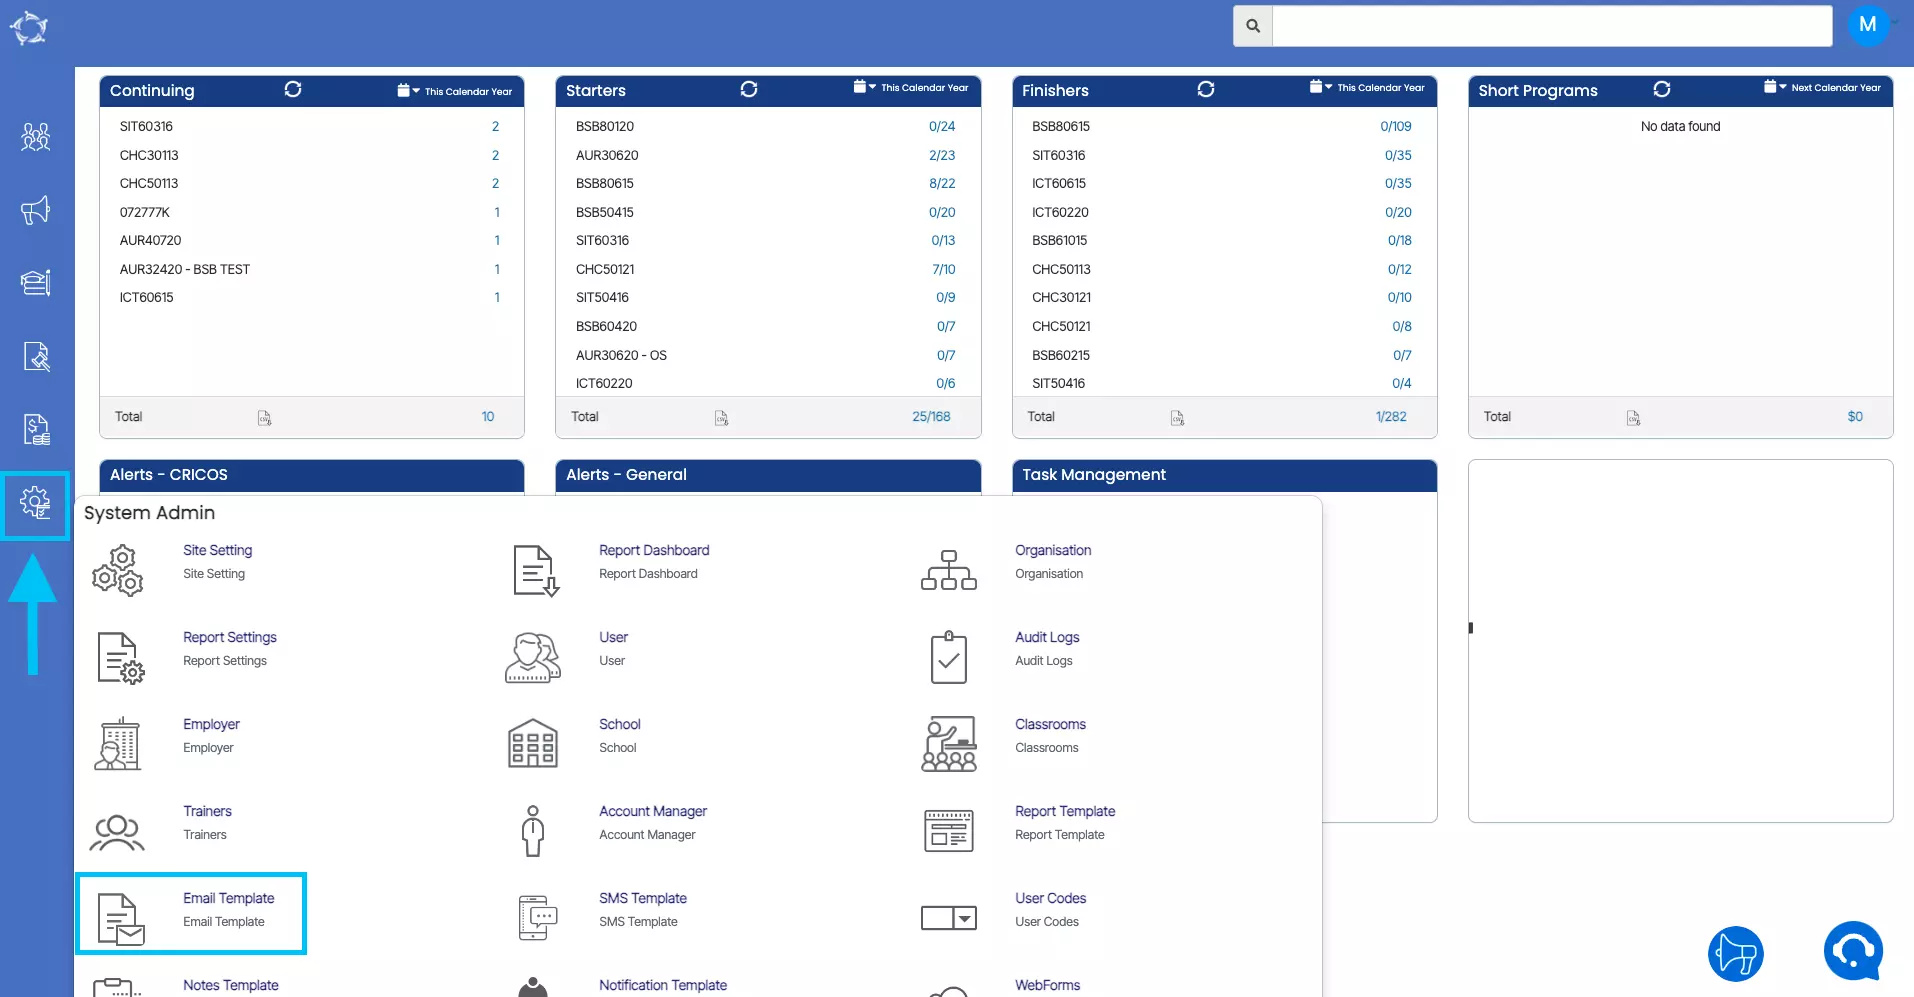
1. Go To TEAMS > Main Dashboard > System Admin Menu > Email Template Icon.
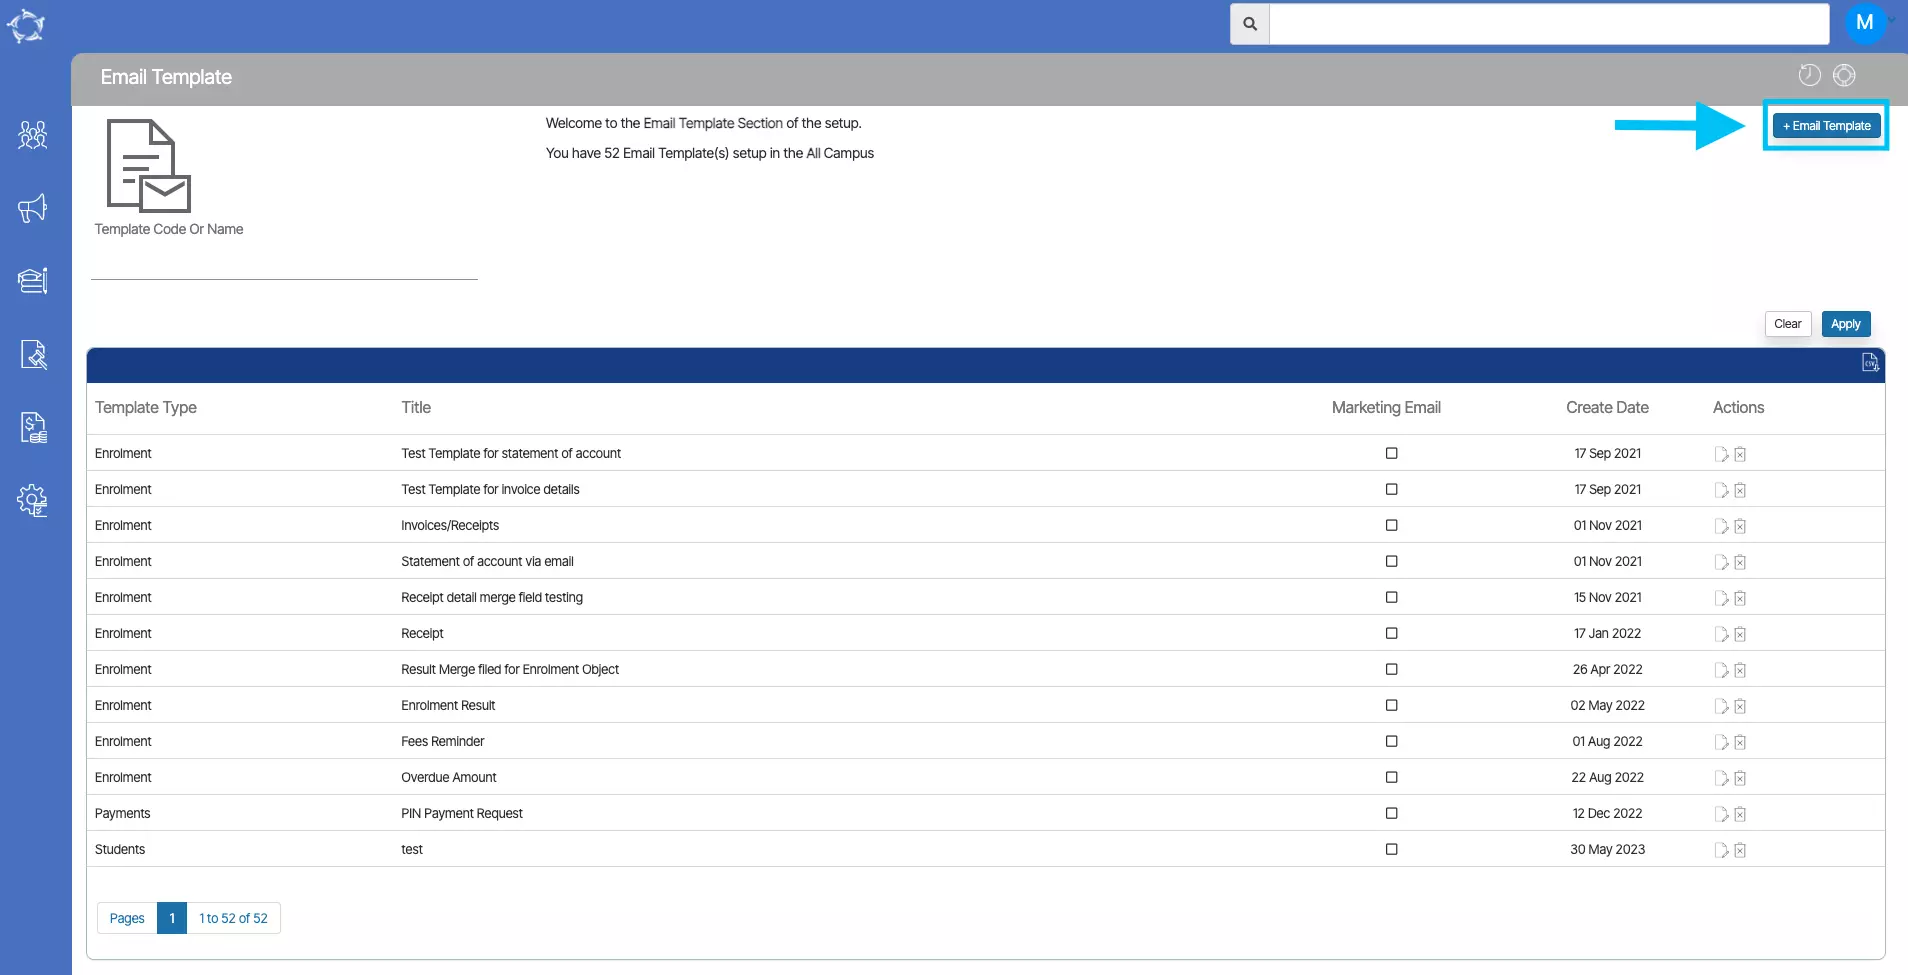
2. Select the +Email template Button on the Email template Welcome Screen.
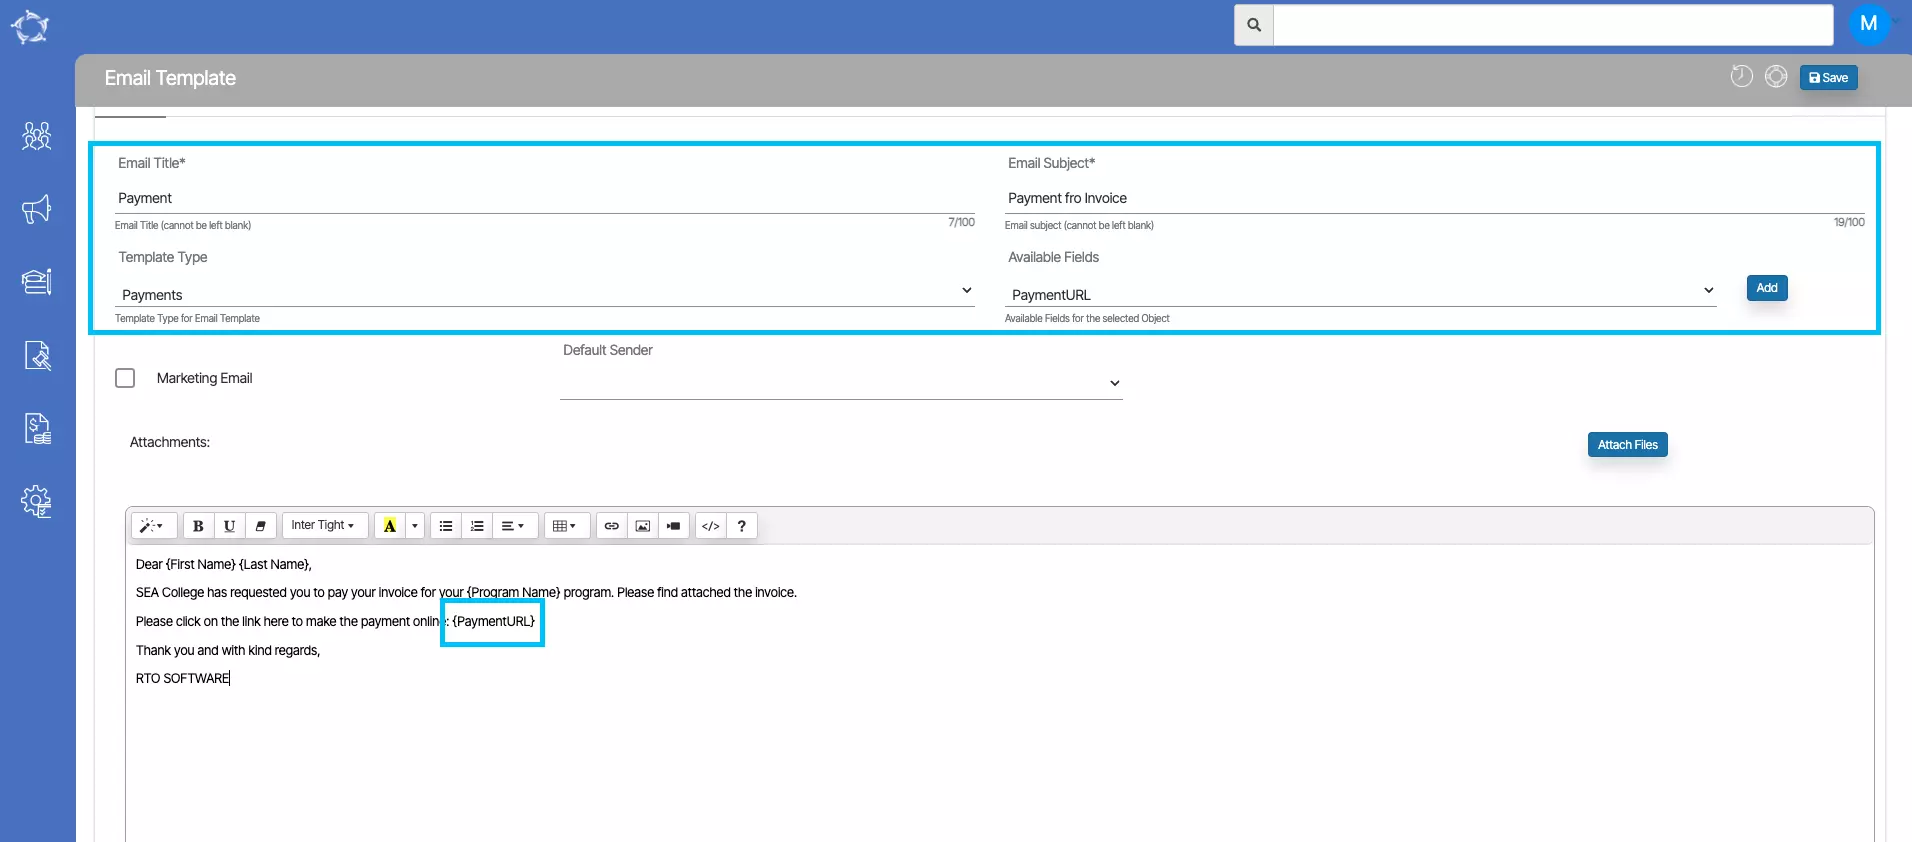
3. On the Email Template Entry Screen, you need to select the Email Title and Email Subject (please note that these two are mandatory to select and they can be left blank). On the other hand, you need to select Template Type and available Merge Field from their respective dropdowns.
Template Type – While creating the template for Pin Payments, you need to select the template from the dropdown as Payments.
Available Fields – This is an important and mandatory merge field PaymentURL and you can select it from this drop dropdown. (Please note that when you select this merge field while creating the email template and then send the email to students then TEAMS will generate the unique URL where students can click pay online).
4. Once all the above steps are done, select the Save button to save the Email Template.