| Student No | Student Number generated by TEAMS |
| Enrolment No | Enrolment Number generated by TEAMS |
| Application No | Application Number generated by TEAMS |
| Student Name | Student (First name)(Middle name)(Last name) |
| Gender | Student’s gender selected at the Applicant/Student levels |
| DOB | Student’s date of birth selected at the Applicant/Student levels |
| Campus | This will show the number of enrolments linked with the campuses |
| CRICOS Code | CRICOS code of the Program updated on the Program Entry screen |
| Program Name | The system will print the name of the program saved on the Program entry screen |
| Enrolment Type | The system will print the enrolment type updated on the Edit enrolment details screen |
| Start Date | Start Date of the enrolments |
| End Date | End Date of the enrolments |
| Duration Weeks | This is the total weeks of the enrolment which includes total study weeks, and total academic holiday weeks.
For example, if the enrolment has study weeks = 40 and academic holiday weeks = 12 then the total duration will be 40+12=52 weeks |
| Started | This is the status of the enrolment, if it is started then it will show Yes |
| Agent Name | This system will show the agent name which is selected at the application or enrolment level |
| Country | Country of the student |
| Account Manager | It will show the Account Manager selected at the Application or Enrolment level |
| Timetable | The system will show the timetable allocated to the enrolment |
| Currently Owing | This is the overdue amount till the present date |
| Total Owing | It is the difference of total invoiced and total receipted |
| Visa Type | It will show the Visa type selected at the Student and Enrolment level |
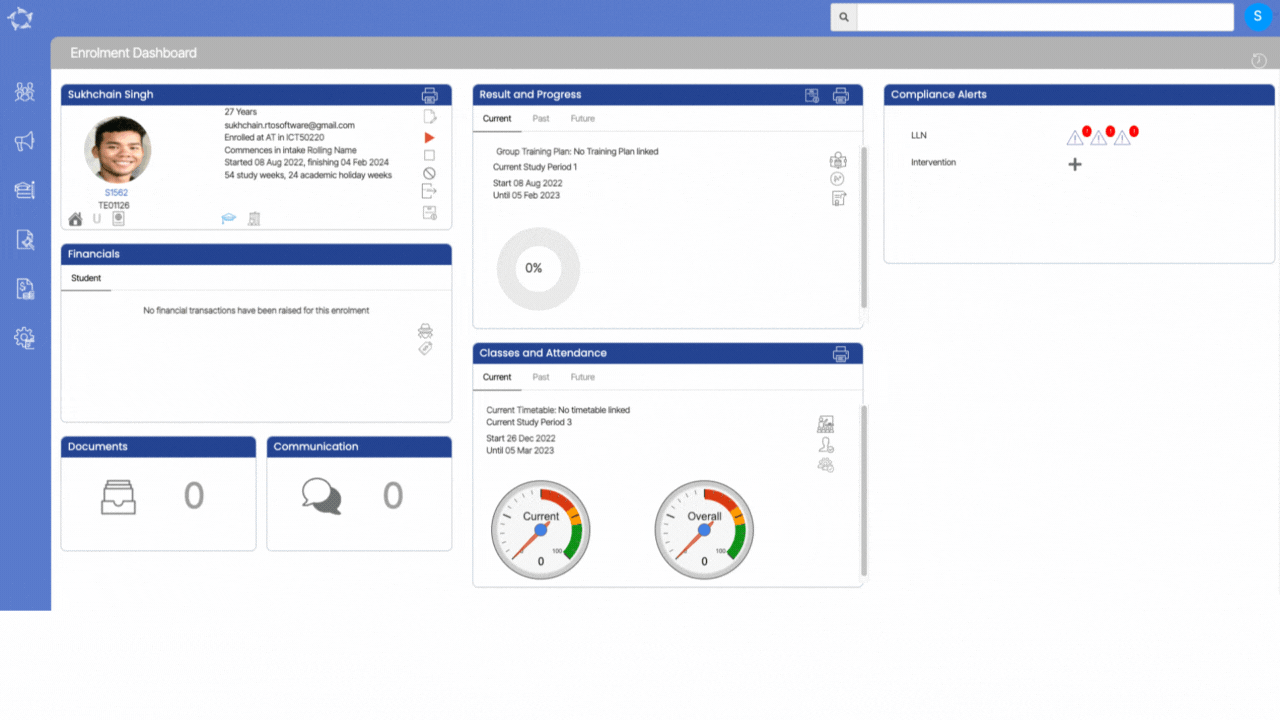
| CoE No | This will show you the COE number updated at the Enrolment Dashboard > Enrolment profile tile |
| Nationality | Nationality of the Student updated at the Applicant or Student levels |
| Classes | The system will show the classes linked to enrolments |
| Future Program | Future enrolment of the student |
| Previous Program | Historical enrolment of the student |
| Enrolment Outcome | Outcome of enrolment selected on the Enrolment Dashboard > Edit enrolment details screen |
| Employer Name | Employer selected at the enrolment level |
| Stage | It will show the commencement status from the Training Plan and Results screen > Qualification Information tile. |
| Notes | Program Notes |
| Total Overdue | It is the difference of total amount of pending invoices and total receipted till date |
| Tuition Fee | This is the total invoiced amount of Tuition fee |
| Other Fee | Total amount of all other fees invoiced excluding tuition fee |
| Marketing Source | Marketing source selected at the application level |
| Level Of Student | It will populate the user code you selected at the student level on the student entry screen. |
| VSN | This is the VSN number selected at the student entry screen |
| VSN Eligible | Student level at student entry screen. |
| AVETMISS State | AVETMISS state is the State Training Authority selected at the Enrolment level > enrolment AVETMISS settings screen |
| Group Training Plan | Selected at the enrolment level > Training Plan and Results screen > Training Plan and Academic Template tile |
| Overseas Student | If the student is selected as overseas on the student entry screen then it will show Yes |
| Special Needs | This is a tick box at the student level on the student entry screen. |
| Special Needs Notes | It will populate the Notes updated for the Special needs on the Student Entry screen |
| Email | Student’s email address updated on the Edit Student Details screen |
| Mobile | Student’s mobile number updated on the Edit Student Details screen |
| Phone | Student’s phone number updated on the Edit Student Details screen |
| International Phone | Student’s international phone number updated on the Student Dashboard > Overseas screen |
| Passport No | Student’s Passport Number updated on the Student Dashboard > Overseas screen |
| USI | Student’s USI number updated on the Student Dashboard > USI screen |
| Student Payment No | |
| AVETMISS | It will show Yes, if the AVETMISS tick box is selected at the student level on edit student details screen. |
| No of Successful Results | This is the total count of successful subjects |
| No of Unsuccessful/Not Yet Achieved Results | This is the total count of unsuccessful subjects |
| Total Subjects Enrolled | This is the total number of the subjects linked to enrolment |
| Program Code | This is a Program code saved on the Program Entry Screen |
| USI Verified | This is the status of USI, if it is verified will populate as Yes and if is not verified will populates as No |
| Student First Name | Student’s First name updated at the Applicant/Student levels |
| Student Last Name | Student’s Last name updated at the Applicant/Student levels |
| Student Email Address 2 | Student’s Secondary email address updated at the Applicant/Student levels |
| Student Email Address 3 | Student’s Additional email address updated at the Applicant/Student levels |
| Student Type | This is the student type (New Student and Returning Student) selected at the Enrolment level |
| Orientation Required | It will show the Orientation date updated at the enrolment level |
| Upsell or Extension | This will show Yes if the tick box is selected or No if the tick box is not selected |
| Internal Package Type | This is a user code in TEAMS and you can let us know your Internal Package type and we will get it updated on your TEAMS site |
| External Package Type | This is a user code in TEAMS and you can let us know your External Package type and we will get it updated on your TEAMS site |
| External Start Date | This relates to the external package type. Once you have selected the external package, the system will ask for the external start date. |


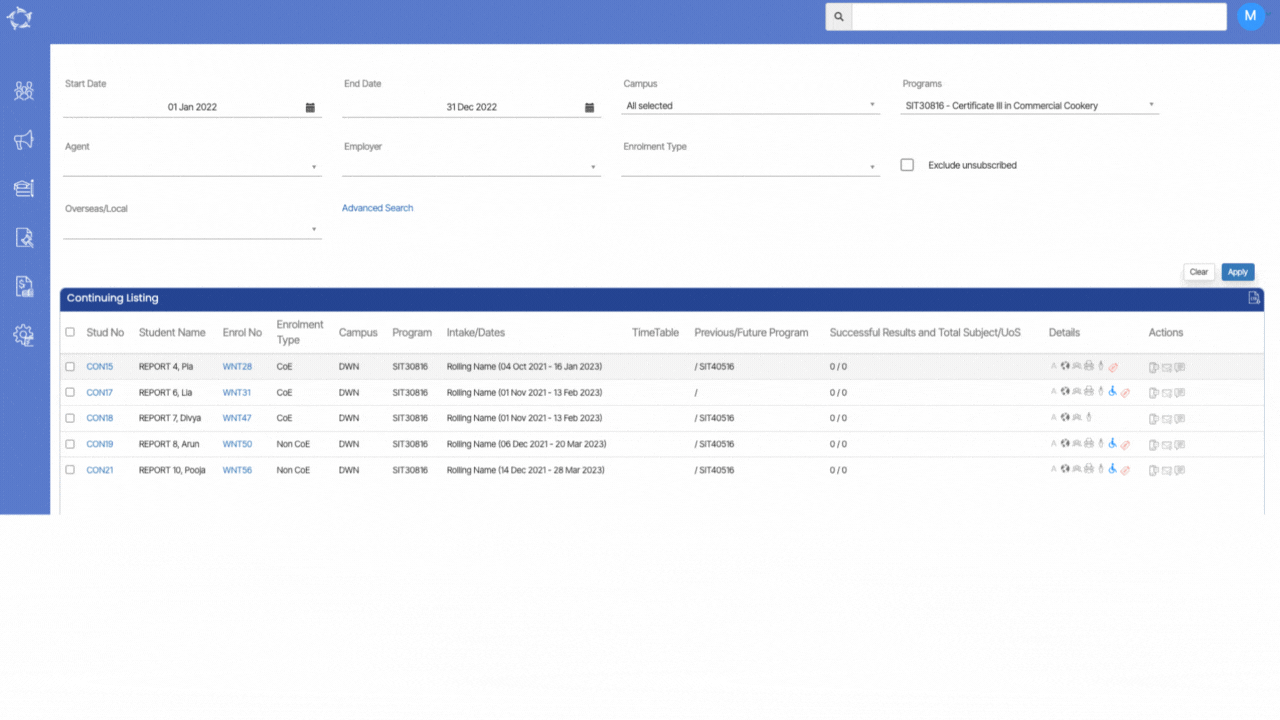


 on the Classes Listing screen there used to be an option to select the Study Period or the Dates. In order to make it more user friendly, we have removed the Study Periods option from the Choose new Classes for Allocation section as shown below.