Applicant Dashboard

history of changes

An applicant is a person who has applied to your college to study one or many programs (courses) and requires an Offer Letter (quote) to be sent to them as to how much it will cost them etc. Some colleges may call applicants potential students or leads.

For CRICOS colleges you would process their application and issue an Offer Letter to the student or their agent. Whereas for a domestic college, you may process the application and send them some form of costing or quote with a Welcome Letter.

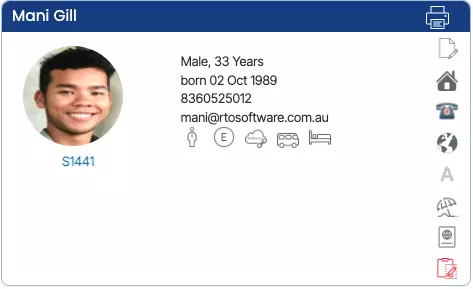
The Applicant dashboard is similar to the Student Dashboard in that it is a summary for the applicant. Each tile in the dashboard will give you summary information such as what they have applied for, a financial summary for each application, and where you can access any documentation or communications you have had with the applicant.

Other than the Financial tile, all the other tiles will allow you to navigate to different screens and information linked to the applicant or do transactions directly from the tile for the applicant.

Tiles

You can learn more about each tile by clicking on the image of the tile.

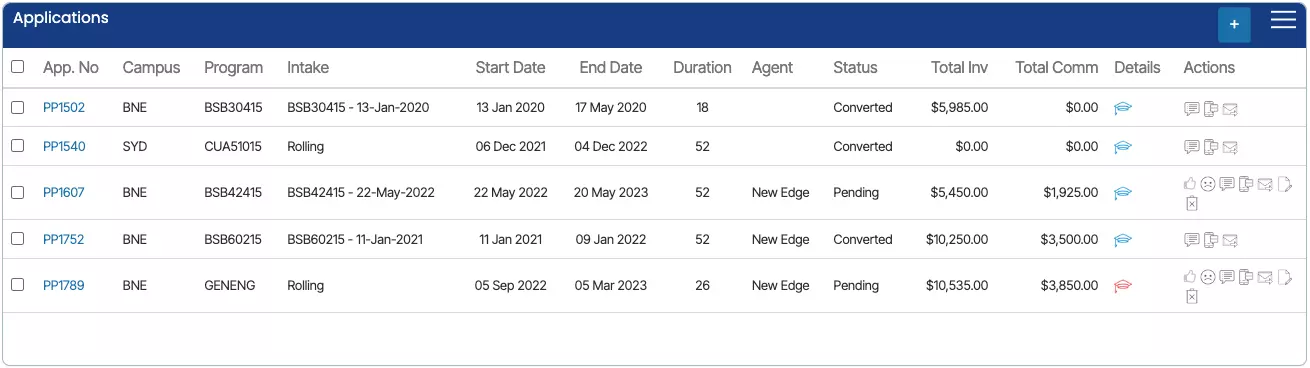
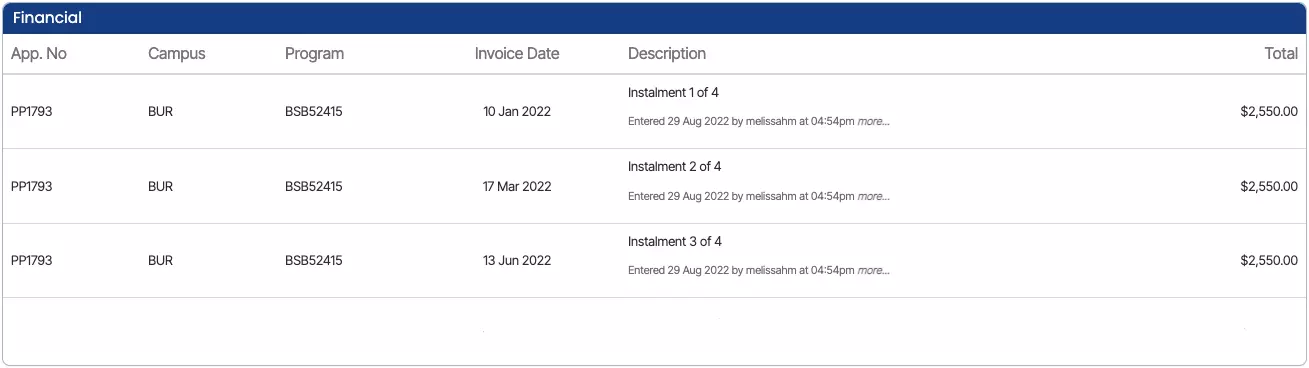
This tile will display a summary of the instalments (invoices at the enrolment level) for each application.

New Application

Dashboard > Marketing Menu > New Application

history of changes

This process (wizard) allows you to create applications for new applicants or existing students in the system.

Although this process is called a new application, it does not mean you create one application at a time for each program that an applicant or student wishes to enrol in. You can add one or multiple programs to the application and once you finish the process the system will generate individual applications for the applicant/student. You can then choose to view the information as a summary from the Applicant Dashboard or the individual applications (programs of study) from the Application Dashboard.

When you finish the process and select the FINISH button the system will take you to a step so you can generate the Offer Letter. For domestic based colleges, you may not call it an Offer Letter you may call it an Enrolment Acceptance letter etc. Please see the report explanation for this and the final step in this process for New Application – Offer Letter for more information.

Note: There are different ways to access the New Application process in the system. You can access this process from

Marketing Dashboard > Summary Tile
Applications listing Screen
Applicant Dashboard > Applications Tile
Student Dashboard > Applications Tile

The New Application process has a number of different steps in it. To view this post you can choose to either use the next arrow below and you will be able to walk through each step OR you can select specific links below to go directly to the relevant step.

New Application – Student Selection

New Application – Choose Programs

New Application – Subjects Delivery Dates

New Application – Fee Selection

New Application – Edit Invoices

New Application – Edit Invoices

New Application – Offer Letter

New Application – Student Selection

In this step, you either enter a new applicant or search and select an existing applicant or student from your system. Once you have entered or selected the correct applicant/student the system will load their name in the Student Name field below.

Note: DO NOT close your browser while you are walking through the steps of this process, as you will lose what you have entered. When you select the NEXT button in each step of this process the system does not save what you have done to the database. It allows you to go back in the process to change what you have selected, however, it is not until the final step where you select the FINISH button that the system will fully save everything to the database for you.

In the table below we have explained each of the fields/sections in this step.

Student Selection FieldsExplanation
Student NameThe first step is to find out if your applicant has previously studied with you and is already in the system. To do this, enter part of the applicant’s name into this field and if their name shows up select it from the list. If it doesn’t then you will need to select the icon for + to add them as a new applicant in the system.
When you search on an applicant’s name the system looks at enquiry students, applicants and students to see if the name is there and if they are will show you a relevant icon as to whether they are an enquiry, applicant or student.
You can select this button to add a new applicant in the system. You will be taken to the New Applicant entry screen and once you have entered all the required information and select the SAVE button, the system will bring you back to this step in the process again.
Student NumberYou can search based on a student number, however, if you are entering a new applicant this will not show unless your system has been setup to generate a student number at the application stage. It will only generate the number when you FINISH the application.
Typically, most colleges only issue a student number on approval/conversion of applications to enrolments so generating a student number at the application level is not set as a standard.
EmailThe system will load this information once you have selected a student or entered and saved your new applicant.
Account ManagerIf you have setup Account Managers in the system, you can link one to the application. Enter part of the account manager’s name into the field and the system will show you the results and just select one.
AgentIf you have setup Agents in the system, you can link one to the application. Enter part of the agent’s name in the field and the system will show you a list and select one from the list.

New Application – Edit Invoices Preview

history of changes

This is the Application Invoice Preview screen where you can view all the student invoices and agent invoices details including invoice notes. You can also add the bonus to the agent from this screen.

Note DO NOT close your browser while you are walking through the steps of this process, as you will lose what you have entered. When you select the NEXT button in each step of this process the system does not save what you have done to the database. It allows you to go back in the process to change what you have selected, however, it is not until the final step where you select the FINISH button that the system will fully save everything to the database for you.

IMPORTANT – In the Agent details screen, there is a tick box for Apply GST. Whether this is selected or not, when an agent is linked to an application, you will have the option to either select or unselect the Apply GST tick box against all or individual agent commission invoices that the system will raise for you.

Also, there is a difference between raising an agent bonus invoice from the Agent Dashboard to raising it in the new application process. From the Agent Dashboard you DO NOT have to link the bonus invoice to one or many enrolments, however from the new application process, the system will automatically link it to the application program that you link the bonus invoice to.

Once you are happy with all the data entered on this screen, you need to select the Finish button to complete the application process.

New Application – Edit Invoices screen

history of changes

This screen will allow you to edit invoices and you can (change invoice date, and due date, fee amount, study periods and recalculate the number of invoices.

NoteDO NOT close your browser while you are walking through the steps of this process, as you will lose what you have entered. When you select the NEXT button in each step of this process the system does not save what you have done to the database. It allows you to go back in the process to change what you have selected, however, it is not until the final step where you select the FINISH button that the system will fully save everything to the database for you.

IMPORTANT – If you want to change the number of invoices then you need to add the desired number in the box and then select the Recalculate button, the system will recalculate the invoices into the desired number.

For example, as you can see below, the No. of invoices was 4 and there were 4 invoices generated for the application and then the no. of invoices is selected as 5 and the system generated 5 invoices accordingly.

IMPORTANT – If you have selected any instalment plan while the fee selection process and you wish to edit the number of invoices and recalculate then the instalment plan will be ignored and new invoices will be created. New dates and amounts will be distributed proportionally and the initial instalment plan will be lost.

Once you are happy with the above requirements, you can then make changes to the fee amount, can add the deposit due, and select the number of study periods including their SD and ED which will show you the initial total and current total on right hand side of the screen. You then need to select the Next button complete the application process.

New Application – Fee Selection

This screen will allow you to select the fees for the application including (Tuition Fee, Application Fee, Material Fee, etc.) The first section of the screen will show you the basic information about the applicant, and then you select the drag down button to expand, which will show you the fee section.

NOTEDO NOT close your browser while you are walking through the steps of this process, as you will lose what you have entered. When you select the NEXT button in each step of this process the system does not save what you have done to the database. It allows you to go back in the process to change what you have selected, however, it is not until the final step where you select the FINISH button that the system will fully save everything to the database for you.

IMPORTANT – if you have set up the Tuition fee and any other fees in the system, then only you will be able to see and select the fees from the dropdown.

Also, if you have selected the agent’s commission for the tuition fee of the program, then the Pay Commission tick box will be automatically ticked while selecting the tuition fee otherwise and if it is not selected at the fee level then you can select the Pay commission tick box for the tuition fee.

Once you have selected the required fees for the application you need to select the Next button to complete the further actions.

Note – When selecting the  Rate Based Tuition fee and inputting the quantity on the New Application Fee Selection Screen, selecting the next button will show you the Amount column, and Quantity column. You can easily view the amount based on the quantity you have selected for the rate based tuition fee.

New Application – Choose Programs

This screen allows you to choose the programs for the application and you can select multiple programs for the application as shown below:

NoteDO NOT close your browser while you are walking through the steps of this process, as you will lose what you have entered. When you select the NEXT button in each step of this process the system does not save what you have done to the database. It allows you to go back in the process to change what you have selected, however, it is not until the final step where you select the FINISH button that the system will fully save everything to the database for you.

When you select the Add button it will show you the total number of Programs in the New Application – Programs selected for the application grid. The tiles will show you basic information about the program. If you wish to make the changes in the selected programs then you can select the edit icon from the program tile or you can delete the program by selecting the delete icon.

Once you are happy with what you have selected for the application, you then need to select the Next button for further actions to complete the application.

Explanation of Fields :

FieldsExplanation
Application TypesThis is a user code and you can create any application type as you required.
Select the Campus that you wish to use for this applicationIf you have multiple campuses then this dropdown will show you all the campuses where you can select a specific campus for the application.
Select the Program that you wish to use for this applicationIt will show you the list of Programs linked to the campus selected.
Program NotesYou can add the Program notes
Select the Intakes for this programThis will show you the intakes that are linked to the program.
Start Date for this ApplicationIf you have selected the intake then the system will populate the start date for the application and if you are using the rolling intake then you select the date from the calendar icon for your rolling intake.
Study WeeksThis will show the total study weeks of the application.
Holiday WeeksTotal holiday weeks.
End Date for this ApplicationThe system will populate the end date for the application when the Program and Intake get selected.
Agent Commission Template
This will show you the agent’s commission for the selected agent in the first step of the application.
Populate subject dates usingThis dropdown will show you the fields that how you want to show the subject dates for this application.
Batch
Type of studentNew Student or Returning Student
Was this an Upsell or Extension?Select the tick box
Does this Enrolment require Orientation?Once you select the tick box, it will show you induction/Orientation field to select the date.
Please Select Package TypeInternal or External

Enrolment dates – can’t be longer than five years

We have added a new check in the application process on the New program – Choose Programs screen where the system will not allow you to add the program to the application if the program’s start date and end date are selected is more than five years.

Also, when you are on the Enrolment Dashboard – Edit Enrolment Screen, you will not be allowed to edit the enrolment dates for more than five years.

IMPORTANT: If Program/s is selected as VET on the program entry screen > settings tab or the subject type for the subject/s is selected as Unit of Competency (UoC) – Nationally Accredited then you are not allowed to add the application dates of more than 5 years. BUT, if the User Choice Tick box is selected on the Program entry screen for them then you will be allowed to add the application dates of more than five years.

Visa Information – Application Dashboard

Application Dashboard > Application Profile Tile > Visa Information Icon

history of changes


This screen provides a comprehensive view of the visa details for an applicant, which are updated at the applicant level. However, please note that you will not have the ability to add or edit any visa details directly from the Application Dashboard.

To access the visa information, simply select the visa icon on the Application Dashboard. This action will redirect you to the view visa details screen, where you can review all the relevant visa information associated with the application. This feature ensures easy access and visibility of visa details while maintaining the necessary restrictions on editing and adding new information directly from the Application Dashboard.