Attendance Monitoring

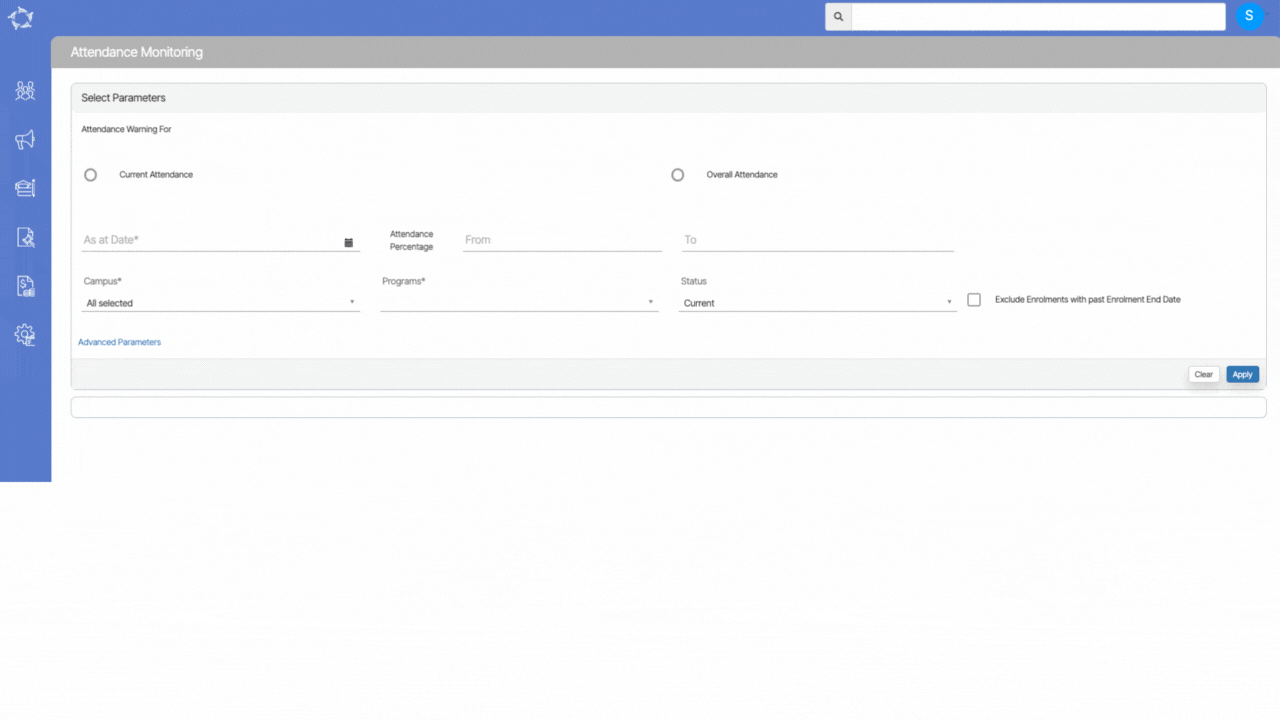
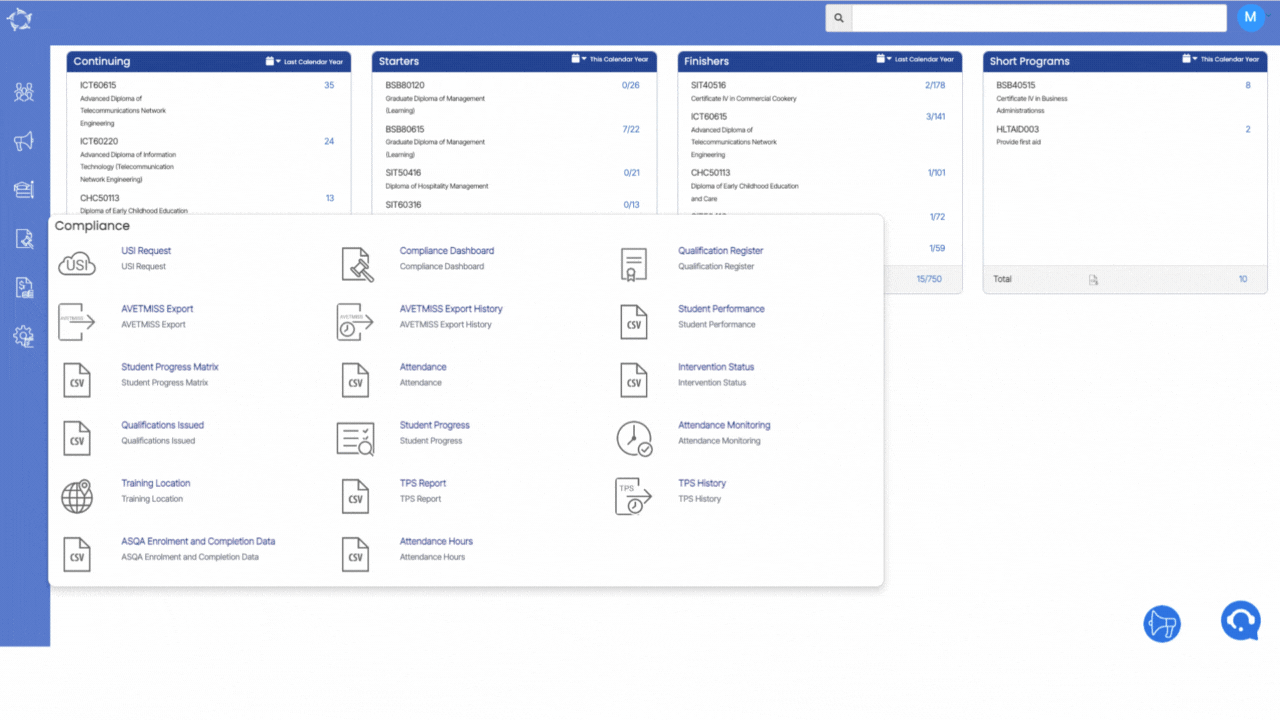
Main Dashboard > Compliance Menu > Attendance Monitoring

An Attendance Monitoring screen can greatly assist in keeping track of student attendance. It provides an easy and efficient way to monitor both the current and overall attendance of students.

This screen is further divided into two sections:

  • Filters/Parameters
  • Listing Grid

Parameters

There are different fields available under the grid from which you can filter out the attendance of the students as per your own requirement. Further explanation of these fields is provided below:

Field NameExplanation
Current AttendanceSelect this radio button to filter out the current attendance of the students
Overall AttendanceSelect this radio button to filter out the overall attendance of the students
As at DateAs at date is always today’s date and this field cannot be left blank as it is a mandatory field
Attendance Percentage – FromEnter the minimum attendance percentage in this field.
Attendance Percentage – ToEnter the maximum attendance percentage in this field.
CampusIf you are monitoring attendance for multiple campuses, you can select the tick box for each campus from the dropdown. This field cannot be left blank as it is a mandatory field
ProgramsThis dropdown will allow you to select multiple programs. this field cannot be left blank as it is a mandatory field
StatusSelect the enrolment status such as Current and Finished
Exclude Enrolments with past Enrolment End DateSelect this tick box if you want to exclude the enrolments with past enrolment end date

Advanced Filters – The advanced filters are non mandatory filters and if you see the relevant information you can select (Intakes, Group training Plans, Overseas/Local Students, Account Manager, Trainer, Enrolment Type, Timetable and classes from the dropdown.

Listing Grid:

By selecting certain parameters, you can view detailed information about a student’s attendance history in the listing grid.

To know more about the icons under the actions column, select here

Student Progress

Main Dashboard > Compliance Menu > Student Progress

Student progress refers to the assessment and measurement of a student’s academic growth and development over a specific period of time. It involves tracking a student’s performance, and interventions over a specific period of time. The Student Progress screen assists you in keeping track of your student’s progress. With this screen, you can easily keep track of the progress of both their Subjects and the Unit of study.

This screen is further divided into two sections:

  • Filters/Parameters
  • Listing Grid

Parameters Grid:

There are different fields available under the grid from which you can filter out the progress of the students as per your own requirement. Further explanation of these fields is provided below:

Field NameExplanation
Monitor at the Subject or UoS level?There are two radio buttons under this field namely Subject and UoS. Based on your requirement you can select one of these radio buttons to monitor student progress.
Subject/UoS Start DateThe system will always look at Subject/UoS start dates only to find enrolments between the date ranges.
Subject/UoS End dateThe system will always look at Subject/UoS end dates only to find enrolments between the date ranges.
Completion % between – FromEnter the minimum completion percentage you want to list in this grid
Completion % between – ToEnter the maximum completion percentage you want to list in this field.
CampusSelect a Campus from the dropdown
ProgramSelect various programs from the dropdown
IntakeSelect Intakes from the dropdown
Group Training PlanSelect the Group Training Plan from the dropdown
Overseas/Local StudentSelect Overseas or local student type or both from the dropdown

Advanced Filters – The advanced filters are non mandatory filters and if you see the relevant information you can select Account Manager, Trainer, Enrolment Type, Timetable and classes from the dropdown.

Listing Grid:

The Listing grid will show you the details related to the student’s progress as per the parameters that you have selected. You can see the student’s progress-related details that are required to help you monitor other basic details of the student.

TPS History Screen

Dashboard > Compliance > TPS History

This screen is designed to display a comprehensive list of all TPS reports generated within a selected calendar year. It also allows for the updating of payment information, and uploading of invoices, and payment receipts. Upon loading the screen, all TPS reports generated during the selected date range will be visible.

Once a report has been submitted to the government, an invoice can be generated and uploaded via this screen along with payment details. Additionally, once the invoice has been paid, the receipt can also be uploaded by clicking on the edit icon under the actions column.

For ease of access, the generated report, uploaded invoice, and payment receipt can be downloaded by clicking on the file name under their respective columns (File, Invoice, and Payment Receipt).

AVETMISS Export History

The AVETMISS Export History screen allows you to view a record of all exports made, including details such as the date of the export, **the format State and National used** and the specific data included. Additionally, you can download the exported files as ZIP files for easy access and storage. In addition to viewing and downloading previous exports, **the screen also allows you to edit their exports as needed.**

To do this, you can select the edit icon under the actions column next to the relevant export. From here, you can add submission information to the export, such as indicating whether or not the data has been successfully submitted, the date of submission, and the user name of the person who submitted it. These details can be important for keeping track of reporting requirements and ensuring compliance with regulatory standards.

AVETMISS Export – National Format

When selecting the export option for National, you will be presented with different filters compared to the State option, as NCVER does not accept State-funded data submissions. You will need to choose the Calendar Year you want to export and submit the student data to NCVER. Additionally, you must select the campuses for which you want to export data. For instance, if you have an ELICOS campus, you should not choose to submit data to NCVER. Once you have chosen your filters, you can select the Export button to proceed with the export process.

Once you select the Export button, the system will refresh the screen and display the AVETMISS Export History hyperlink. However, since AVETMISS exports may take some time, the duration is dependent on the amount of data to be checked and exported. Therefore, you can choose to either access the AVETMISS Export History screen by selecting the provided link or wait for the system to email the zipped up export files to you.

FieldsExplanation
Calendar YearSelect the calendar year from the dropdown to generate the export.
Select enrolments to exportSearch and select enrolments, if you wish to generate the export for specific enrolments.
Enrolment TypeSelect the enrolment type from the dropdown.
CampusYou can select multiple campuses here.
ProgramsSelect Programs here.
Email AddressBy default, the email address will be displayed here.

AVETMISS Export – State Format

When selecting the option to export at the state level, you will notice that the available filters are different from those for the national option. This is because a state-level export is typically done when your RTO is funded in that particular state, and therefore there are specific fields related to state contracts that need to be included in the export. If you are exporting data at the state level, be sure to use the filters that are relevant to your specific state and its requirements.

IMPORTANT – Even if you are making monthly submissions to a state and receiving payments on a regular basis, your data must be submitted based on the entire calendar year, rather than just a single month’s worth of data. Therefore, it is recommended that the dates you enter for your export cover the full calendar year, such as 01/01/2022 to 31/12/2022. Once you have selected the appropriate filters for your state-level export, simply select the Export button to complete the process.

FieldsExplanation
StateSelect the state from the drop down for Avetmiss Export
Start & End DatesSelect the dates if you are generating the export according to monthly or yearly basis.
Export Special Contract Only
Select enrolments to exportIf you wish to generate the Avetmiss Export for specific enrolments then you can simply search and select the enrolment number in the magic search field.
Enrolment TypesThis is a user code and based on the User Code created in TEAMS, you can select the enrolment type from the drop down.
CampusSelect the appropriate campus from this dropdown and if you are exporting for multiple campuses then you can select them by selecting the tick boxes.
ProgramsYou can select programs here.
Purchasing ContractsYou can select purchasing contracts here.
Email AddressThis field will show you the email address by default.

USI Request

Main Dashboard > Compliance Menu > USI Request

On this screen, you will be able to view the history of your USI requests, including the status and relevant information displayed in a grid format. If you have multiple campuses, you can select the desired one from the dropdown menu.

Additionally, you can select the intake and specify a custom date range using the calendar icon. Once you have applied all the necessary filters, you will need to select the Apply button in order to display the filtered results. This feature allows for efficient tracking and monitoring of USI requests and their associated status updates.

Training Location

Main Dashboard > Compliance Menu > Training Location

The Training Location Welcome Screen is a feature that displays a list of active training locations that are already in your database. You can easily search for a specific training location by either entering its Location Code or Name in the search field. Additionally, if you need to view any inactive training locations, you can select the Include Inactive Training Locations tick box.

This feature is helpful for you to quickly access information about training locations without having to manually navigate through the database. With the Training Location Welcome Screen, you can easily find the information you need. You can also add a new training location by selecting the +Add button.

Student Progress Matrix Report Data Columns

The table provided contains a list of columns and their respective explanations that will be included in the report that will be generated.

ColumnsExplanations
Student NumberThis is the system-generated student number.
Student NameThis is the complete student’s name (First name, Middle name and Last name)
Enrolment NumberThis is the system-generated enrolment number.
Enrolment Start DateThis is the start date of the enrolment.
Enrolment End DateThis is the end date of the enrolment.
Enrolment OutcomeThis column will show you the enrolment outcome such as in progress, Cancelled etc which is updated on the Edit Enrolment Details screen
EmployerIt will display the legal employer’s name.
List of SubjectsIt will display all the subjects’ names linked with the program and the system will display the outcome codes in the cells. 

NOTE – If the enrolment is cancelled then the system will display a can in each cell and if the subject is deleted from the enrolment then it will show the NA in the cell.
The cell will be blank if no result is updated on the Training Plan and Result screen for that subject.

Student Progress Matrix Report

Main Dashboard > Compliance > Student Progress Matrix

Overview

The purpose of this report is to provide a summary of the student’s progress based on their program. Unlike the Student’s Results in the Listing report, which runs down the rows of an excel per enrolment, this report presents a different view known as the Student Progress Matrix. In this report, the subjects for enrolment run horizontally across the columns.

The report aims to give a comprehensive overview of the student’s progress in their program, showcasing their achievements and identifying areas where they may need improvement.

Student Progress Matrix Report Filters

Student Progress Matrix Report Data Columns