Attendance Step 2

Main Dashboard > Student Management > Attendance

history of changes

The Attendance and Results screen will show you two sections as follows –
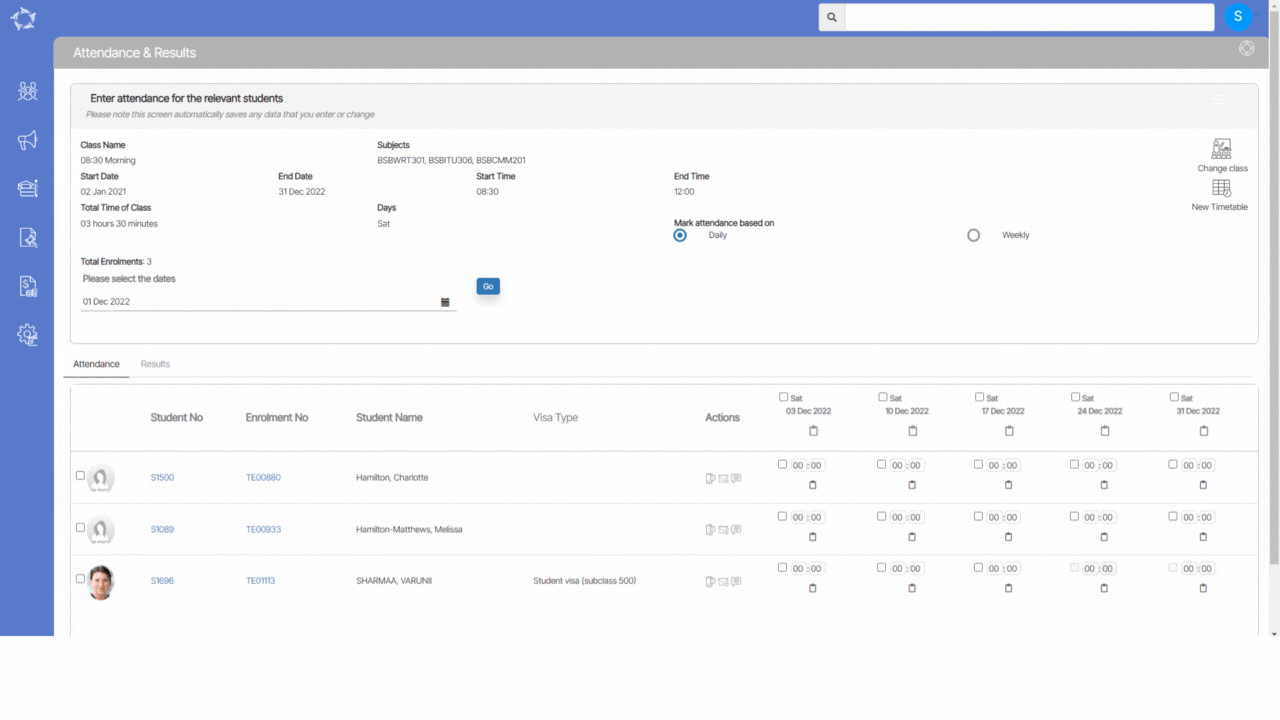
Section 1:

This section displays information about the selected class, including the class name, date range, and timetable. In this section, you can mark attendance or absence for the students on a daily or weekly basis by selecting the appropriate radio button. Additionally, you have the option to modify the dates as per your requirements.

In the Summary section of the class information, two icons have been included for the options of Change Class and New Timetable. This will make it easier for users to access these features and make any necessary changes to their class schedule.

  • Change Class Icon – The Change Class icon allows users to select a different class to mark attendance for. Selecting this icon will redirect the user to the previous screen, where they can select a new class and continue marking attendance.
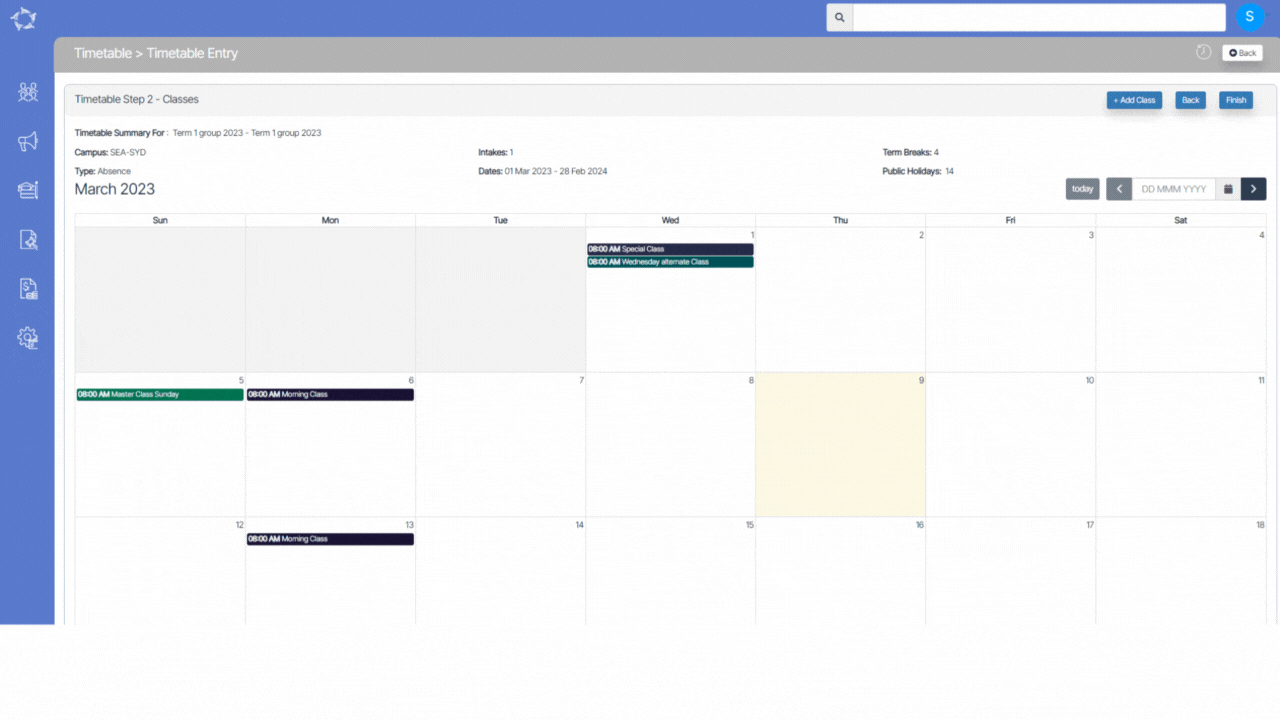
  • New Timetable IconThe New Timetable icon provides you with the option to select a different timetable and date range for attendance. Selecting this icon will redirect the user to the previous screen, where they can select a new timetable and date range

Section 2:

Allows you to mark attendance or absence for the students under the Attendance or Absence tab. You can also record the student’s results under the Results tab.

Can’t see a SAVE button on the screen?

Unlike other screens in the system, this screen will auto-save when you enter or edit data in it.

Attendance Tab

  • In the Attendance tab, you can record whether a student is present or absent, depending on how the timetable was set up. To do this, select the checkbox next to each student that you want to mark attendance or absence. Check the box for Attendance if the student is present or Absence if the student is absent.
  • When you select the checkbox for a student in the Attendance tab, the system will display a number in two boxes next to the checkbox. These boxes are for hours and minutes, and the number displayed will be the total hours and minutes of the class for which you can mark attendance.
  • If a student attended or was absent for only part of the class, you can modify the numbers in the hours and minutes boxes accordingly. However, the modified values cannot be greater than the original number displayed in the boxes. The system only allows you to mark attendance or absence for the actual amount of time the student was present or absent in the class.

Can’t select the tick box for a student to mark attendance?

If you are unable to select the tick box for a student, it may be because the student has a student holiday entered in the system, and it has been linked to their specific enrolment. In this case, you cannot mark the student as attended or absent for the duration of the holiday period.

Results Tab

  • In the Results tab, the top section of the screen displays a summary of the subjects or units of study linked to the class. In this section, you can see what subjects or units of study are associated with the class. For each student enrolled in the class, the system displays the subjects or units of study they are linked to, as well as any results that have been recorded for those subjects or units of study.
  • To mark a result for a particular subject or unit of study for a student, select the Result dropdown for that subject or unit of study. This dropdown will be located next to the student’s name in the Results tab.

Note: There are a few results (Recognition of prior learning, Did not start, etc.) that are in red. You should only see them when you are reviewing historical enrolment results. They are inactive results that you may have linked to a subject and you need to see them so that you can change them where needed. If you do see them in the list, do not use them as they will not be accepted in your National Student data submissions, and you will get errors.

Result date is mandatory and you don’t record dates?

As part of your AVETMISS compliance requirements, your student results require result dates.

To protect your data for AVETMISS data submissions the system will make the result date mandatory where:

1. Any Subject set with Type of Subject is Unit of Competency (UoC) – Nationally Accredited in the Subject entry screen OR

2. Any Unit of Study that has a VET subject linked to it and meets the requirements in point 1 above.

Final Step Classes Preview

In this step, you will be able to view all the classes that you have created or edited. Once you are satisfied with the changes, you can select the Finish button to complete the process of creating the classes. However, you can still make further edits and add any new class during this step. It’s important to ensure that all the necessary classes are created accurately and efficiently to avoid any issues in the future.

Copy Timetable Step 2 Select Classes

In this step of the process, the system displays all the classes that were linked to the previous timetable. The information for each class remains the same, except for the start and end dates which will now be different. The system will automatically copy over the timetable dates entered in the previous step and apply them to all the classes.

In addition to displaying the previously linked classes, this step also allows you to create new classes and make edits to existing ones. This gives you the flexibility to make any necessary changes or additions to the class. Select all the classes that you wish to copy in this new timetable.

Copy Timetable Step 1 Information & Resource Selection

During this step, the system will replicate all the data and resource selection from the previous timetable. However, the Timetable Code, Timetable Name, and Timetable Dates will not be copied. To complete this step, you will need to enter details into these four fields. Additionally, you have the ability to modify the information in other fields as well. This allows for flexibility in creating a new timetable while still retaining some of the previous data and resources.

Note – Please be aware that when you enter the start and end date for the new timetable, the system will refresh the information related to intakes, term breaks, and public holidays. This means that any changes made to these dates in the previous timetable will not carry over to the new timetable. It is important to review and verify all information related to intakes, term breaks, and public holidays to ensure that they are accurate the new timetable.

Application Process – Study Period Changes

When using the study period start date as the invoice date or invoice due date while the application process, the system automatically calculates the study period dates for you.

To update the length of your study periods in your instalment plans, you can follow a few simple steps. First, navigate to the second step of the instalment plan settings, where you can edit the details of each instalment. You can enter the length of the study period in weeks for each instalment, based on the actual duration of your course or program. Once you have entered this information, be sure to save your changes.

By updating your instalment plan in this way, the system will be able to automatically use the invoice dates as the study period start date and will use the number of weeks specified as the study period length in the instalment plan to calculate the study period end date.

Note: if you still need any assistance in setup the study period length, you can contact our support team.

Results History – New Screen

The Result History screen provides a complete record of all past results and their respective dates for specific subjects. You will be able to access this screen from the Training Plan & Results screen > Results History icon.

This screen is divided into two sections:

Enrolment Profile Tile

The Enrolment Profile Tile provides an overview of basic details related to an enrolment. This tile displays various icons that are associated with enrolment information, however, it is important to note that these icons are read-only, meaning that it is not possible to make any changes to enrolment details through this screen.

Result History Listing Grid

The grid displays a comprehensive list of past records for the subject’s results. Each column in the grid provides specific information about the corresponding result record.

  • Subject Code – This refers to the subject code linked to the enrolment.
  • Subject Name – This refers to the subject name linked to the enrolment.
  • Pre. Score – column displays the score obtained by the student in the previous attempt.
  • Pre. Result – This column shows the result obtained by the student in the previous attempt.
  • Pre. Result Date – It displays the date when the previous attempt was made.
  • Date Changed – It shows the date when any changes were made to the result record.
  • User Changed – This column displays the name of the user who made changes to the result record.
  • Notes – This column shows any additional notes added to the result record.
  • Attempt – This column indicates the attempt number for the result record.

Certificate Report – New parameters for Result Types

The Enrolment Dashboard now includes new parameters for result types in the Certificates Pop up window. Specifically, you can select from three options: Final Results, Progressive Results, or Both.

Note – We have implemented this for Non-AQTF results (Grading Based), but in upcoming updates, we will implement it on all other result types which includes AQTF results as well.

When printing certificates, it’s important to consider whether to include only progressive results, final results, or both. To do this, you can select the appropriate radio button depending on your preference. If you only want to include progressive results, select the Progressive Result radio button. Conversely, if you only want to include final results, select the Final Result radio button. Finally, if you want to include both types of results, select the Both radio button.

Enrolment AVETMISS Settings > +Pre2018 AVETMISS settings button changes

We have made some changes to the +Pre2018 AVETMISS settings button on the Enrolment Avetmiss Settings screen.

The button will now only be visible under specific conditions. Specifically, it will only be displayed if the enrolment start date is earlier or equal to 01/01/2019. On the other hand, if the enrolment start date is after 01/01/2019, the button will not be visible, and it will remain hidden.

IMPORTANT – Our general recommendation is to utilise this button when importing historical data. If you are being able to see this button, we encourage you to contact our support team for assistance.

Training Plan & Results – Subject Dates Colour Coding

This is a new check on the Training Plan and result screen, if the start date and end date of a subject have already passed and there is final outcome for those subjects then subject dates will be displayed in red/pink Colour. This will help you quickly identify subjects that may require attention.

The start date of subjects is showing as 03/06/2022 and the end date as 24/07/2022, but there is no final outcome or result mentioned. Both of these dates are highlighted in a red/pink colour for those subjects.

Training Plan & Results Screen – Colour Codings

A new feature has been introduced on the Training Plan and Results Screen, which involves colour coding for both Results and Subject dates. Please select the below links to know more about the new rules.

Results Colour Coding

The results colour coding has been implemented to make it easier for users to differentiate between different types of updated results. This will display different colours for each updated result, allowing users to quickly identify the type of result without having to read through each one individually.

To know more, select here – Training Plan & Results – Result Colour Coding

Subject Dates colour Coding

This is a new check on the Training Plan and result screen, if the start date and end date of a subject have already passed, but the result is still updated for it, the subject dates will be displayed in red/pink colour. This will help you quickly identify subjects that may require attention.

To know more, select here – Training Plan & Results – Subject Dates Colour Coding