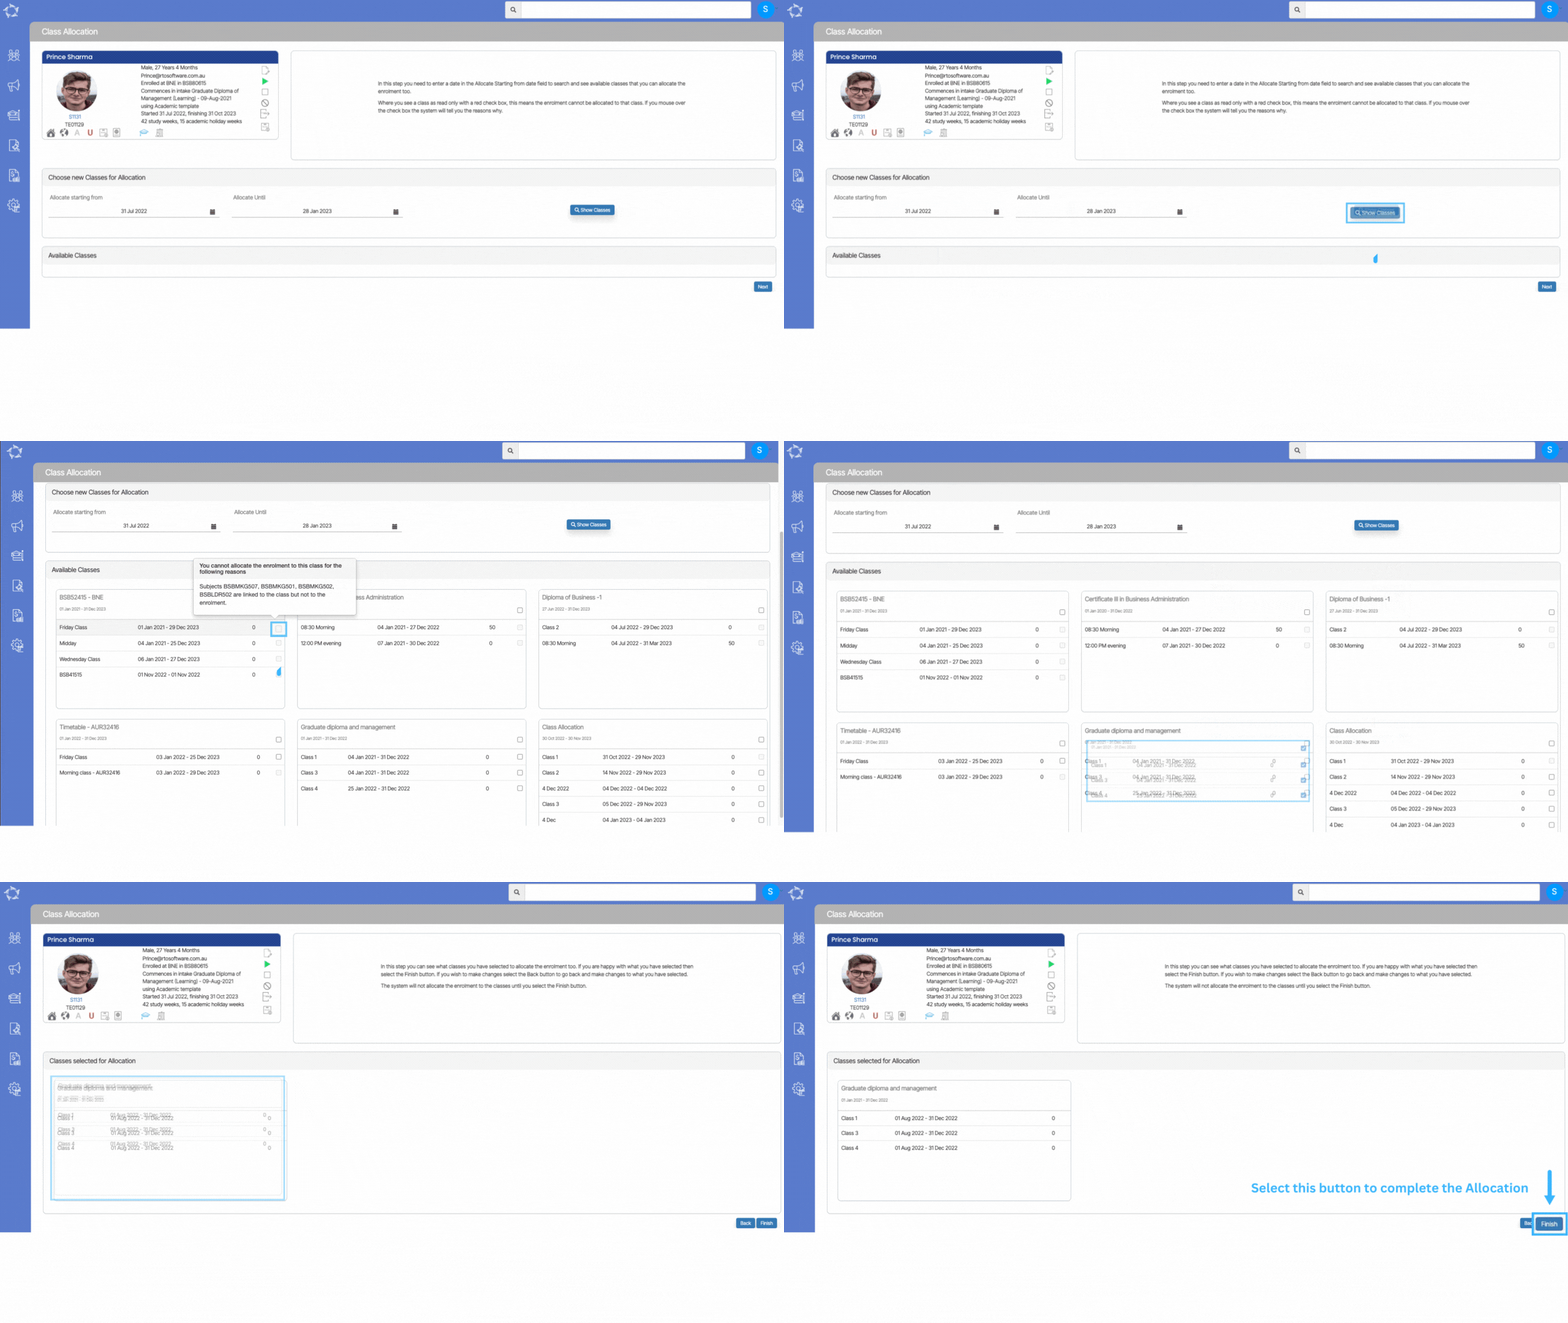
This is the second step of the Class Allocation. This screen will allow you to allocate classes to an enrolment.
Follow the below steps to Allocate Classes:
- Search for the class date by selecting the start date and end date from the choose new classes for allocation tile and then select the Show Classes button.
- The classes that are available, are the current classes that you can allocate to the enrolment by selecting the tick boxes and then hit the Next button.
- You will be taken to the Classes selected for allocation preview screen where you can see the classes that are allocated and the maximum capacity of the classes.
- When all the above steps are done, select the Finish button to complete the allocation.
IMPORTANT – There are tick boxes that are frozen and you cannot select the tick boxes for the classes due to the following reasons:
Reason 1 – Classes cannot be selected because subjects are linked to the classes but not to the enrolment.
Reason 2 – Classes cannot be selected because the enrolment is already allocated to the Friday class.

If you have any queries, please do not hesitate to contact us on 1300 85 05 85 or email us on support@rtosoftware.com.au
