In TEAMS, setting up Program Structure involves a series of essential steps and guidelines. Firstly, creating and defining the subjects that will be offered within the system. Then, establishing the overall program framework, outlining the program and subjects. Next, linking specific subjects to the corresponding program ensures a well-organised curriculum for each student. To account for breaks and time off, public holidays are incorporated into the system.
Additionally, configure intakes, allowing students to enrol at specific times throughout the year. Financial aspects are also managed within TEAMS, with the ability to set up fees and instalment plans for students’ convenience. For offering group training, you need to create group training plans to accommodate such arrangements. Lastly, the program is linked with the campus, ensuring seamless communication and data management between different locations. By following these steps and guidelines, TEAMS facilitates an efficient and structured student management system, enhancing the overall educational experience.
Please see the below steps and processes to create a program structure in TEAMS-:
Step 1 – Subjects
It is recommended, to create a Subject and update the subject’s AVETMISS settings before you set up a program in TEAMS.
a) Go to the Main Dashboard > Academic Menu > Subjects
b) When you select the Subjects icon, the system will present you with a Subject Welcome Screen. This screen will show you all the active subjects that are already present in your database. To know more, select here – Subject Welcome Screen
c) For adding a new subject, select the +Subject Button from the subject Welcome Screen.
d) Once you have successfully created the subject and saved it, the system will show you a Burger Menu Icon. You need to select the AVETMISS Settings option to update the Subject AVETMISS settings for a subject.
Step 2 – Programs
Once you have completed Step 1, you need to set up the Program and its settings along with the Program AVETMISS Settings.
a) Go to the Main Dashboard > Academic Menu > Programs
b) When you select the Programs Icon, the system will present you with the Program Welcome Screen. You need to select the +Program Button to create a new program in the system.
c) Once you have successfully created the Program along with the settings, the system will show you a Burger Menu Icon. Now from there, you need to select the Subjects option to link the subjects to the program.
d) Once you have successfully linked the subjects with the relevant fields, you then need to select the Program AVETMISS Settings option from the Burger Menu Icon to update the Program’s AVETMISS Settings.
Step 3 – Public Holidays
It is recommended that if you are creating Intakes then you need to create Public Holidays in the system as a prior step.
Step 3 – Intakes
NOTE – Before you create Intakes, you need to understand how your site is set up by our Onboarding team. Whether they have created your Academic Template or not. If your Academic template is not set up then you need to go to Main Dashboard > System Admin Menu > Term Breaks icon to create the Term Break in the system.
If you have a setup of Academic Template then you can simply create Intakes. Once you have created the Intakes, please make sure that you are linking the Intake with the Program. To link the Intake, you need to go to the Program Entry Screen > Burger menu > Program Intakes. Select the Program Intakes option to link the intake with the Program
Step 4 – Fees
After the above steps, you need to set up fees for a program. To create fees, you need to go to Main Dashboard > Finance Menu > Fee Icon. Once you selected the Fees Icon, the system will take you to the Fee Welcome Screen and there you need to select the +Add Button to create a fee in the system. Please note – You don’t have to link fees to the programs because while creating fees, the screen lets you select the Object Type such as Programs, Campus, Subjects etc. So If you are creating the fee for a program, Object type > Program, automatically links the fee with the program you selected.
Step 5 – Instalment Plans
Now again, you have to understand what TEAMS has set up for you. If you are using the pattern for the invoices while creating the Application then you don’t have to use the instalment plans. If our team has already created the instalment plan for you then you simply need to go to the Instalment Plan Welcome Screen and from this screen, you need to select the edit icon under the Actions column from the grid. Once you select the Edit Icon, the system will take you to the Instalment Plan Entry Screen. On this screen, you can search and link your new program from the Program field. You can also create a new Instalment Plan for your program from the Instalment Plan Entry Screen.
Step 6 – Academic Template
If your Academic Template is already set up and you want to make some changes then please it is recommended you contact our support team and they will guide you and help you with the academic template.
Step 7 – Group Training Plans
If your Timetables are already set up and you know the dates of the units that the student will study then you need to create Group Training Plans. Please note that you will only create group training Plans if your Academic template is not set up. So when you create GTP and while creating the Application when you select the GTP, the unit’s date will automatically get populates exactly as per your timetable.
Step 8 – Link the Program with the Campus
Once all the above steps are done, this is the final step, you need to link the program to the campus. When you are on the Campus Welcome Screen, you need to edit the campus from the Edit Icon under the Actions Column from the grid. This will take you to the Campus Entry Screen and there you need to select the Linked Programs option from the Burger menu on the right hand side of your screen.
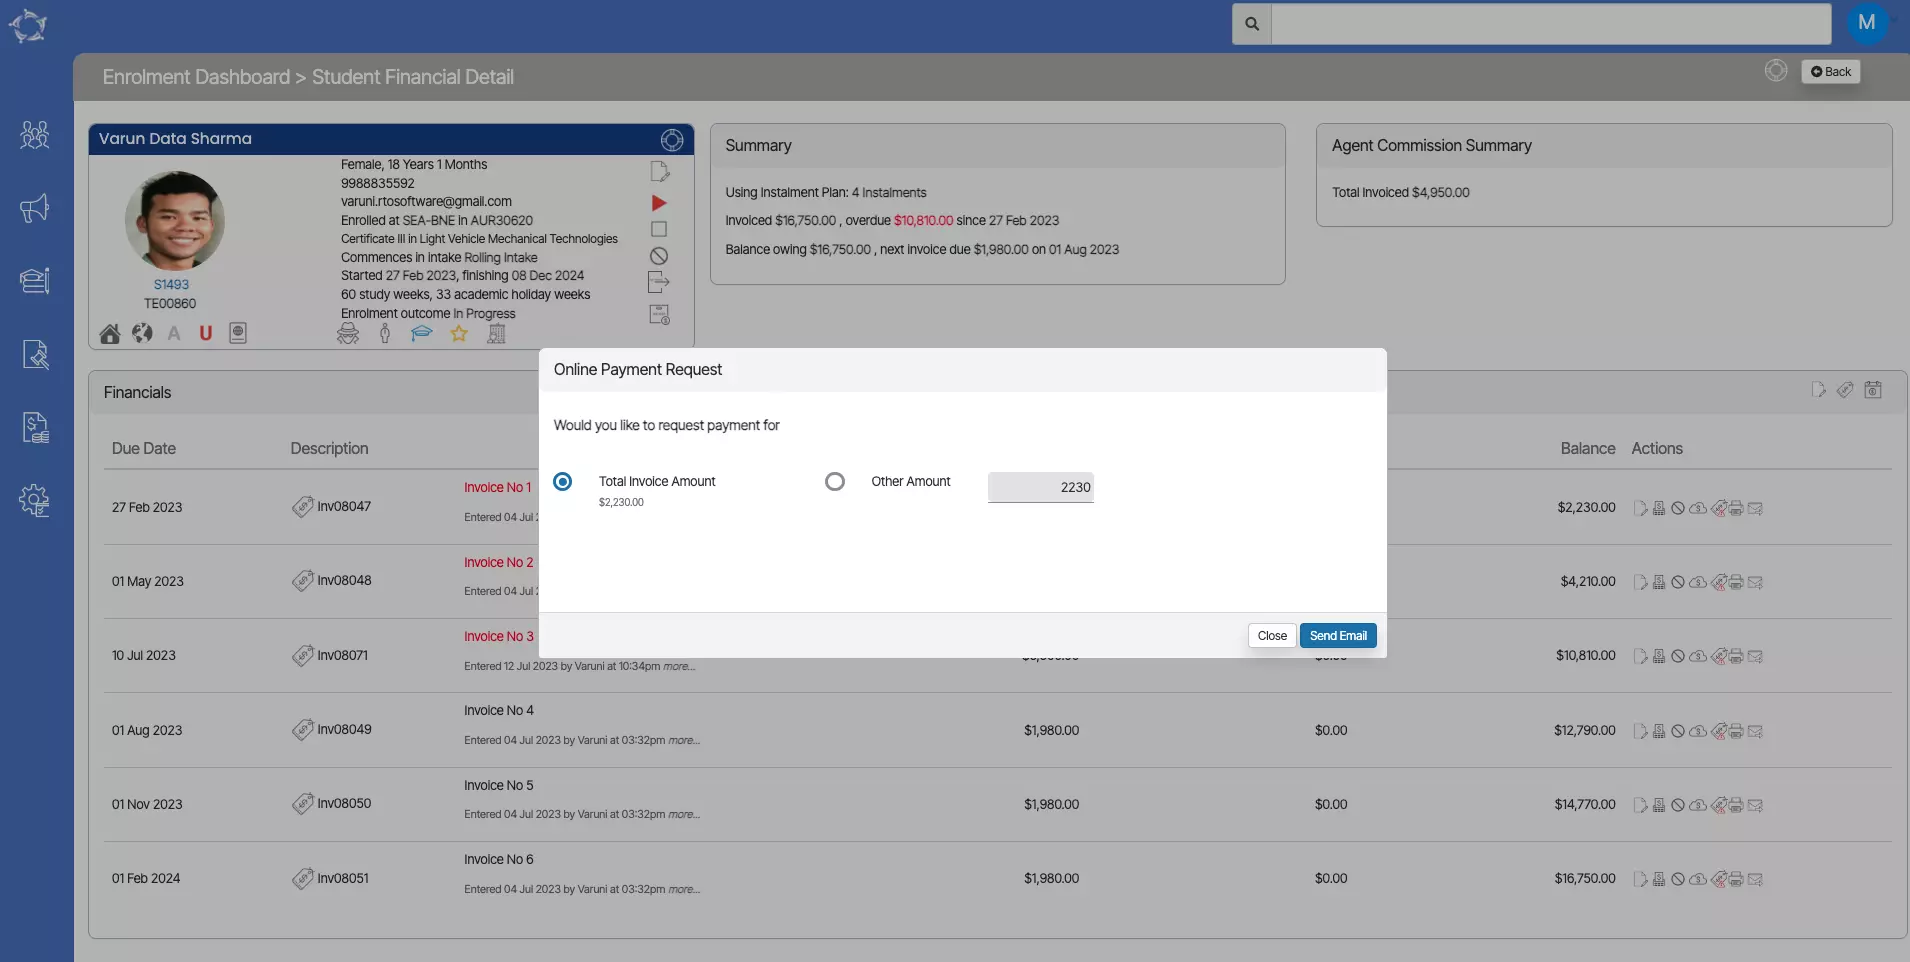
 as shown below from the student financial screen.
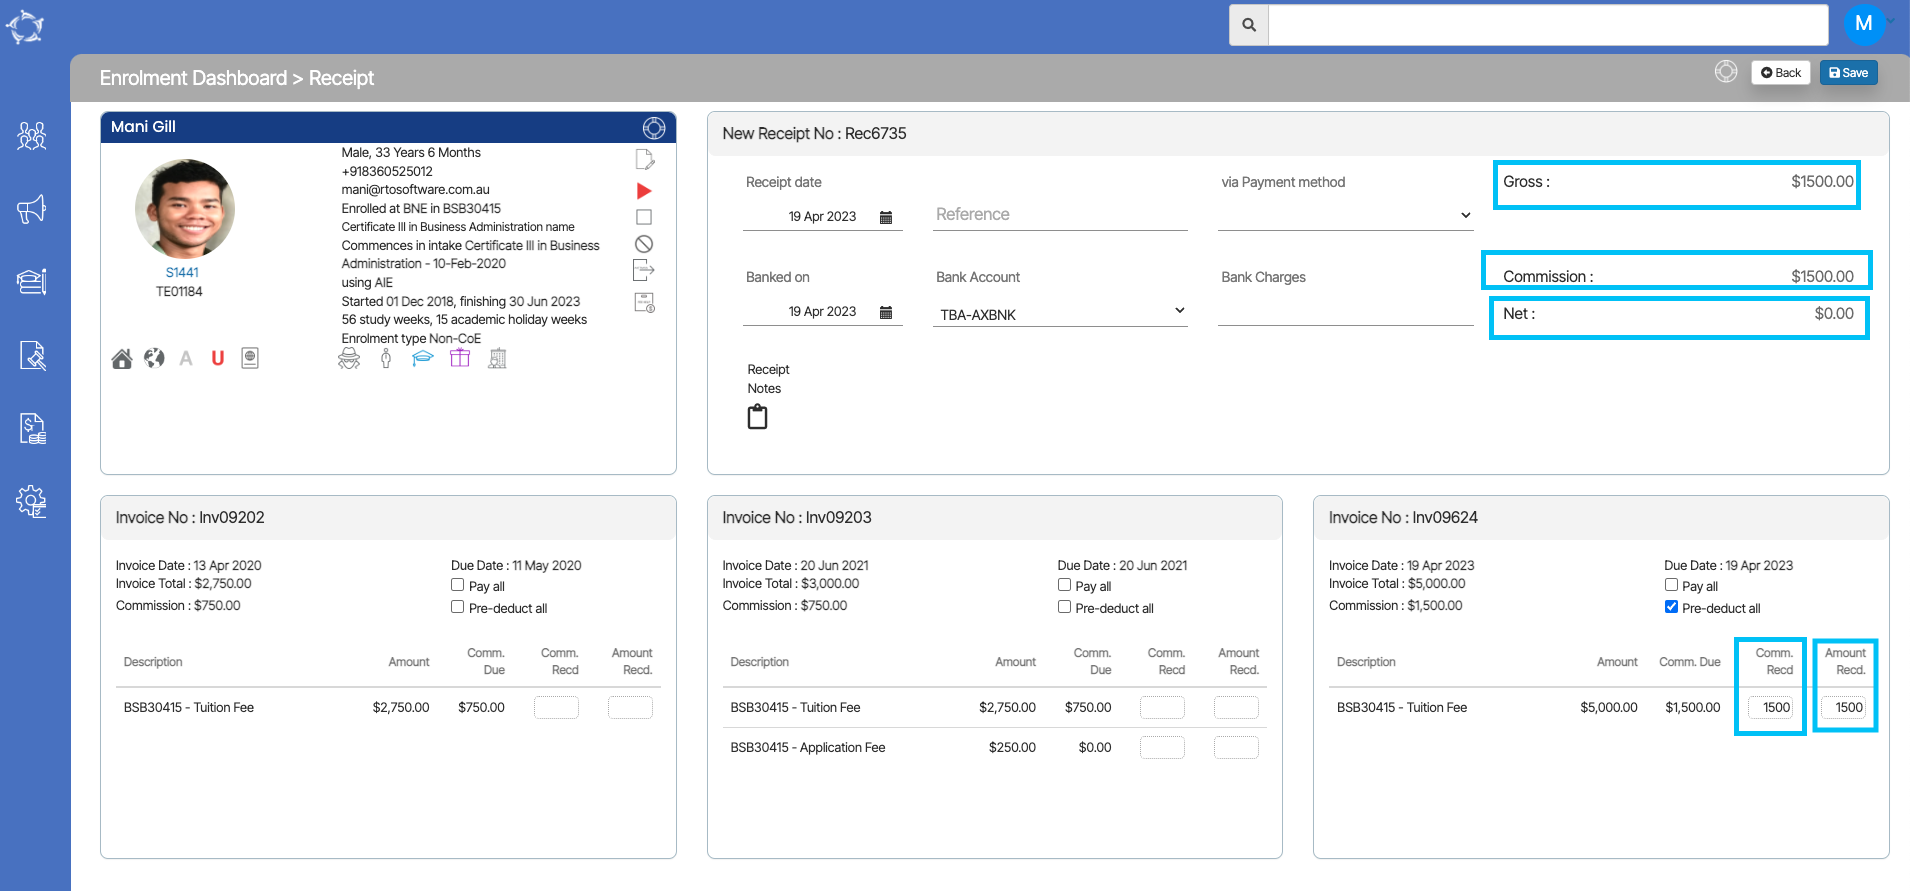