Enrolment Dashboard > Edit Agent Commission Invoices

Sometimes, it happens that agents change the commission rates in between of a student’s enrolment. They might change it from 30% to 35% depending upon agent to agent. And there might be the cases where you have already paid to the agent some of commission as per the initial commission rate and the remaining commission will be paid as per the incremented commission rate. Not just that, there might be some other scenarios, where you have to change the commission amount for a student’s enrolment. Of course, you will be updating the agent commission rate from the agent entry screen, so that all the future applications can be processed with the new commission rate. However, for the existing enrolments where the commission amount is calculated based on the previous commission %, you would need to edit them manually to have proper track of commission amounts.

We didn’t have the facility to edit the commission amount from the enrolment dashboard, however, now we have the edit facility for you to edit the agent commission invoices.

On the Enrolment Dashboard > agent’s financials screen, you will see a new icon.

Once you click on the icon, it will direct you towards the edit agent commission screen where you will be able to edit the amount manually for each agent’s invoice.

To edit any agent’s commission amount, click on the icon to expand the invoice details.

It will show you each invoice’s details as below screenshot, so that you can edit the commission amount.

Change the commission amount from Comm. Excl and GST from Comm. GST columns.

Other fields will be read only fields and you won’t be able to edit anything for those fields. The last column Comm. Amount will be auto calculated by the system based on the commission and GST amount you update.

You can even make the commission notes as well from the notes icon.

Important

You won’t be able to edit the commission amount if there is already a commission payment made against that invoice. Same is the case where you might have created the negative invoice for a student’s invoice. In such cases, the system will not allow you to edit the amount.

If you try to update the commission amount less than what you have paid to the agent for that invoice, the system will throw an error as:

However, you can update the commission amount more than what you have already paid to the agent for that invoice.

After you are done changing all the commission amounts, click on the Save button and your agent commission invoices will be updated.

Change – Template name for Academic Docs

Enrolment Dashboard > Result and Progress Tile > Print icon

Dashboard > System Admin > Report Template

Student Dashboard > Current and Upcoming Enrolments Burger Menu

We have changed the template name from Academic Docs to Certificates in the system.

Now, you will see the report name as Certificates on the Enrolment Dashboard > Student Result Progress tile, Report Template screen and Current and Upcoming Enrolments tile.

Result and Progress Tile

Report Template Screen

Current and Upcoming Enrolments Tile

Report Dashboard Changes

Earlier, you were only able to see the report name on the Report Dashboard but now with this new change, you will be able to see the name of the Template used to print that report with the report name.

Once the report gets generated, the system will show you the Template Name and Report Name as shown below:

Date Format

As you know that TEAMS supports the date format as DD MMM YYYY i.e. 01 Jan 2022 for all of our clients. See below the example screenshot:

Based on our recent client interactions where a client wants DD/MM/YYYY format i.e. 01/01/2022 on every screen. We have done a system setting for it without impacting our clients who wants the current date format as DD MMM YYYY.

According to this system setting, if it’s set to the format as DD/MM/YYYY, then for that client on every screen, the date format will show as DD/MM/YYYY only.

Even the date entering fields will support DD/MM/YYYY format for those clients.

Note: By default, the date format will be DD MMM YYYY but if you wish to get it changed, please contact support.

UPDATE – Thursday, 28 July 2022

IMPORTANT: A new TEAMS update is scheduled.

Your TEAMS site will be updated on

Thursday, 28th of July, 2022

This is an important preview email
of what’s coming on your site soon

As you know, we have been continually improving and adding new features to TEAMS. We strongly believe in making software that helps our clients gain better efficiencies and improve their operations.

Note: You may need to alert other team members within your college as the changes may affect their role or department. 

Please spend a few minutes going through our What’s New and Newsletter emails. It will not only help you maximise the time and cost savings, it may be absolutely vital for your College’s Compliance with the latest regulations.

We strongly recommend that you take your time and read this (and future update email/s)

You may need to discuss new upcoming features with the relevant decision makers or team members. Each of the changes outlined also has hyperlinks that you can click to take you to our help website for further detailed explanation. 

With all that in mind, please review some of the key points outlining the list of changes below –

Major Process Changes

Report Related Changes

General / Small Improvements

Please review the changes and if something doesn’t make sense of you would like further clarification after reviewing it, please feel free to contact our Support team. 

There are a number of new initiatives and changes in the pipeline for the next update (due 11th August).

Remember, we are always open for feedback and a big thank you to so many of you who have been actively participating in helping us bring these new improvements to life. Your input and engagement are key in helping us improve and we really appreciate it.

Any questions, please feel free to reach out to us and we look forward to serving you to the best of our ability.

All the best from all of us here at RTO Software.

Follow us on Facebook and Instagram

If you have any further questions,
please feel free to contact our support staff on
1300 85 05 85 or support@rtosoftware.com.au
Remember – these changes go live on Thursday, 28th July 2022. 


Have a great day!

Documents Log > New Look

Student Dashboard > Documents Tile

Documents log screen is used to upload and check documents for a student that you and any other user have uploaded. We now have changed its look for you.

How it was before:

How it is now:

You will be able to see the documents in more sorted way. Also, the document type when you upload a document will be mandatory field for you to select. This way, the system will group all the documents according to the document type.

Moreover, now the system will show you processing bar when you upload a document.

Change – Added BCC in the compose email screen

Enrolment Dashboard > Communication Tile > Communication Log Burger Menu > Email Log

We have added a new field in the compose email screen i.e. BCC. Now you can BCC the email to the preferred email address while sending an email to any agent, applicant, student and enrolment.

Important Links

Audit Log > New column

Student Dashboard > Show Audit History icon > Audit Logs

Audit logs are used to view changes/updates that any TEAMS user has done on the screens. We recently have added a new column namely Object Details on this screen.

You will be able to see the student number, enrolment number, student name and application number. This way, it’s helpful and easy for you to search for the changes/updates.

New option for Receipts Report – report based on Receipts in Advance

Dashboard > Finance menu > Receipt

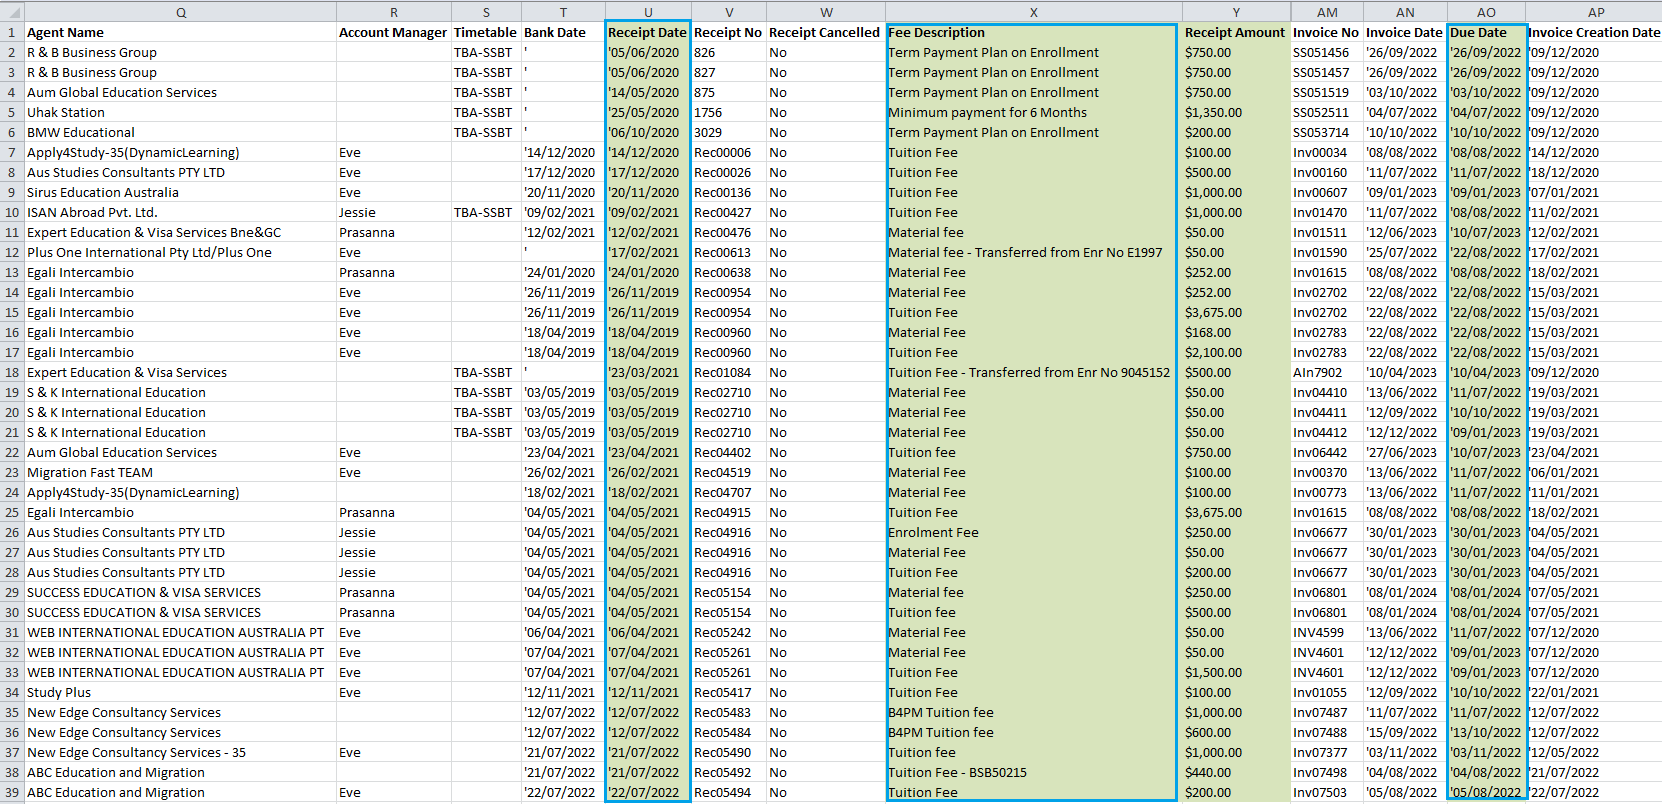
We have introduced a new option for the Receipts report that will allow you to generate the report based on Receipts in Advance. As you can see below, in the section for Report Based On there is a new option for Receipts in Advance – Invoice Due Date.

IMPORTANT: When you select this option you will be asked to enter a date for Invoices Due from. The system needs this date as it will use it to find any invoice that has an invoice due date equal to or greater than the date you have entered in the parameter screen. Once it finds all the invoices that match that parameter it then looks at each invoice and sees if there are any receipts linked to the invoice and if there are, then they are the invoices that will generate in the report. The system will NOT look at receipt dates for this option in the report.

For Example, as you can see below we have entered the Invoice Due from date of 01/07/2022 in the invoice due from date filed. The system will go and find all the invoices (based on other parameters you have selected) and find any that have an invoice due date equal to or greater than 01/07/2022. Then if any of them have receipts entered against them they are the invoices that will show in the report.

By default, the Include Fee line Item will be selected and if you do not want the report to print the fee line item then you can unselect this tick box. This means you can run the report and just see a detailed listing of the invoices where you see fee line items for the invoice and what money was receipted for the fee OR you can unselect this option and it generates a summary style where you just see the invoice in one row with a total amount for the invoice, no fee line items will show.

In the example below, the option for Include Fee Line Item tick box was selected, it has printed the fee description in the report accordingly.

You can also see the generated version of this report below: