Visa/CoE Details Changes

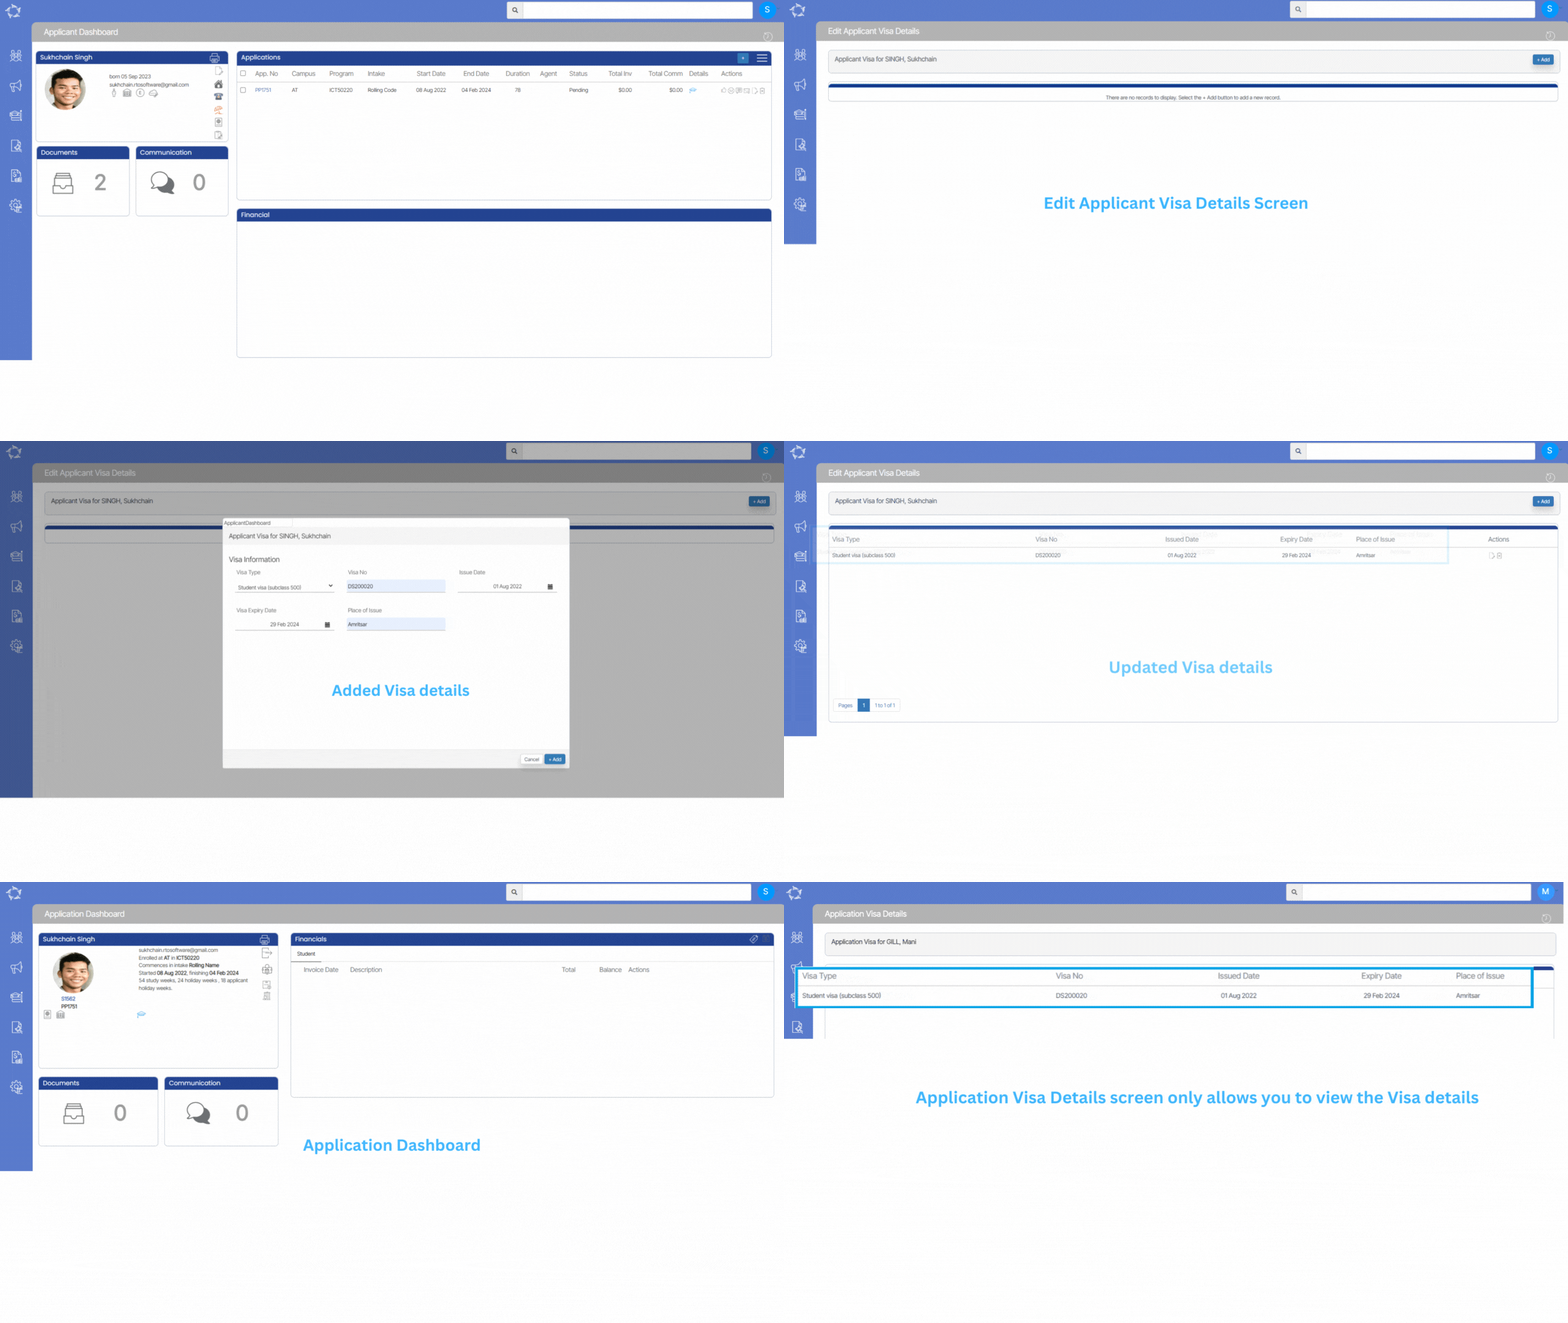
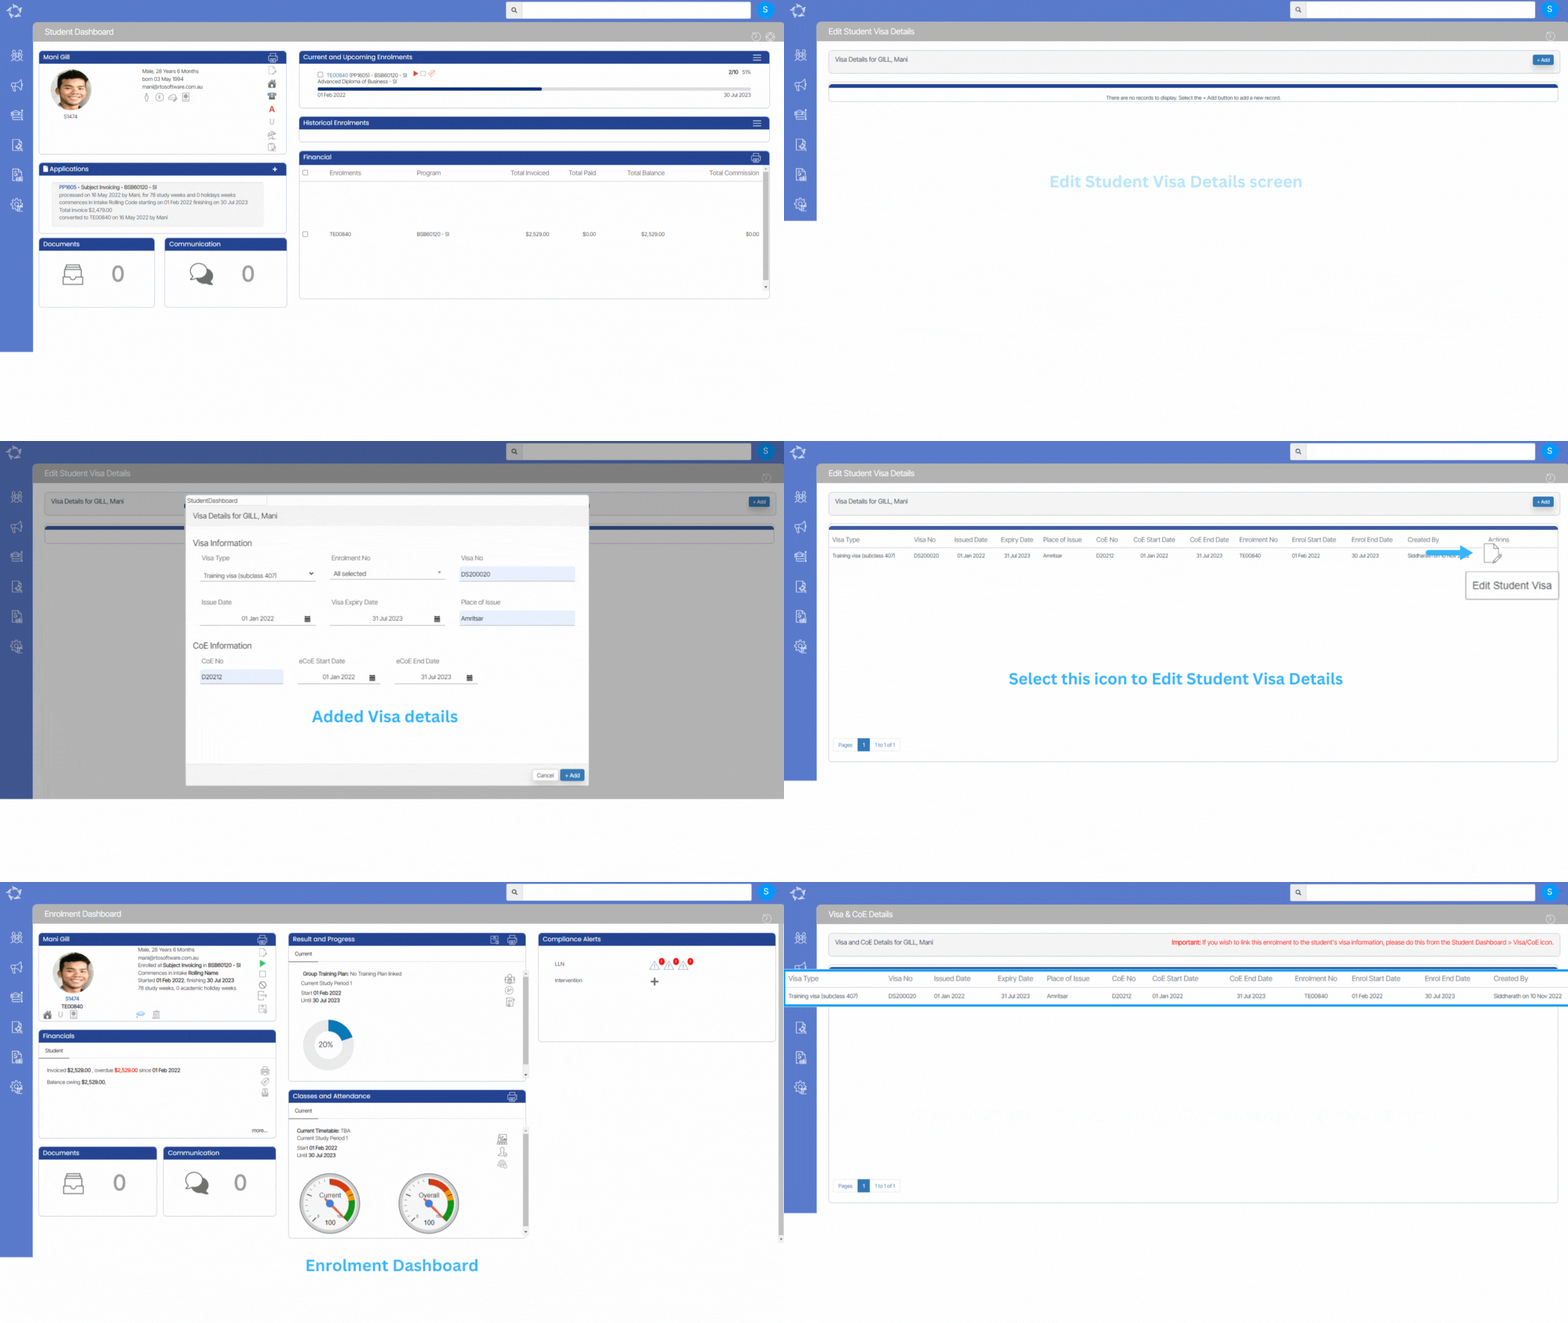
We have made some new changes to the Visa/CoE details screen in TEAMS and these changes are reflected in the screens listed below.

Applicant and Application Dashboards – Visa Details

You will only be able to add/edit visa details at the Applicant level. At the Application level, we have changed this to be read only information. However, you won’t be able to make any changes to the visa details at the application level as the details will be read only.
Student and Enrolment Dashboards – Visa/CoE Details

We have also added three new columns on the student dashboard visa screen. Such as

CoE Start Date
CoE End Date
Enrolment Start Date
Enrolment End Date

Also, you will now be able to add both Visa and CoE information for a student from Student Dashboard and this will be the only location where you can add/edit information for the student/enrolment. However, the Visa/CoE details will reflect as read only.
 Starters Tile – Rules

The system uses the following rules to give you the counts in this Starters Tile.

Rules
1. Look for any enrolment that has an enrolment start date within the calendar date option selected.
2. Do not count any enrolment that has been flagged as cancelled. This means you should see the word Cancelled in red against the enrolment NOT that the Enrolment Outcome is set to Cancelled only.
3. Look at programs set to inactive and see if any enrolment in the program has an enrolment start date within the calendar date option and if yes count them and display them.

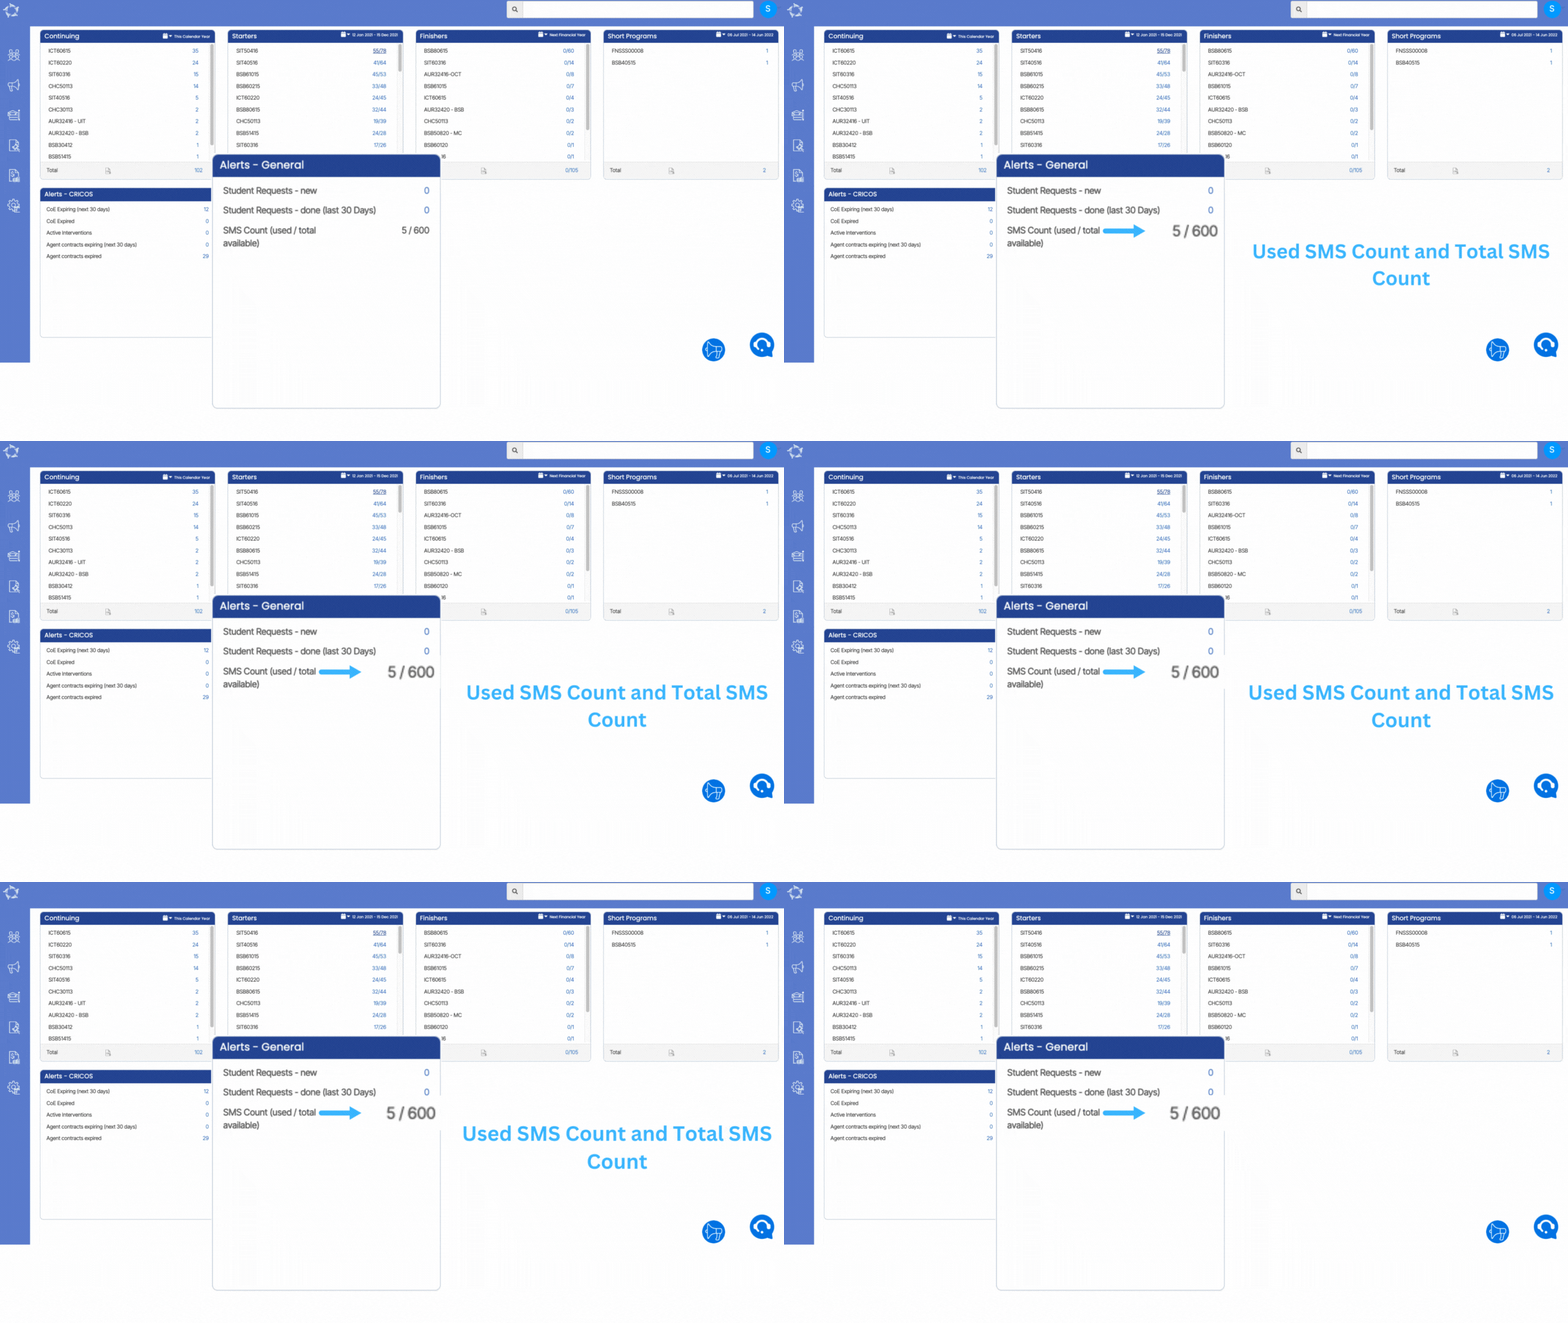
SMS Count

SMS count alert will show you the number of SMSs that have been used by a client. The number on the right side is the total count of SMSs which have been allocated for a month and the number on the left side is the count of SMSs that have been used by the client in a month.

Important : 5 is the count of SMSs that is used by Client. 600 is the total count of SMSs.

New Applicant

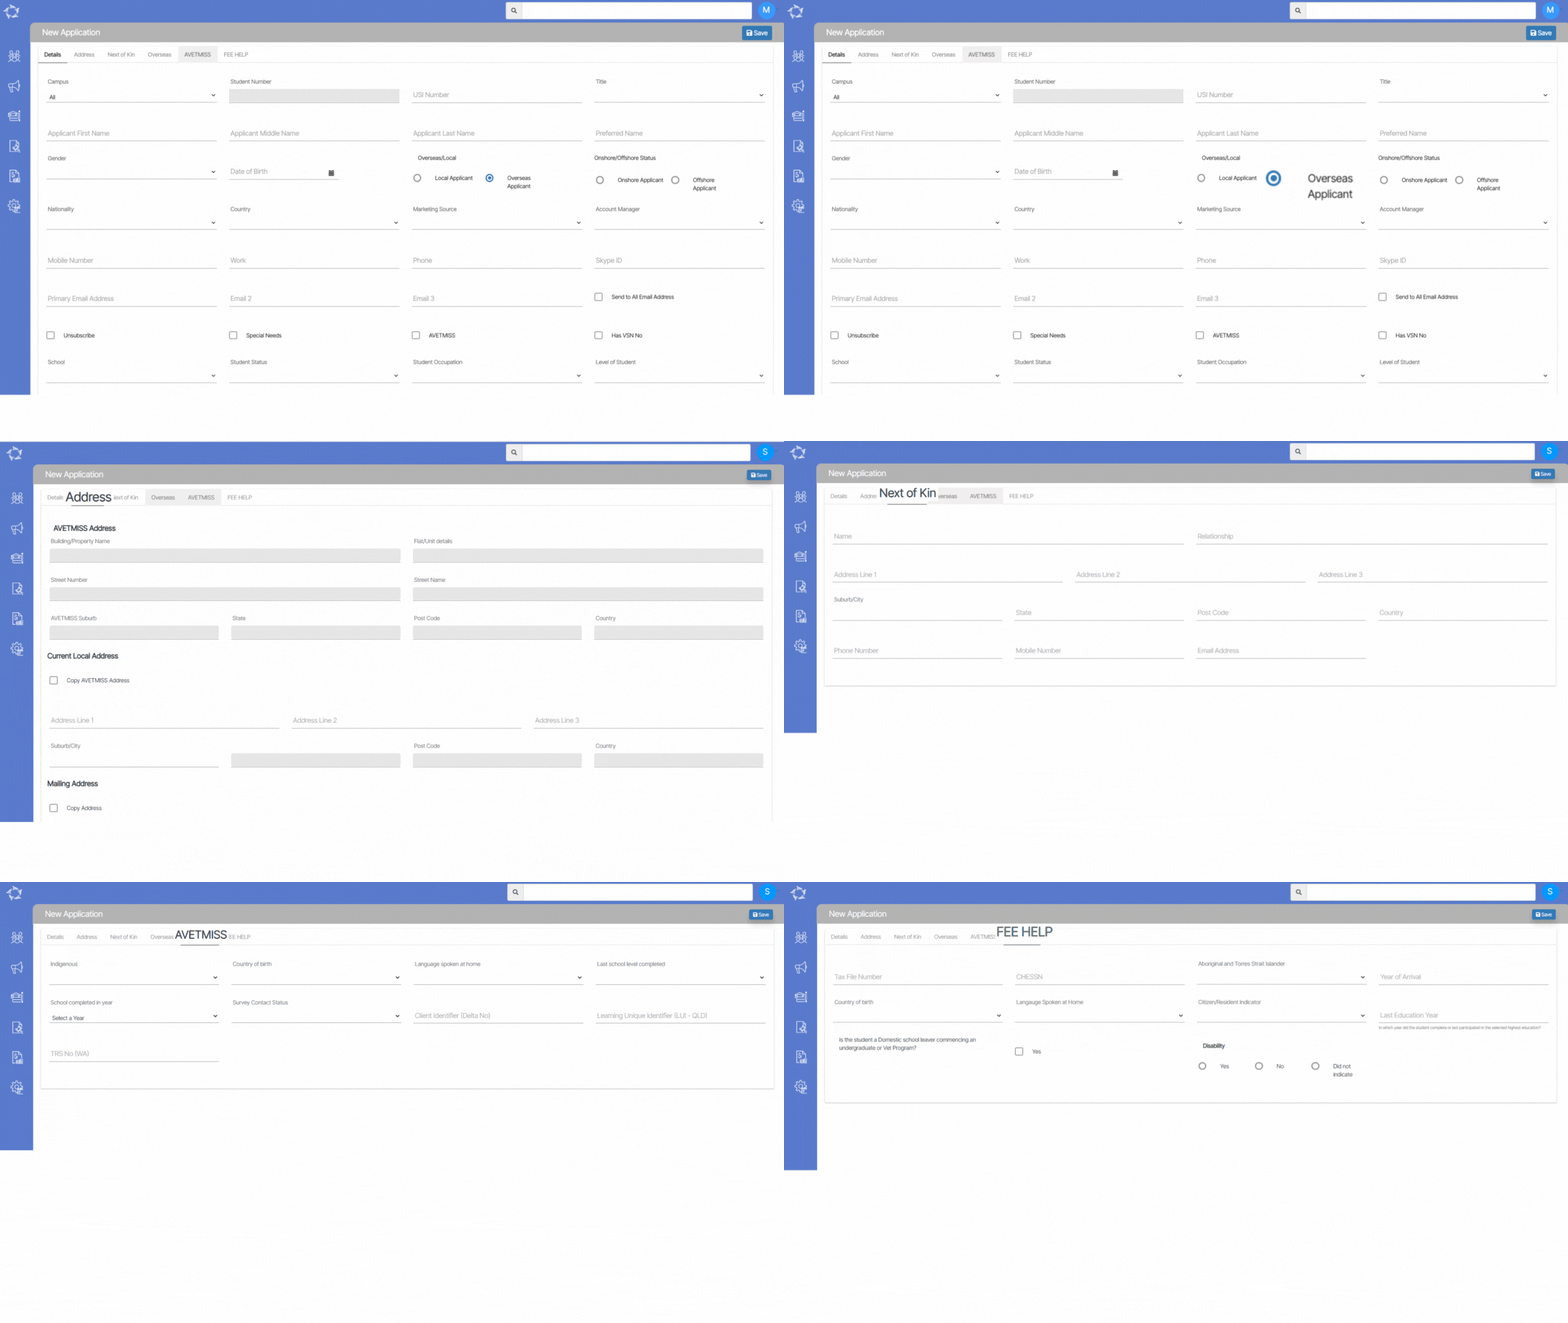
This screen allows you to add a New Applicant to your RTO with their basic details. This screen has different tabs where the system will allow you to add the details accordingly.

Note: The Overseas tab will only be visible if you select the Overseas/Applicant radio button while adding the applicant’s details and the same as you need to select the AVETMISS tick box to see the AVETMISS tab.

Tabs Description
DetailsThis tab will allow you to add basic information for the applicant. Some fields are very basic and self-explanatory, for other important fields in this tab you can read more here.
Address This tab will allow you to add the applicant’s Australian address information. From Local and Mailing addresses to the specific AVETMISS address format for VET students. It is important to note that for a VET student, you should enter the AVETMISS address first then you can select the copy tick box to copy the address to the local and/or mailing address fields. The system cannot copy from the local/mailing address fields to the AVETMISS address fields. For more information on Addresses click here.
Next of Ki This tab will allow you to add information for the student’s Next of Kin. For more information click here.
Overseas You will only be able to add the information under this tab if the applicant is set as an overseas student. To do this you need to select the radio button for Overseas Applicant that is under the field heading of Local/Overseas. When you do this, you also need to then update the student’s Onshore/Offshore Status by selecting a radio button to identify if the student/applicant is Onshore or Offshore. For more information click here.
AVETMISS You need to select the AVETMISS tick box on the details tab to make the AVETMISS tab visible. When you do this, you will be able to add the AVETMISS details for the Applicant.
FEE HELP You can add Fee HELP information for the applicant in this tab.

Program Screen – New Field

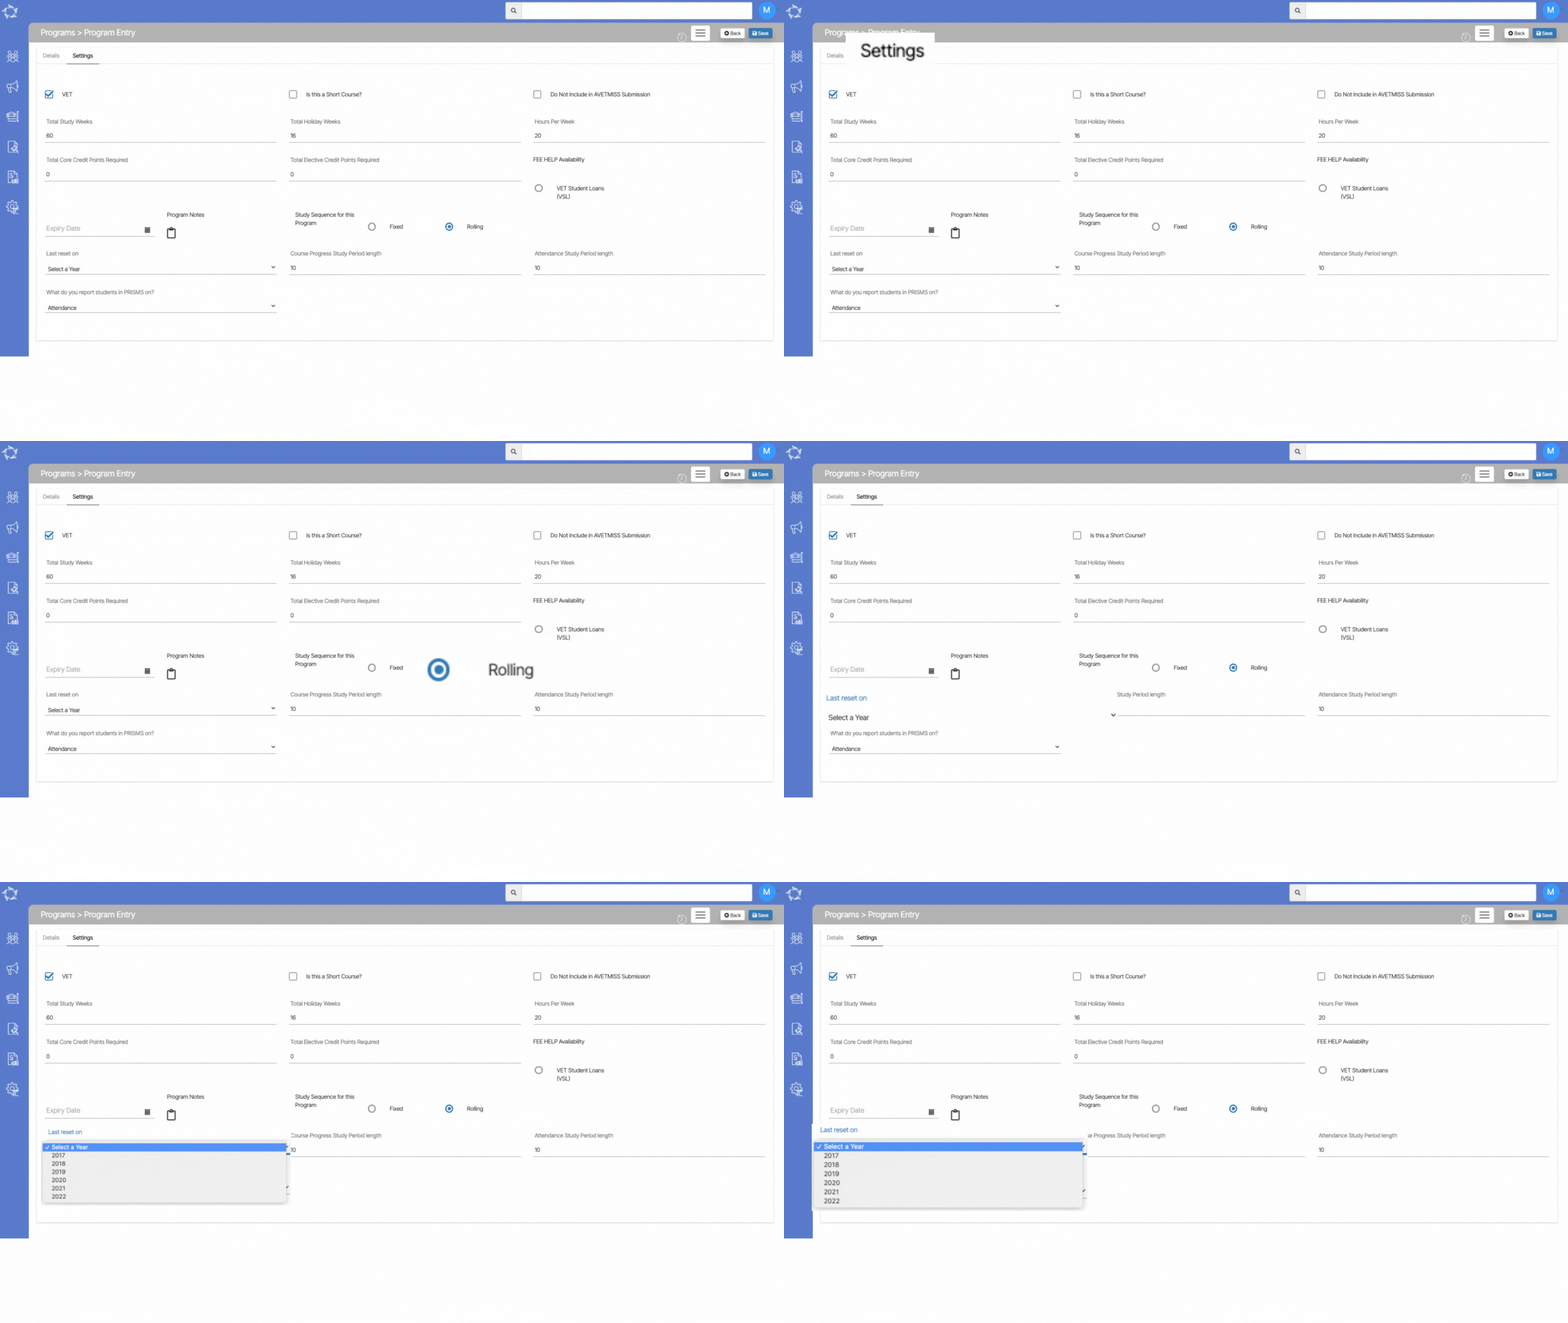
We have added a new field Last Reset on to the Program Screen > Settings tab and you will only see this field if you have set up the study sequence of the program as rolling in your TEAMS site.

You can set the last reset year as rolling from the dropdown.

Agent – new fields for Agent Portal

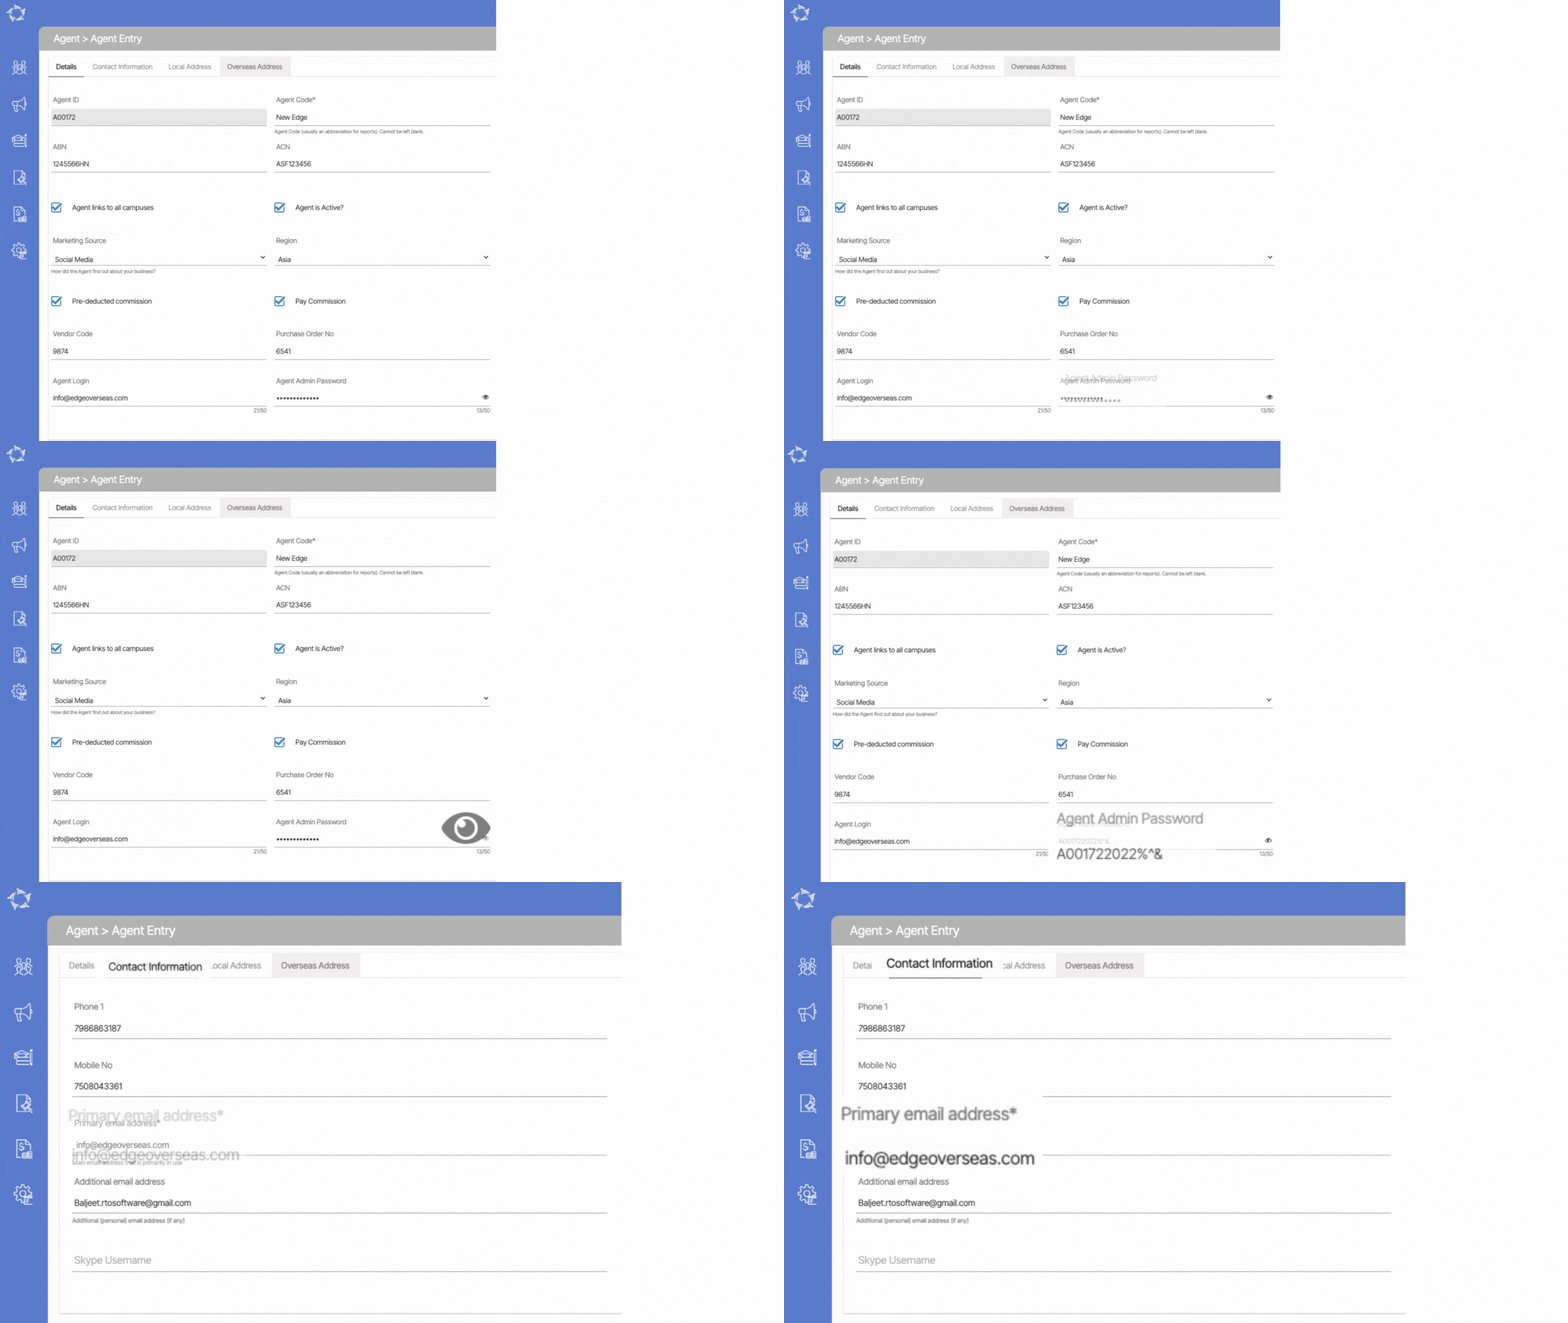
We have now added two new fields for Agent login and Agent Admin Password to allow you to setup an agent with a login to the Agent Portal. For the new password field you will also see the new View icon.

Note: When setting up login details for an agent to access your Agent Portal, it is our recommendation that you follow a standard format that your staff must use when creating logins for agents. The recommended format is as follows:

Agent Login: use the agent’s primary email address for this, such as info@edgeoverseas.com – the agent’s primary email address is on the Contact Information tab of the Agent Entry screen.

Agent Admin Password: use the Agent ID that the system automatically generates for an agent. This can be found on the Details tab of the Agent Entry screen. In the example below, the Agent ID is A00172. Then add a mix of numbers and symbols to make it a stronger password. So for this agent below it could be something like A001722022%^&

Both of the pieces of information we have recommended are unique to a specific agent. There can be no mistaking what agent the login is for and no chance that a user will use the same login details for two different agents.

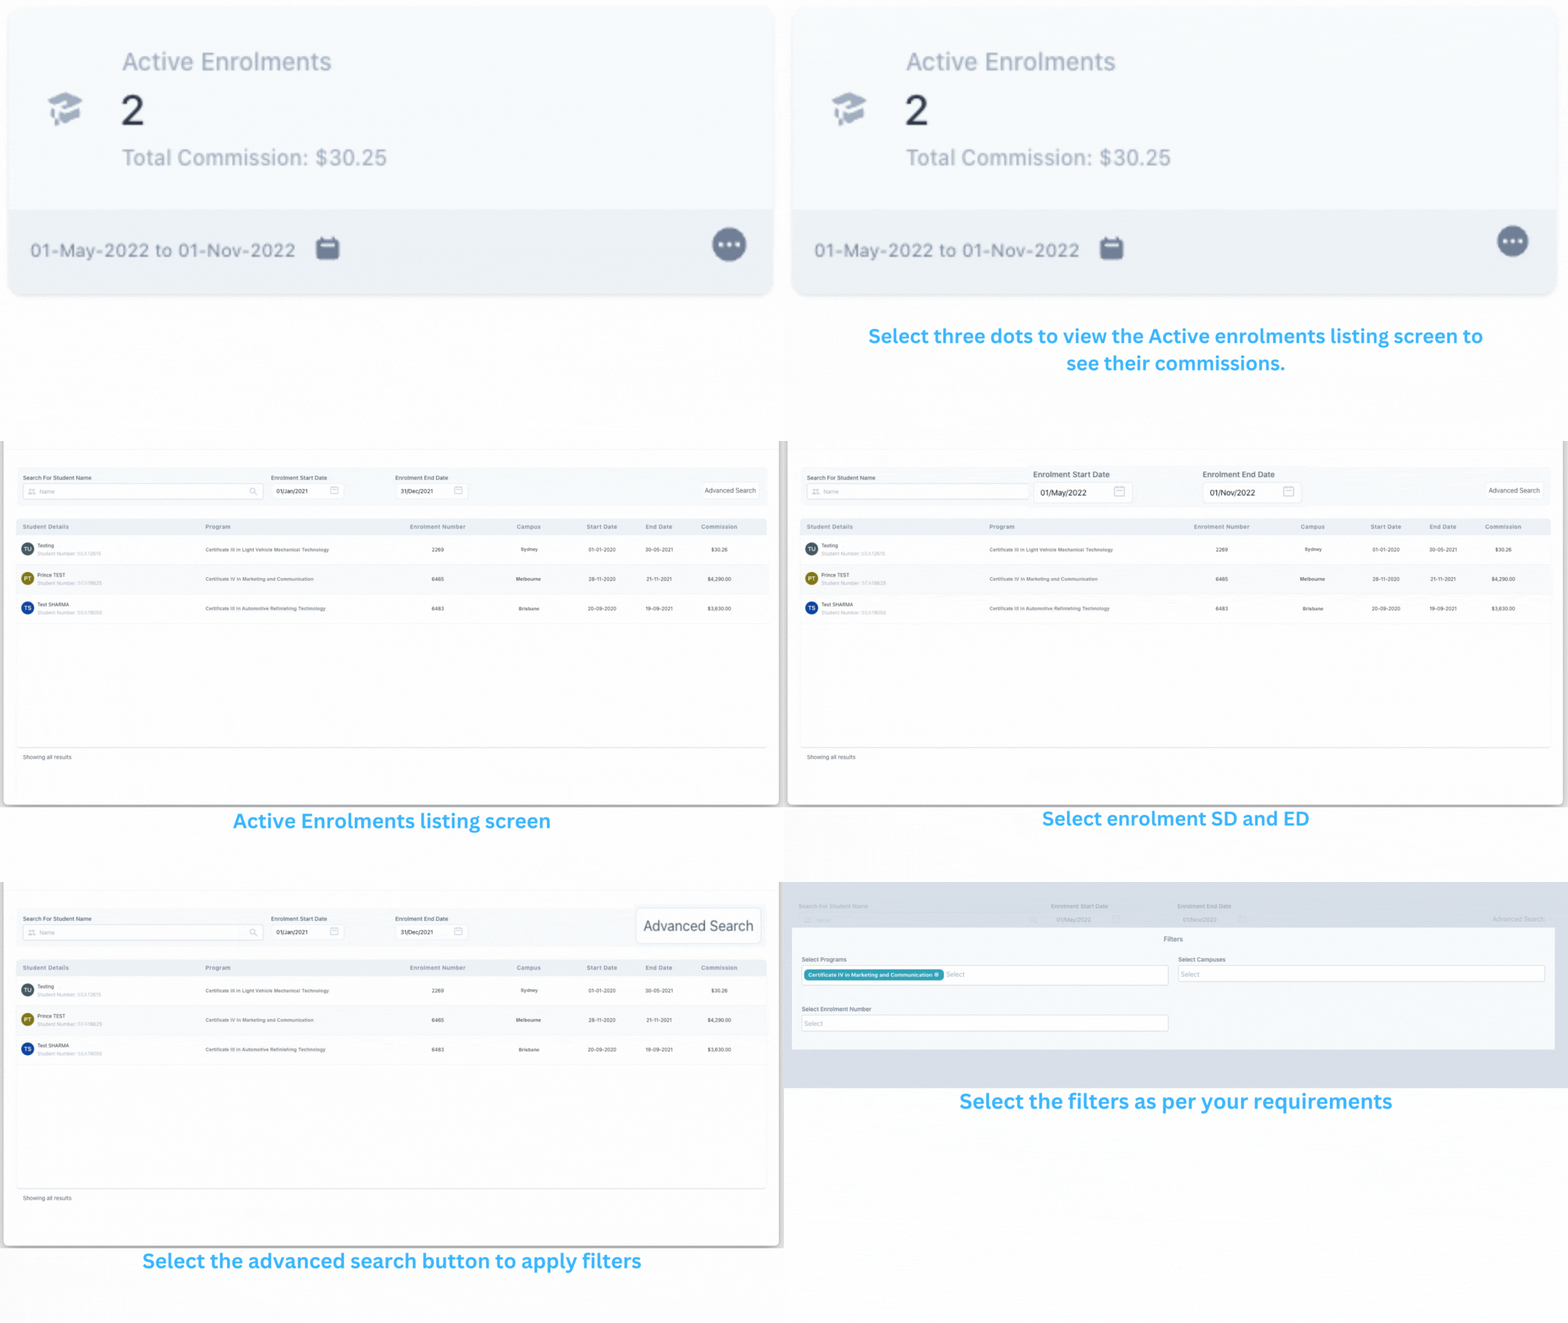
Agent Portal dashboard > Active Enrolments Tile

This tile will show you all the Active enrolments with their total commissions and it will allow you to do the followings.

  • Select the date range from the calendar to view the active enrolments accordingly.
  • Select three dots to view the Active enrolments listing screen to see their commissions.
  • You can search for a particular student with its name or with their enrolment start date and end date.
  • You can also do an Advanced search to apply more filters to view the enrolments accordingly.

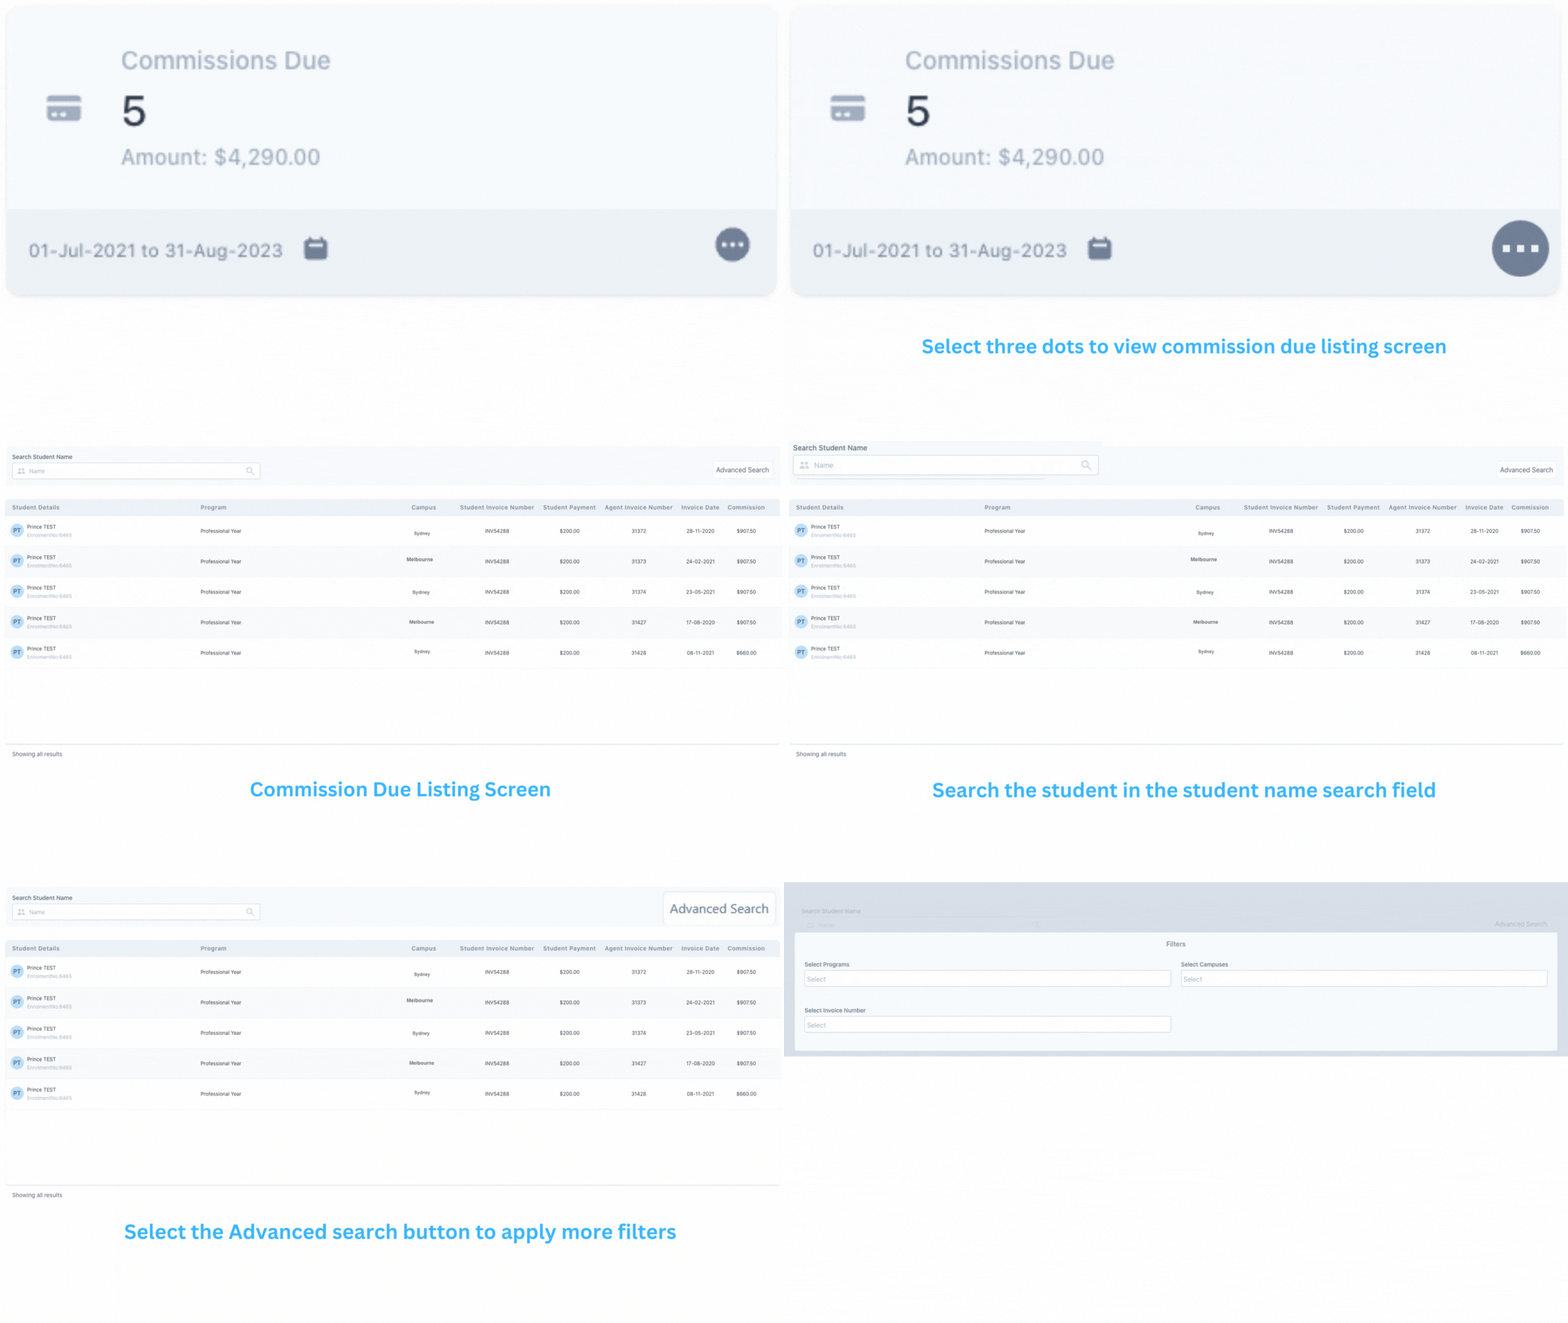
Agent Portal Dashboard – Commission Due Tile

This tile will show you the total Commission Due Amount and will allow you to do the following.

  • Select the date range from the calendar to view the commission due amount accordingly.
  • Select three dots to view the commission due listing screen.
  • View Commission Due Listing screen
  • Search for a particular student to view their commission
  • Apply more filters with the Advanced Search

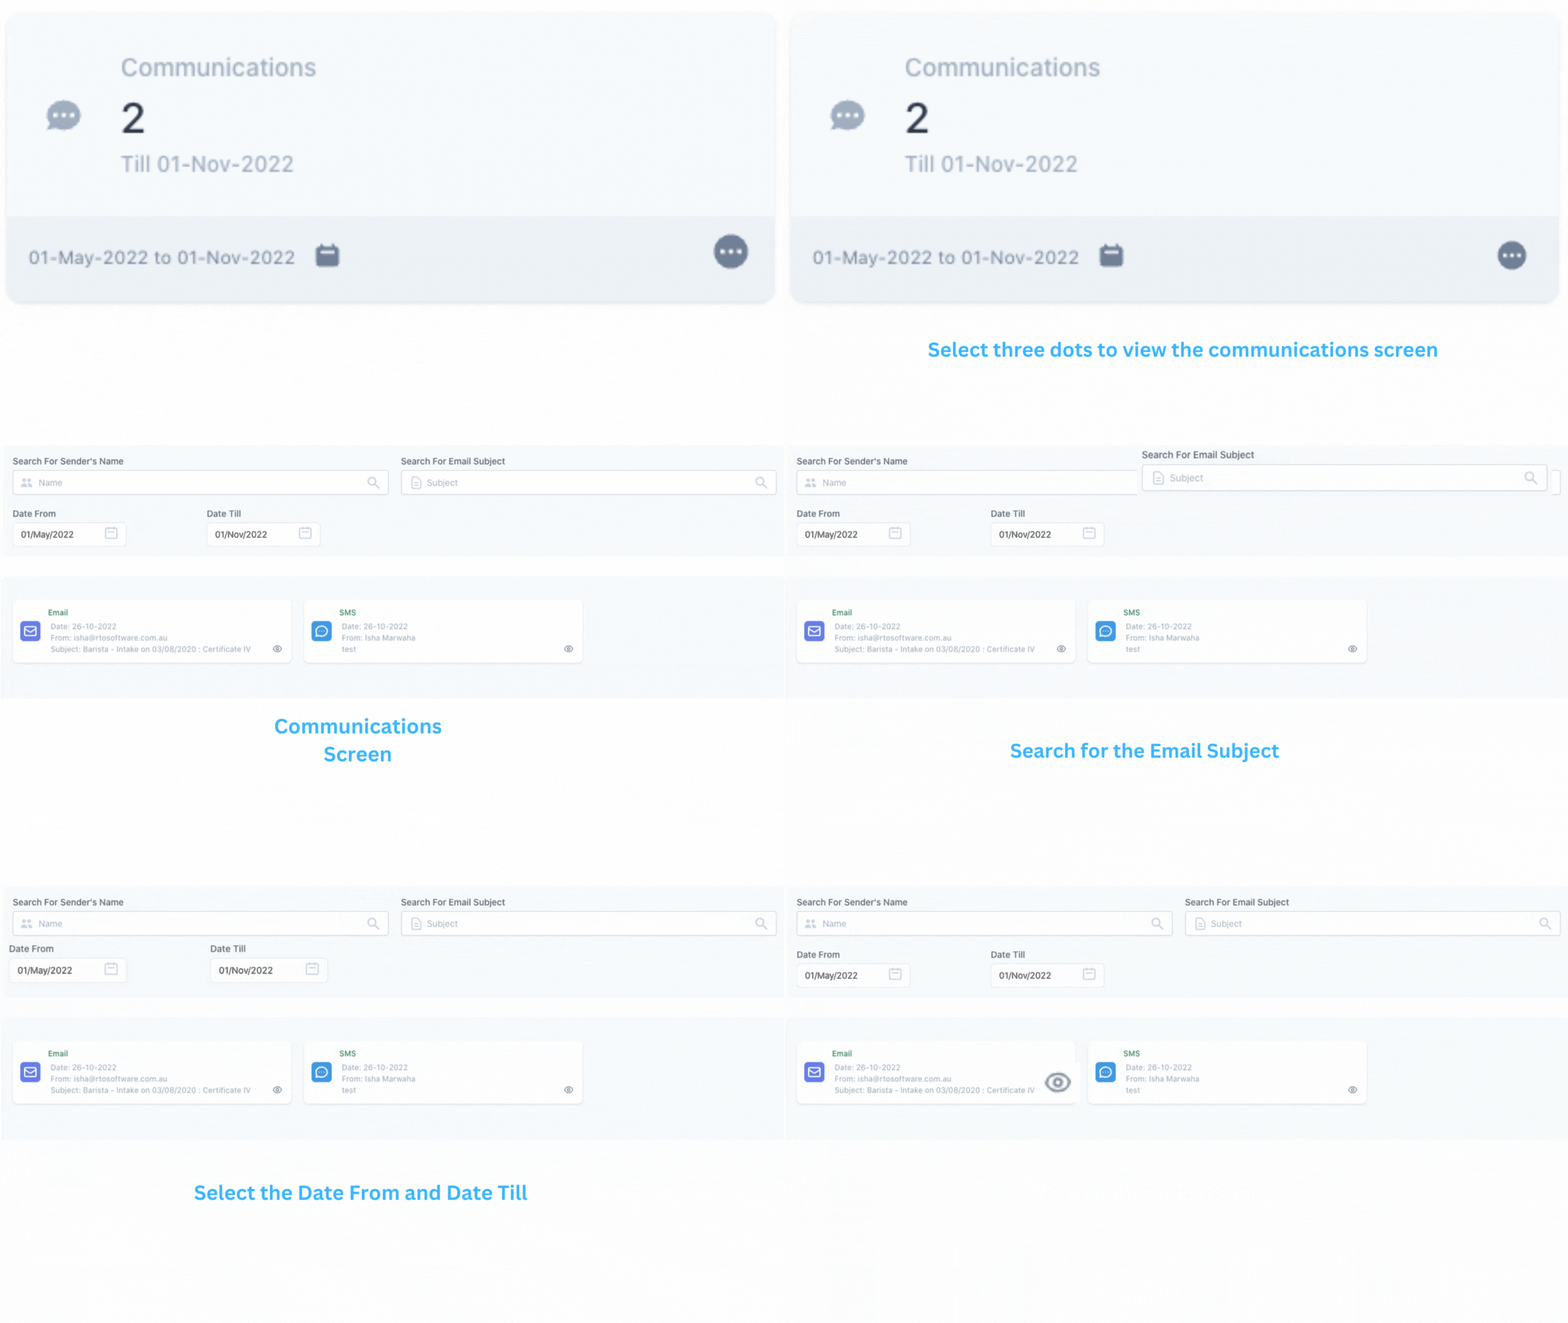
Agent Portal Dashboard – Communications Tile

This tile will show all the communications that Agent had with the student via email or SMS and this screen will allow the agent to do the following.

  • You can select the date range from the calendar to view communications accordingly
  • You can select three dots to view the communications screen
  • You can search for the sender’s name and email subject
  • You can apply Dates (Date From and Date Till)
  • You can view the communication from the view icon