Before using the pending payment welcome screen or processing any pending payments, there are several important business rules that you should follow to ensure accuracy and efficiency. These include:
Sr No.
Rules
1
If you are not seeing the pending payment welcome screen and instead are seeing the Commission payment screen, it could be because the system setting is not enabled for your site. The pending payment welcome screen is a feature that displays pending payment batches that have not been paid or approved yet.
2
To enable this feature, you will need to contact support to turn on the system setting for your site. Once the setting is turned on, you should be able to access the pending payment welcome screen and view all pending payment batches that require processing or approval.
3
The pending payment welcome screen is a system feature that displays all pending payment batches that have not yet been paid or approved. Once a payment batch has been marked as paid or approved, it will no longer appear on the pending payment welcome screen.
Choose the group of students for whom you want to raise invoices, and create the invoices or fees with the necessary details such as amount, due date, and any other relevant information. Review and confirm the invoices or fees before submitting them, and the system should generate and send them automatically to the selected students.
Here are some general steps you can follow to generate invoices in bulk:
IMPORTANT – When generating invoices in bulk, it’s important to note that you can complete steps 3 and 4 in any order. However, it’s crucial to remember not to select the “SAVE” button until you have completed both steps. In step 3, you will need to select the fees you want to include in the invoice, while in step 4, you will need to enter invoice information such as the date and any discounts or adjustments. Once you have entered all the relevant fees and invoice details, be sure to select the “SAVE” button at the top of the screen to save the invoice.
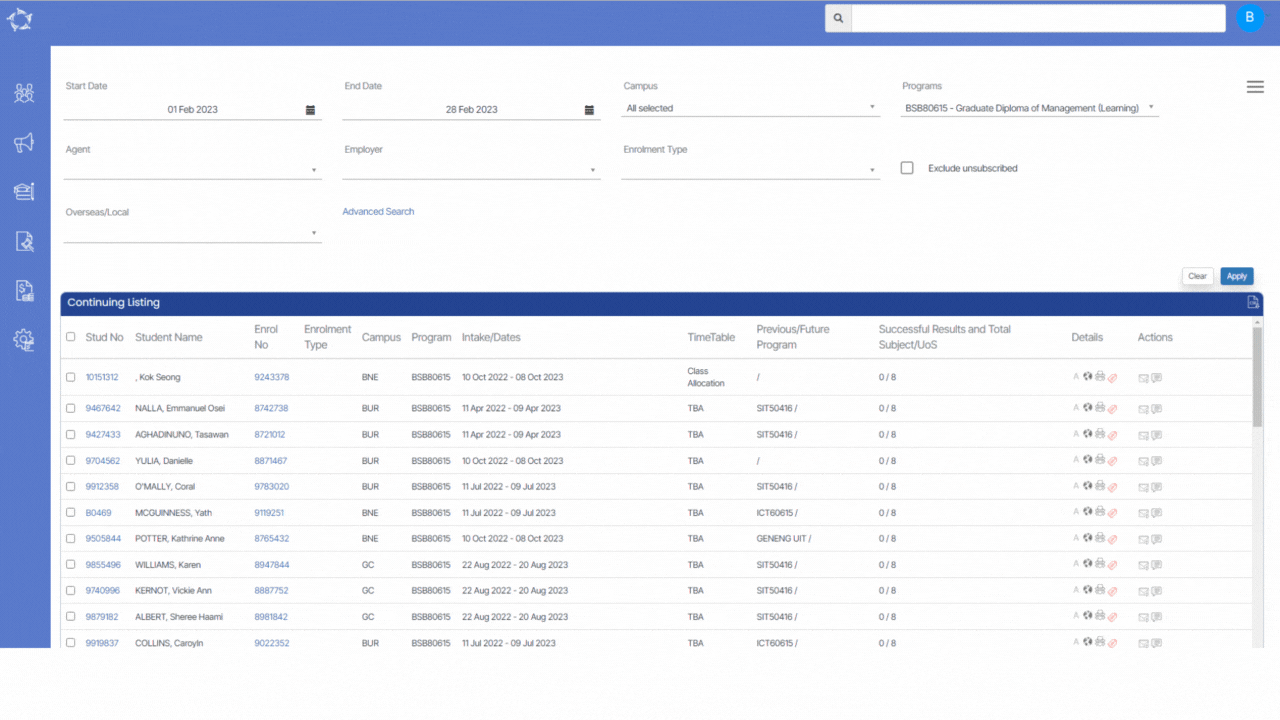
Step 1 – Navigate to the Continuing, Starters, or Finishers listing screen and select the tick box next to the student numbers for the students you want to generate invoices.
Step 2 – Select the “Burger Menu” (typically three stacked lines) in the top right-hand corner of the screen. From the dropdown menu that appears, select “Generate Bulk Invoices
Step 3 – When generating bulk invoices, you will need to select the fees you wish to include in each invoice. The process for selecting fees is similar to that of creating individual invoices from the Enrolment Dashboard. To select fees, go to the Fee Selection section and choose the Fee Type from the list. The system will then refresh the dropdown list for Fee Name, and you can select the relevant fee for the invoice. If necessary, you can adjust the amount or add a discount before adding the fee to the Fee Items section. It’s essential to select the “+Add” button to ensure the fee is added to the invoice. Once you have selected all necessary fees, you can proceed to review the invoice details and generate the invoices in bulk.
Step 4 – After selecting the fees for the invoices in the Fee Items tile, you can proceed to the Invoice Summary section. Here, you will see the total amount that will be invoiced, which includes any applicable discounts or adjustments. For example, you might see a total of fees that have been selected along with a discount of 10%. You will also need to select the invoice date, which will be used as the due date for the invoice. Once you have entered all of the necessary information, be sure to select the “SAVE” button located in the top right corner of the screen. This will ensure that the invoice is saved and linked to the selected enrolments.
Step 5 – To view invoices for a particular student, you can go to the Enrolment Dashboard and select the Financials tile. From there, select the Student tab and then select the “more…” option next in the bottom right corner of the screen. This will take you to the Student Financial detail screen to view a list of all the invoices associated with the selected enrolment. You can then review each invoice to see details such as the fees included, the invoice date, and the amount due.
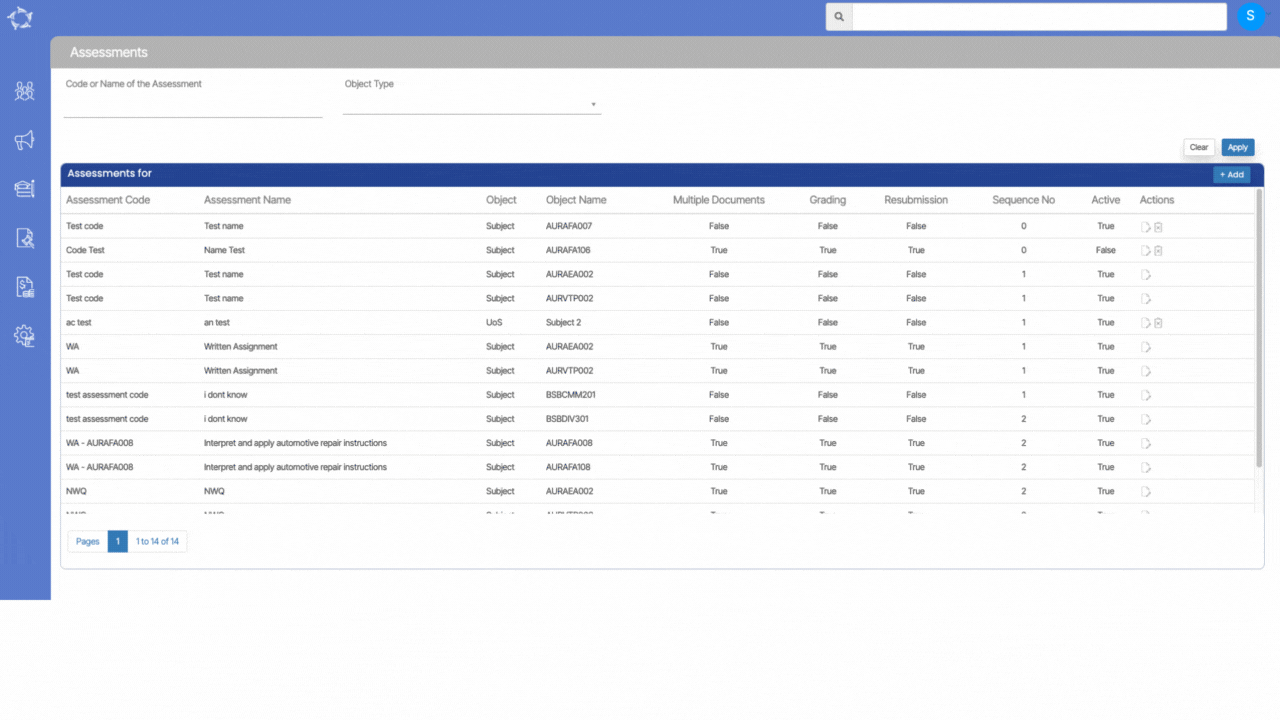
This screen will show you all the assessments in the grid that are in your system. You can search assessments with the Code or Name of the assessments in the search field for the object such as Subjects and Uos from the dropdown and select the apply button or hit the enter key from your keyboard.
To know more about the Icons under the Actions, select them here
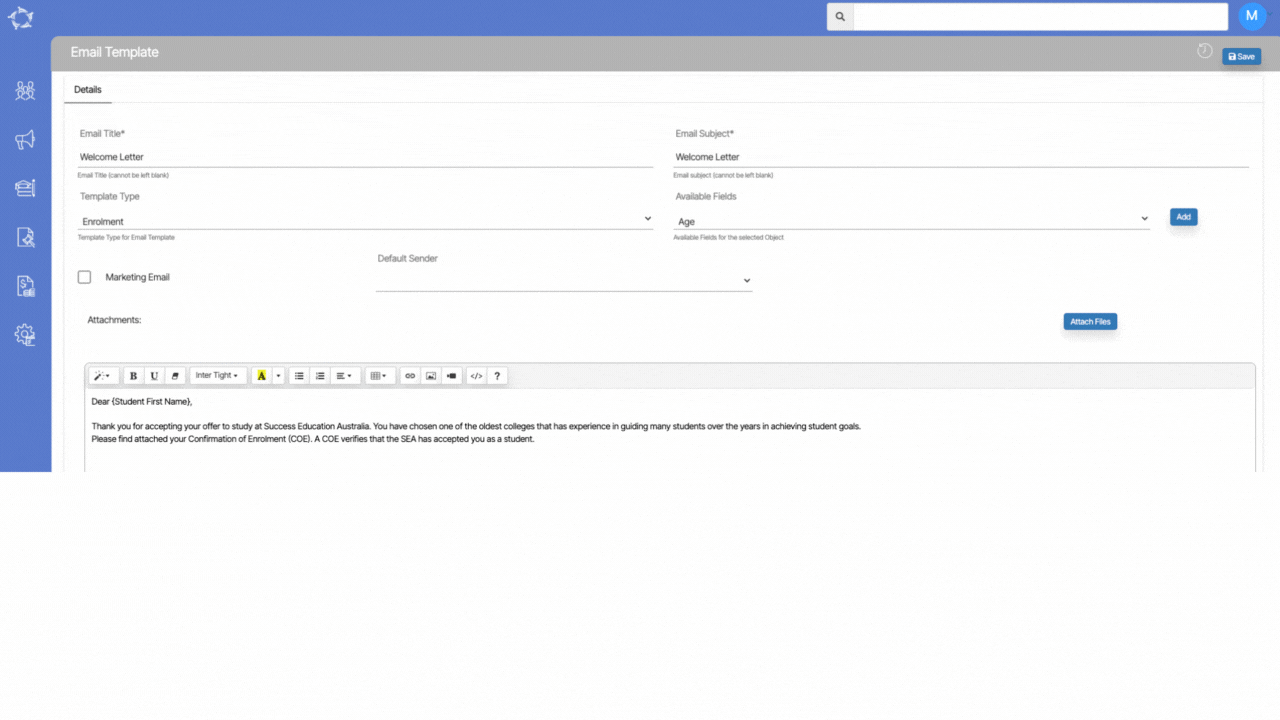
We have added new merge fields for Campus Program CRICOS code and Program CRICOS Name for customising the enrolments Email Template.
When you’re creating an email template for enrolments, you can now use these merge fields to automatically fill in the Program CRICOS code and campus program CRICOS code into the email.
Note – If the CRICOS code for the campus program is not updated on the “Campus > Linked Program” screen and the CRICOS name for the program is not updated on the “Program Entry” screen, then the information will not be printed in the merge fields when sending emails.
Here are some recent questions that have been asked and the answers to them.
Questions
Answers
How do I see the primary contacts for an agent in the Agent Welcome list?
Please select the read more link to know the answer.
In my web application form, one of our programs is not showing, why?
If you have an existing web application form for TEAMS and there are issues with it, please contact our support staff. If you would like to set up a web application or enquiry form for your TEAMS site, please also contact support.
Primary Contacts are those contacts that are linked to the agents with their contact information. Please see the below steps to list the primary contact on the Agent Welcome Screen.
The very first step is, you need to update the primary contact information of the person on the Agent Entry Screen > Burger Menu > Contacts Screen.
Select the +Add button to link the contact information and once you select it, the system will show you a pop window on the screen.
In the pop window, update the contact information as you required and Save.
IMPORTANT – Before saving the contact information on the pop window, If you wish to show the contact as a primary contact then you need to select the Primary Contact tick box for the contact.
When you are on the Agent Welcome Screen, you need to do the following steps:
Select the parameters as you required (including by selecting the List primary Contact tick box) and then select Apply Button.
The system will show the agents in the grid with their primary contact details.
Note – if the agent has a contact and they have a primary contact tick box is ticked for them then that agent entry will have the expand (+) icon against the agent code to see the primary contact.
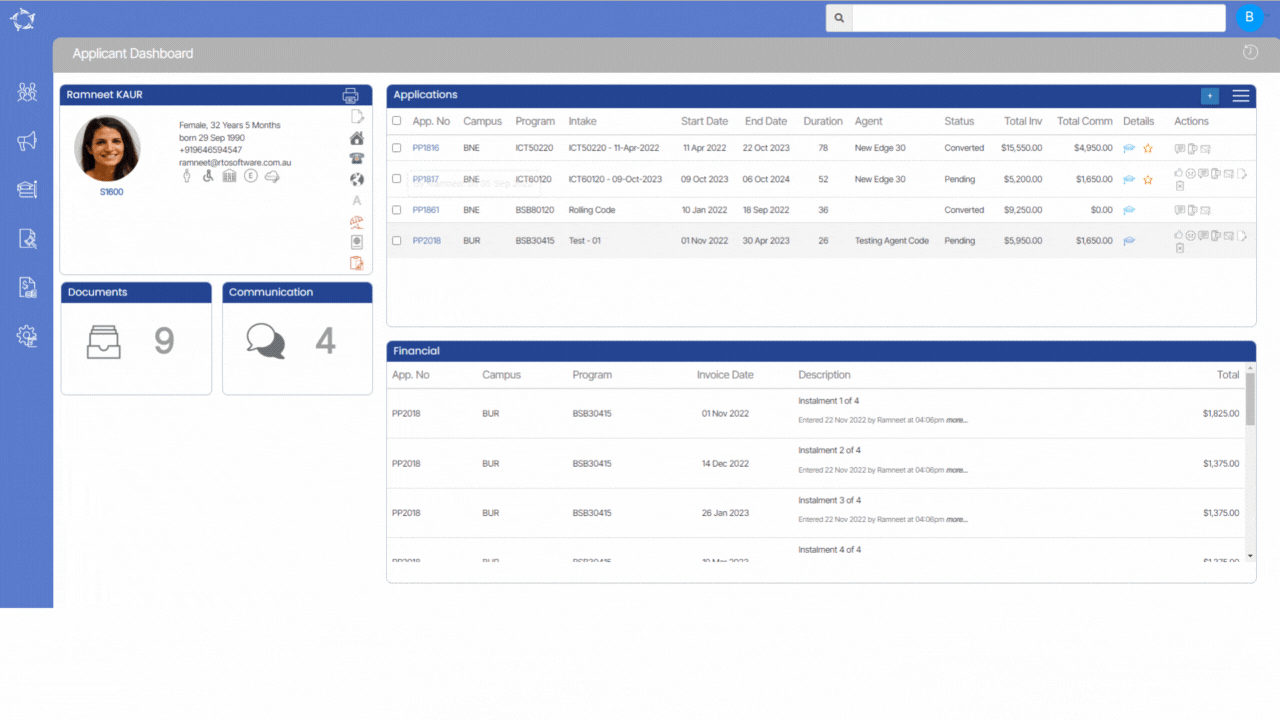
Applicant Dashboard > Applications Tile > Burger Menu
This screen allows you to modify the intake date for an applicant’s application at the applicant level when the application is not converted. This can be helpful in cases where the student needs to defer their application due to a visa delay or personal reasons. To simplify the process and save time, you can now modify the intake dates for multiple applications of the same applicant at once.
Note: When using this screen, ensure that all necessary changes to application dates are made before converting the application. If changes need to be made after the application is converted then you can make the changes from the Student Dashboard – Edit Enrolment/s Dates screen.
The below steps will explain to you how you can change the intake date:
To utilise this option, you need to select the specific application number for which you want to modify the intake dates.
Select the Burger menu icon on the Applications Tile where you manage the applicant’s application information. The Burger menu icon typically looks like three horizontal lines stacked on top of each other.
Look for the option titled “Edit Application/s Dates” and select.
The screen will then take you to the Edit Application/s Dates screen where you can modify the intake dates for one or more applications.
By default, the system will show the section for 1st application and you can expand other application sections by selecting the expand (+) button.
To enrol the applicant in a new intake, you must select the desired intake from a dropdown menu. Once an intake is selected, the system will automatically populate other fields such as the start date, study weeks, holiday weeks, and end date.
IMPORTANT – When changing the intake for an application, it may be necessary to update various dates associated with that application, including invoice dates, invoice due dates, and subject dates.
To make this process easier and more efficient, the system appears to have a checkbox labeled “Update subject dates and Generate New Invoices“. By selecting this checkbox, the system will automatically update the relevant dates and new invoices associated with the application to match the new intake. It is recommended that users always check this box to avoid the need for manual updates on a case-by-case basis.
Once all the above steps are done, select the save button, and the system should update the application dates as per the changes you have made. It is recommended that you double-check all dates and information to ensure that everything is correct before proceeding.
This screen will allow you to search for an agent. You can simply type the agent name or agent code in the search field and it will show the relevant suggestions where you can select the appropriate agent. Once you have searched and selected the agent then the system will open Agent Dashboard for you.