The Intakes welcome screen will show you the basic information about the intakes in the grid that are active in your database. You can search for a specific intake with the Intake code in the search field and then hit the enter key or select the Apply button. The system will show you the relevant searched data in the grid.
You will also be able to edit the intake by selecting the edit icon under the actions column or you can add a new intake from the + Intake button.
IMPORTANT – We believe that staying informed about the latest developments in our software is vital for optimising your experience and maximising the benefits of using our system. To view the latest updates and modifications on the Edit Enrolment AVETMISS Settings screen, we kindly request you to navigate to the History icon showing above in the top left corner of the screen. By selecting this icon, you will gain access to a detailed log of all the recent changes made to TEAMS.
Overview
The first thing to know is that AVETMISS stands for the Australian Vocational Education and Training Management Information Statistical Standard. It is the national data standard that ensures consistent and accurate capture and reporting of Vocational Education and Training (VET) information about students.
The screen will show you two tabs namely Enrolment AVETMISS Settings and Subject AVETMISS Settings.
The Enrolment AVETMISS Settings tab will allow you to update the AVETMISS settings for the enrolment whereas the Subject AVETMISS Settings will show you subject level AVETMISS settings.
Enrolment AVETMISS Settings Tab
The below table will explain each and every field of Enrolment AVETMISS Settings:
Columns
Explanations
Include in National Export
Tick the box if you want to include enrolment in national export.
Purchasing Contract
You can select the purchasing contract from the dropdown.
State Training Authority
From the dropdown menu you can select State Training Authority.
Fee Exemption
From the dropdown menu, you can select the fee exemption.
Any Disability
By marking this option you can select the disability of the student.
At School
By marking this option you can select the school type and enter the school name.
Proficiency in English
From the dropdown menu you can select the english proficiency of the student.
Study Reason
You can select the study reason from the dropdown menu.
Funding Source National
From the drop down you can select funding source national.
Funding Source – State Training Authority No
You can enter the funding source – state training authority no in this field.
Current Labour Status
You can select the current labour status from the dropdown.
Prior Educational achievements
By marking this option, you can select the educational achievements of the students. When you select the level of prior education, for example, a Bachelor’s degree, etc, you can also select if the level of education is equal to Australian(A), Australian Equivalent(E), and Internation(I).
Special Contract
From the dropdown menu you can select special contract.
Training Location
From the dropdown menu, you can select the training location.
Competency Enrolment
Tick this option if the enrolment is competent.
Student Still At School
Tick this option if the student is still in school.
Full Time Student
Tick this option if student is studying full time.
Training Contract Identifier
You can enter the training contract identifier number in this field.
Overseas Student
Tick this option if student is from overseas.
Date Program Completed
From the calendar, you can select a date when the program is completed.
Smart and Skilled enrolment
For smart and skilled enrolment.
AASN
From the dropdown menu, you can select the student’s Australian Apprenticeship Support Network.
ANP
From the dropdown menu you can select student’s Apprenticeship Network Provider.
Subject AVETMISS Settings Tab
The below table will explain every field of Subject AVETMISS Settings:
Fields
Explanations
Internal Percentage
You can add Internal Percentage in this field.
External Percentage
You can add External Percentage in this field.
Workplace Percentage
You can add Workplace in this field.
Pre-dominant Delivery Mode
It will automatically be filled based on the Internal Percentage.
This icon will allow you to edit Subject AVETMISS Setting.
This tick box will allow you to select subjects in bulk.
This icon is displayed in two sections. In the grid and in the grid header.
If you are excluding a particular subject from AVETMISS then you can select this icon against that single subject and the system will show you a pop message ensuring confirmation as OK to exclude the subject from AVETMISS. If you wish to exclude multiple subjects then you can simply select tick boxes against the subjects and select the icon above the grid in the blue ribbon.
Please note – Once you have excluded the subjects from the Avetmiss submission, then the icon will turn red colour.
The training plan and result screen will give you an overview of the subjects linked to enrolment and their results. We have made some latest new enhancements changes to the Training Plan and Results Screen.
In the new look of the Training Plan and Results screen, You will see three new tabs on the screen above the grid.
Current – Subjects currently linked to the enrolment will be shown under this tab.
Inactive – In this tab, you will see all the subjects flagged as inactive. To make any subject inactive, select this icon under the actions column in the current tab. And the system will ask for your confirmation and by selecting OK, the system will move the subject from the current tab to the Inactive tab and flag the subject as inactive. To reinstate any inactive subject to active you can select this icon and again the system will ask for your confirmation. Confirming the same the system will flag the subject active and move it back to the current tab.
Delete – To Delete a subject from the current or inactive tab, select this icon you can see the deleted subject under the deleted tab. You can also restore the deleted subject by selecting this icon under the actions column. Once you have given the system confirmation, it will restore the subject to the tab from where it was deleted. It can be either inactive or current. Also, If you have added and saved notes for any subjects on this screen the system will show you the notes in green color.
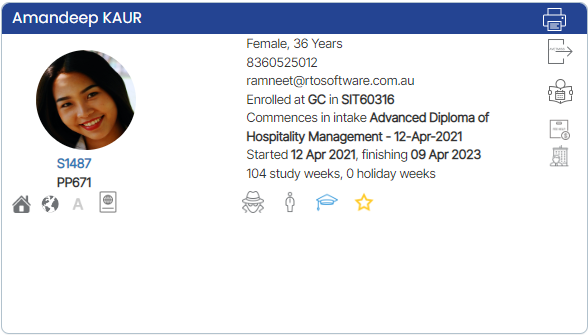
On the Enrolment Dashboard, Under the Student Profile Tile 2nd vertical icon allows you to start the enrolment. It has three different colors – white, red and green- indicating whether enrolment is yet to start, not yet started or started. You can start the enrolment by clicking on this icon.
The white icon indicates the enrolment is yet to start i.e. enrolment start date is in the future.
The red icon indicates that the enrolment’s start date was in the past and it is not yet started.
The green icon indicates that the enrolment is started.
On the Enrolment Dashboard, Under the Student Profile Tile, 3rd vertical icon allows you to finish the enrolment. It has three different colors – white, red and green. You can finish/ unfinish the enrolment by clicking the finish icon.
The white icon indicates the enrolment is yet to finish i.e. enrolment end date is in the future.
The red icon indicates that the enrolment’s end date was in the past and is not yet finished.
The green icon indicates that the enrolment is finished.
Application Dashboard > Application Profile Tile > Training Plan and Results Icon
This screen is all about the subjects/modules/units linked to the application, their start and end date, results and results date. It is visually distributed in 3 tiles (Applicant Profile tile, Group Training Plan, and Training Plan and Results tile) for Training Plan and Results tile, you can edit the dates, results, and many more.
Group Training Plan Tile
This tile displays the information related to how the system is populating subject dates. You can also change the subject dates by using one of the given options in this tile. Also, it will allow you to allocate a group training plan to the application.
When selecting the icon , the pop window will appear on the screen and you can select the appropriate GTP from the dropdown and select the SAVE button.
Once you select the save button, the screen will show you the pop message on top of the screen with your site name saying the below-highlighted message. Select OK to continue or Cancel.
Training Plan and Results tile
This tile will show you all the subjects and different columns related to the subjects. You can edit the results and their dates, send emails and SMS from the Actions column.
Note – You can also add new subjects, when you select the + icon, the pop window will appear.
There are two radio buttons and you can select the desired radio button and update the filters accordingly.
Program linked to the Application or – You can select this radio button if you want to add the subject that is linked to the program. It will show you drop down for the subject code that is linked with the program
From the full list of Subjects in the system – You can select this radio button if you wish to add the subject from the list of subjects in the system. This is a magic search field and you can search for the desired subject.
Please note – Other fields are very basic and self-explanatory and you can update those fields accordingly.
This screen will show you the basic information about the applicant on the application dashboard. Like all dashboards, it is comprised of a number of different tiles that will allow you to navigate to different screens and information linked to the application.
Tiles
Here are all the tiles present on an application dashboard. You can learn more about each tile by selecting the image of the tile.
This screen will allow you to edit the AVETMISS details of an Application and Subject. When you are on this screen, you will see two different tabs:
Application AVETMISS Settings – In this tab, you can update the AVETMISS settings for the application.
Subject AVETMISS Settings – In this tab, you can update the subject AVETMISS settings.
Explanation of the fields below for Application AVETMISS settings
Application AVETMISS Settings
Explanation
Include in National Export
You can tick this box if you want to include this application in national export.
Purchasing Contract
You can select the purchasing contract from the dropdown menu.
State Training Authority
You can select the state training authority from the dropdown menu.
Fee Exemption
From the dropdown menu, you can select the reason for fee exemption.
Any Disability
You can tick this box if the applicant is disabled and select their disability from the dropdown.
Proficiency in English
You can select an applicant’s proficiency in English from the dropdown.
Funding Source National
You can select the funding source of the applicant from the dropdown.
Study Reason
You can select the applicant’s reason for studying a particular course from this dropdown.
Funding Source – State Training Authority No
State training authority numbers should be added in this field.
Current labour status
From the dropdown, you can select the applicant’s labour status.
Prior educational achievements
Tick this box and you will be able to select the applicant’s prior education achievements.
Training location
From the dropdown, you can select the training location.
Training Contract Identifier
You can add a training contract identifier number in this field.
Overseas Student
Tick this box if the applicant is from overseas.
Do not include in AVETMISS submission
Tick this box if you do not want to include a particular application in the AVETMISS submission.
Smart Skilled Contract Enrolment
Tick this tick box if the application is a smart skilled application, also when you tick this tick box Funding source national and state training authority number should be auto-filled.
Student Still At School
Tick this box if the student is still in school and select the school type from the dropdown.
AASN
Here you can add information about the Australian Apprenticeship Support Network.
ANP
Fields Explanation below for Subject AVETMISS settings
Fields
Explanation
Hours Attended
You can add the hours attended by the student for the specific subject.
Training Location
From the dropdown, you can select the training location.
Internal
You can make the internal value 100 if the applicant wants to study onshore (classroom-based).
External
You can make the external value 100 if the applicant wants to study offshore.
Workplace
If the applicant is employed and wants a work-based study, then you can make the workplace value 100. Pre-dominant Delivery Mode – It will be auto-populated according to the values you will put in the Internal, External, and Workplace fields.
The orientation date is a period before the start of an academic year for your college students.
You can add the orientation date while creating an application or you can add the orientation date at the enrolment level on the edit enrolment screen. You need to select the “Does this Enrolment require Orientation?” tick box and it will show you the Induction/Orientation field to add the orientation date from the calendar.
Note: Once you added the orientation date, it will show you a star icon as yellow with a tooltip showing the orientation date on the Application Dashboard and Enrolment Dashboard.
There are two Student type radio buttons New Student and Returning Student in TEAMS and you can select at the applications level while choosing the program for the application or you can select them at the enrolment level on the edit enrolment screen.
New Student – When you select this radio button for the student type then you will see a blue graduation cap at the application and enrolment level.
Returning Student – when you select this radio button for the student type then you will see a red graduation cap at the application and enrolment level.


 under the actions column in the current tab. And the system will ask for your confirmation and by selecting OK, the system will move the subject from the current tab to the Inactive tab and flag the subject as inactive. To reinstate any inactive subject to active you can select this icon
  and again the system will ask for your confirmation. Confirming the same the system will flag the subject active and move it back to the current tab.
 you can see the deleted subject under the deleted tab. You can also restore the deleted subject by selecting this icon


 , the pop window will appear on the screen and you can select the appropriate GTP from the dropdown and select the SAVE button.

 at the application and enrolment level.
 at the application and enrolment level.