Main Dashboard > Academics > Allocate Subjects/UoS
This screen provides the functionality to assign a subject to multiple enrolments simultaneously while specifying the start and end dates for the subject. Additionally, it allows you to select one or multiple subjects that are already linked to the enrolment, which can be deleted or removed as the new subject that you are allocating will replace them.
To do this, you need to follow three different steps on three different screens.
Step 1
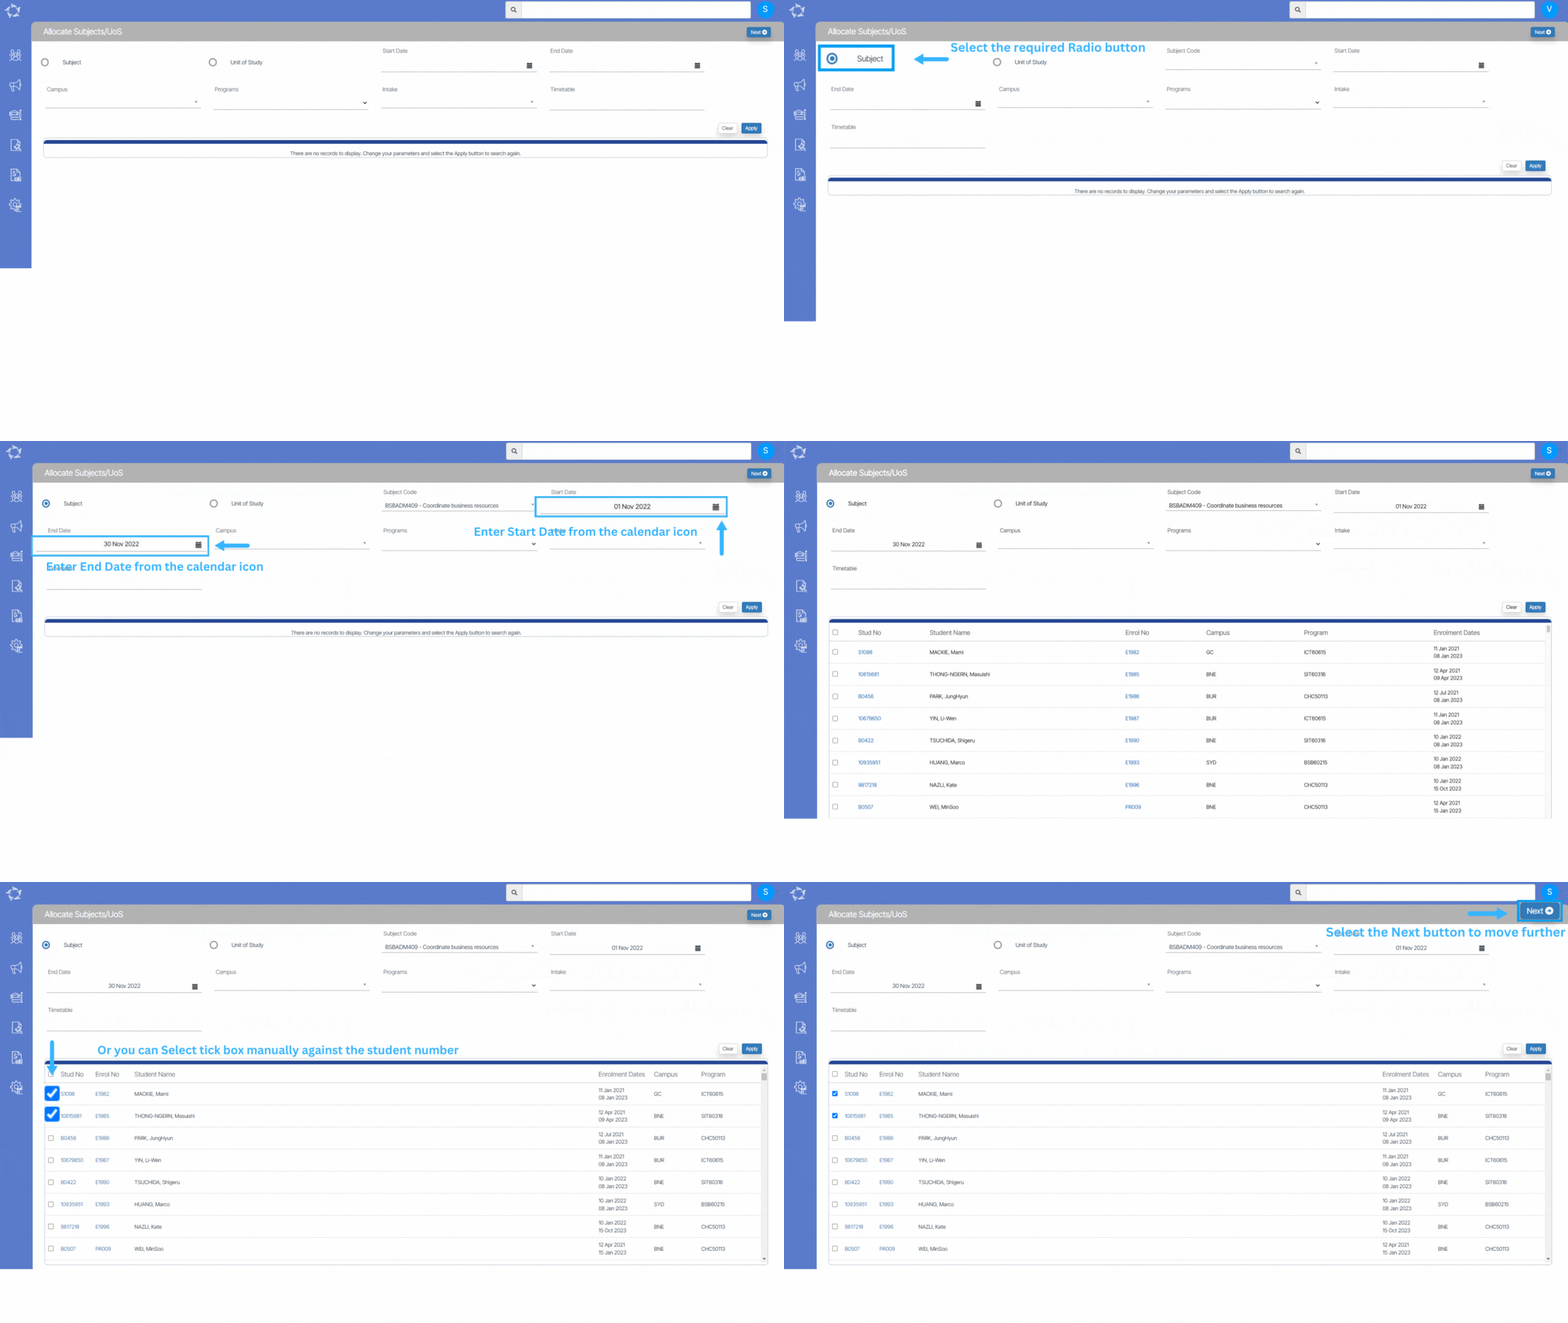
The first step of this screen involves selecting various filters to narrow down the search for subjects that need to be allocated to enrolments. These filters include subject code, subject dates, campus, program, intake, and timetable. Depending on the radio button selected for Subjects and Units of Competency (UoC), the appropriate filter options will be displayed.
After selecting the appropriate filters, you must select the Apply button to view the grid displaying the student enrolments that have the subject linked to them. This grid will show all the relevant enrolment details, such as the student’s name, enrolment number, and enrolment dates. To allocate the subject to a specific enrolment, users must select the tick box against the desired enrolment and click on the “Next” button. This step is essential to ensure that the correct subject is allocated to the appropriate enrolment and to avoid any errors or confusion. By selecting the appropriate enrolment, users can proceed to the next step and complete the subject allocation process.

Step 2
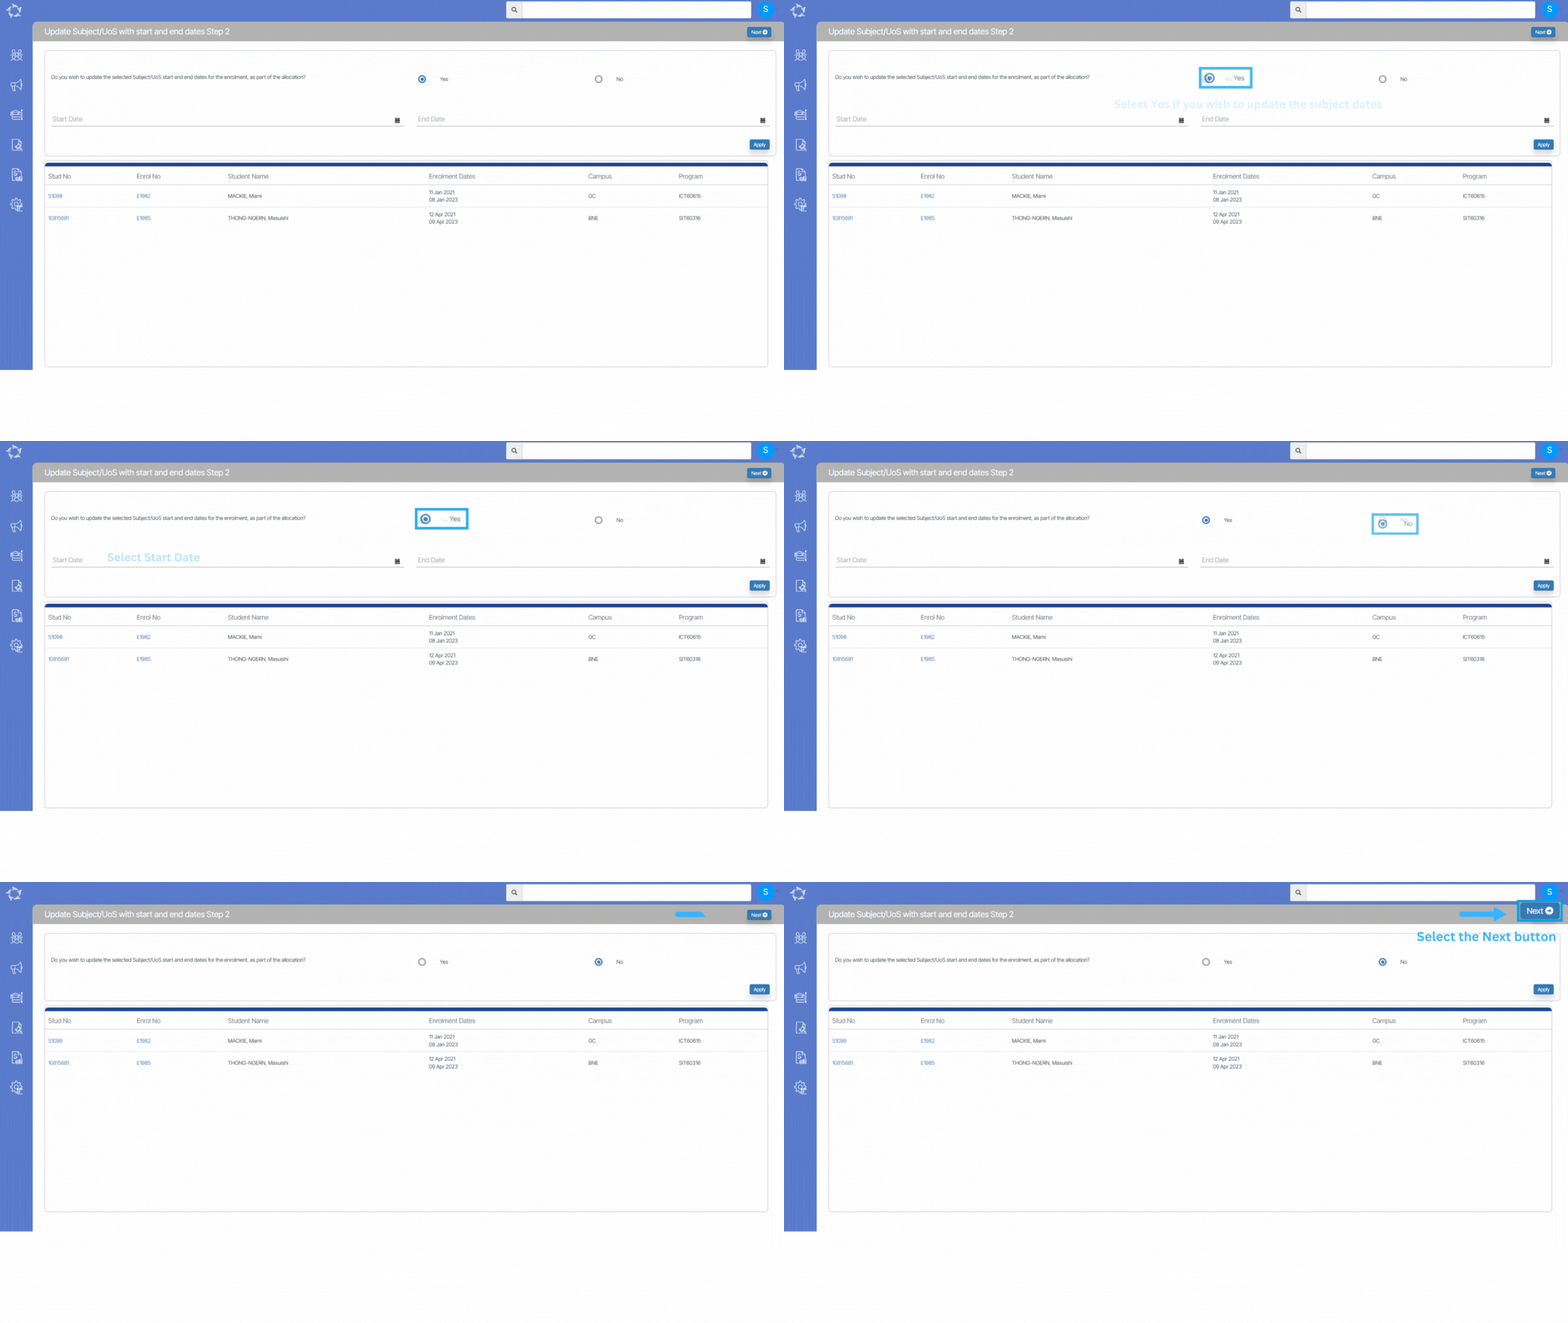
During the second step of the process, you will be presented with the option to update the start and end dates for the Subject/Unit of Study that you have selected for enrolment. This will be presented to you in the form of two radio buttons, Yes and No.
When you choose to update the dates for selected subjects, the system will prompt you to enter the new Start Date and End Date in the provided fields. After entering the dates, you will need to select the Apply button. Once you do this, the screen will refresh and display two tabs: Subject/UoS dates cannot be updated and Subject/UoS dates can be updated. These tabs will show you a grid of enrolment for the subjects that you can and cannot update the dates for.
If you select No, it will indicate that you do not wish to make any changes to the subject dates. Once you have made your selection, you can proceed further by selecting the Next button.
IMPORTANT – There are enrolments you have selected that cannot have the Subject/Uos {Code – Name} deleted as it has a final result. The system will continue to complete the previous steps of allocating the Subject/UoS to the enrolments and where applicable updating start and end dates. However, you will need to go to the Training Plan and Results screen for the enrolment and delete this Subject/UoS manually.

Step 3
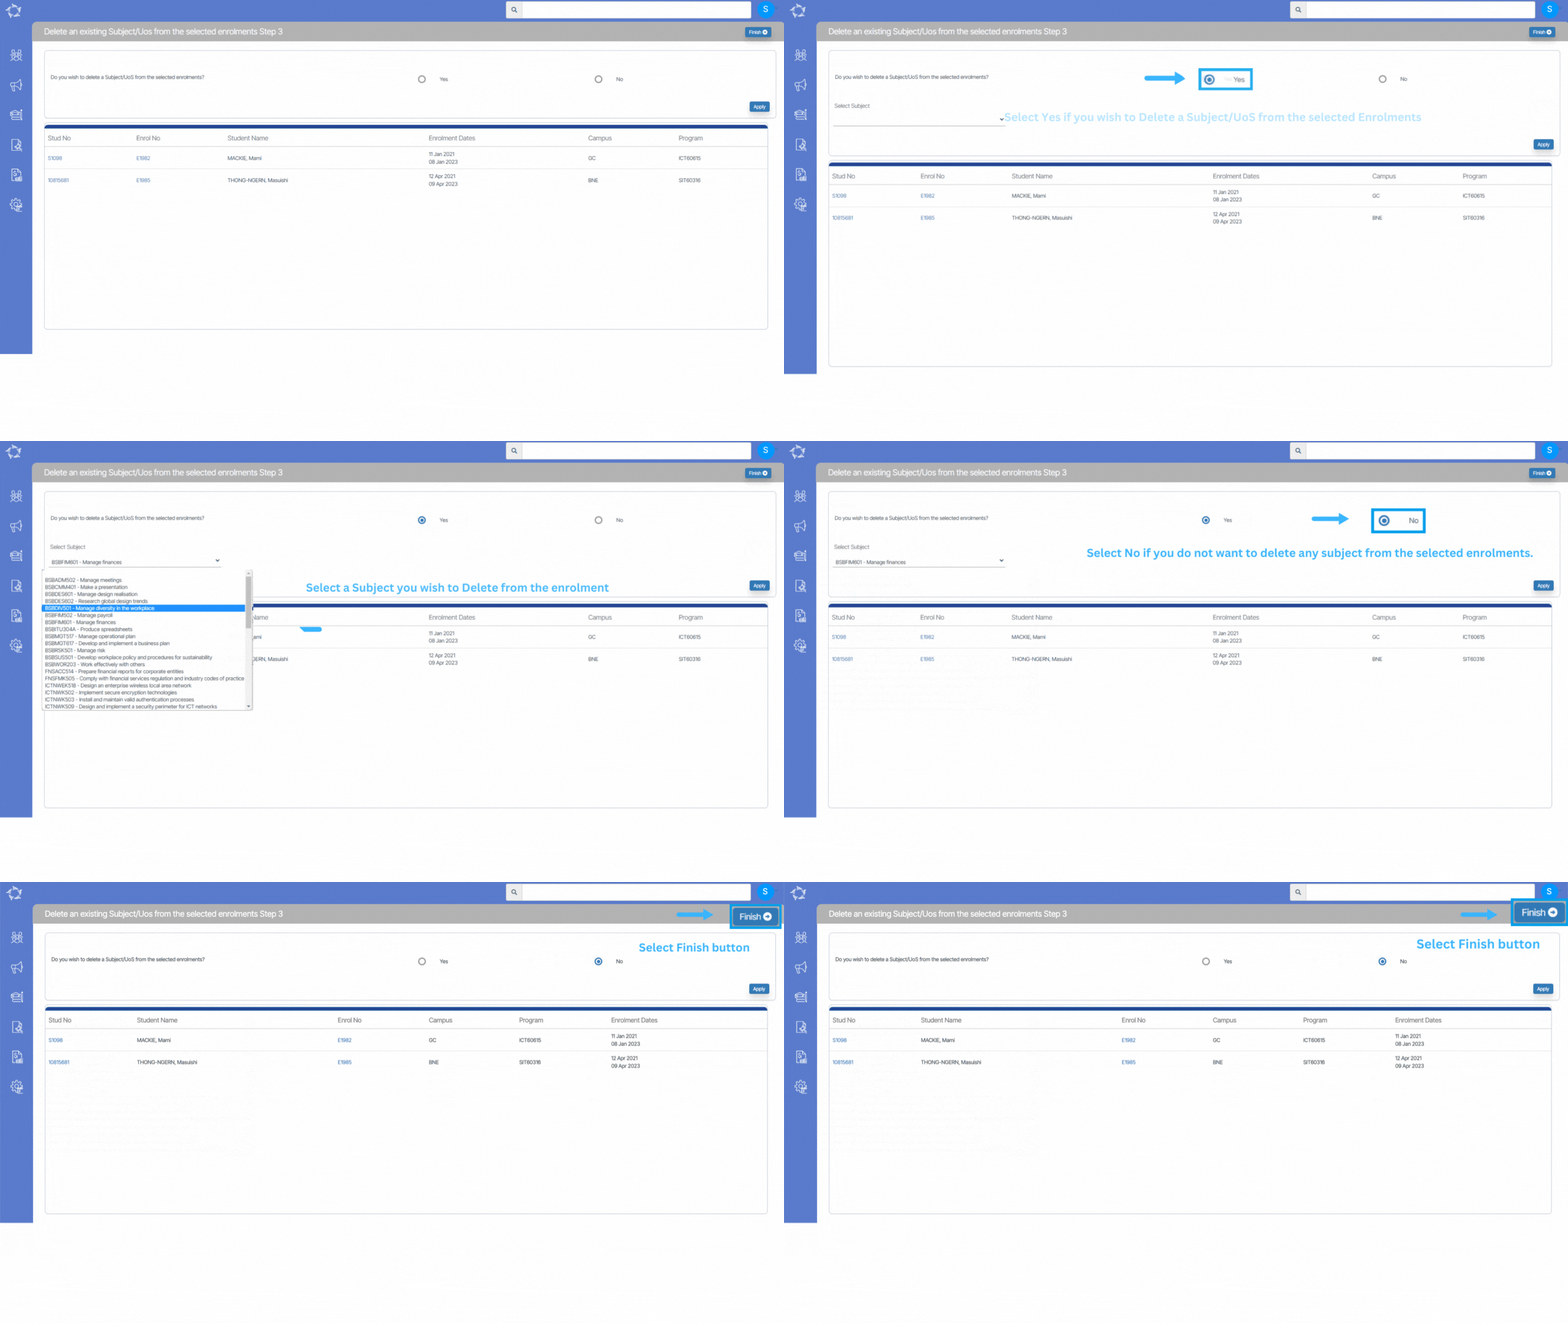
The final step in this process involves deciding whether you want to delete a Subject/UoS from the selected enrolments. You will be presented with Yes and No radio buttons to choose from. If you select Yes, a drop-down list of subjects will appear on the screen. You can then choose the subject you wish to delete and select the Finish button. This will complete the deletion process and remove the selected subject from the enrolments.

If you have any queries, please do not hesitate to contact us on 1300 85 05 85 or email us on support@rtosoftware.com.au
