Main Dashboard > Academics > Unit of Studies > Unit of Study Button
To add or edit a unit of study, start by selecting the + Unit of Study button. This will take you to the Unit of Study Entry screen, where you’ll find various fields to complete. Make sure to enter all the necessary information in each field, including the code and name of the unit of study, its descriptive code and descriptive name, the campus name and other relevant details. Once you’ve filled in all the required fields, select Save. This will ensure that your unit of study is properly recorded and can be easily accessed and managed in the future.
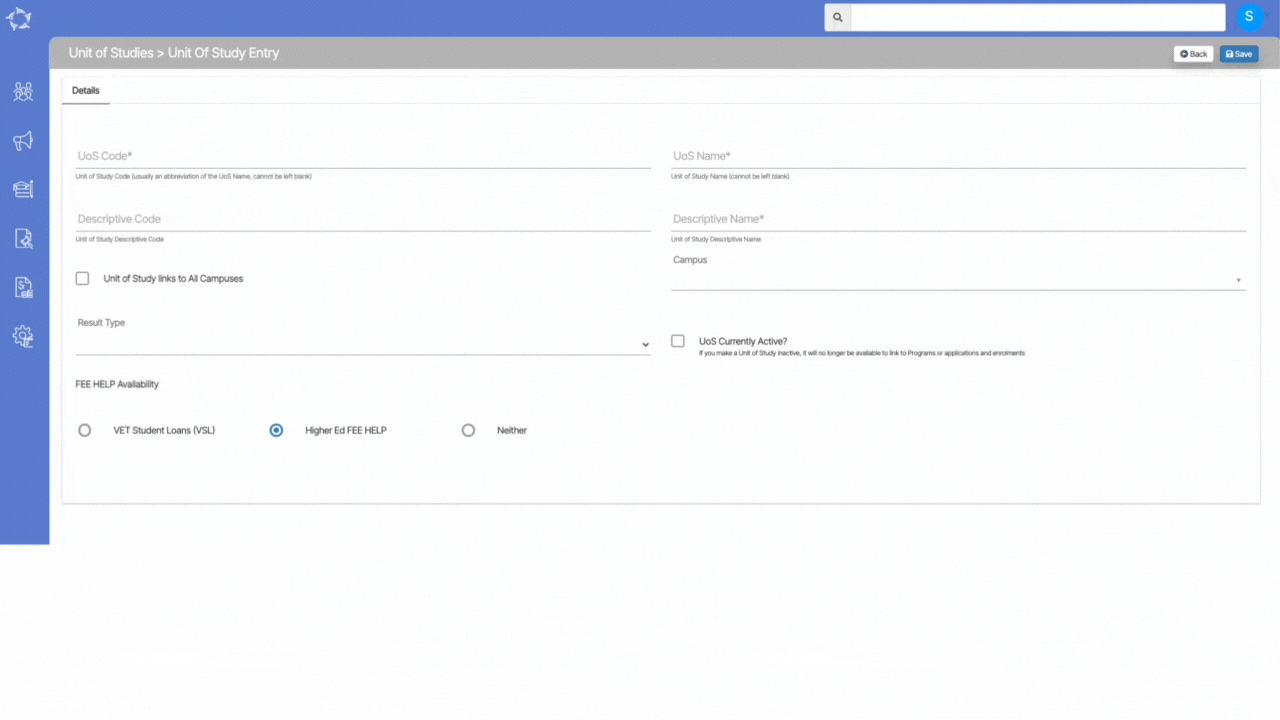
Explanation of the fields on the Unit of Study Entry Screen is below:
| Fields | Explanation |
|---|---|
| UoS Code | This is a mandatory field and this field cannot be left blank |
| UoS Name | This is a mandatory field and this field cannot be left blank |
| Descriptive Code | You can write UoS Descriptive Code in this field. |
| Descriptive Name | You can write UoS Descriptive name in this field. |
| Unit of Study to All Campuses | Select this box if you want to link the UoS to all campuses. |
| Campus | You can select desired campuses manually from this dropdown. |
| Results Type | From the dropdown, you can select the result type as Competency Based, Descriptive Based or Grading Based |
| UoS Currently Active | Select this box to make the UoS active. |
| FEE-HELP availability. | This field has two three radio buttons: VET Student Loans (VSL), Higher Ed FEE HELP and Neither. Select the desired option. |
If you have any queries, please do not hesitate to contact us on 1300 85 05 85 or email us on support@rtosoftware.com.au