Main Dashboard > Academics menu > Timetable Button > Timetable Entry Screen
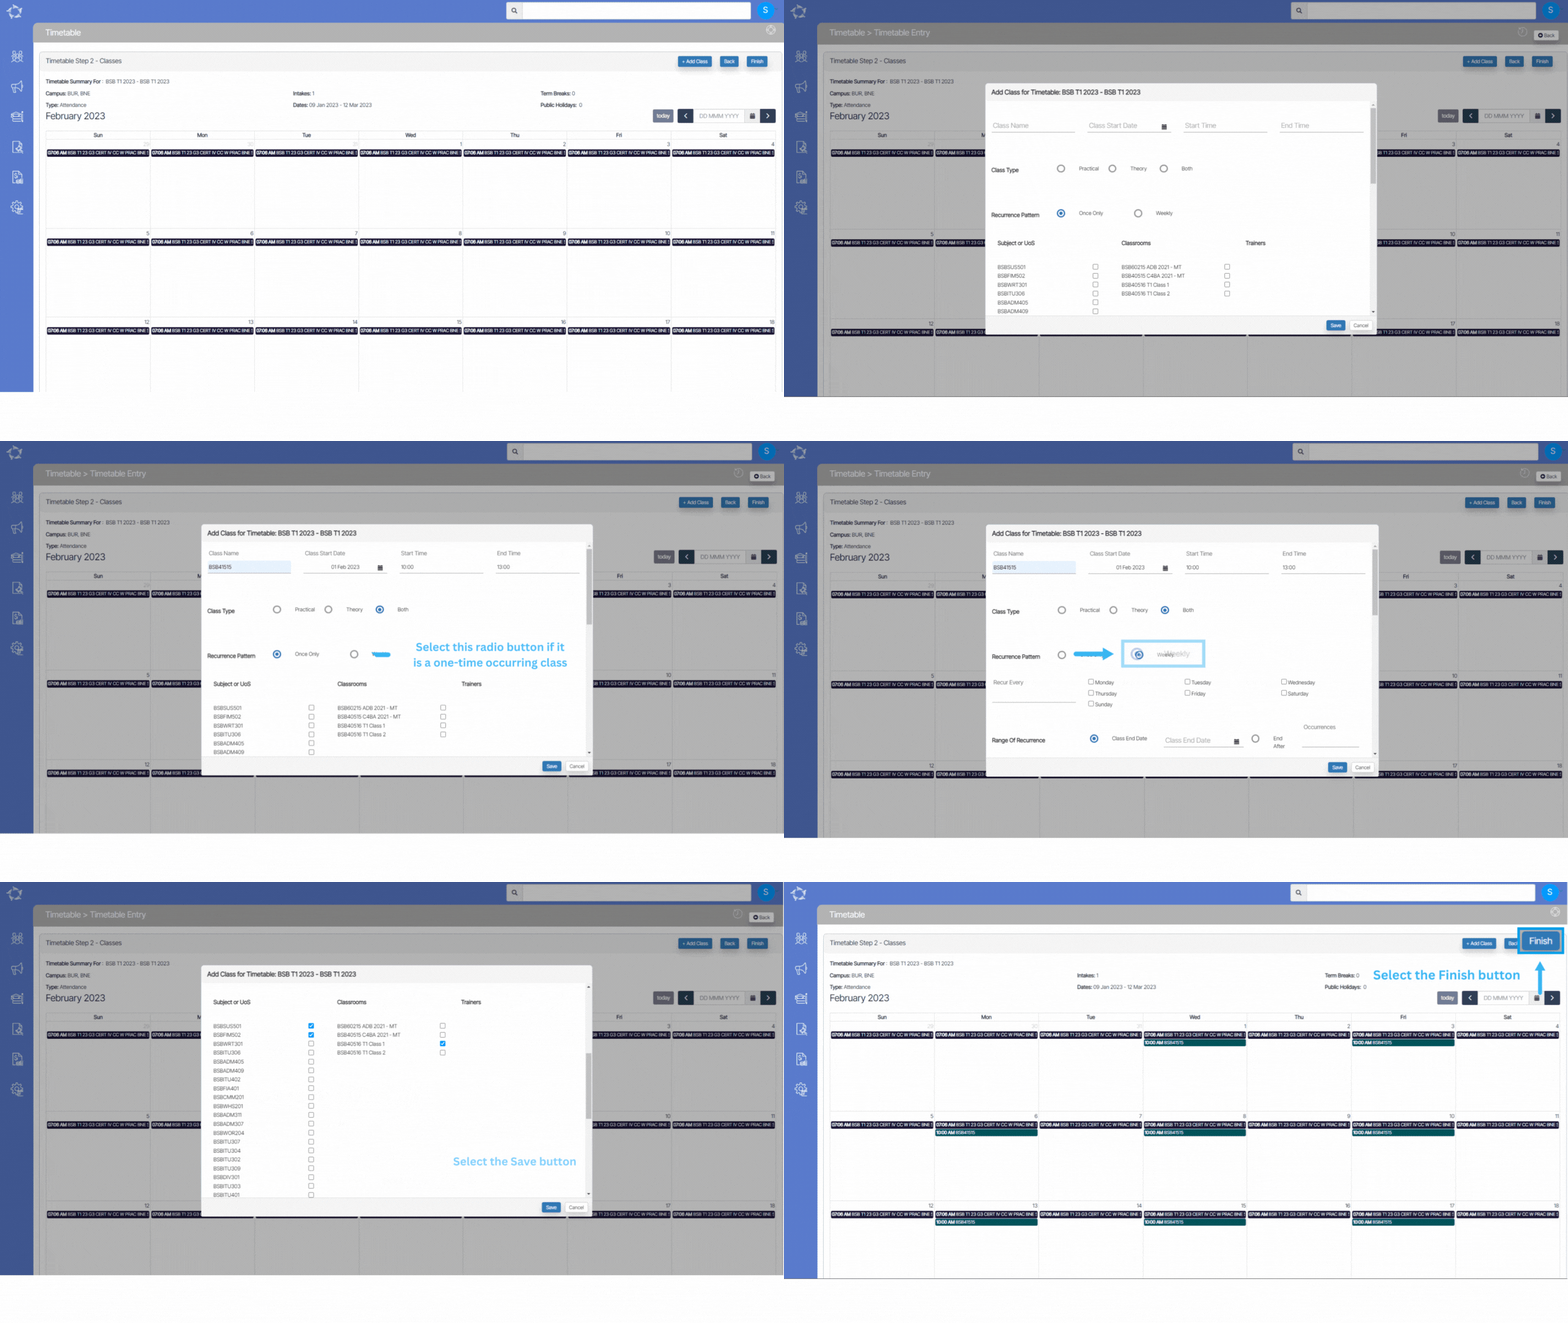
After you have entered the basic information for the timetable in the Timetable Entry Screen Step 1, you will be taken to a screen that provides you with an overview of the timetable details. This screen will give you a summary of the information you have entered so far and allow you to create classes for the timetable.
The information will be displayed in a calendar view, which can help you to visualise the timetable. To create classes for the timetable, you will need to select the +Add Class button. This will allow you to add classes to the timetable structure.
Once you selected the add button, it will open the floating window on the screen where you need to do the following steps:
- Class Name – This can be the name of the Program or Subject that the class is associated with. You will need to add the appropriate Class Name.
- Class Start Date – This is the date on which the class will start. You will need to enter the appropriate date using a calendar icon.
- Start Time – This refers to the time at which the class will start. You will need to select the appropriate start time using a start time field.
- End Time – This refers to the time at which the class will end. You will need to select the appropriate start time using the end time field.
- Class Type – This label has three radio buttons such as Practical, Theory or both. (If the class is a practical class, you will need to select the Practical radio button. If the class is a theory class, you will need to select the Theory radio button. If the class is both a practical and theory class, you will need to select the Both radio button.)
- Recurrence Pattern – There are two radio buttons to choose from: (One-Time: Select this radio button if the class will only occur once and will not be repeated and Weekly: Select this radio button if the class will occur on a regular, weekly basis).
- Recur Every – Recur Every value should be set to 1. You can also select the specific weekdays on which the class will occur. You can do this by selecting the checkboxes next to the desired weekdays in the Week Days section. For example, if the class will occur every Monday, Wednesday, and Friday, you would select the checkboxes next to Monday, Wednesday, and Friday in the Week Days section.
- To select the subject or unit of study for the class, you can use the tick boxes. This will allow you to select the appropriate subject or unit of study from a list of options. Similarly, to select the classroom for the class, you can use the tick boxes labeled Classroom in the add class window. This will allow you to select the appropriate classroom from a list of options.
- Finally, to select the trainers for the class, you can use the tick box labeled Trainers. This will allow you to select the appropriate trainers from a list of options.
- Once you have added all the necessary classes to the timetable by following the steps mentioned earlier, you can select the Save button to save the changes made to the timetable. After selecting Save, the screen will refresh and display all the classes that you have created so far in the calendar view.
Note – If you need to add more classes to the timetable, you can repeat the same process by selecting the +Add Class button and following the steps mentioned earlier. Once you have added all the required classes to the timetable, and you are satisfied with the details entered for each class, you can select the Finish button to create the timetable.

If you have any queries, please do not hesitate to contact us on 1300 85 05 85 or email us on support@rtosoftware.com.au
