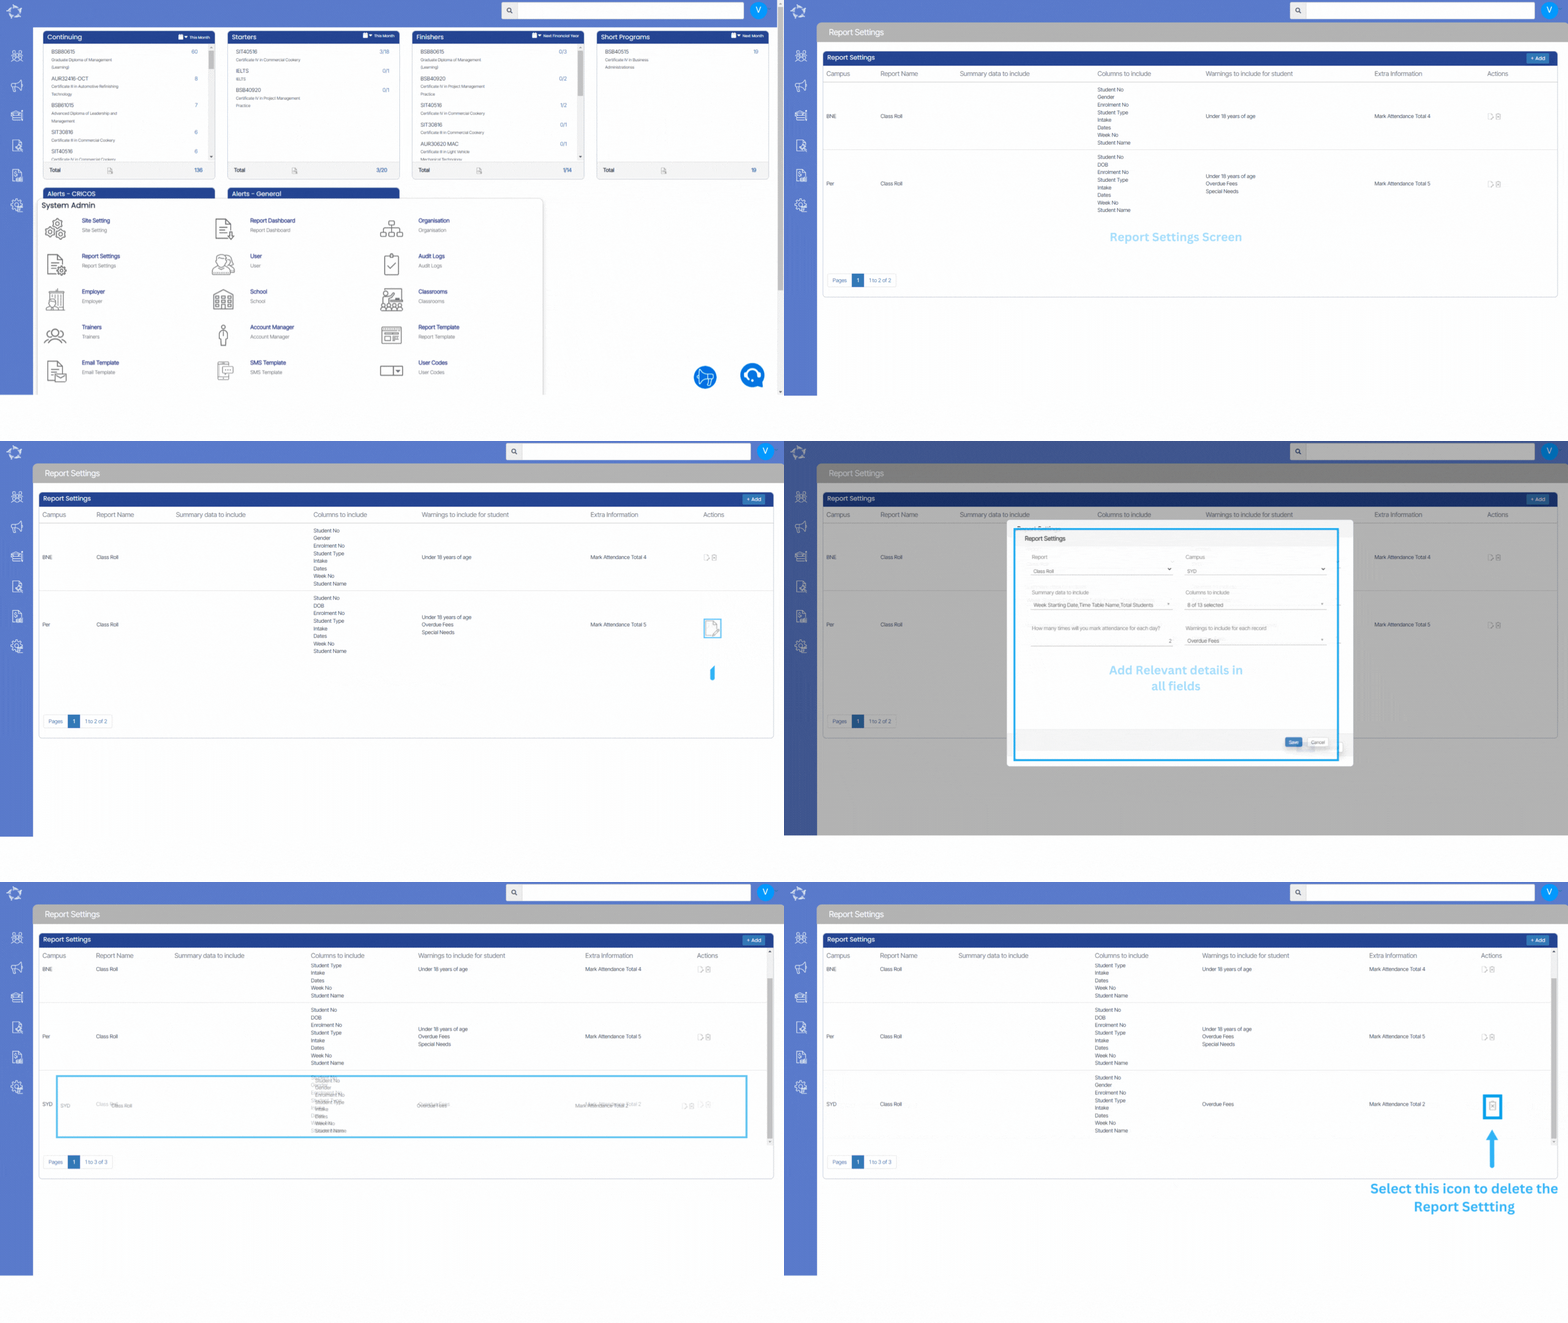
Dashboard > System Admin > Report Setting
The report settings screen provides you with the ability to manage and customise the report configurations. You can add new report settings, edit existing settings, or delete outdated ones. This ensures that the generated reports meet their specific needs and provide relevant and accurate information.
If you wish to add another report setting to the campus, you can select the +Add button.
Once you select the +Add button, a popup window will open on the screen. Fill in the required information in the provided fields. Ensure the accuracy of the details entered to avoid any transactional issues. Double-check the information before proceeding to the next step. Once all the necessary fields have been completed, select the save button to finalise the process.
You can also edit or remove existing report settings by selecting the respective icons next to each account.

Below is the explanation of the fields
| Fields | Explanation |
|---|---|
| Report | Select the desired report from the available options in the dropdown menu. |
| Campus | You can select specific Campus for the report setting here |
| Summary data to include | You can select what types of summarised information should be included in the report at the end. |
| Columns to include | Select the desired data fields or columns from the dropdown for inclusion in the report. |
| How many times will you mark attendance for each day? | You can determine the frequency of attendance marking for each day. |
| Warnings to include for each record | You can select the specific warnings to be included for each record in the report. |
If you have any queries, please do not hesitate to contact us on 1300 85 05 85 or email us on support@rtosoftware.com.au
