Overview
This screen allows you to do two things –
- You can mark attendance for a class of students.
- You can mark results for any Subject or Unit of Studies (UoS) linked to a class.
When taking attendance, you will need to indicate whether each student in the class is present (attendance) or absent. The options you select will depend on how the timetable for the class was set up.
In the summary section of Step 2, after selecting the class, the system will display what you are marking – either absence or attendance – so that you can ensure you are recording the correct information.
Follow the below-given steps to mark the Attendance/Absence and Result of the student:
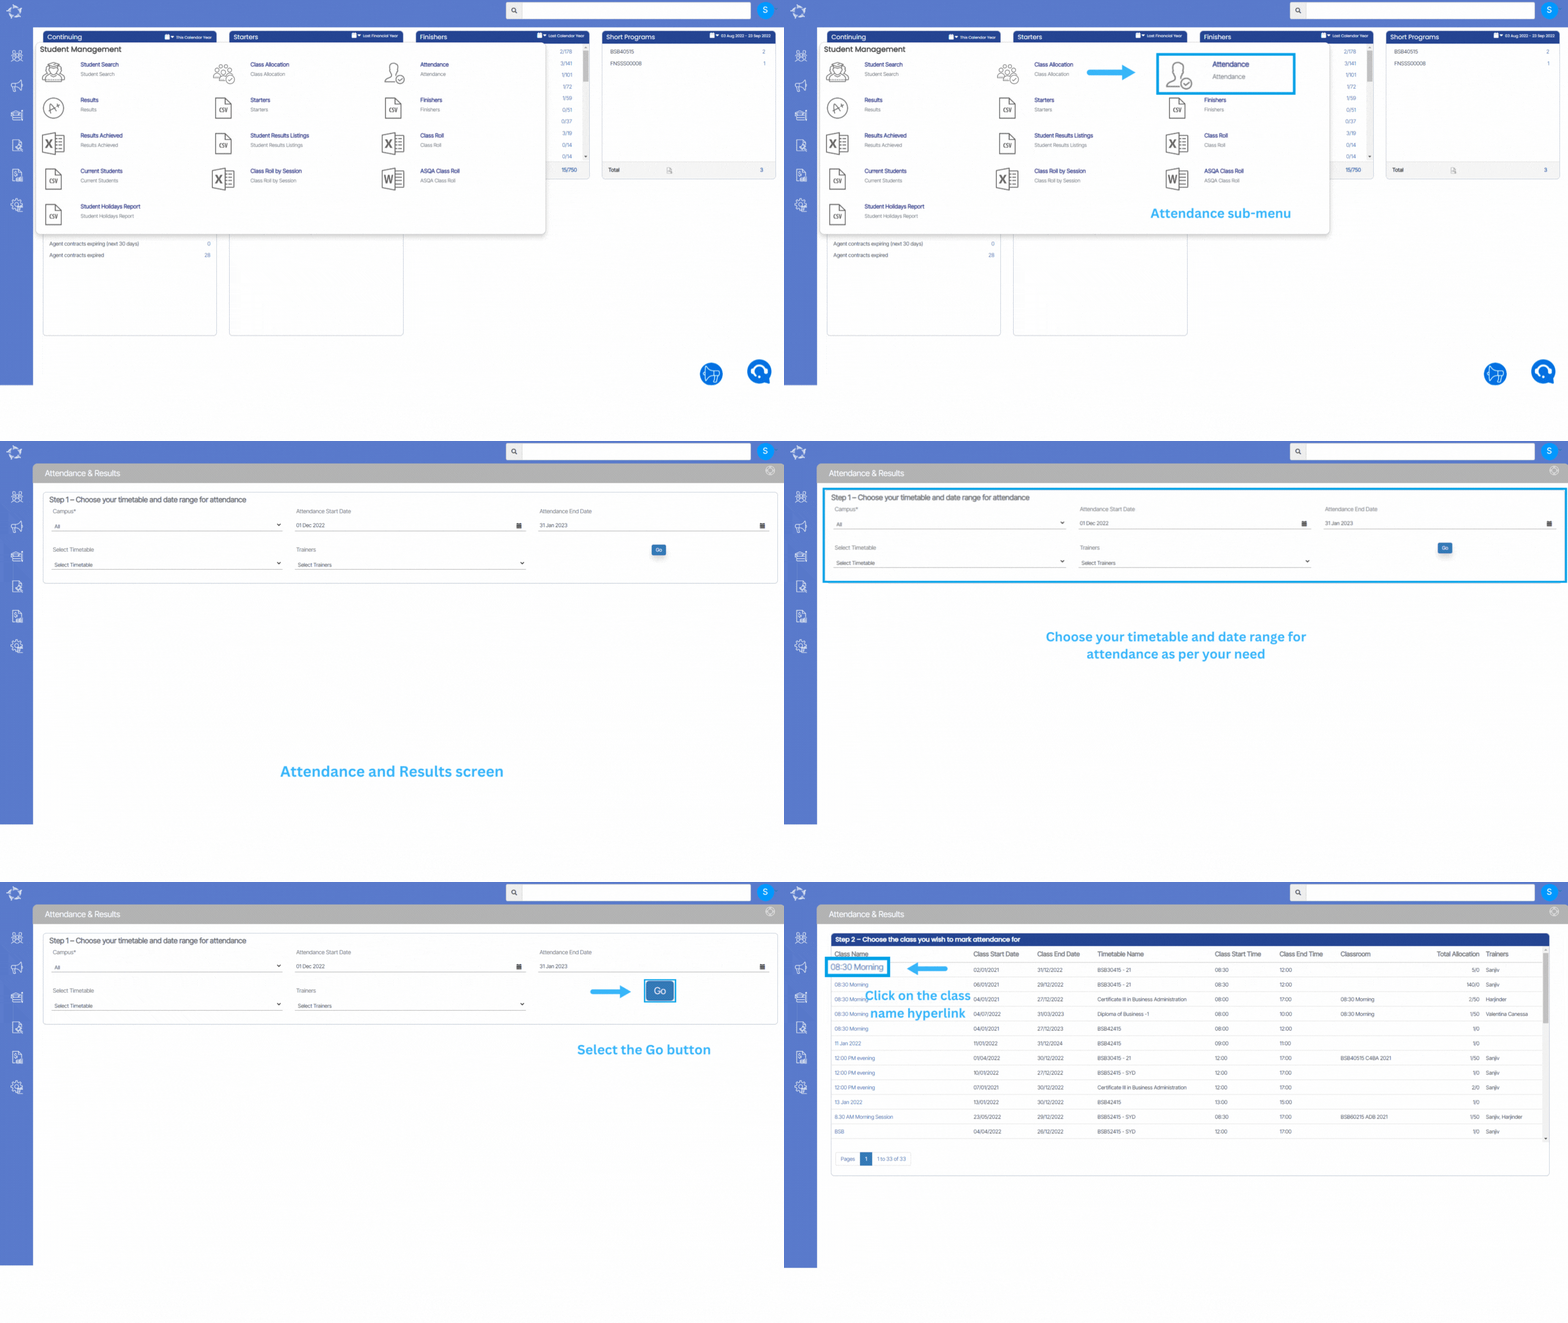
- Select the timetable and date range for the attendance records you wish to view or update. This step enables you to filter and select a specific timetable for a particular campus. After selecting a date range (start and end dates) and a timetable, select the Go button to proceed.
Can’t find your Timetable in the Select Timetable dropdown?
You will only see timetables that meet the filters you have chosen for Campus, Attendance Start and End Dates.
Reasons for not finding a particular timetable that you may be looking for can be –
1. There are no classes in that timetable within that date range.
2. You have selected a date range that is incorrect.
- Once you select the Go button, a list of classes that you can mark attendance or absence for will be displayed. To view the list of students enrolled in a particular class, select the Class Name link in the first column. This will take you to a new page that shows the list of students for that class.

If you have any queries, please do not hesitate to contact us on 1300 85 05 85 or email us on support@rtosoftware.com.au

