Assessments > Add Button > Assessment Entry
When you select the +Add Button, the system will open the Assessment Entry screen for you. On the Assessment Entry screen, you will see different fields on the Details tab. Enter the details in all the fields and save.
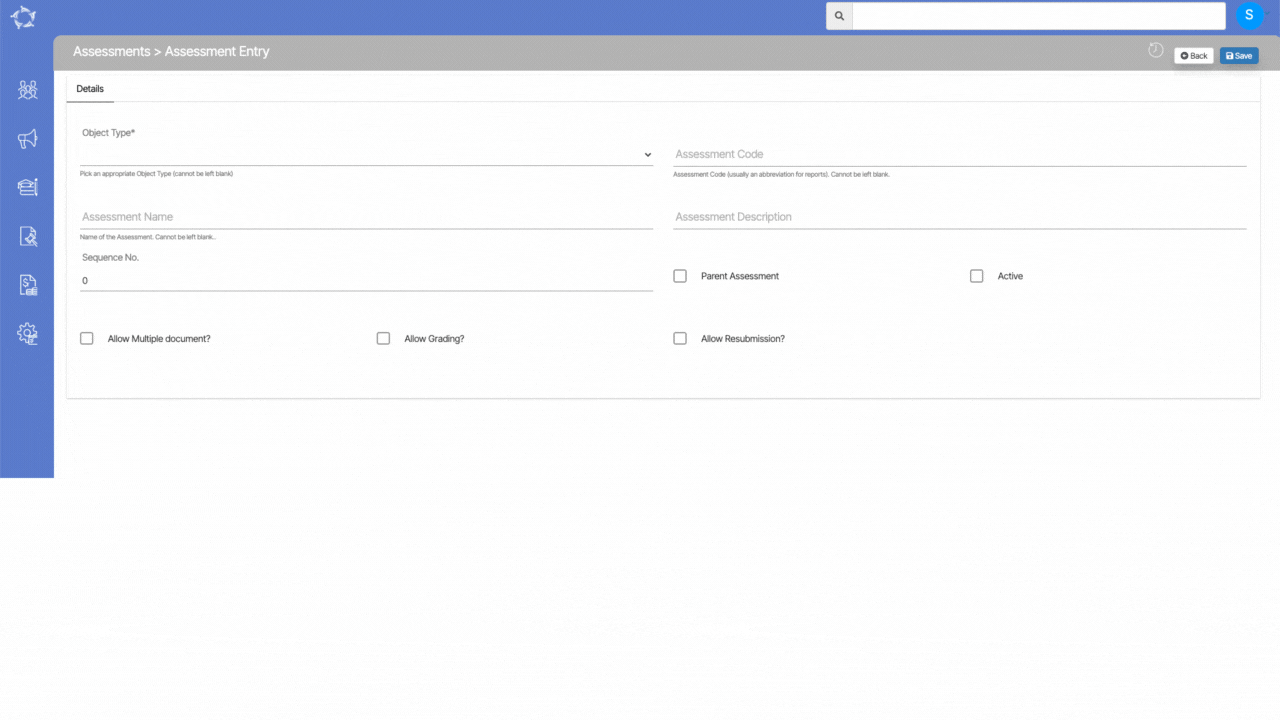
Explanation of the Assessment Entry Screen is below:
| Fields | Explanation |
|---|---|
| Object Type* | This is a mandatory field and you need to select the object type such as Subject, UoS, etc from the dropdown. Based on the object type selected, the system will show you another field as a select a subject or select UoS. The field will be a magic search field and you can search and select the required field accordingly. |
| Assessment Code | Enter the Assessment Code |
| Assessment Name | Enter the Assessment Name |
| Assessment Description | Enter the Assessment Description in this field. |
| Sequence No | Enter the Sequence no in this field. |
| Parent Assessment | Select this tick box if you want this Assessment as a Parent Assessment. |
| Active | Select this tick box to make the assessment Active. |
| Allow Multiple document? | Select this tick box to Allow Multiple document for the specific assessment |
| Allow Grading? | Select this tick box to Allow Grading for the specific assessment |
| Allow Resubmission | Select this tick box to Allow Resubmission for the specific assessment |
If you have any queries, please do not hesitate to contact us on 1300 85 05 85 or email us on support@rtosoftware.com.au