Main Dashboard > Marketing Menu > Agent Dashboard > Applications Tile
Overview
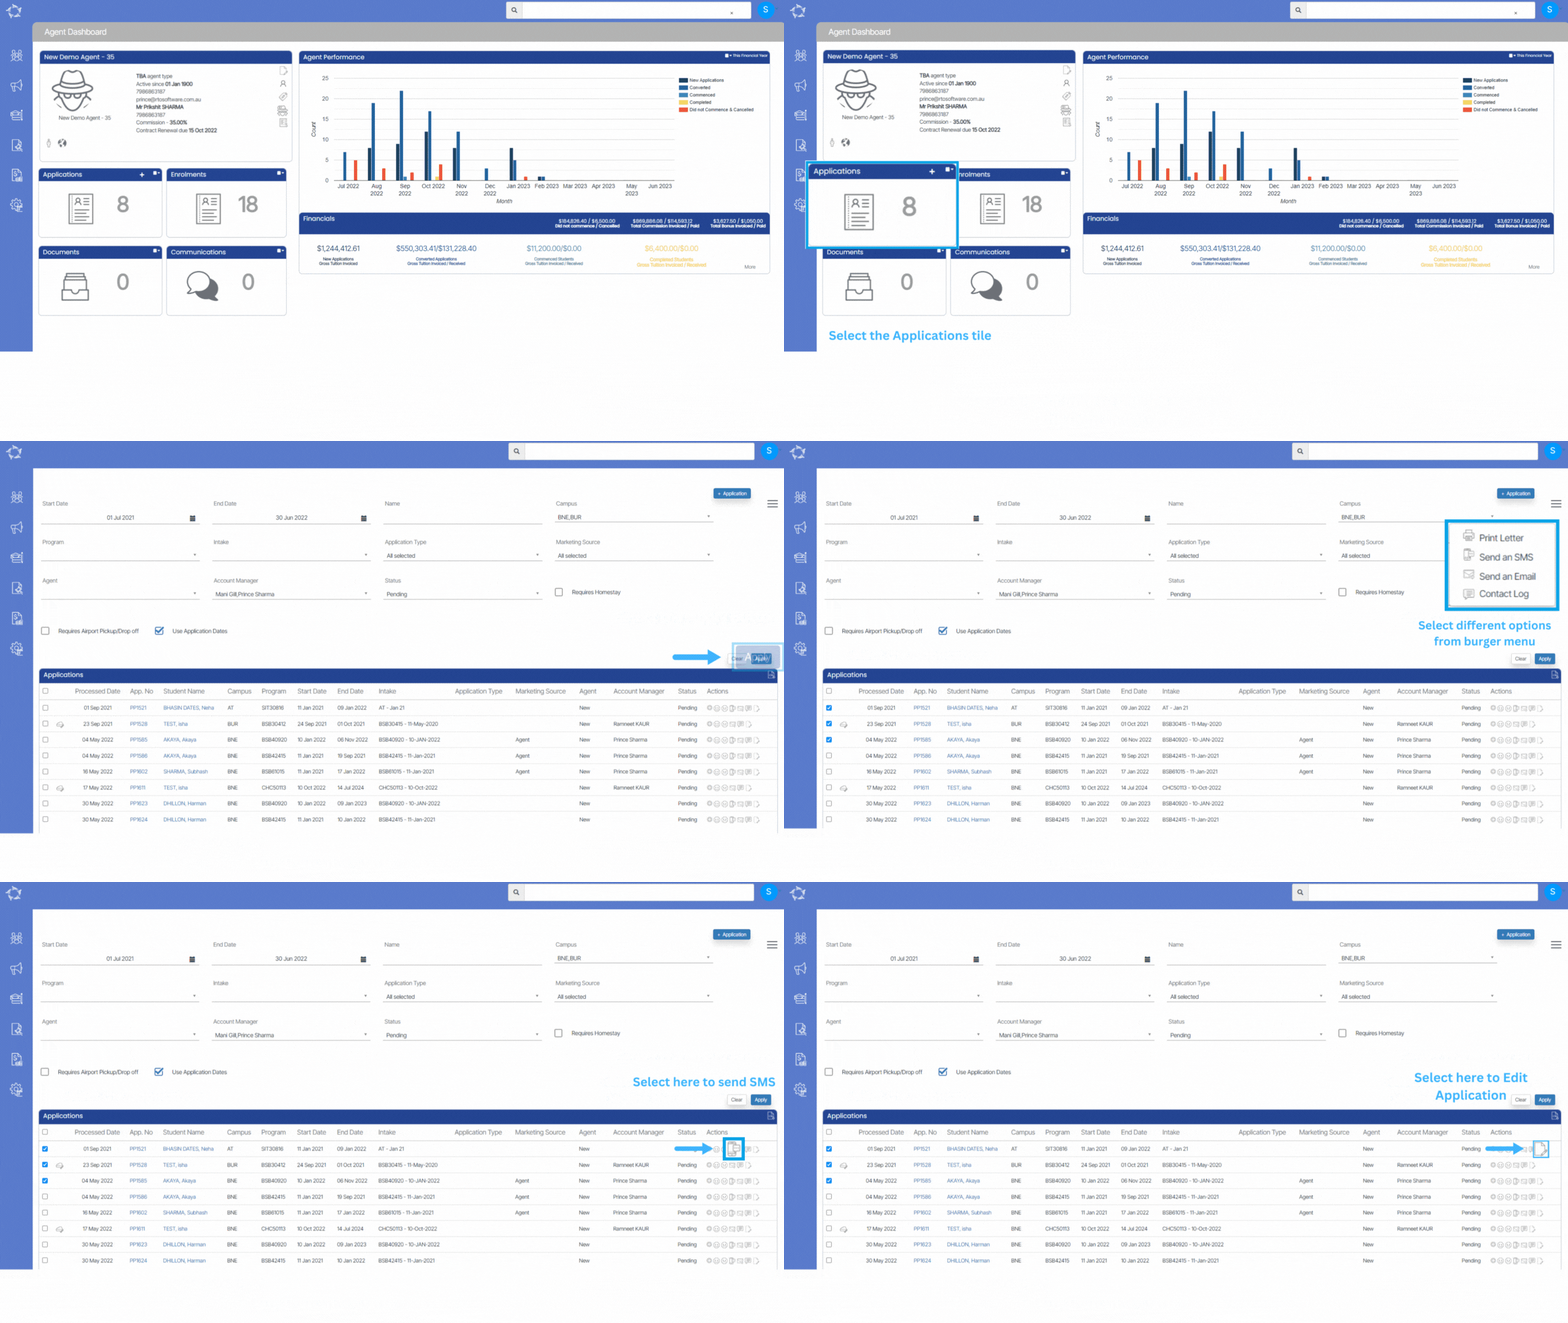
In the Applications Tile, we show all the pending applications linked to the Agent. You can convert, decline and perform other actions to the applications from this listing screen.
This screen is divided into two sections.
1) Filters/Parameters
2) Listing Grids
Filters/Parameters:
To open this screen, you would have selected the Applications Tile link from the Agent Dashboard. Based on the date range you have selected on the Application Tile, the system will open the screen and populate the information in this section. For example, it will show you the start and end dates that were used in the tile. You can add a New Application with this agent by selecting the +Application button.
Select here to know more about the filters/parameters.
Listing Grid
In this grid, we are displaying the list of all pending applications. We are showing the Applications Processed Date, App No, Student Name, Campus, Program, Start Date, End Date, Intake, Application Type, Marketing Source, Agent, Account Manager, Status, and Actions columns. All of these columns are self-explanatory.
Select here to know about the Icons under the Actions column and Burger Menu
How to select Applications?
Use tick boxes to select applications if you wish to send email/SMS, create a contact log, print letters and start enrolments in bulk. After selecting the students, pick the option from the burger menu and you are one step away to finish your heap of work in one go.
Or if you wish to select all students at once, use the tick box present right beside the Processed Date column.

If you have any queries, please do not hesitate to contact us on 1300 85 05 85 or email us on support@rtosoftware.com.au
