The Import File screen is designed to facilitate the seamless transfer of data in the system. With its intuitive layout and clear instructions, you can easily navigate through the process of selecting and uploading files. You can import data in CSV format, including student master, avetmiss information, overseas information, and result results.
The Approved User dropdown field allows you to assign specific users with the authority to perform the import operation, ensuring data security and accountability.
Selecting the Next button prompts you to proceed confidently to the next step, enhancing usability and efficiency.
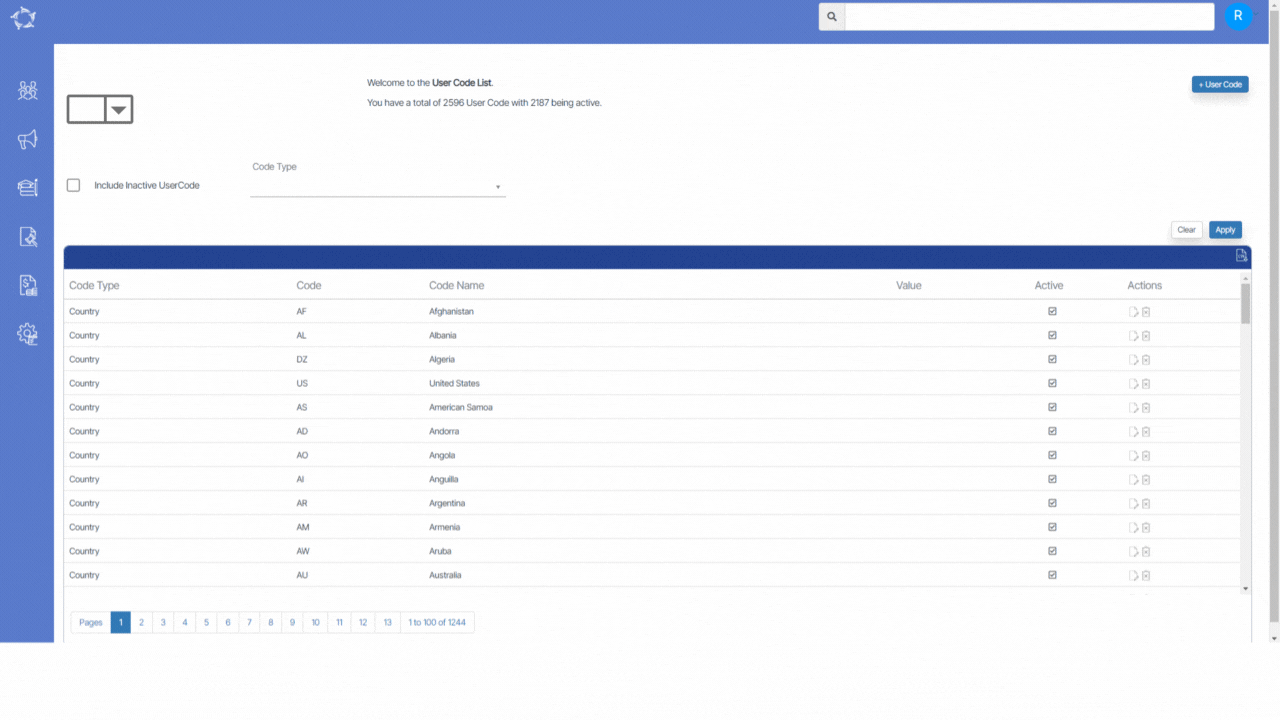
User Codes > +User Code Button > User Code Entry Screen
Before attempting to create or modify a User Code, it is essential to identify the field’s name where the dropdown is located. For example, the field could be named Marketing Source. This step is crucial as it allows us to determine if the field is available on the current screen for customising the dropdown options. Once we have obtained the field’s name, we can proceed to the User Code screen to carry out the necessary actions.
How to Create User Codes
Step 1 – Select the + User Code button on the User Code Welcome screen and the system will open the User Code entry screen.
Step 2 – Code Type – Select the option from the dropdown for the Code Type field and this is where you need to select the name of the field you want to add in the dropdown as Marketing Source.
Step 3 – Code – This is usually an abbreviation of the User Code Name field, for example, the User Code Name that you want to see in the dropdown for Marketing Source could be Website, so the code could be entered as www.
Note – the code that you enter does not show anywhere else in the system, it only shows on this screen and the initial User Code List screen.
Step 4 – User Code Name – this is the entry that will display in the dropdown, such as Website.
Step 5 – Group Name & User Name – select the option as All in these fields.
Step 6 – Fields like Contact Name, Contact Phone, Contact Mobile and Address are self explanatory fields and you can fill them accordingly.
Step 7 – Once all the above fields have information entered then select the Save button at the top of the screen. Once you have saved the new entry, you can navigate back to your original screen and you would need to refresh it (if you already have it open) and you will see your new user code displaying in the dropdown.
The Notes Template Welcome screen is a user friendly interface designed to assist you in organising and managing your notes effectively. It provides a clean and intuitive layout that allows you to create, categorise, and access your notes with ease.
The Notes Templates screen offers options to edit, delete, and add new templates. It also shows the count of active and total templates. The delete button removes templates from your list.
If you wish to add another notes template to the campus then you can select the +Add button. Once you select the +Add button, a pop up window will open on the screen. Fill in the required information in the provided fields
Campus – Select the Campus name from the drop down.
Applies to – This will show you different objects in TEAMS such as Applicant, Student Enrolment etc. Depending upon your requirements you can select the object from the dropdown.
Shown In – This drop down will show you different fields and you can select one at a time, once you selected the Notes will appear accordingly.
Title – Title of the Notes
Notes – Enter your Notes by selecting the Notes Icon.
Active – Select the tick box to make the Notes Active.
You can also edit or remove existing note templates by clicking on the respective icons next to each account.
The employer Program Preference screen allows employers to customise their program options. You can effortlessly navigate through various options using buttons like Add, Edit and Delete.
The Add button allows you to create new program options with ease, while the Edit button provides the flexibility to modify existing options, ensuring they stay relevant to changing needs. With the Delete button, you can easily remove outdated or redundant program options.
Furthermore, the listing grid presents a clear overview of all program options, making it convenient for employers to review and arrange them systematically.
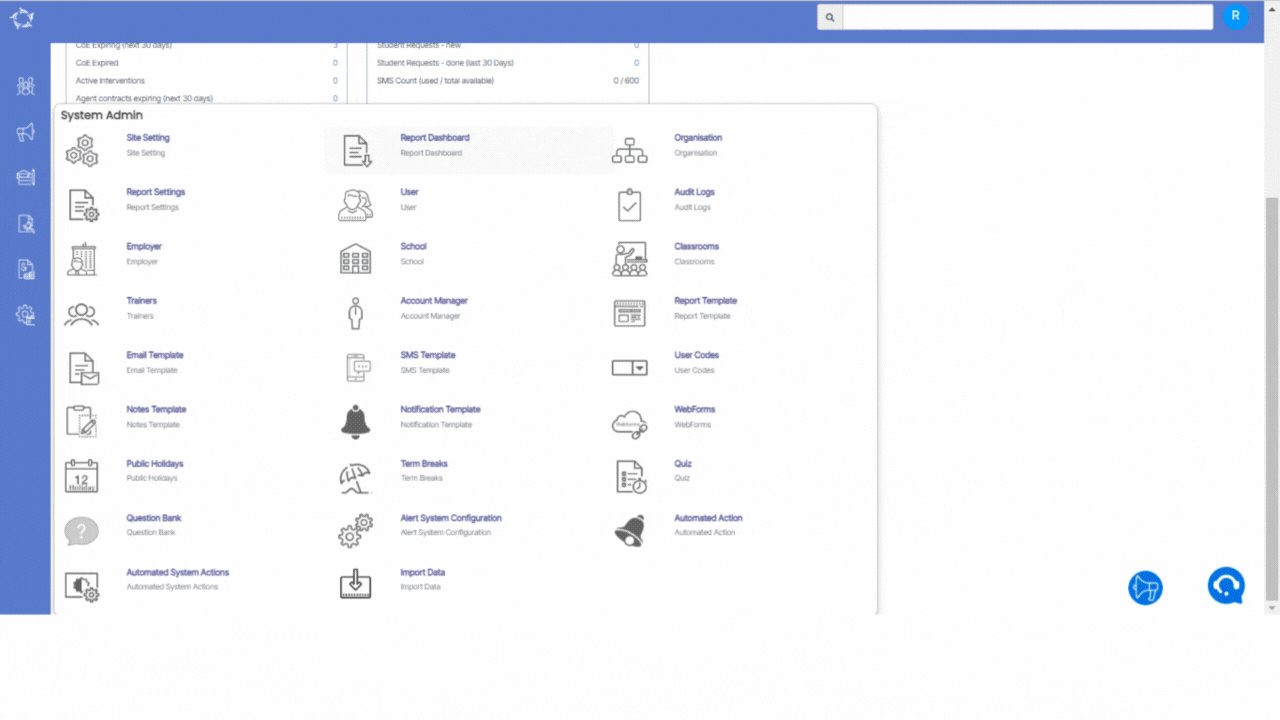
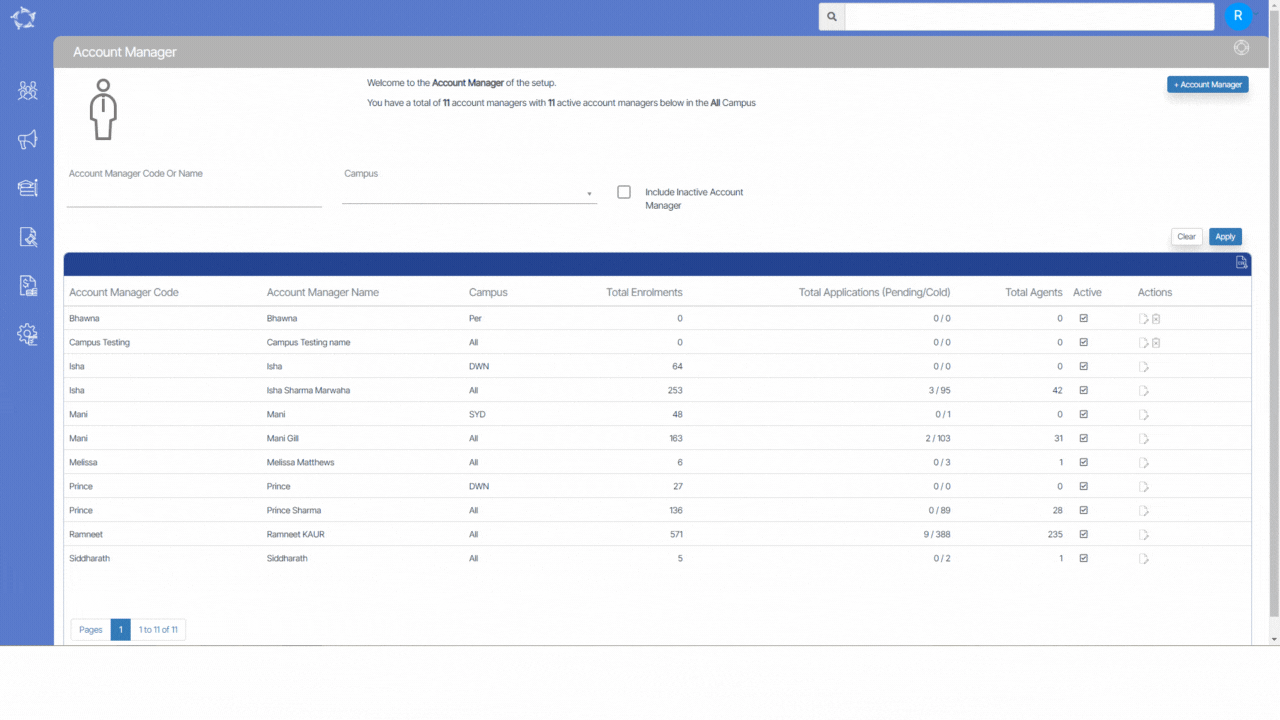
Main Dashboard > System Admin menu > Account Manager
To create a new account manager, select the +Account Manager button from the Account Manager Welcome screen. This will take you to the Account Manager Entry Screen, where you will be able to input or modify the relevant information associated with the account. You will need to select the appropriate account manager code and name, along with other required details that need to be filled in. It is crucial to enter the correct account manager code and name to avoid any confusion in the future.
After filling in the details of the Account Manager, select the “Save” button to save the changes.
Below is the Explanation of the fields.
Field Name
Explanation
Account Manager Code
This field cannot be left blank as it is mandatory
Account Manager Name
This field cannot be left blank as it is mandatory
Account Manager link to all Campuses
Tick this option to select this Account Manager for all campuses
Campus
You can select a specific Campus for the Account Manager here
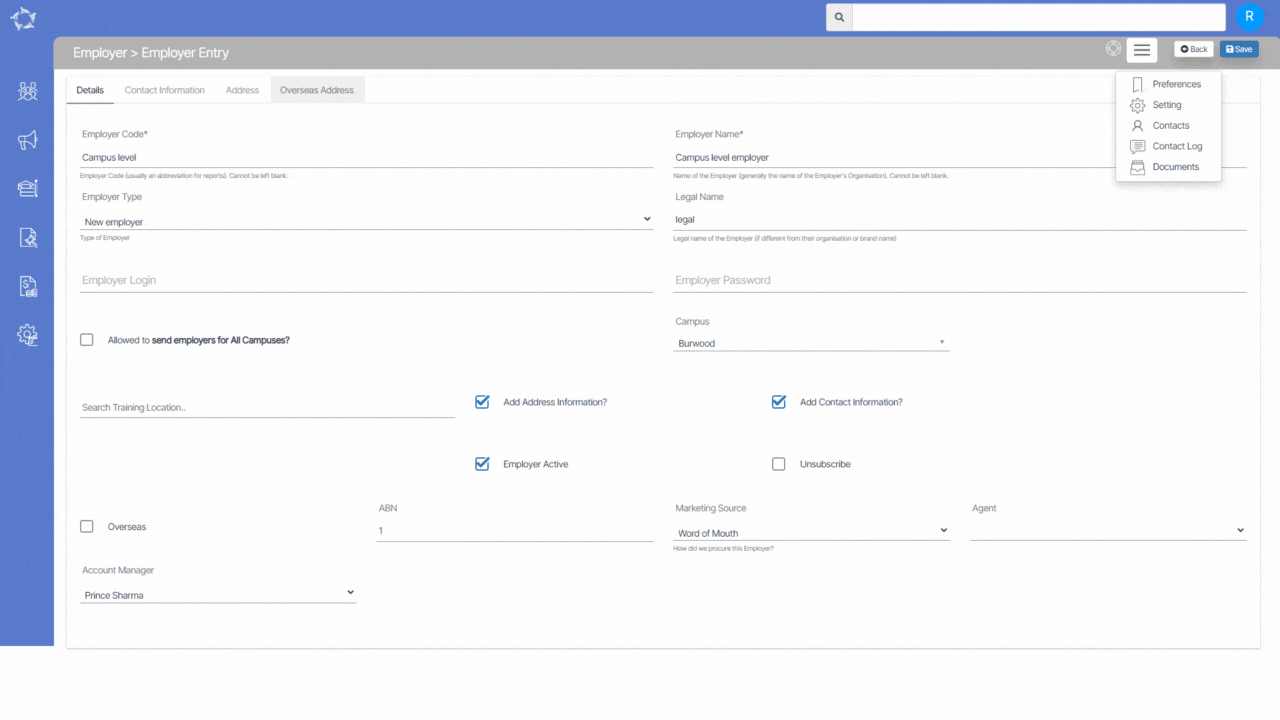
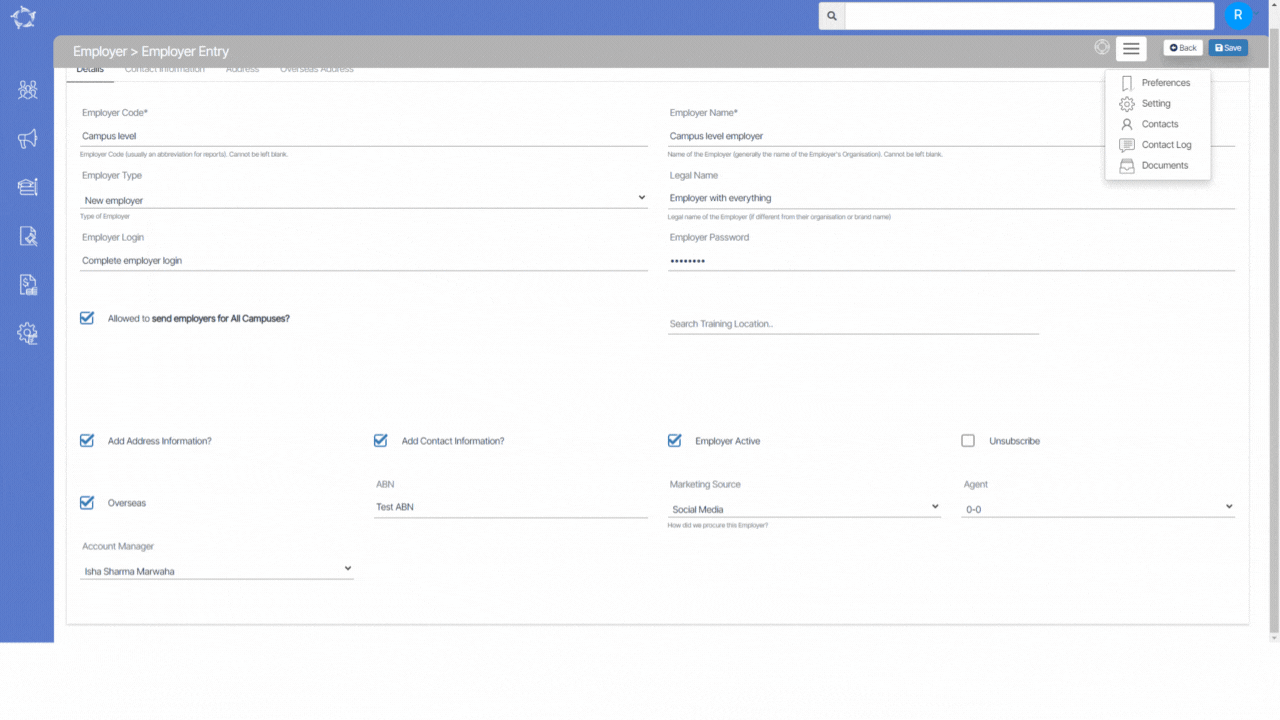
When you select the Documents option, you will be taken to the Employer Entry > Documents screen. If you have already uploaded documents for the employer, it will show you in the grid.
You can also add the document by selecting the +Add button, a pop-up window will appear on the screen where you can choose the document you want to upload for the employer.
The field’s name and explanations are given below:
Fields
Explanations
Upload Date
This will show the date, the day you upload the document
Notes
You can write notes for your own reference by selecting the notes icon.
Document Type
This is a user code in TEAMS and based on the user, you can select the document type.
Document Name
It will show the name of the document which you have selected.
Public Document
Select this box to make the document public on the employer portal.
This screen lets you enter the contact logs for the employer. You will be able to view the employer’s current contact logs in the grid and make edits or deletions as necessary.
You will also be able to add a new contact log for an employer from the +Add button.
Field
Explanation
Contact Date
You can enter the contact date in this field.
User Name
Select the user name from the dropdown field
Log Type
You can select the log type from the dropdown field.
The employer setting screen is a vital part of an employer’s invoicing management system. This screen allows you to define and customise invoice numbering. You can establish unique invoice number formats, including prefixes, suffixes, and sequential numbering patterns, to align with their internal accounting practices.
By configuring the invoice number screen setting, you can ensure consistent and organised invoice tracking and enhance professionalism in financial transactions. This feature empowers you to maintain accurate and systematic records of your invoices.
Explanation of the fields below:
Fields
Explanations
Student Invoice Prefix
You can add a customized prefix to their invoice numbers.
Student Invoice Format
You can add a preferred format for invoice numbers.
Student Invoice Number
In this field, a unique identification number for an invoice is entered.
Student Invoice Suffix
You can add a customized suffix to their invoice numbers.