We have introduced a valuable new feature in our system: the ability to send emails to students in bulk, simplifying the email distribution process for you. With this enhancement, you can now select multiple students from different pagination screens, like Main Dashboard – Continuing, Finishers, and Starters Listings, Financial Dashboard – Overdue Fees Listing, Payment Received and Payment Due listing screens all at once, rather than having to send emails page by page.
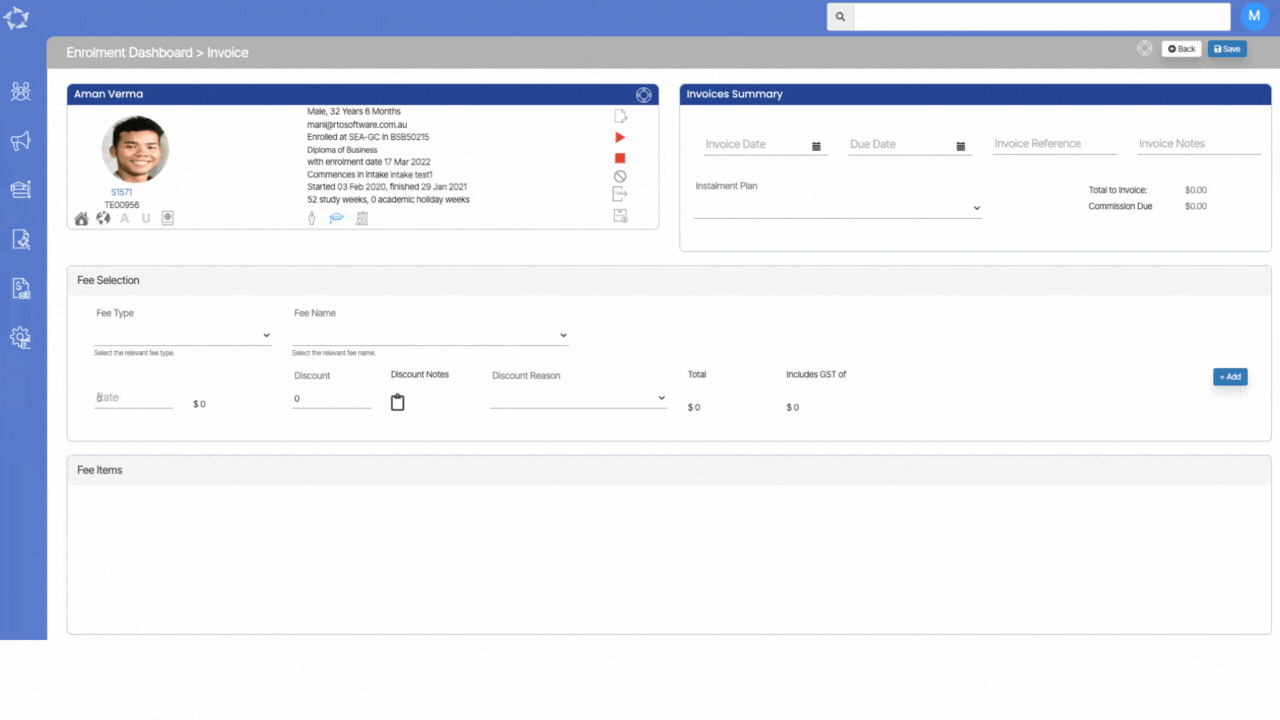
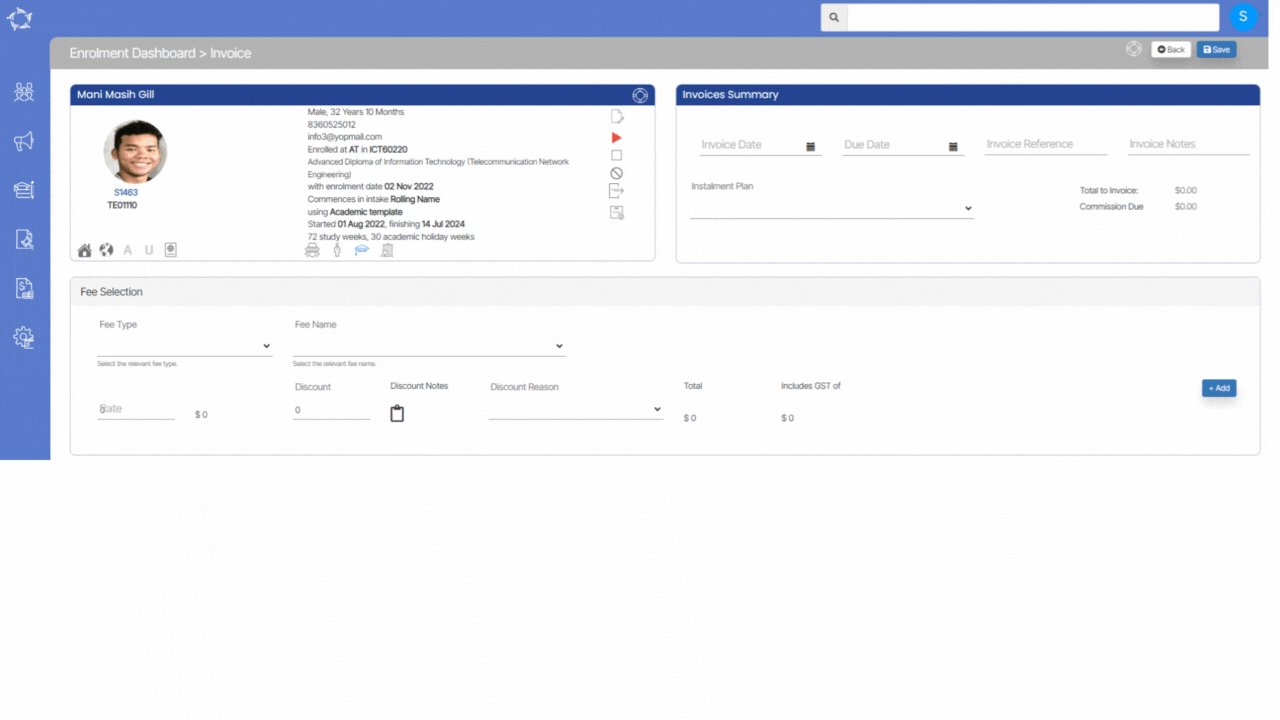
We’ve implemented some improvements to the Fee Selection section when editing invoices or creating new invoices for the Application or Enrolment in the system. Now, when you choose a FeeType, the system will automatically populate the Fee Name by default in the fee name dropdown for that particular fee type.
IMPORTANT – The fee name dropdown will only populate the fee name if there is only one fee created for the fee type. If there are multiple fees created for the fee type, the system will not populate the fee name by default, you will need to manually select the fee from the dropdown.
In a recent update, we introduced the Invoice Notes field to enhance your invoicing experience in both the Application Dashboard’s Invoices section and the Enrolment Dashboard’s Invoices section. With our latest update, you can add and edit invoice notes directly when editing an invoice for a specific application or enrolment. This means you can seamlessly manage and update invoice details on the Edit Application Invoice and Edit Invoice screens, providing you with greater control and customisation in your invoicing processes.
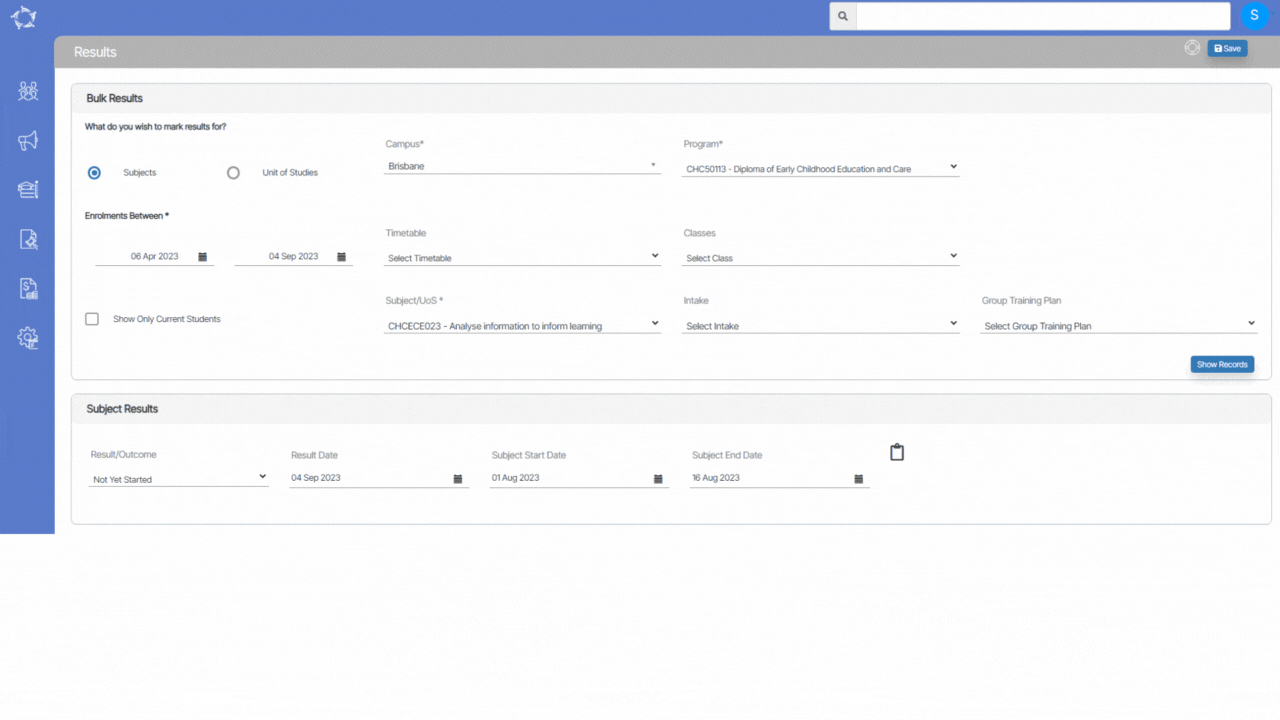
We have added two new fields, Subject Start Date and End Date, on the Bulk Results screen. These new features make it easier for you to update the start and end dates for subjects in bulk.
Note – before you proceed with making changes on this screen, you need to understand the below scenarios:
Scenario 1: Pre-Existing Subject Dates
If the start and end dates are already present in the grid for a subject, and you attempt to add new dates in the Subject Start Date and End Date fields and then select the save button, the system will display a pop-up message on the screen. The message will say, “Please ensure that the subject dates fall within the enrolment dates.” Additionally, any pre-existing subject dates for students will remain unaffected. This means that the system will not overwrite existing dates if subject dates are already updated for any of the students.
Scenario 2: Updating Subject Dates
If there are no subject dates present for a subject in the grid, and you update the dates and click save, the system will automatically update the subject dates for those students on the Training Plan and Results screen.
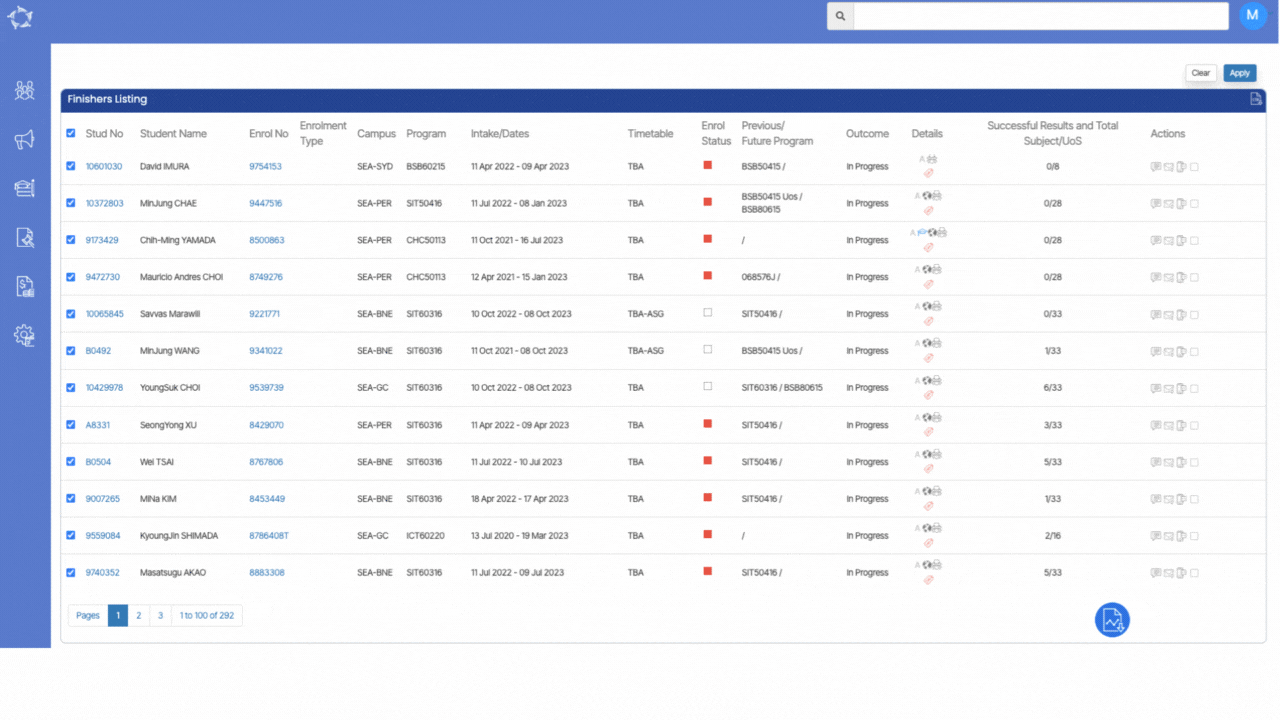
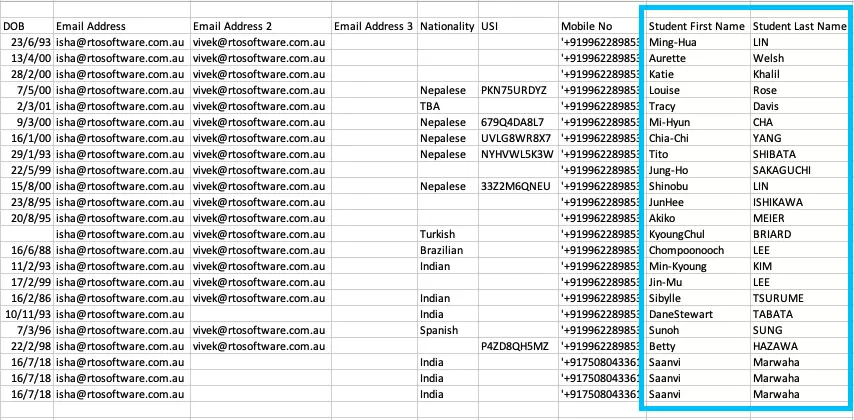
In our recent updates to the Finishers Report, we’ve made valuable enhancements by introducing the inclusion of two new columns: Student First Name and Student Last Name. These additions are aimed at providing more comprehensive and personalised information within the report. With the integration of these columns, the finisher report now offers a more holistic view, allowing you to easily identify and associate students’ first and last names with their respective accomplishments.
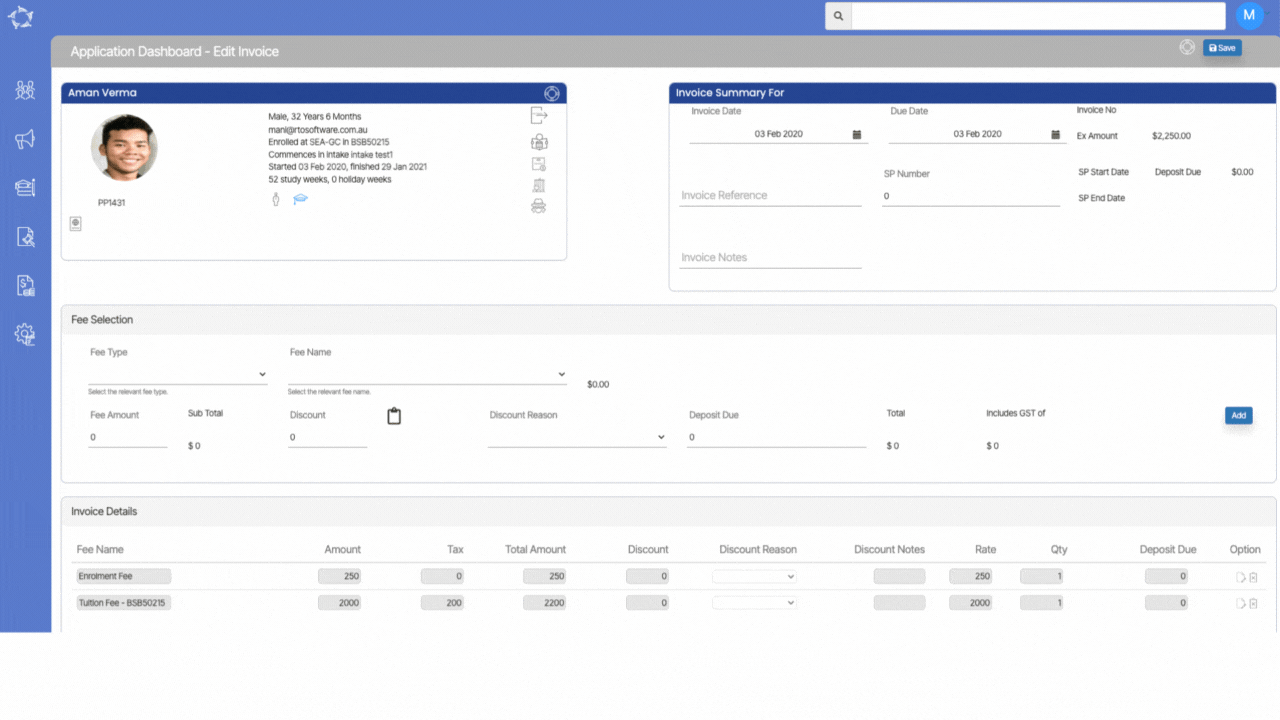
A significant update has been made to the student financial details screen, introducing the inclusion of two additional columns namely QTY (Quantity) and Rate. This modification holds particular relevance when generating invoices that are based on a specific rate.
Notably, upon creating an invoice with a designated quantity, this information will now be prominently visible when selecting the “More” option within the Student Financial Tab. This enhancement spans various types of fee transactions, encompassing Invoices, receipts, transfers, and refunds.
In an exciting addition to our student dashboard, we have implemented a fresh feature – the notes icon. This icon serves as a gateway to a convenient pop-up window, triggered with a simple click. Within this pop-up, you can effortlessly add your notes for the student . Once you’ve composed your notes, a quick step remains – just tap on the ‘Update’ button. This action seamlessly saves all your input and changes, ensuring your notes are securely stored for future reference.
A valuable enhancement has been introduced to our invoicing process. When generating a new invoice, a convenient invoice notes feature has been incorporated into both the Application Dashboard’s Invoices section and the Enrolment Dashboard’s Invoices section. This enhancement allows you to include pertinent notes while generating invoices, enabling comprehensive communication. These notes are then seamlessly incorporated into the student financial summaries upon saving.
Furthermore, the convenience of adding invoice notes extends to the application creation stage. During the process of creating a new application, you now have the ability to add Invoice Notes from the Application Preview screen. This inclusion of invoice notes at the application level ensures that the information seamlessly carries forward.
Notably, these notes are visible on the Application Dashboard under the Financial tile’s Student Tab. This functionality continues to be relevant even after an application is converted, as the notes persistently appear on the Enrolment Dashboard’s Student Financial Details screen.
Below is the table that will give you the explanation about the filters.
Filters
Explanations
Enrolment Start Date
Select the start date from the calendar and the system will show you the students falling in the start date range you selected.
Enrolment End Date
Select the end date from the calendar and the system will show you the students falling in the start date range you selected.
Student Number
This is a magic search field and if you wish to generate the report for a particular student then you can simply search the student with the name or student number in the field.
Campus
Select the Campus from the dropdown by selecting the tick box against the campus name.
Program
This field will show you the program based on the Campus you have selected. You can search the program by typing the program code or program name in this field.
Timatable
This dropdown will show you the timetables based on the Program you have selected.
State
Type and Search the State in the field.
Include Students without Enrolments
Select this tick box if you wish to include the students without their enrolments in this report.
Include
This dropdown will show you student as All, Current and Finished. You can select any option as per your requirements.