AVETMISS Enrolment – Delivery Mode/Pre dominant identifiers missing

Compliance Dashboard > AVETMISS Enrolment > Delivery Mode/Pre dominant identifiers missing

The AVETMISS Enrolments tile will show you the enrolments as a link that has Delivery Mode/Pre dominant identifiers missing for the subjects. To update the Delivery Mode, you need to follow the below steps:

  • Select This Calendar Year (2022) from the calendar icon
  • Select the hyperlink next to the Delivery Mode/Pre dominant identifiers missing
  • You will be taken to the Delivery Mode/Pre dominant identifiers missing listing screen.
  • Select the enrolments for which you wish to update the Delivery Mode
  • It will open the Enrolment Dashboard, you then need to select the AVETMISS settings icon
  • On the AVETMISS settings screen, select the Subject AVETMISS Settings tab
  • Edit the Subject and update the Delivery Mode and save.

Note: When you have updated the Delivery Mode/Pre dominant identifiers for the enrolments, you need to refresh the Compliance dashboard screen to see the count of the enrolments for the Delivery mode.

AVETMISS Enrolments – Training Location Missing

Compliance Dashboard > AVETMISS Enrolments > Training Location Missing

The AVETMISS Enrolments tile will show you the enrolments as a link that has the Training Location missing for them. To update the Training Location, you need to follow the below steps:

  • Select This Calendar Year (2023) from the calendar icon
  • Select the hyperlink next to the Training Location Missing
  • You will be taken to the Training Location Missing listing screen
  • From the filters, select your desired Campus from the dropdown and then click on the Apply Filter button
  • The screen will refresh and show you the Training location dropdown with Update button
  • You need to select the Training Location from the dropdown and then click on the Update button

Note: When you have updated the Training Location for the enrolments, you need to refresh the Compliance Dashboard screen to see the count of the enrolments for the training location

AVETMISS Enrolments – Include in National Export

Compliance Dashboard > AVETMISS Enrolments Tile > Include in National Export

IMPORTANT – If you are reporting the student/enrolment to NCVER, you must select the Include in National Export tick box at the enrolment level AVETMISS Settings otherwise the enrolment will not get reported in the submission and if you doing the submission at the state level then you need to select the State Training Authority on the Enrolment AVETMISS settings screen.

The AVETMISS Enrolments tile will show you the enrolments for which the Include in National Export is not ticked. To select/tick the include in national export, you need to follow the below steps:

  • Select This Calendar Year (2023) from the calendar icon
  • Select the hyperlink count next to the Include in National Export
  • You will be taken to the Include in National Export listing Screen
  • Select the desired tick boxes against the student number that you wish to include in the National Export
  • Then select the Include in national Export tick box above the grid and click on the update button

Note: When you have selected the Include in National Export tick box for the enrolments, you need to refresh the Compliance dashboard screen to see the count of the enrolments for the Include in National Export.

AVETMISS Enrolments – Funding source – National should not be blank

Compliance Dashboard > AVETMISS Enrolments Tile > Funding source – National should not be blank

IMPORTANT – If the enrolment is selected as overseas then the funding source national must not be left blank. to update the funding source national you need to see if your student is studying onshore or offshore.

Funding Source National is a code that defines the mode of study whether it is Online, Classroom based or Training Based etc.

Examples
For Onshore Students – If the student is not in Australia and studying overseas then you need to select the funding source national as (31 – International Onshore Client – Other Revenue)
For Offshore Students – If the student is studying in Australia then you need to select the funding source national as (32 – Internation Offshore Client – Other Revenue)

The AVETMISS Enrolments tile will show you the enrolments as a link that has the funding source national as blank for them. To update the Funding Source National, you need to follow the below steps:

  • Select This Calendar Year (2023) from the calendar icon.
  • Select the hyperlink next to the Funding source – National should not be blank.
  • You will be taken to the Funding source – National should not be blank listing Screen.
  • Select the enrolments that you wish to update the Funding Source National.
  • It will open the Enrolment Dashboard, you then need to select the AVETMISS settings icon.
  • On the AVETMISS settings screen, select the Funding Source National from the dropdown and save.

Note: When you have updated the Funding Source National for the enrolments, you need to refresh the Compliance dashboard screen to see the count of the enrolments for the funding source national.

AVETMISS Enrolments – Enrolment is not flagged as overseas

Compliance Dashboard > AVETMISS Enrolment Tile > Enrolment is not flagged as overseas

IMPORTANT – if you are a 100% CRICOS VET college then this should say YES for all your students. For every student who is enrolled in a VET Program then you MUST make sure they are set as Overseas in two locations that are: Student Level – Edit Student Screen and Enrolment Level – Edit AVETMISS screen

Note: If the student is overseas then you must select whether the student is studying onshore or offshore on the edit student screen.

The AVETMISS Enrolments tile will show you the enrolments as a link that are not flagged as overseas. To flag the enrolment as overseas you need to follow the below steps:

  • Select This Calendar Year (2023) from the calendar icon
  • Select the hyperlink next to the Enrolment is not flagged as overseas
  • You will be taken to the Enrolment is not flagged as an overseas listing Screen, Check the ‘Overseas Enrolment’ box to fix the error in bulk.
  • You may select all the students at once by selecting the header tickbox.
  • Finally, click on the ‘Update’ button to mark the selected enrolments as overseas.

AVETMISS Enrolments – Overdue Result

Compliance Dashboard > AVETMISS Enrolments Tile > Overdue results

IMPORTANT – if you have enrolments that end in 2023, and they have no final outcome/result such as Competent, Withdrawn, CT etc then you will get errors. You can remove this error by updating the final outcome for each subject or updating the subject end date to 2023.

When there are results (Not Yet Started or Continuing Enrolment) and it has the result date within the calendar year 2023 selected then the system will show you the overdue results for the subjects. You need to select the correct result and result date falling in the submission calendar year.

Note: If you have the NYS and CE results for the subjects and these results don’t have final outcome then you need to update the result date as the future calendar year.

The AVETMISS Enrolments tile will show you the overdue results of the subjects that are without the results of the subject for the enrolments with the total count of the enrolments as a link. To update the results you need to follow the below steps:

  • Select This Calendar Year (2023) from the calendar icon.
  • Select the hyperlink next to the Overdue Result label.
  • You will be taken to the Overdue Result Listing Screen.
  • Select the enrolments that you wish to update the results.
  • It will open the Enrolment Dashboard, you then need to select the Group Training Plan icon.
  • On the Group Training Plan screen, you can update the results and save them.

Note: When you have updated the Overdue Result for the subjects of the enrolments, you need to refresh the Compliance dashboard screen to see the count of the overdue result.

Communication Log Screen – Ability To Download Attachments

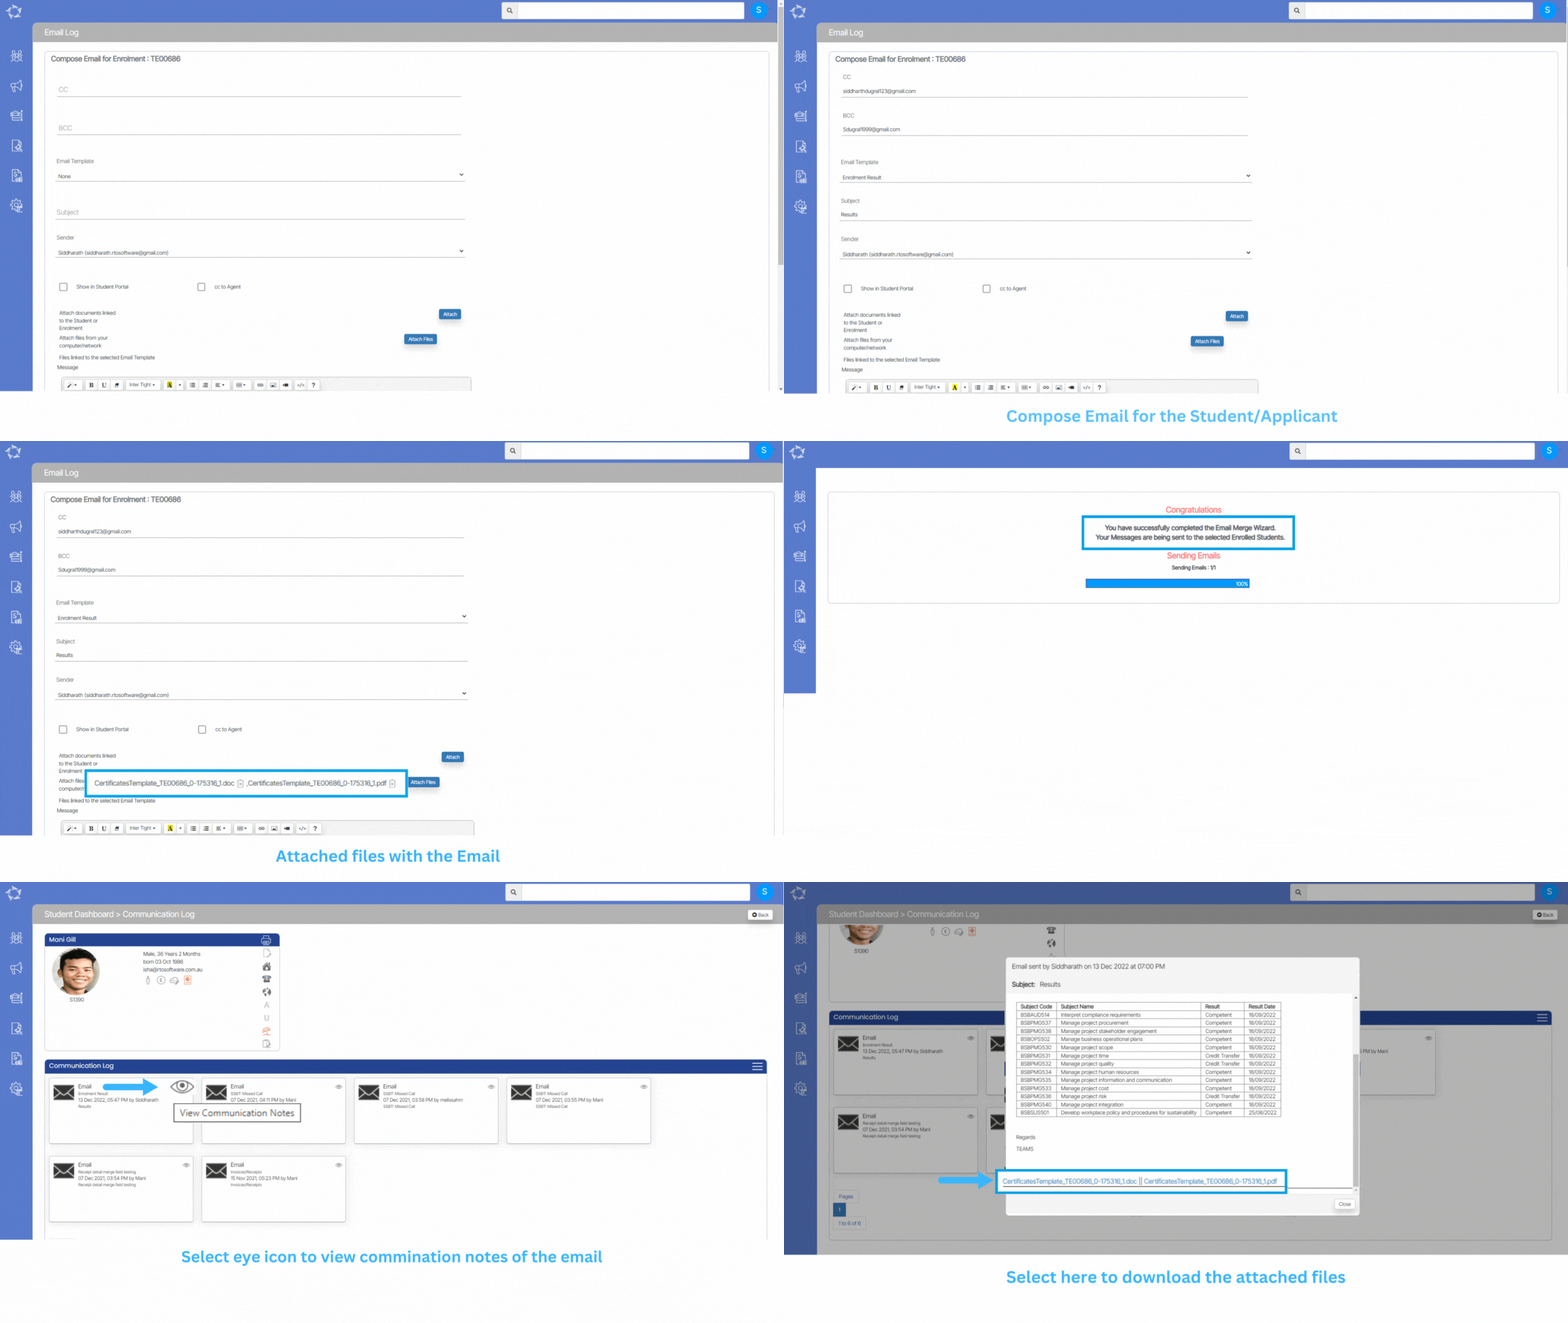
We have made some changes to the Communication log screen and added the ability to download the attachments when any email was sent to a student/enrolment.

You can select the view icon for the email and then select the attachment to download the attached files.

Note: The system will allow you to download the attachments for future emails in this update.

Historical Enrolments

Student Dashboard > Historical Enrolments Tile

OVERVIEW

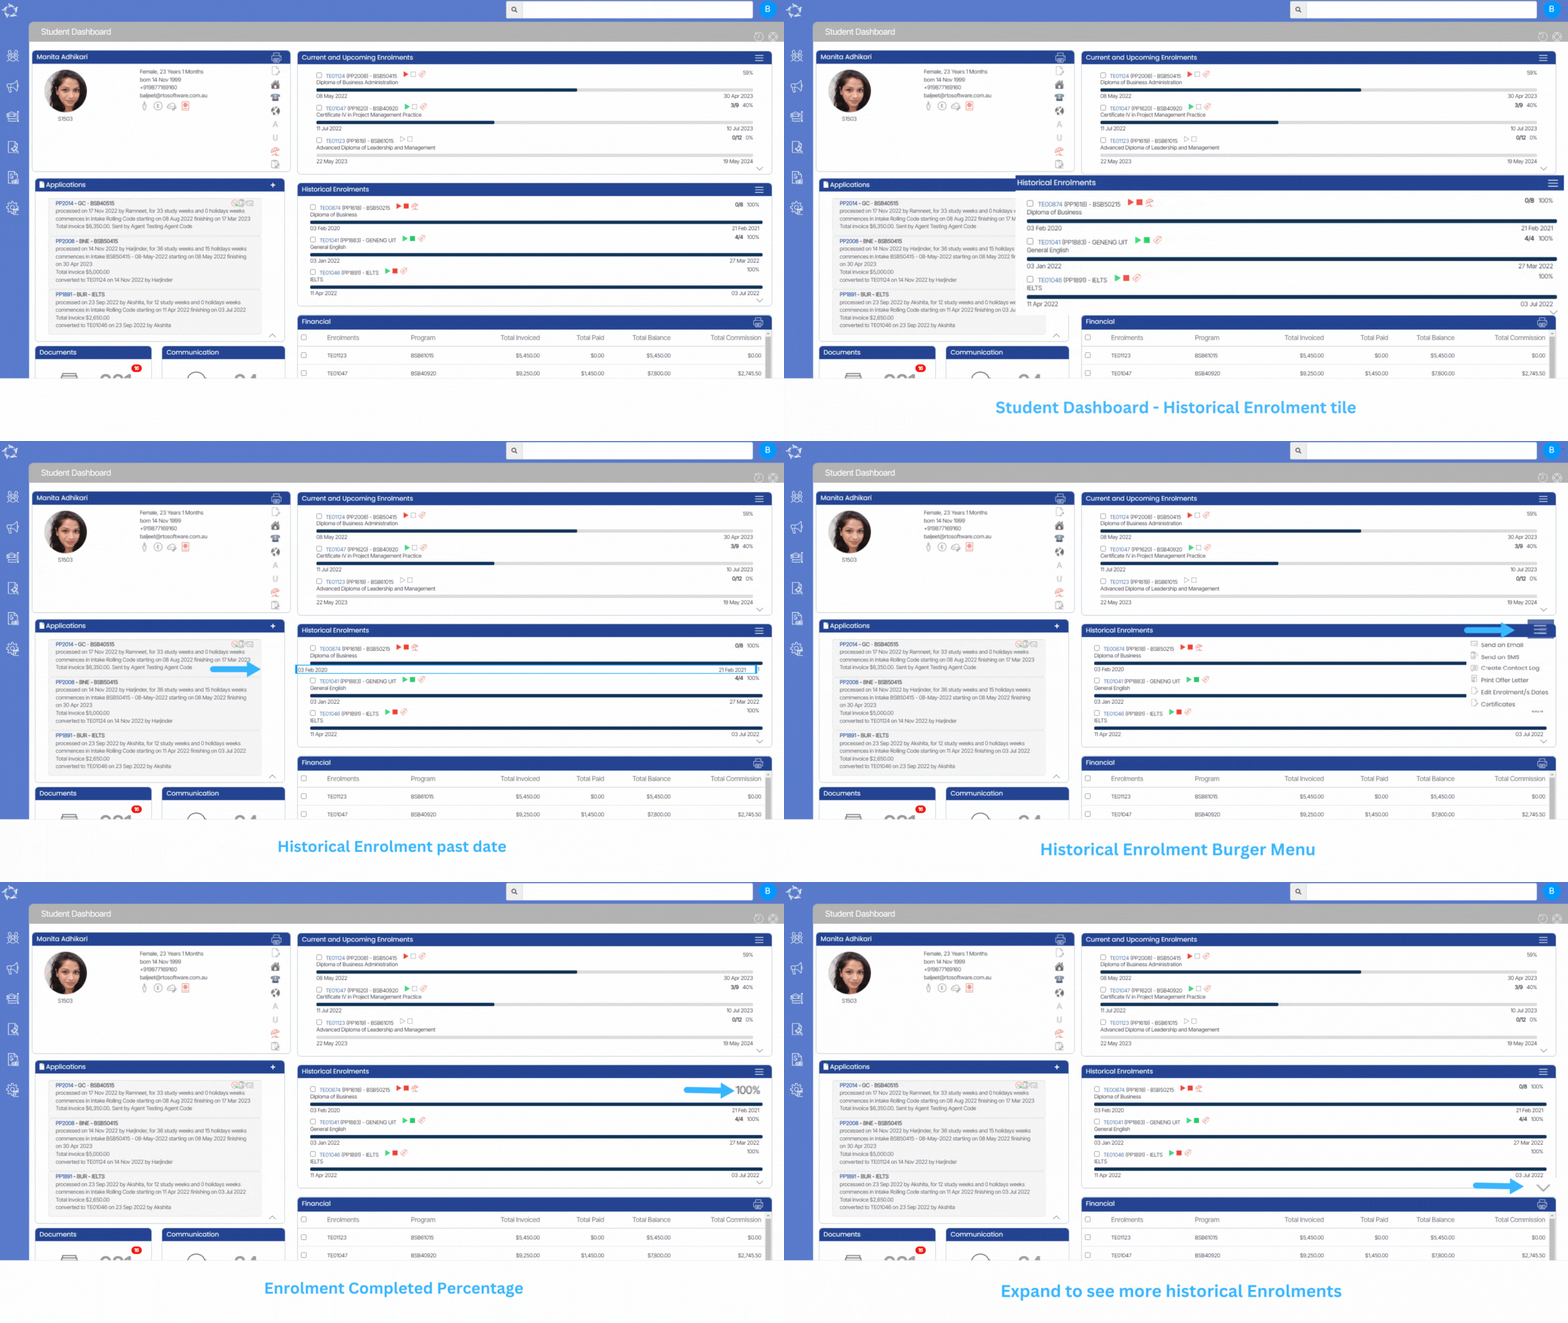
This tile will show you all the historical enrolments of the students along with the basic details of the enrolments. It will show you all the past enrolments whose end date is less than today’s date.

IMPORTANT: – It is not necessary that you will be seeing all the icons above the bar. It will show you only 3 historical enrolments. However, if you want to see more than 3 historical enrolments you need to click on the arrow placed at the right corner of the Historical Enrolment of the tile.

Select to know more about the Icons

Select to know more about the Burger Menu

To know about the Historical enrolments tile, please see below:

  • Once you place the cursor on the dark blue bar, the system will show you the past status of enrolment in the tooltip that X number of weeks have been completed out of Y number of weeks.

If the enrolment is flagged as started but not finished, then it will show you the Arrived. weeks x of Y.

If the enrolment is not flagged as started then the system will show you the status as Not Started.

If the enrolment is flagged as started and finished, then the system will show you the status as Finish

  • The dates under the bar are the start dates and end dates of enrolment which will be visible for each enrolment listed in the historical enrolment tile. According to the weeks, the system will calculate the enrolment completed percentage which is showing 100% for the enrolment and also according to the count of successfully completed subjects. The system will show you the completed subjects for example 3 subjects are completed out of a total of 9 subjects.
  • If a student has more than 3 enrolments then only 3 enrolments will be visible on the Historical Enrolment tile. The rest of the enrolments will be hidden. To unhide the other enrolments you need to click on the highlighted arrow and on the system will expand the tile to show you more historical enrolments.

Application Dashboard

history of changes

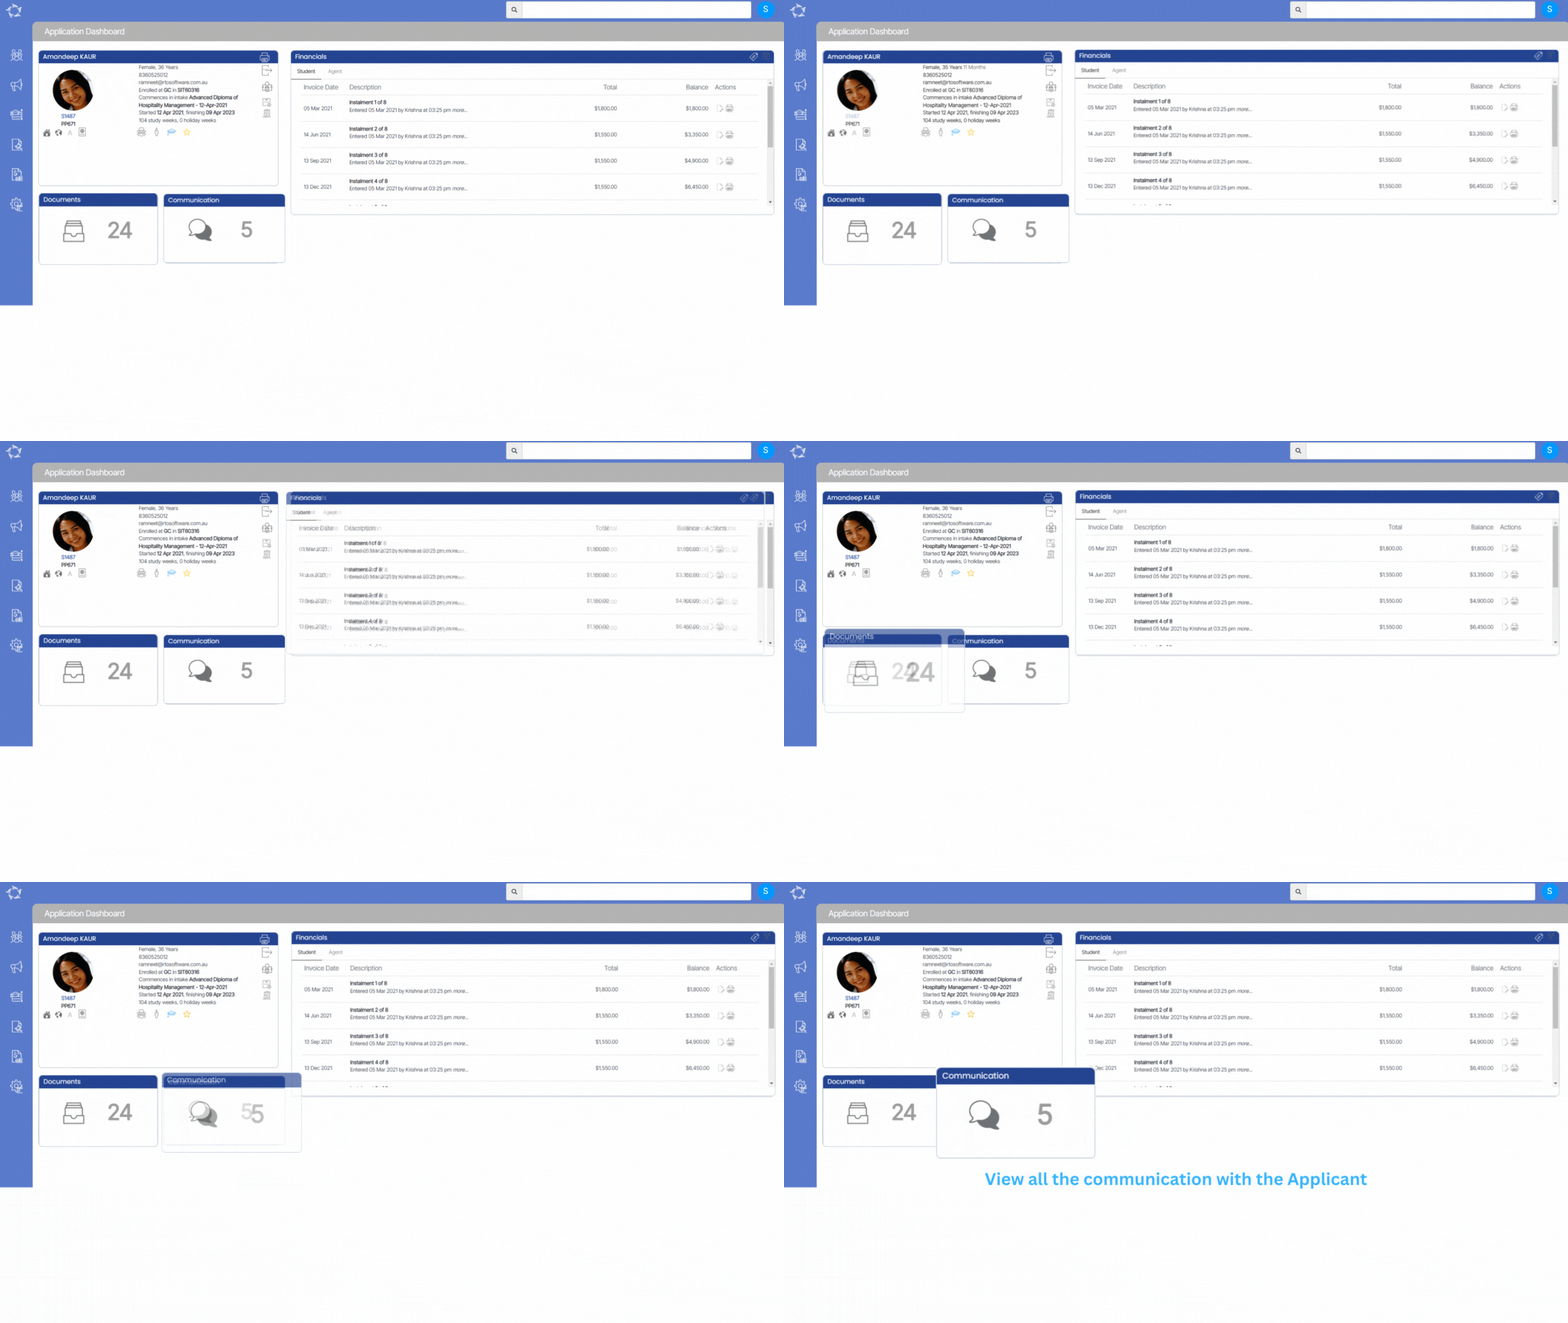
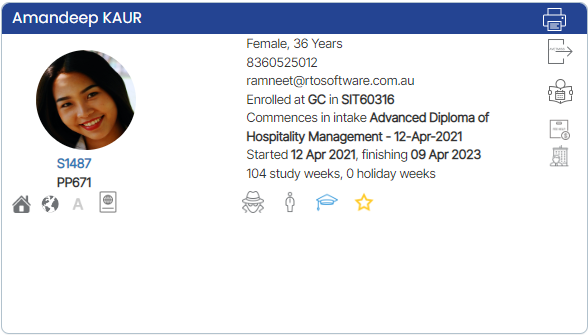
This screen will show you the basic information about the applicant on the application dashboard. Like all dashboards, it is comprised of a number of different tiles that will allow you to navigate to different screens and information linked to the application.

Tiles

Here are all the tiles present on an application dashboard. You can learn more about each tile by selecting the image of the tile.

These tiles are common tiles in all the dashboards.