This is the tag we use to approve any post (old and being edited etc) through revisions. Once the majority of all existing/old posts have gone through our edit process and have this tag, we will then bulk remove it from them.
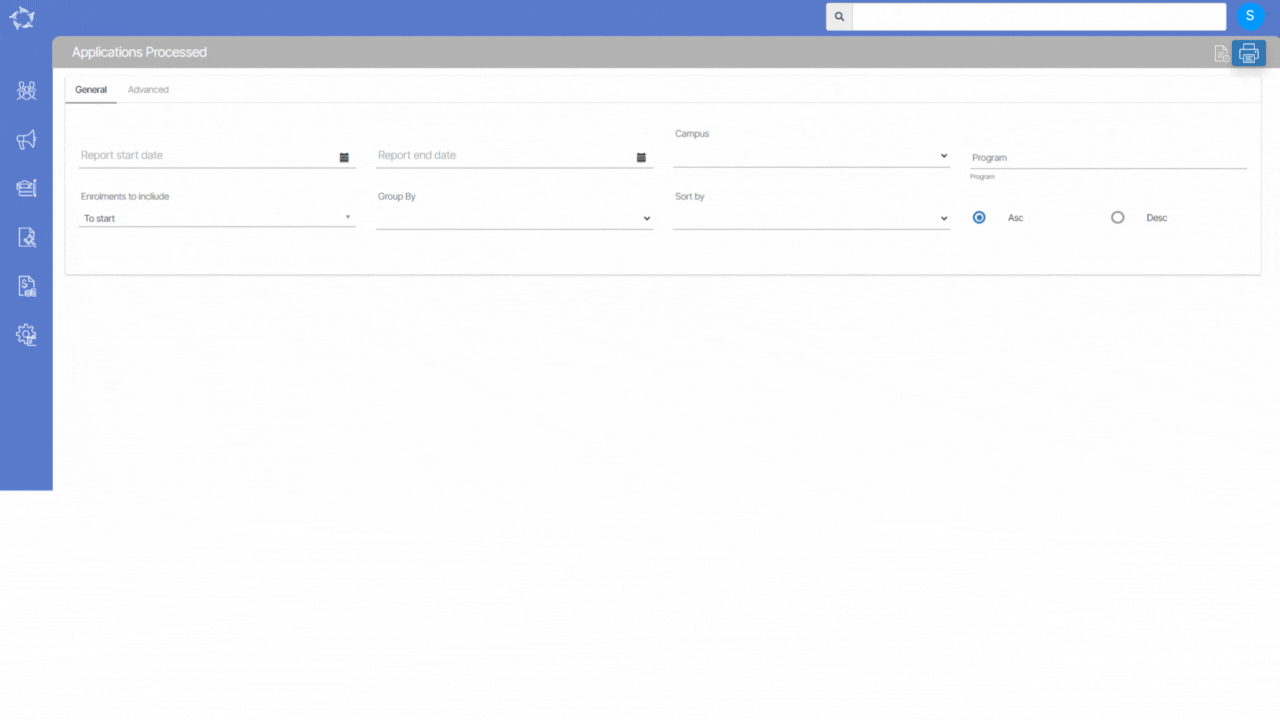
We have introduced a new column ‘Enrolment Status’ in the Application Processed Report. This column will show you the status of the enrolment if it is current, not yet started or finished.
IMPORTANT – In this report, you will see the records of applications and enrolments as well but it will only show the data for the enrolments in the enrolment status column.
Now we are also displaying the reference in the refund transaction details on the student financial screen.
Note – You will be able to see the reference value entered while creating the refund and also you can print the reference value in the refund report as well.
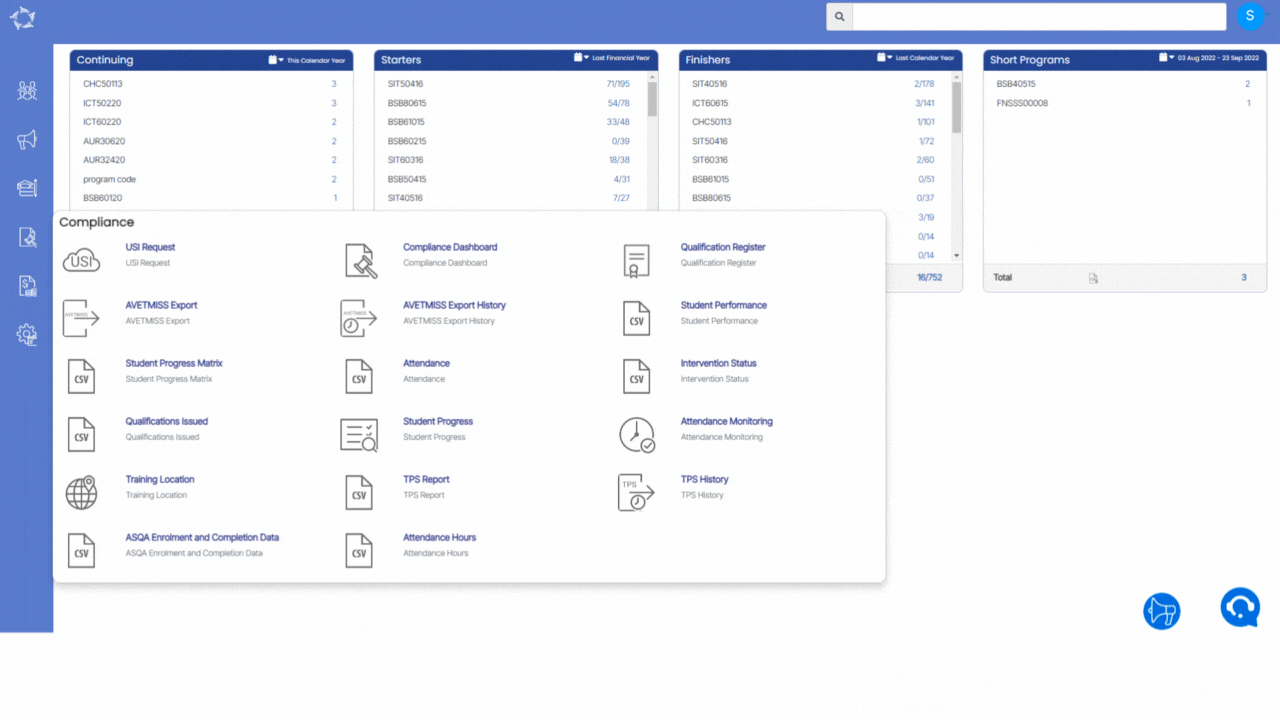
Main Dashboard > Compliance Menu > Attendance Hours Report
We have added a new report Attendance Hours Report under the Compliance Menu. This report will show you the Attended and Absent hours for each enrolment of the student for a selected period.
To know more about the Filters/Parameters, Columns, and explanations, please select the below links.
Our mission is to build software that helps you do things more efficiently. Your input and engagement are vital in helping us improve our service and offerings for your college. We are always open to listening to your feedback.
Any questions, please feel free to reach out to us. We look forward to serving you to the best of our ability.
Please review the changes and if you would like further clarification, please contact our Support team.
A big thank you to so many of you who have been actively participating in helping us bring these new improvements to life.
Next update is due onThursday, 26th January 2023
Note: Please alert other team members within your college if the changes outlined above affect their role or department.
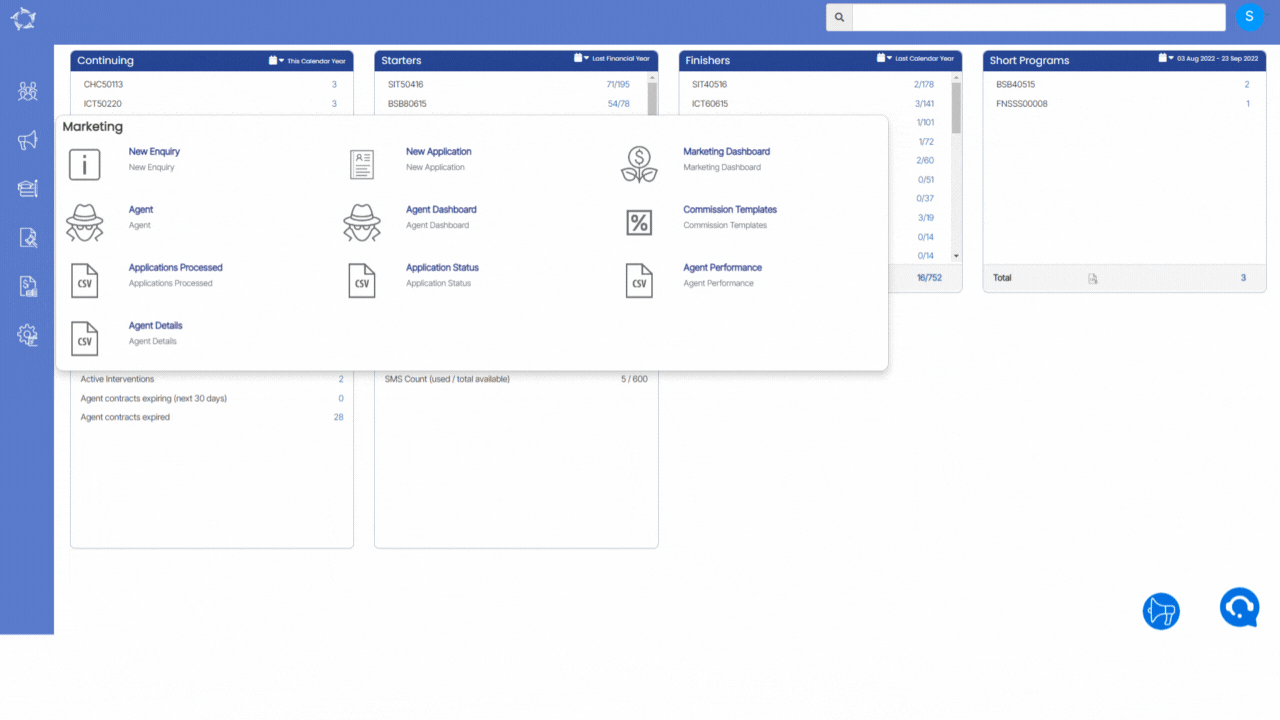
We have added a new report under the Marketing Menu called Agent Details Report. This report will give you every detail about the agent such as Agent Name, Agent Code, addresses, contract dates, etc.
To know more about the Filter and columns and their explanations, please select the below links.
This screen is primarily used by funded clients, specifically for User Choice contracts, to track the employer/s linked to the student’s enrolment. Non-funded clients can also use this screen to add employers for work placements, however, no matter what type of college you are in, you need to set up Employers in the system first. Once you have set up employers, you can then use this screen to add an employer to the enrolment or application.
Where you are adding an employer for a Funded enrolment:
Explanation of the Fields:
Field Name
Explanation
Employer Role
Select the Employer role under this field.
Employer Name
Type in the name or code of the employer under this magic search field.
Start Date
Enter the start date of the purchasing contract that your college, employer, and student have.
End Date
Enter the end date of the purchasing contract that your college, employer, and student have.
Client Identifier
This is typically known as the Delta number from the government’s Delta system for User Choice contracts, however, if it is not a User Choice contract enter any other number, specifically identified as the client identifier, that relates to the specific funded contract linked to the enrolment.
Training Contract Identifier
Depending on which State the enrolment is funded in will determine what number you enter here. In QLD this number is the same as the Client Identifier whereas if you are in Victoria, typically there is a different number you enter here. You would need to look at your contract and the State specific requirements to see what number you should enter here.
Employer Role – you will see three options to select as follows:
GTO – only select this if the Employer is the GTO which means the system will also consider this employer as the Legal employer as well.
Note: You will not be able to add another employer to the enrolment with an employer role of Legal when you select this employer role.
Host – typically this option would only be used where you have a GTO Employer linked to the enrolment. The GTO employer contracts the student out to a ‘host’ employer and you need to add the information for that employer to the enrolment.
Legal – if the employer is not a GTO, then you would enter an employer with an employer role of Legal.
IMPORTANT: for your funded enrolments, where you have an employer linked with the purchasing contract information, the system will only ever use the employer role of GTO or Legal to export information in the NAT files for the enrolment. The Host employer role will be ignored for AVETMISS purposes.
Note: where a student leaves an employer (legal or GTO) then you may need to change the end date against the enrolment. If you will be adding a new employer, then you must change the end date of the first employer to the last date they were contracted to the employer, before entering a new employer against the enrolment. You cannot have overlapping start and/or end dates for each employer in this scenario.
Where you are adding an employer for Work Placement:
Explanation of the Fields:
Field Name
Explanation
Employer Name
Type in the name or code of the employer and select it.
Start Date
Update the start date for the work placement with the employer.
End Date
Update the end date for the work placement with the employer.
IMPORTANT: There is no save button for this screen as it will autosave when you select the Add button.
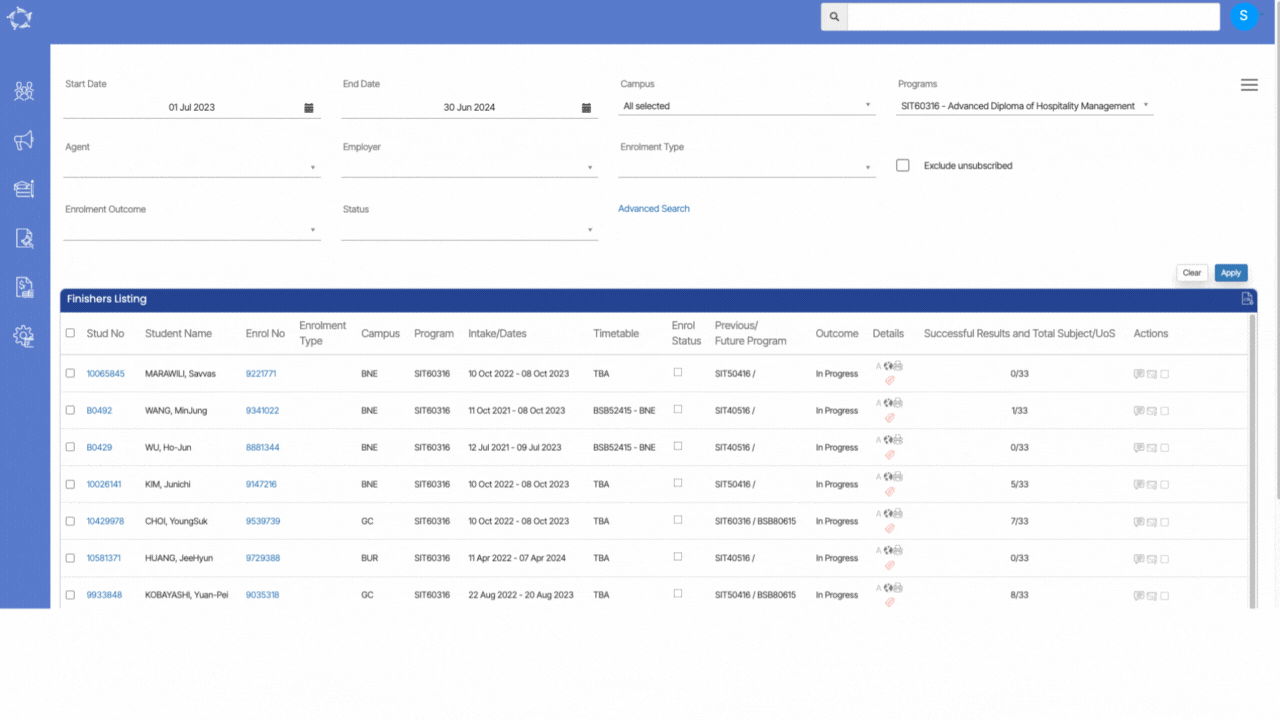
In TEAMS, It’s important that you finish enrolments when the students have completed their studies.
You do not have to manually open each enrolment and finish it, instead, we have the finishers tile > finishers listing screen that you can use to finish the enrolments in bulk. This post will explain to you how to use the finishers listing screen to finish the enrolments all at once.