This is the tag we use to approve any post (old and being edited etc) through revisions. Once the majority of all existing/old posts have gone through our edit process and have this tag, we will then bulk remove it from them.
By choosing the address option, you gain access to the campus address screen, which allows you to add or modify both the local and mailing addresses associated with the campus.
Within this screen, you will find separate sections dedicated to the local address and the mailing address. Each field within these sections is designed to be self-explanatory, ensuring clarity and ease of use. Whether you need to update the physical location details or specify the address for receiving mail, this screen provides a straightforward interface to input and edit the necessary information for both types of addresses.
After setting up the Campus and saving it, you will see a Burger Menu icon displayed on the Campus Entry screen. Selecting this icon will open a menu offering various options. Here are some of the options available under the burger menu:
The campus screen will show you the total number of campuses as per your site licence. To find a particular Campus, you can search for it using either its code or name. If you want to see Campus/es that are no longer active, you can choose to include them in your search results by selecting the box Include Inactive Campuses and selecting the Apply button. This can be useful when you need to manage both active and inactive subjects.
IMPORTANT – If you have a setup of up to 5 campuses as per your site licence and you have only set up 3 campuses then you will be able to add a new campus from the +Campus button. if you have set up 5 campuses in the system then you will not be able to see the +campus button on the welcome screen. The site licence only allows you to add 5 campuses for your RTO.
The Intakes welcome screen will show you the basic information about the intakes in the grid that are active in your database. You can search for a specific intake with the Intake code in the search field and then hit the enter key or select the Apply button. The system will show you the relevant searched data in the grid.
You will also be able to edit the intake by selecting the edit icon under the actions column or you can add a new intake from the + Intake button.
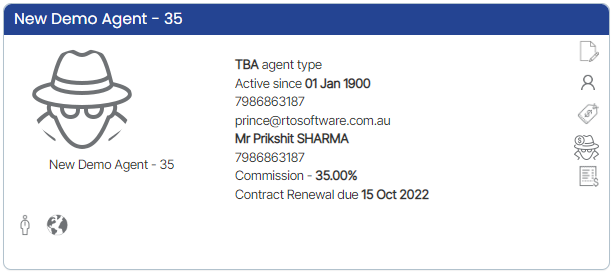
The Agent Dashboard screen will give you a history of the Agent with your college. It is comprised of a number of different tiles that will allow you to navigate to different screens and information linked to the Agent.
The Agent profile tile will give you an overview of the agent’s basic information. A user can upload the Agent picture, edit the details, create bonus invoices, and view pending payments
This is the pending application’s tile and you can convert them from its listing screen
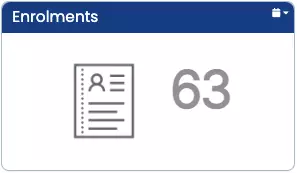
This tile will show you the list of enrolments linked to the agent.
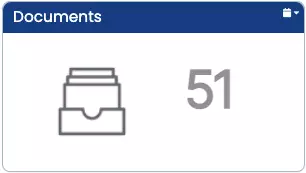
These tiles are common tiles in all the dashboards.
On the Agent Dashboard, we have a bar graph that can give you vast amount of information to keep a check on agent performance.
Main Dashboard > Academic menu > Group Training Plan
The Group Training Plan is used to define the Subjects/unit’s date in the system. The Group Training Plan welcome screen will give you the basic information regarding the GTP’s created in the system and will allow you to search, add and edit group training plans from this screen.
Select here to know more about the icons under the actions column. You will also be able to download the csv file from the csv Icon
The Subjects welcome screen will show you the total number of subjects with the total number of active subjects for all the campuses.
To find a particular subject, you can search for it using either its code or name. If you want to see subjects that are no longer active, you can choose to include them in your search results by ticking a box and clicking the apply button. This can be useful when you need to manage both active and inactive subjects.
IMPORTANT – It is recommended that when creating any new subject, you need to check whether the subject is already in the system and it is superseding with the new subject code.
To do this, you need to search the subject by the subject name in the search field. If the subject name is already in the system with the old subject code then you need to create the subject with the New Subject Code and Name from the Subject Entry Screen.
Once you have created the Subject, you need to come back to the subject welcome screen, search the subject with the subject name, the system will show you both the old and new subject in the grid. There you need to go to the old subject’s supersede icon , the system will show you a pop window where you can search and add new subject and save. This will supersedes the subject with the new subject. Once you have done this, you will be presented with new supersede icon which will show you that this subject has supersedes the old subject (with the old subject code).
NOTE – For your upcoming students/enrolments, you will be using the new subject for the program and it recommended to untick the compulsory tick box if it is linked with the Program from the Program Entry Screen.
Icons under the Actions column
Edit Icon – If you want to make any changes to the subject then you can simply select this icon to edit the desired subject.
Supersede Subject Icon – This icon is used to supersede the subject and when you select the icon, the screen will open the pop window where you add the new subject code and select save.
Subject Supersede Icon – When the subject gets superseded, the grey icon will turn red and you can select the icon and the screen will open the pop window where you can see the superseded subject.
When accessing the Marketing section from the main menu, you will be presented with a selection of icons that serve as shortcuts to various screens and reports related to marketing activities. These icons enable easy navigation to different sections where you can perform tasks such as managing applications, handling inquiries, and processing agent transactions on a daily basis.
When accessing the System Admin section from the main menu, you will be presented with a list of icons that grant you access to various screens associated with the setup and configuration of templates, users, employers, account managers, and other system-level functions. This section is specifically designed to facilitate the management and customisation of the system according to your specific requirements.
By selecting the appropriate icons, you can navigate to the respective screens where you can perform tasks such as creating and modifying templates, managing user accounts and permissions, configuring employer settings, assigning account managers, and leveraging automation features. These icons include:
Below is the table that will show you General and Advanced filters on the Current Student Report Parameters Screen.
General Filters
Explanation
Report Start & End dates
Select the report start and end dates from the calendar icon.
Campus
You can select campus from the dropdown.
Program
Search the Program by typing the program code or Name
Enrolments to include
Select (Current, To Start or Finished) enrolments from the dropdown
Include cancelled enrolments
When the cancel enrolment function is used, selecting this option will include any cancelled enrolments that meet the other selected parameters in the report. However, if only the enrolment outcome is marked as cancelled without using the cancel function, the system is unaware of their cancellation status and will only include them if they meet all other report parameters.
Show only Smart and Skilled enrolments
Select this tick box to Show only Smart and Skilled enrolments
Include students on holiday
Select this tick box to Include students on holiday
This is magic search field and you can select multiple timetables.
Enrolment Type
This is user code in TEAMS, select the enrolment time updated in TEAMS
Enrolment Outcome
Select multiple enrolment outcomes (completed, in progress etc.) from the dropdown
Agent
Select multiple agents from the dropdown.
Employer
Select employers from the dropdown.
Account Manager
Select Account managers
Marketing Source
Select Marketing Sources
Nationality
Select Nationalities
Country
Select Countries
Select the the “Print” Icon to generate the report. After clicking on it, the system will direct you towards the report dashboard screen. You can see the report status over there if it’s generated or not. Once it’s generated, download the report.


 the system will show you a pop window where you can search and add new subject and save. This will supersedes the subject with the new subject.
 which will show you that this subject has supersedes the old subject (with the old subject code).
 – If you want to make any changes to the subject then you can simply select this icon to edit the desired subject.