Unit of Studies

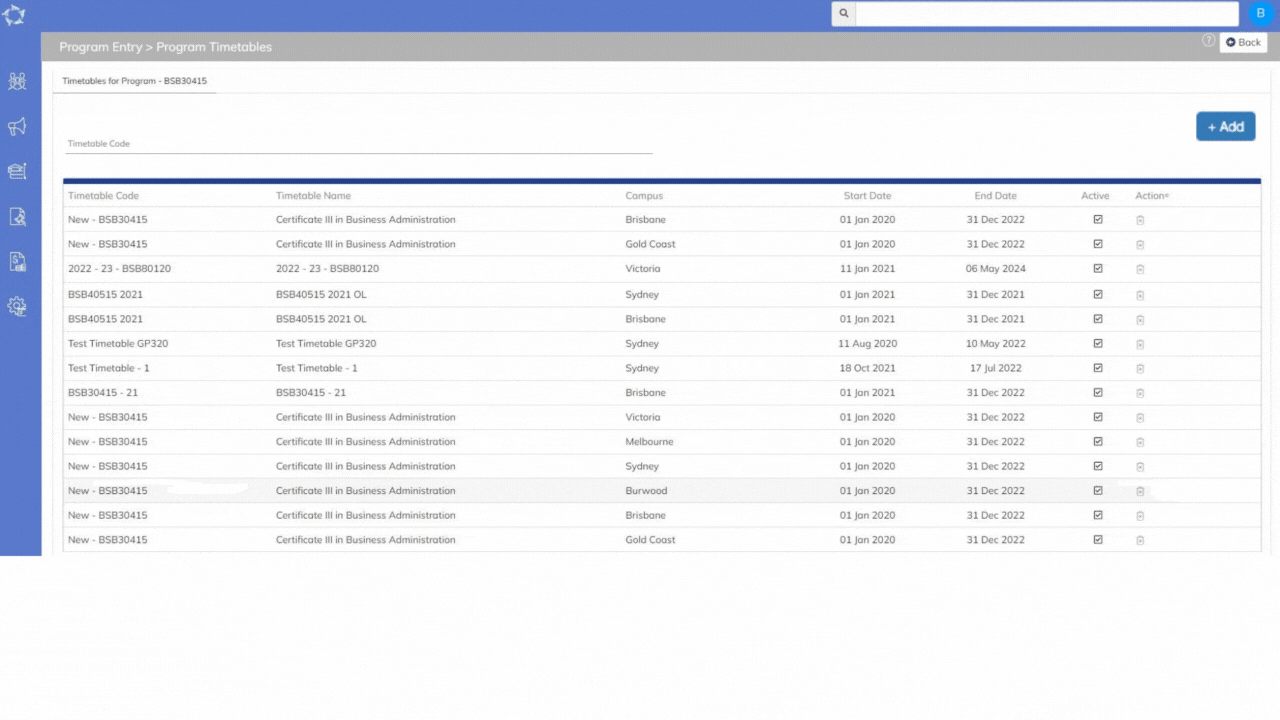
Dashboard > Academics menu > Unit of Studies

The Unit of Study is where the students enrolled in a unit to undertake the required study and to complete the assigned assessment pieces as per the unit outline.

When you are on the UoS welcome screen, you will be able to search, edit and view UoS that are already in your database and you can also add a new +Unit of Study in the system.

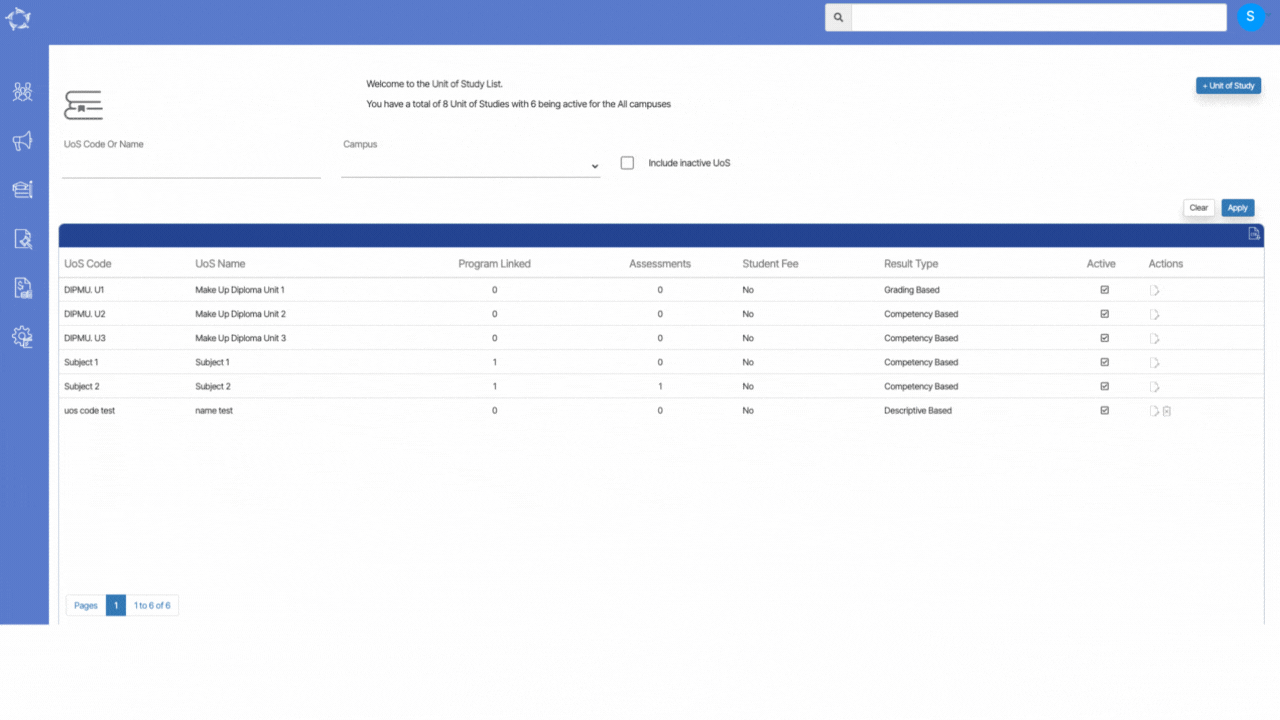
Explanation of the fields on the Unit of Study Screen is below:

FieldsExplanation
UoS CodeThis search field will allow you to search for the specific UoS with their Code and Name.
CampusYou can select the Campus from the Dropdown.
Include inactive UoSIf you select this tick box, then it will show all the inactive UoS.
Apply buttonOnce you applied the filters, you can select the Apply button to see your desired search or simply select the enter key.
+ Unit of StudyYou can select this button if you want to add a new UoS in the system

Assessment – Documents

Assessments Entry Screen > Burger Menu > Documents

On this screen, you will be able to see the documents in the grid that are already linked with the assessment and you can also add the documents for an Assessment. When you select the +Add button, the system will show the files on your local system and as per your need, you can select your desired document to upload.

After selecting the document, a popup window will appear and you will be able to see the document there. You can select the document type and you can also add notes for the document. Then select the Upload button.

An explanation of the fields is below:

FieldsExplanation
Upload DateThis will show you the current date and you will not be able to change the date as it is auto populated and read only.
NotesYou can write notes for your own reference by selecting the notes icon.
Document TypeThis is a user code in TEAMS and based on the user code created, you can select the document type
Document NameIt will show the name of the document which you have selected.
Public DocumentSelect this box if you want to make the document public on the student portal.

AGD – Applications Tile

Main Dashboard > Marketing Menu > Agent Dashboard > Applications Tile

Overview

In the Applications Tile, we show all the pending applications linked to the Agent. You can convert, decline and perform other actions to the applications from this listing screen.

This screen is divided into two sections.
1) Filters/Parameters
2) Listing Grids

Filters/Parameters:

To open this screen, you would have selected the Applications Tile link from the Agent Dashboard. Based on the date range you have selected on the Application Tile, the system will open the screen and populate the information in this section. For example, it will show you the start and end dates that were used in the tile. You can add a New Application with this agent by selecting the +Application button.

Select here to know more about the filters/parameters.

Listing Grid

In this grid, we are displaying the list of all pending applications. We are showing the Applications Processed Date, App No, Student Name, Campus, Program, Start Date, End Date, Intake, Application Type, Marketing Source, Agent, Account Manager, Status, and Actions columns. All of these columns are self-explanatory.

Select here to know about the Icons under the Actions column and Burger Menu

How to select Applications?

Use tick boxes to select applications if you wish to send email/SMS, create a contact log, print letters and start enrolments in bulk. After selecting the students, pick the option from the burger menu and you are one step away to finish your heap of work in one go.

Or if you wish to select all students at once, use the tick box present right beside the Processed Date column.

AGD – Enrolments Tile

Main Dashboard > Marketing Menu > Agent Dashboard > Enrolments Tile

Overview

In the Applications Tile, we show all the enrolments that are linked to the Agent.

This screen is divided into two sections.
1) Filters/Parameters
2) Listing Grids

Filters/Parameters:

To open this screen, you would have selected the Enrolments Tile link from the Agent Dashboard. Based on the date range you have selected on the Enrolments Tile, the system will open the screen and populate the information in this section. For example, it will show you the start and end dates that were used in the tile.

Select here to know more about the filters/parameters.

Listing Grid

In this grid, we are displaying the list of all enrolments. We are showing the Student No, Enrolment No, Student Name, Campus, Program, Intake, Enrol. Start-End Date, Enrolment Status, Previous/Future Program, and Overdue Amt columns. All of these columns are self-explanatory.

Select here to know about the Icons under the Actions column and Burger Menu

How to select Enrolments?

Use tick boxes to select enrolments if you wish to send email/SMS, create a contact log, print letters and start enrolments in bulk. After selecting the students, pick the option from the burger menu and you are one step away to finish your heap of work in one go.

Or if you wish to select all students at once, use the tick box present right beside the Student No column.

Program – Timetables

Main Dashboard > Academics > Program > Program Entry Burger Menu > Timetables

This screen will show you the timetables in the grid that are allocated to the Program. You can add the timetable from the add button or delete the timetable for the delete icon under the actions column.

To link the timetable to a program, you need to type in the timetable code in the magic search field and once you type in the first three initials of the timetable code or name, it will show you suggestions to select the timetable.

When you select the desired timetable from the suggestions, you then need to select the +Add button and once you hit the add button, the selected timetable will get linked to a program as shown below:

Subject – Document

Subjects > Subjects Entry Burger Menu > Documents

When you select the documents option, you will taken to the subject document scree. You will see documents in the grid that are already linked with the Subjects. You can add documents for the subject by selecting the +Add button.

When to select the +Add button, a popup window will appear where you can select the document from your local system to upload save.

Explanation of the fields below:

FieldsExplanation
Upload DateThis will show you today’s days which will be auto populated.
NotesYou can write notes for your own reference by selecting the notes icon.
DocumentsTick this box if you want to make the document public on the student portal.

Commission Template Entry Screen

Main Dashboard > Marketing Menu > Commission Templates > +Template Button

Overview

A commission template specifies the percentage amount that will be paid to the Agent for their services. The Commission Template entry screen will let you create the template as per your need. You need to enter the template name and mark the template as Active.

The system will let you create two different types of Commission Templates:

Same for all Programs

The system will allow you to create a commission template that will be the same for all the programs and you can select the template when creating the student application. You can choose from the two different commission types that are explained below:

Fixed Amount for all Programs: By selecting the Fixed Amount for all Programs radio button, You can enter a fixed amount of commission that will be set as the default amount whenever the respected commission template is selected while creating the application or linking agent to an enrolment.

Fixed Percentage for all Programs: By selecting the Fixed Percentage for all Programs radio button, You can enter a fixed percentage of commission that will be set as the default whenever the respected commission template is selected while creating the application or linking agent to an enrolment.

Define individually for each Program

The system will allow you to create a Commission Template individually for a specific program when the Define individually for each Program radio button is selected. Enter the Commission Template name and select the save button first. Then you need to select the +Program Commission button from where you can choose the specific program for this commission template.

Note: You can either select the Agent commission Type or Program from the Program Commission screen. The system will not allow you to select both fields at the same time for the commission template.

The field name and Explanation of the field are given below:

Field NameExplanations
Agent Commission TypeThis is a user code in TEAMS and you can select the Agent Commission Type from the dropdown field.
ProgramSelect the Program for the commission template from the dropdown field.
Commission PercentageEnter the Commission Percentage in this field.

Commission Templates

Main Dashboard > Marketing Menu > Commission Templates

Overview

A commission template specifies the percentage amount that will be paid to the Agent for their services. The Commission Template welcome screen will show you some basic information about the Commission Template and will allow you to search, edit and create commission template for the agent. You can edit the commission template by selecting the icon.

You can create new commission templates by selecting the +Template button.

AGD – Agent Performance Bar Graph

Main Dashboard > Marketing > Agent Dashboard > Agent Performance Tile

Each CRICOS RTO that has collaboration with agents, needs to monitor the agent performance in order to make up their mind in taking certain decisions. On the Agent Dashboard, we have a bar graph that can give you a vast amount of information to keep a check on the agent performance.

This bar graph will display the agent performance for the current financial year. On the right top side of the bar graph, you can see the calendar option. From there, you can change the date range as per your requirement.

Click here to learn about the calendar option

Bar Graph

The horizontal line of the bar graph will display the months based on what calendar option you select. The vertical line of the bar graph will display the count and that count again varies depending upon the calendar option. The vertical colourful bars in the bar graph will present the data with a tooltip. Once you will move your cursor over the bar, you can see a tooltip based on which colour bar you have moved your cursor to. Each colour represents a different purpose. You can see the colour classification on the right side of the bar graph.

As you can below, the tooltip says Converted Applications 17 for the month of Oct 2022. It means for October month, there are just 12 applications to process for that agent, hence the height of the bar is till count 17.0. So from these colourful bars, you can easily read how many total applications linked with the agent, how many converted, commenced, completed, and did not commence & canceled.

Financials

Just below the bar graph, we have the financials area for that agent. This is easily readable from the labels just below the figures. This gives you the Tuition Fee’s data based on the calendar option you select.

Moreover, there is a more button in this section that will directs you toward the Agent Financial Transaction screen.

Campus – Documents

Campus > Edit Campus > Campus Entry Burger Menu > Documents

When you select the documents option from the burger menu, a document screen will open where you can add documents for the campus by selecting the +Add button.

Upon selecting the +Add button, a popup window will open on the screen from where you can select the document which you want to upload for the campus.

Explanation of the fields

FieldsExplanations
Upload DateIt will be today’s date and will get auto-populated in the field
NotesYou can write any notes for your own reference.
Document TypeThis is a user code in TEAMS and based on the User Code created in TEAMS, you can select the document type.
Document NameIt will show the name of the document which you have selected.
Public DocumentTick this box if you want to make the document public.
Reference MaterialIf the document is for reference then you can tick this box. Also, you can write the title of the material.
Display in SRC WorkplaceTick this box if you want to display the document in SRC Workplace.