This is the tag we use to approve any post (old and being edited etc) through revisions. Once the majority of all existing/old posts have gone through our edit process and have this tag, we will then bulk remove it from them.
The main menu for Finance provides a list of icons that allow you to navigate to different areas related to financial transactions for students and agents. By selecting the icons, you can access the financial dashboard, screens, and reports that provide information on the financial status and activities of these groups.
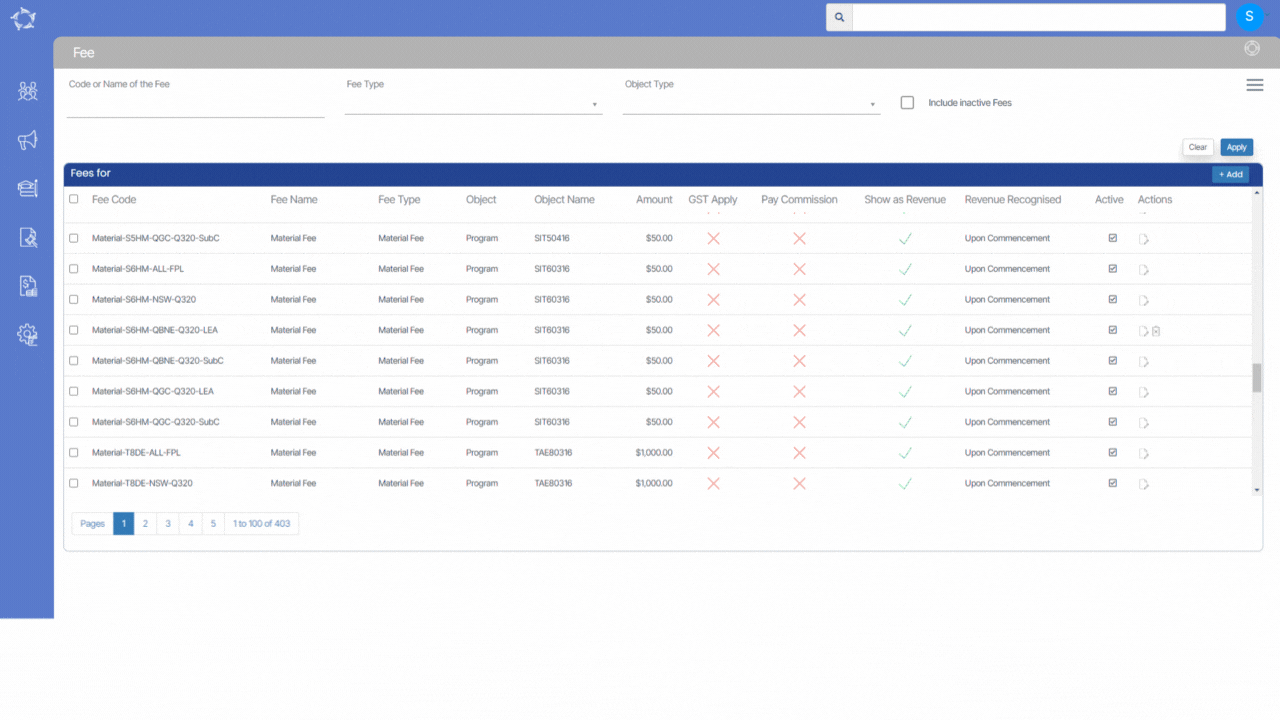
Main Dashboard > Finance Menu > Fee Icon > +Add button
The Fee Entry screen enables you to add new fees to the system or edit existing ones. If you want to create a new fee, you’ll need to input the relevant details related to the fee into the appropriate fields. Once you’ve provided all the necessary information, you can save your new fee by clicking the save button. This process allows you efficient and organised fee management, as you can easily create and modify fees as needed.
Below is the explanation of the fields:
Field Name
Explanation
Object Type
This is a mandatory field and cannot be left blank as the system will create the fee based on the object type selected. Select the appropriate object type (such as Organisation, Campus, Subject, UoS or Program) from the dropdown to create the fees.
Fee Type
This is also a mandatory field and based on the fee type created in TEAMS, it will populate in the dropdown.
Fee Code
This is also a mandatory field and you can add the fee code in this field.
Fee Name
This is also a mandatory field and you can enter the fee name (Name of Fee (generally a combination of Fee Type and Student Fee Name)in this field.
Fee Amount
This is also a mandatory field and you can enter the fee amount (If this fee has GST applied to it, you must enter the excluding GST amount in this field) in this field. Only enter the amount with numbers, do not enter any currency symbols such as $.
Apply GST
Select this tick box if the fee has GST applied to it.
Pay Commission
Select this tick box to apply pay commission.
Is Rate Fee?
Select this tick box if the fee is rate based fee.
Active
Select this tick box to make the fee active.
Show as Revenue
When you select this tick box, the system will pop up the drop down namely (When is revenue Taken up). Based on the user code created for the revenue, you can select it from the drop
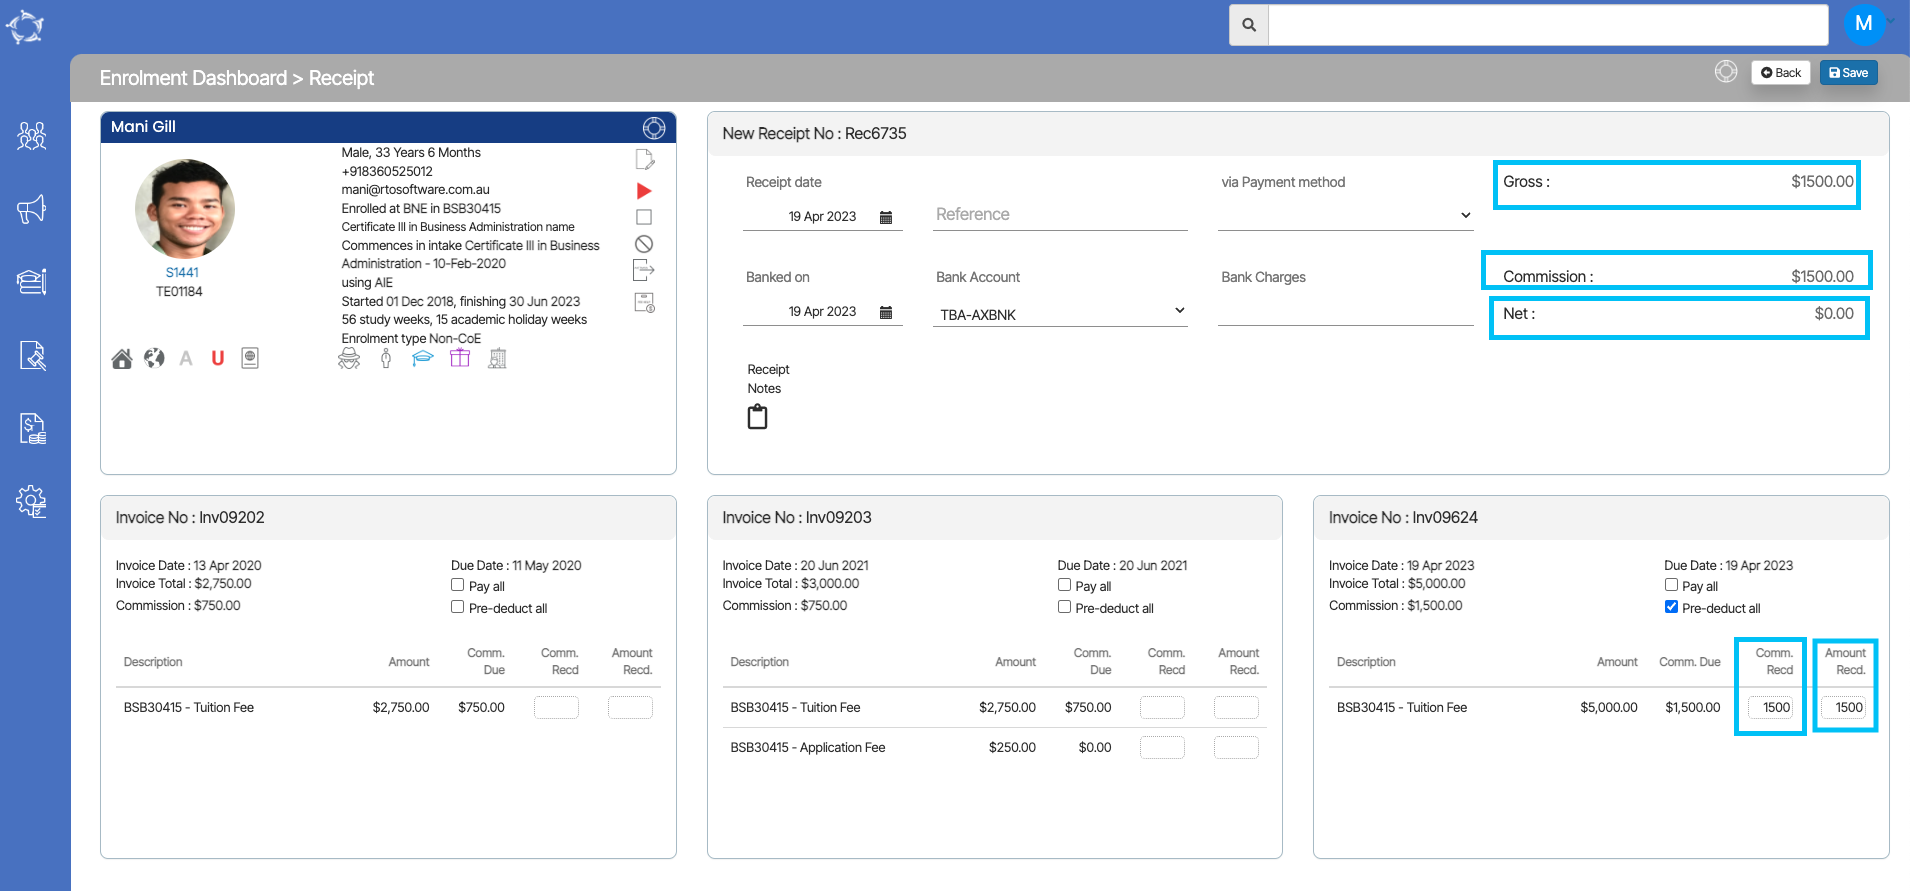
Here’s the scenario that we’re going to answer for you. A student has an invoice worth $5,000 in tuition and the commission on that is $1200. The student gives the agent, the $1200 to pay towards their invoice. But the agent keeps that money that’s full $1200. To pay for their commission amount.
Remember– The student is paying the agent the $1500 to pay to the college. The system knows the gross amount that the student paid $1500 and it knows by the Net amount is $0.00 that the agent kept that money. So it is important for you to d the transaction in TEAMS as shown below.
This is how you would do that. The receipt for the student in teams.
Look for the Invoice and update the commission Received and the Amount Received and the system will tick the pre-deduct tick box for that commission. In the above tile for the receipt, the system will show the gross amount as $1500, the Commission amount as $1500 and the Net amount as $0.00 that college will receive as you can see below in the screenshot.
If the system has not calculated a GST amount for the agent invoice, it is most likely because the Charge GST option was not set for an Agent. There could also be the scenario where the agent did have a charge GST set and the system did calculate the GST in many of their commission invoices, however, a user has gone and edited the agent and unselected this setting. When you do this, any new commission invoices the system generates, will not have the GST calculated.
IMPORTANT – it is important to understand that at the time you do a transaction in TEAMS, the system uses the settings for that transaction as they are. If you then change the settings afterwards, the system will NOT retrospectively go backwards and update data. For example, you have an Agent that was not set with Apply GST and you raise the invoices for an agent. You then realise this mistake and go and update the Agent with Charge GST turned on. The system will not go backwards and update all the agent invoices with the fee in it where the GST wasn’t calculated, it will only use the new setting for the new invoices you raise.
If you have this scenario where you want to fix agent commission invoices to show the GST and currently isn’t then there are two sections to fix this problem.
Those sections are as follows:
Section 1 – Edit the Agent settings
Go to Main Dashboard > Marketing Menu > Agent Dashboard Icon
When you are on the Agent Dashboard screen, Select the edit icon from the agent profile tile.
The system will take you to the Agent Entry Screen.
Select the Charge GST tick box and save the screen.
Section 2 – Edit the Agent Commission Invoice/s
When all the steps are done, go back to the Enrolment Dashboard for the student.
Note – If you haven’t made any payment to the Agent, you have the option to delete the Agent from the enrolment and then relink them. By relinking the Agent, you will establish a new connection that allows you to access and view the GST amount for the Agent’s invoices. This means that once you have successfully relinked the Agent, you will be able to see the specific amount of GST associated with their invoices.
In the Finacial Tile, go to the Agent tab and delete the agent from the delete icon. The system will show you a pop on top of the screen (Are you sure, you want to delete Agent), select Ok to continue and or cancel to leave it as it is.
Once you have deleted the agent, go back to the student tab in the financial tile and select the Agent Icon.
The system will show you a pop on the screen to relink the agent. Select the appropriate agent and update.
The system will refresh the screen for you and then you can see the GST amount for the Agent Invoices.
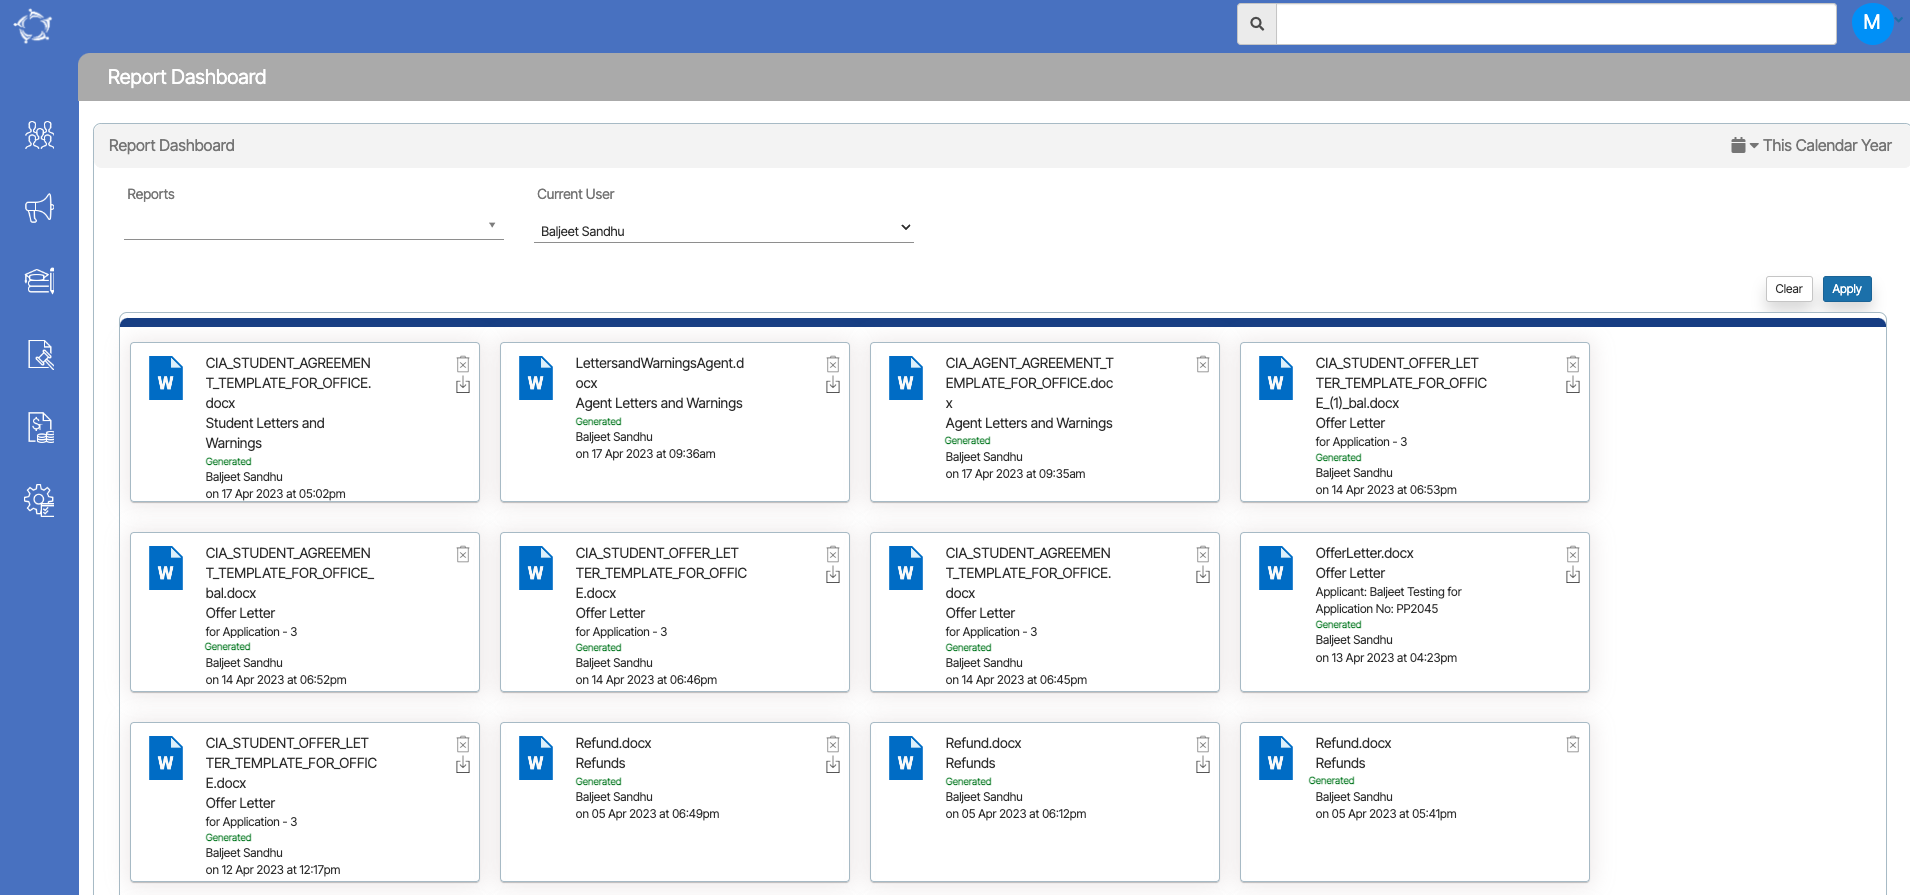
The generation of reports has been optimised, resulting in a significant reduction in the time it takes to produce Word formats. The system has been improved to enhance the speed of generating reports, providing you with faster access to the information you need.
Q&A
Do you have a TEAMS question?
Make a list of your questions, send them to our support teams and we will send you the answer and add them to our fortnightly update.
Select the read more button as here are some questions we get asked and then answers on how to do them in TEAMS.
Our mission is to build software that helps you do things more efficiently. Your input and engagement are vital in helping us improve our service and offerings for your college. We are always open to listening to your feedback.
Any questions, please feel free to reach out to us. We look forward to serving you to the best of our ability.
Please review the changes and if you would like further clarification, please contact our Support team.
A big thank you to so many of you who have been actively participating in helping us bring these new improvements to life.
Next update is due onThursday, 4th May 2023
Note: Please alert other team members within your college if the changes outlined above affect their role or department.
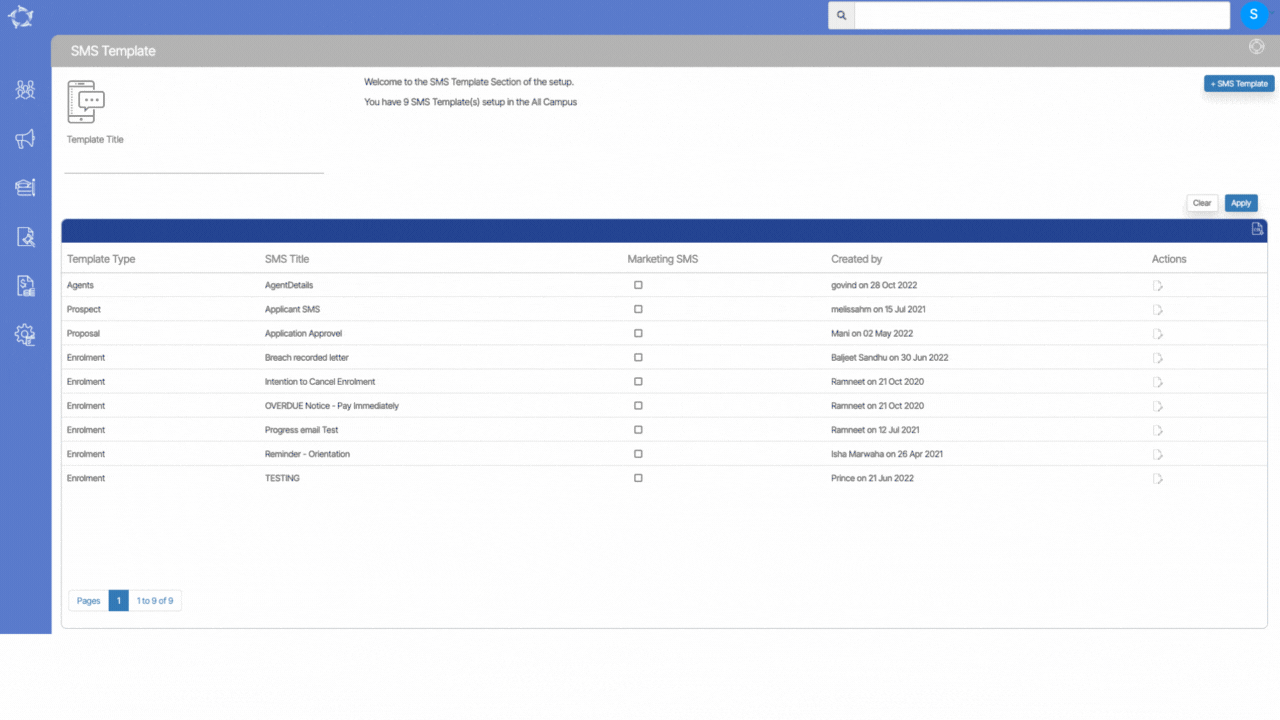
The SMS Template screen displays a grid containing a list of all available SMS templates. To locate a specific template, you can enter its code or name in the search field. The search function will return any matching results that match your criteria. Additionally, you can edit a template by selecting the edit icon located under the Actions column in the grid. This will allow you to make changes to the template’s content, format, or other details.
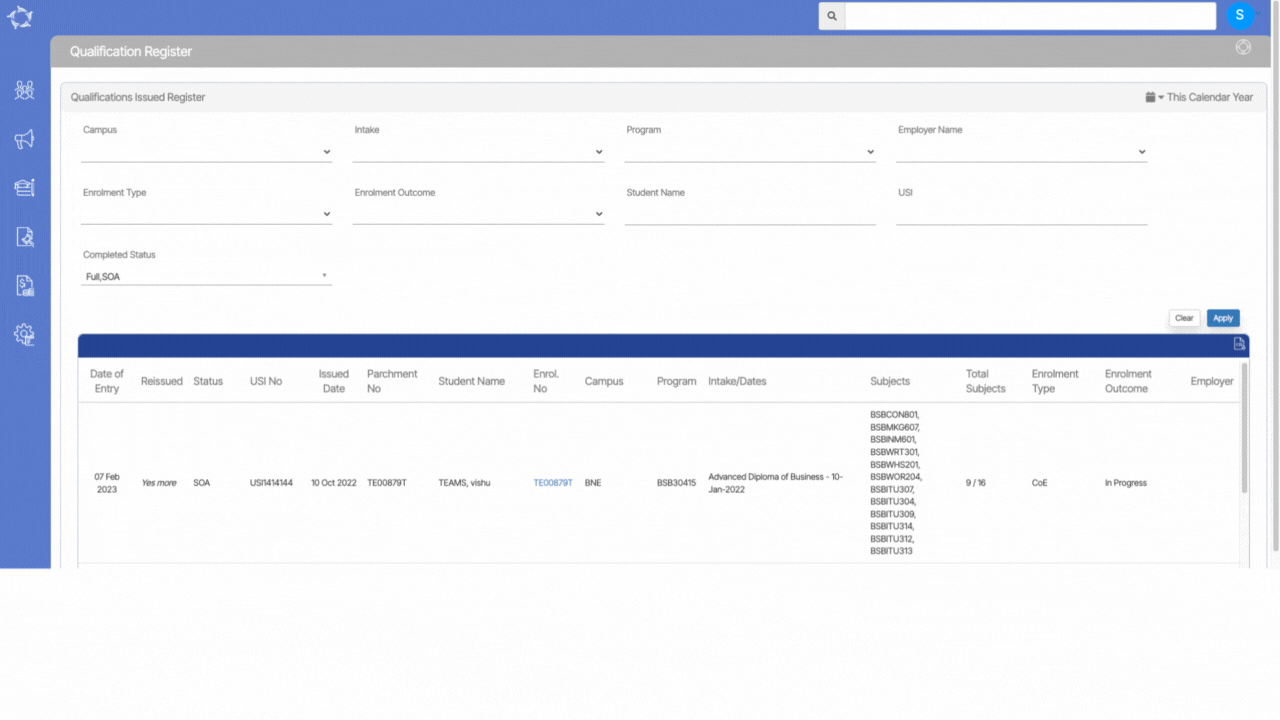
Main Dashboard > Compliance Menu > Qualification Register
The qualification-issued register is a record-keeping system used to track and manage the qualifications that you have issued to students. Its primary purpose is to help manage and track the qualifications that have been issued to students who have completed a particular course or program.
This screen is further divided into two sections:
Parameters Grid
Listing Grid
Parameters Grid:
There are different fields available under the grid from which you can filter out the Qualification issued to the students as per your own requirement. Further explanation of these fields is provided below:
Field Name
Explanation
Campus
If you need qualifications-issued register for multiple campuses, you can select the tick box for each campus from the dropdown.
Intake
Select Intakes from the dropdown field
Program
Select various programs from the dropdown field
Employer Name
Select employer from the drop-down field
Enrolment Type
Select enrolment type from the drop-down.
Enrolment Outcome
Select the enrolment outcome from the drop-down.
Student Name
Enter the student’s name in this field.
USI
Enter the student’s USI in this field.
Completed Status
Select the completed status from the drop-down field.
Listing Grid:
The Listing grid will show you the qualifications-issued register as per the parameters that you have selected. In the listing grid, you can see the qualifications that you have issued to students and other information related to the qualification of the students.
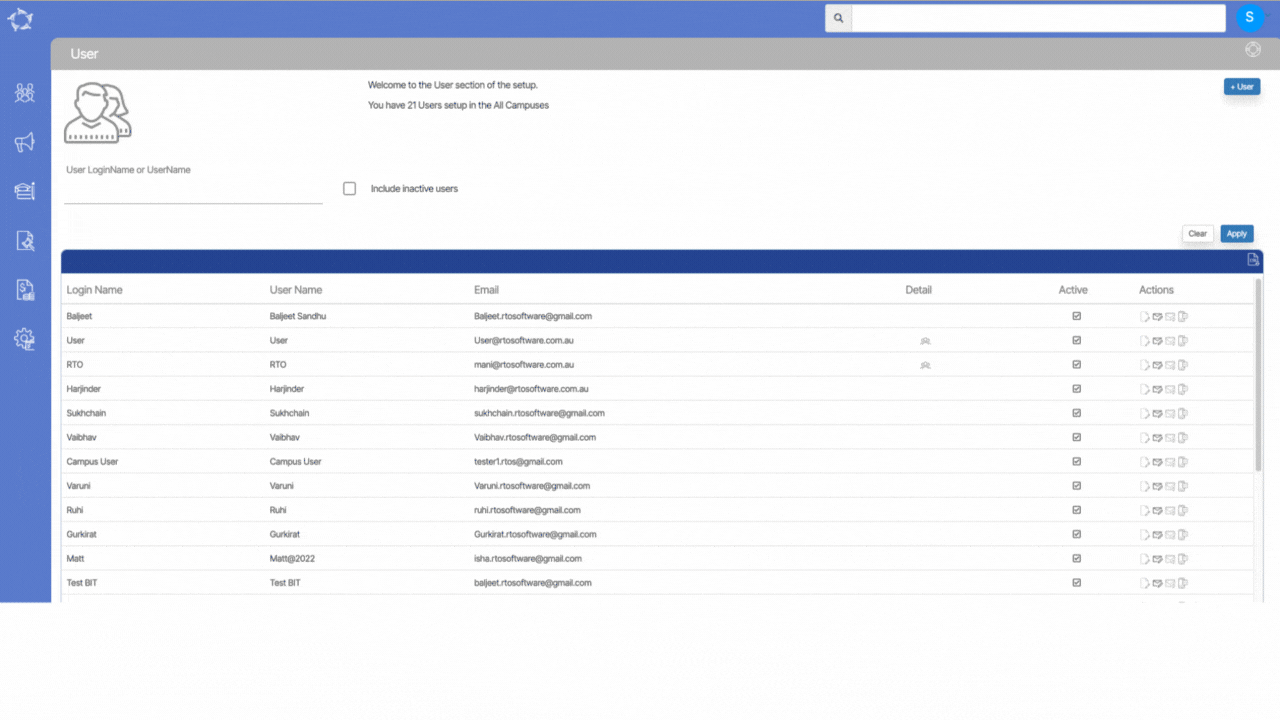
This screen provides you with the ability to view all the users that have been previously created in the system. You can easily search for a particular user by using their login name or username. If you want to limit your search to only inactive users, you can check the ‘Include Inactive Users’ box before clicking on the Apply button. This will filter the results and show you only the inactive users.
To add a new user to the system, you can select the +User button located at the top right corner of the screen. This will take you to the User Entry Screen where you can input the necessary information and create a new user account.
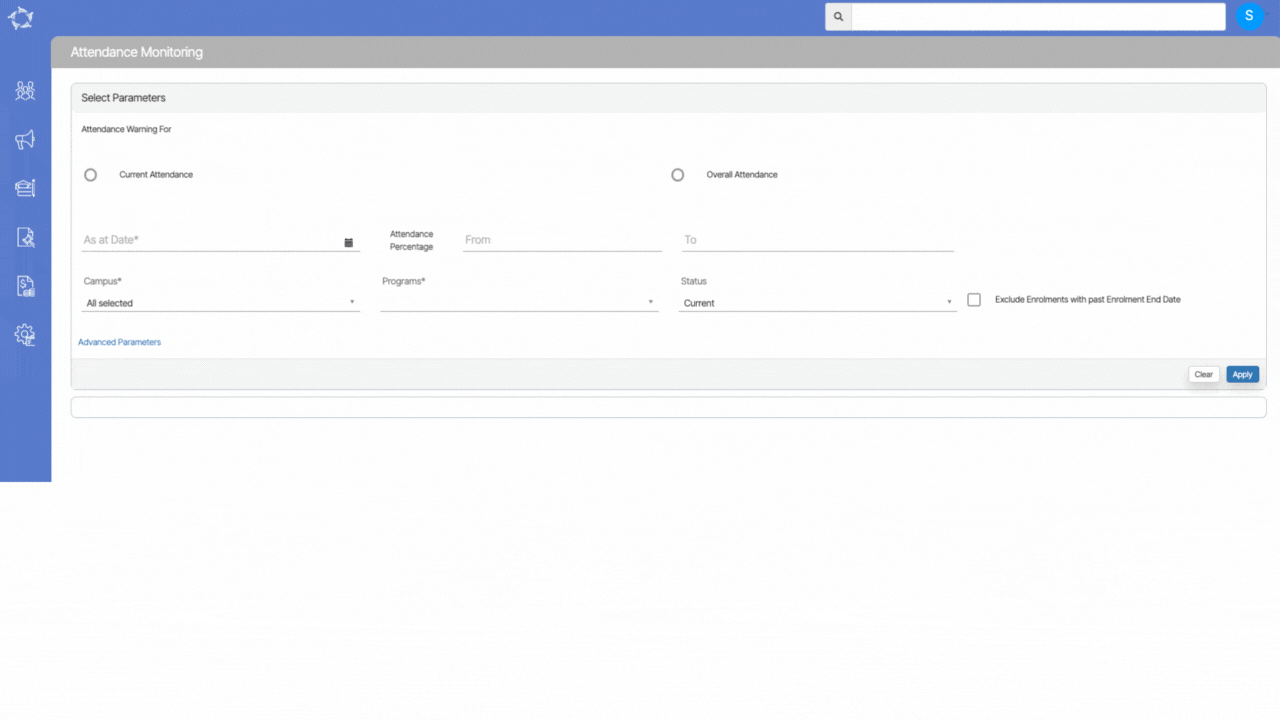
Main Dashboard > Compliance Menu > Attendance Monitoring
An Attendance Monitoring screen can greatly assist in keeping track of student attendance. It provides an easy and efficient way to monitor both the current and overall attendance of students.
This screen is further divided into two sections:
Filters/Parameters
Listing Grid
Parameters
There are different fields available under the grid from which you can filter out the attendance of the students as per your own requirement. Further explanation of these fields is provided below:
Field Name
Explanation
Current Attendance
Select this radio button to filter out the current attendance of the students
Overall Attendance
Select this radio button to filter out the overall attendance of the students
As at Date
As at date is always today’s date and this field cannot be left blank as it is a mandatory field
Attendance Percentage – From
Enter the minimum attendance percentage in this field.
Attendance Percentage – To
Enter the maximum attendance percentage in this field.
Campus
If you are monitoring attendance for multiple campuses, you can select the tick box for each campus from the dropdown. This field cannot be left blank as it is a mandatory field
Programs
This dropdown will allow you to select multiple programs. this field cannot be left blank as it is a mandatory field
Status
Select the enrolment status such as Current and Finished
Exclude Enrolments with past Enrolment End Date
Select this tick box if you want to exclude the enrolments with past enrolment end date
Advanced Filters – The advanced filters are non mandatory filters and if you see the relevant information you can select (Intakes, Group training Plans, Overseas/Local Students, Account Manager, Trainer, Enrolment Type, Timetable and classes from the dropdown.
Listing Grid:
By selecting certain parameters, you can view detailed information about a student’s attendance history in the listing grid.
To know more about the icons under the actions column, select here