Below is the list of changes that have been made to the Edit Enrolment AVETMISS Settings.
| Date Updated | Changes Made |
|---|---|
| 30 Nov 23 | Bulk Exclusion of Subjects from AVETMISS Submission |
This is the tag we use to approve any post (old and being edited etc) through revisions. Once the majority of all existing/old posts have gone through our edit process and have this tag, we will then bulk remove it from them.
Below is the list of changes that have been made to the Edit Enrolment AVETMISS Settings.
| Date Updated | Changes Made |
|---|---|
| 30 Nov 23 | Bulk Exclusion of Subjects from AVETMISS Submission |
A student portal is an online platform, offering students to log in using their email addresses. Students can access a range of personalised information, including academic results, and details of their past enrolments and future enrolments.
Student portal login page – to log in to the student portal, your students will be provided with the URL for example – https://Students-teams web address.(https://Students-xyz.rtoteam.com.au)
We have student letters and warning report that is used to create student ID cards in TEAMS: There are different steps and scenarios that you must follow to create student ID cards.
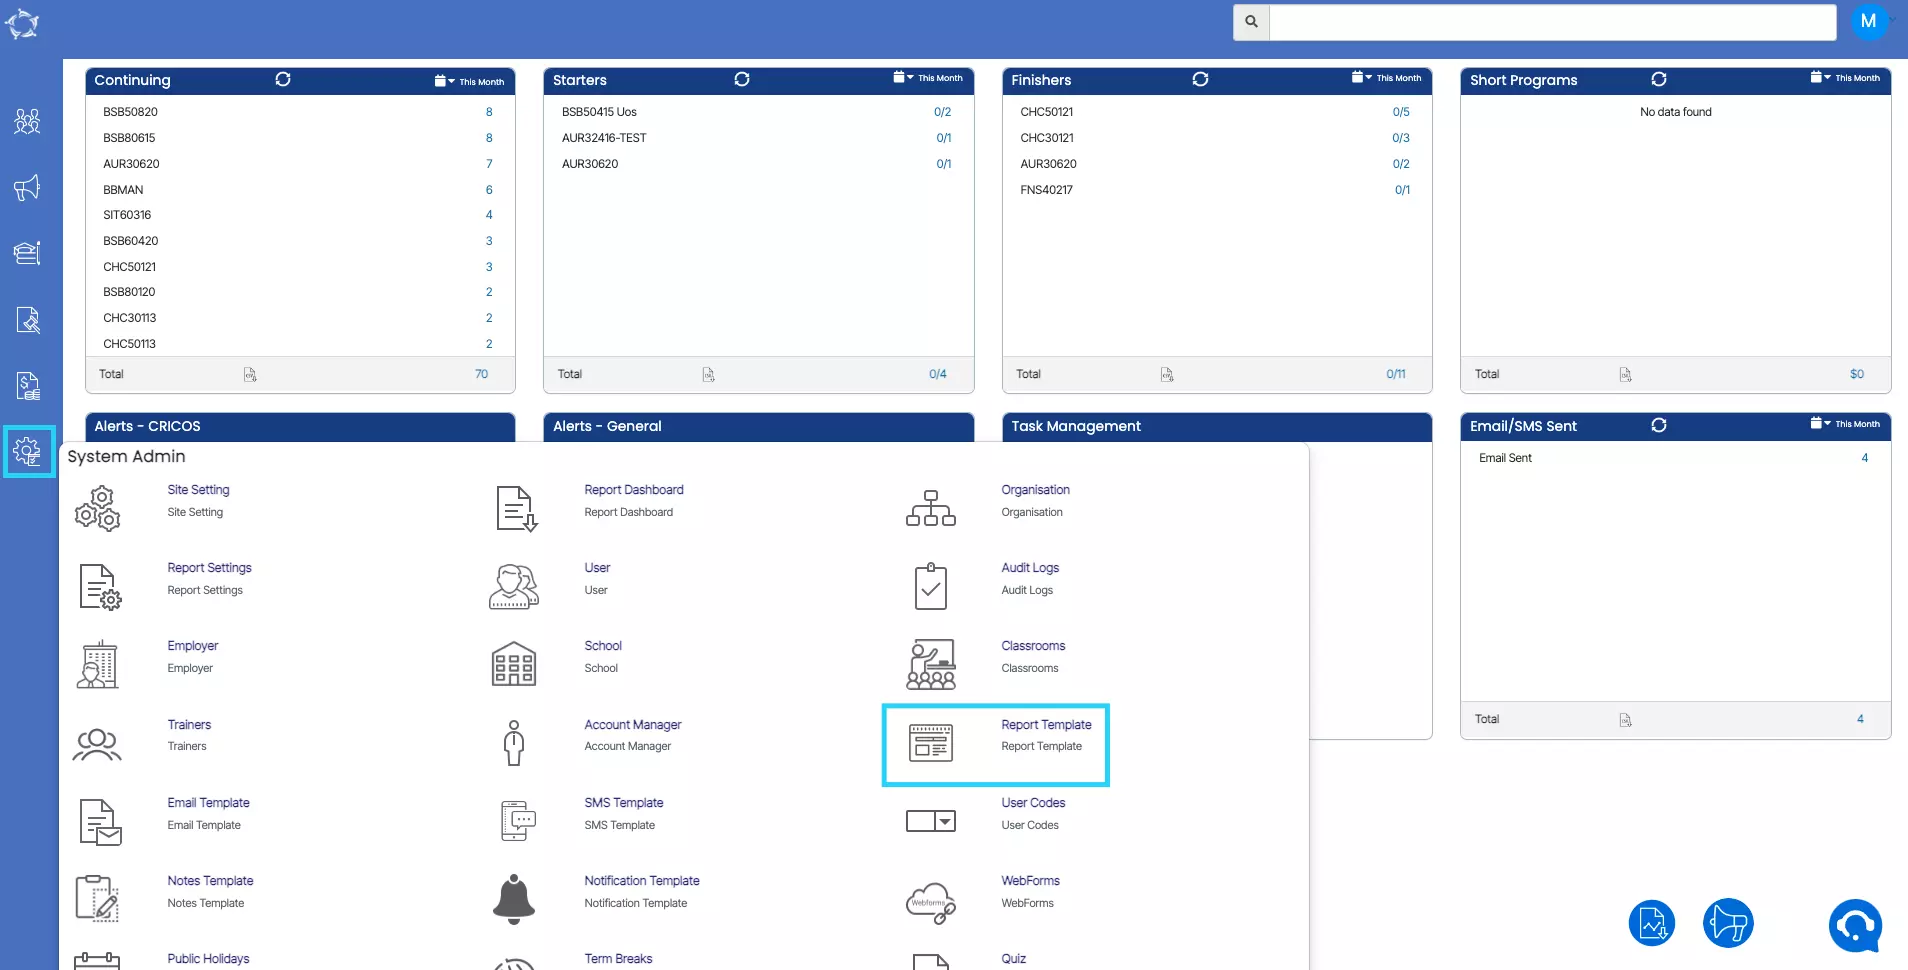
Step 1 – The very first step is to download the master template of student letters and warning reports from TEAMS. Without the master template, you won’t be able to customise your student ID cards in TEAMS. To download, go to Main Dashboard > System Admin > Report Template screen.
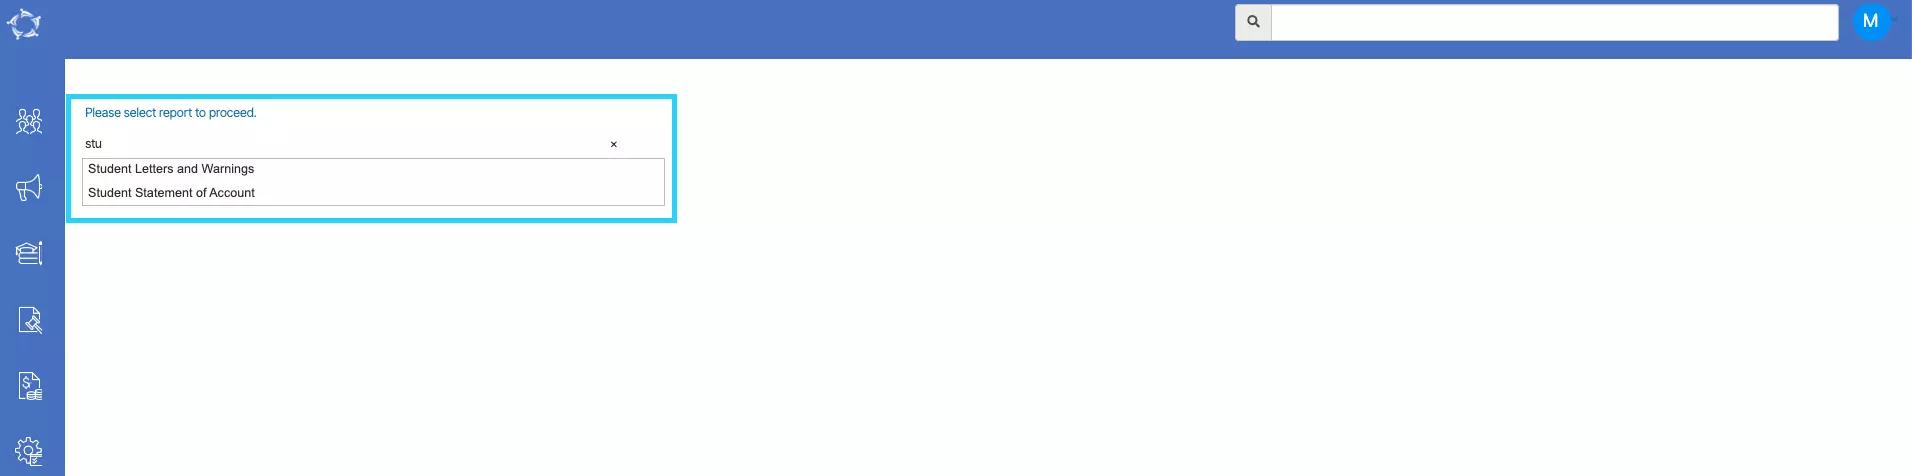
Step 2 – Select the report in the search field to proceed. For example, if you are going to search for student letters and warnings then try typing 3 initial letters of it and the system will show you all report templates starting with those 3 initials. Select the required one.
Step 3 – Once you select it, the screen will refresh and show you the customised templates in the grid.
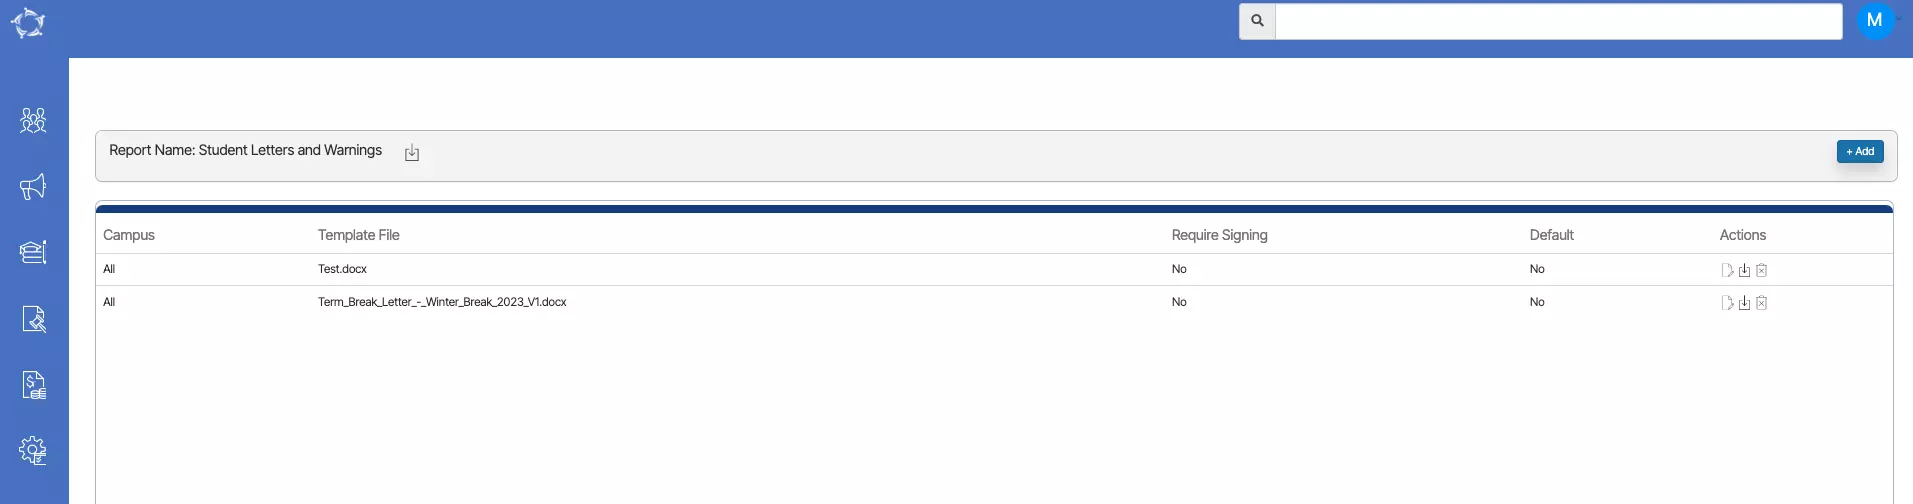
Step 4 – If you do not have any customised template then you need to select the download icon beside the report name. This will download the Master version of the student letters and warnings template which will help you to customise the student ID card for your RTO.
When you have downloaded the student letters and warnings master template, it will show you some basic information about the template at the start and then show you different sections that we have in every word report. You will find two categories of merge fields.
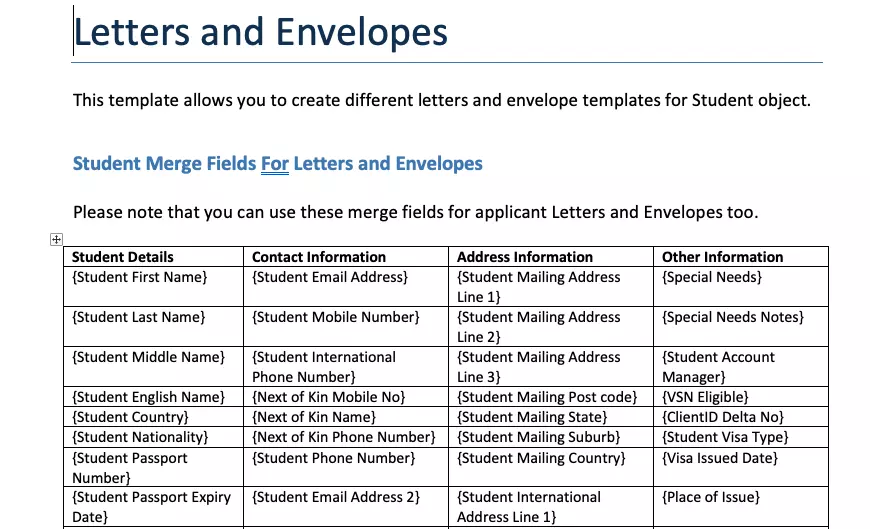
Individual Merge Fields
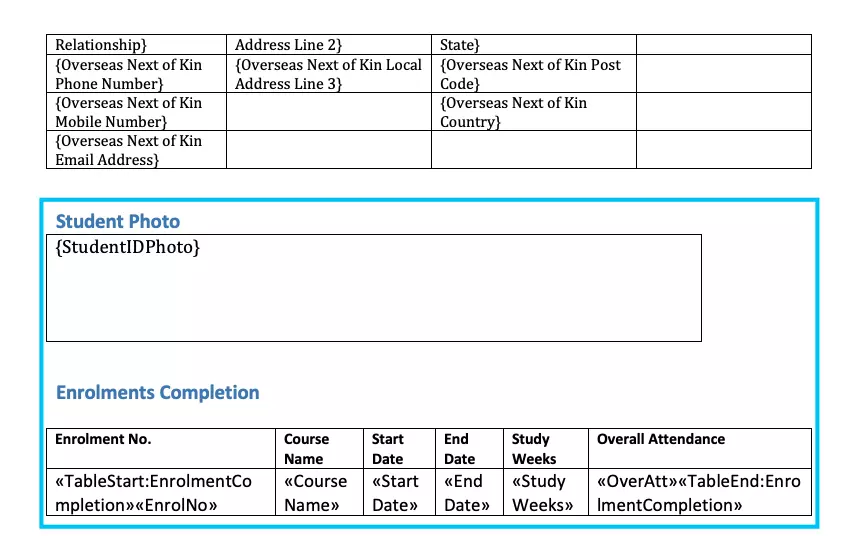
Table Merge Fields
This screen allows you to create automated system actions in the system. Please see the below table that will show you the explanation of each filter presented on this screen.
Please note that the dropdown on this is user code and one can create them from the User Code Screen in the System. If you still have queries, please contact our support team.
| Fields | Explanation |
|---|---|
| Department | If you have created departments such as Finance, Marketing, Academic, Compliance or any other based on your requirement then this dropdown will show accordingly. |
| Automated Process | Based on the department selected, this dropdown will show you the options accordingly. |
| Campus | If you have more than one campus then this dropdown will show you the list of all your campuses. You can select the desired campus. Please note – you can only select one campus at a time. |
| System Action Name | Type in the appropriate System Action Name in this field. |
| Active | Select the Active tick box to make the action active. Please make sure to select this tick box to see this entry as active in the system. |
| Action Rule | Based on the Action rule you have created from the User code screen, it will be visible here. for example, if you have No. of days before the Start Date(Enrolment Start Date) as an option upon selecting, it will show you another dropdown as # of days before Start date. |
| # of days before Start date | Here you need to enter the number value. For example – If you have added the number value as 5 then the system will automate this action 5 days before the enrolment start date. |
When all the above steps are done, you need to select the Save button on the right hand side of the screen to save the record.
Main Dashboard > System Admin > Automated System Actions
Automated system actions refer to predefined and programmed tasks that are executed automatically within a system. These actions are typically designed to streamline processes, enhance efficiency, and reduce the need for manual intervention. Automated system actions can include a wide range of functions, such as sending notifications, triggering workflows or performing any other predetermined tasks based on predefined conditions or events.
This screen will allow you a create a new notification template in the system. before creating the template, you need to understand the fields on this screen.
Notification Title – The “Notification Title” is a mandatory field, serving as the displayed title preceding the message when students receive the notification. This field must be filled out and cannot be left blank.
Template Type – This dropdown is a user code and if you wish to set up a user code for your TEAMS site, please contact our support team.
Available Fields – Based on the Template Type selected, the Available fields (merge fields) will appear in the field.
Add Button – Once you have selected the merge field, you need to select the Add button to add the merge field in the message field. Note: Please do not change the brackets used for the merge fields, otherwise they will not function correctly
Message – You can type in the message for your notification template and please be aware that your Notification Template cannot be longer than 300 characters. Also, be aware that if you use merge fields this may cause your message to exceed 300 characters upon merging.
A notification template serves as a pre-defined format or structure for messages and alerts sent to students. The Notification Template welcome screen provides a convenient overview of existing templates within your system, presented in a grid format. From this screen, you have the flexibility to edit or delete templates by selecting the corresponding icons in the Actions column. Additionally, the option to add a new notification template is readily available through the +Notification Template button.
On this screen, you will find a grid displaying a list of Student Requests completed within the past 30 days. Each request can be managed with options to download, view, edit, or delete as needed. Additionally, you have the capability to initiate a new request by simply selecting the +Add button located on the right-hand side of the screen.
When you select the “Add” button, a pop-up window will appear, providing you with the means to create a new Request Type, upload any necessary documents, add relevant notes, and save the request.