This screen will allow you to search for an agent. You can simply type the agent name or agent code in the search field and it will show the relevant suggestions where you can select the appropriate agent. Once you have searched and selected the agent then the system will open Agent Dashboard for you.
Note – When you select the Offshore Agent tick box, the Overseas address tab will get visible and you won’t be able to select the Local Address tab.
Note – Below tables will give you an explanation of details tab and other tabs(contact information, local address and overseas) are self explanatory tab where you add contact information and agent’s address
Details Tab
Field
Explanation
Agent ID
It is a read-only system-generated field that will automatically populate Agent’s ID.
Agent Code
Agent Code (usually an abbreviation for reports). Cannot be left blank.
Agent Name
Name of the Agent (generally the name of the Agent’s Organisation). Cannot be left blank.
Legal Name
The legal name of the Agent (if different from their organisation or brand name).
ABN
You can enter the Australian Business Number in this field.
ACN
You can enter the Australian Company Number in this field.
Offshore Agent
Select this tick box if the agent is offshore (overseas).
Agent Type
This is user code and based on the user code created in TEAMS, you can select the agent type from dropdown.
Agent Links to all Campuses
If your RTO has multiple campuses then you can select this tick box.
Campus
You can select the specific campus from the dropdown field. This field will be visible if the Agent Links to all campuses check box is un-tick.
Agent is Active?
If you do not select this tick then the agent will not appear on the required screens.
No Longer accepting new Applications
By select this tick box, the agent will not appear for the new applications.
Account Manager
This is user code and based on the user code created in TEAMS, you can select the account manager from dropdown.
Marketing Source
This is user code and based on the user code created in TEAMS, you can select the marketing source from dropdown.
Region
This is user code and based on the user code created in TEAMS, you can select the region from dropdown.
Contract Expiry Date
Agent’s contract expiry date.
Charge GST
Select this tick box to charge GST on the agent’s commission.
Pre-deducted commission
Select this tick box if you wish to pre deduct the commission while creating the receipts for the students.
Pay Commission
If you select this tick box, the system will show different fields related to pay the commission Commission Template – This will be the default commission set for the agent Optional Commission templates – This will show you commission’s list from which you can select any optional commission.
Optional Commission Template
You can select optional commission template from the dropdown field
Vendor Code
Enter the Vendor code of the agent in this field
Purchase Order No
Enter the Purchase order number of the agent in this field
Purchase Order Amount
You can enter the Purchase order amount in this field
Agent Login
You can enter the Agent Login ID in this field
Agent Admin Password
You can enter the Agent Admin password in this field
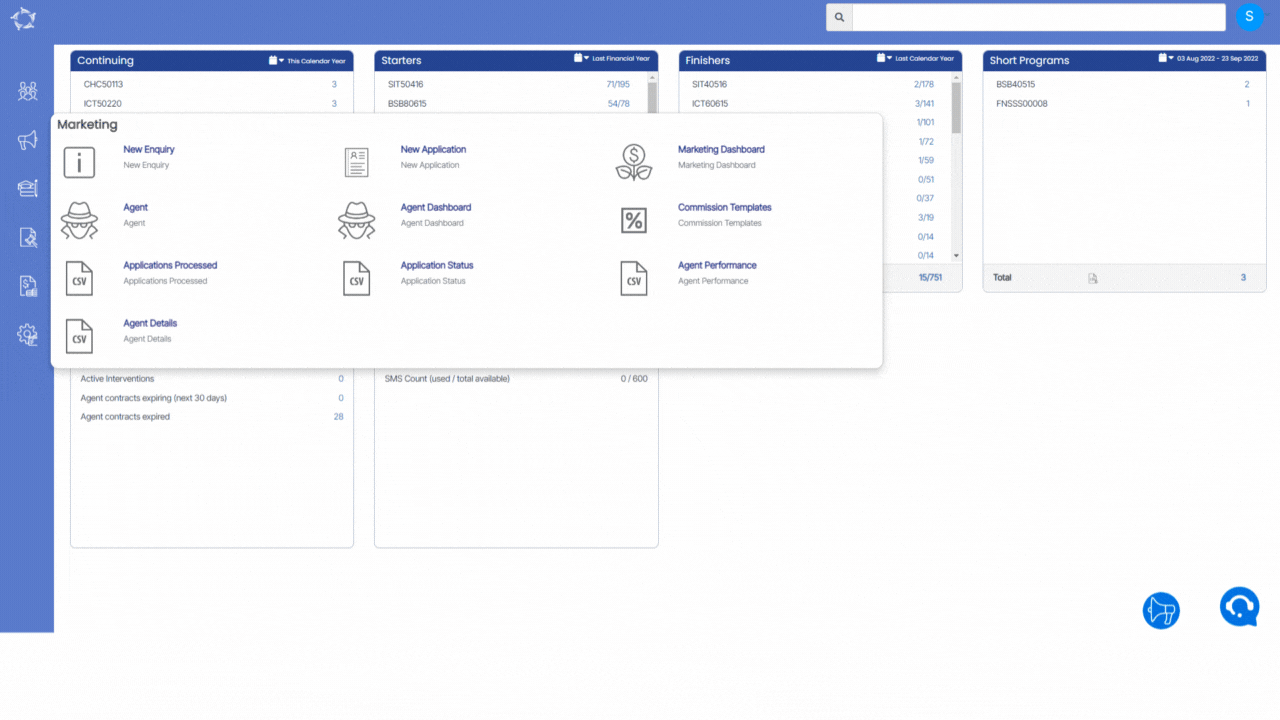
Main Dashboard > Marketing Menu > Agent Dashboard > Applications Tile
Overview
In the Applications Tile, we show all the pending applications linked to the Agent. You can convert, decline and perform other actions to the applications from this listing screen.
This screen is divided into two sections. 1) Filters/Parameters 2) Listing Grids
Filters/Parameters:
To open this screen, you would have selected the Applications Tile link from the Agent Dashboard. Based on the date range you have selected on the Application Tile, the system will open the screen and populate the information in this section. For example, it will show you the start and end dates that were used in the tile. You can add a New Application with this agent by selecting the +Application button.
Select here to know more about the filters/parameters.
Listing Grid
In this grid, we are displaying the list of all pending applications. We are showing the Applications Processed Date, App No, Student Name, Campus, Program, Start Date, End Date, Intake, Application Type, Marketing Source, Agent, Account Manager, Status, and Actions columns. All of these columns are self-explanatory.
Select here to know about the Icons under the Actions column and Burger Menu
How to select Applications?
Use tick boxes to select applications if you wish to send email/SMS, create a contact log, print letters and start enrolments in bulk. After selecting the students, pick the option from the burger menu and you are one step away to finish your heap of work in one go.
Or if you wish to select all students at once, use the tick box present right beside the Processed Date column.
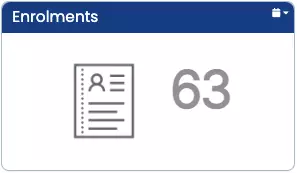
Main Dashboard > Marketing Menu > Agent Dashboard > Enrolments Tile
Overview
In the Applications Tile, we show all the enrolments that are linked to the Agent.
This screen is divided into two sections. 1) Filters/Parameters 2) Listing Grids
Filters/Parameters:
To open this screen, you would have selected the Enrolments Tile link from the Agent Dashboard. Based on the date range you have selected on the Enrolments Tile, the system will open the screen and populate the information in this section. For example, it will show you the start and end dates that were used in the tile.
Select here to know more about the filters/parameters.
Listing Grid
In this grid, we are displaying the list of all enrolments. We are showing the Student No, Enrolment No, Student Name, Campus, Program, Intake, Enrol. Start-End Date, Enrolment Status, Previous/Future Program, and Overdue Amt columns. All of these columns are self-explanatory.
Select here to know about the Icons under the Actions column and Burger Menu
How to select Enrolments?
Use tick boxes to select enrolments if you wish to send email/SMS, create a contact log, print letters and start enrolments in bulk. After selecting the students, pick the option from the burger menu and you are one step away to finish your heap of work in one go.
Or if you wish to select all students at once, use the tick box present right beside the Student No column.
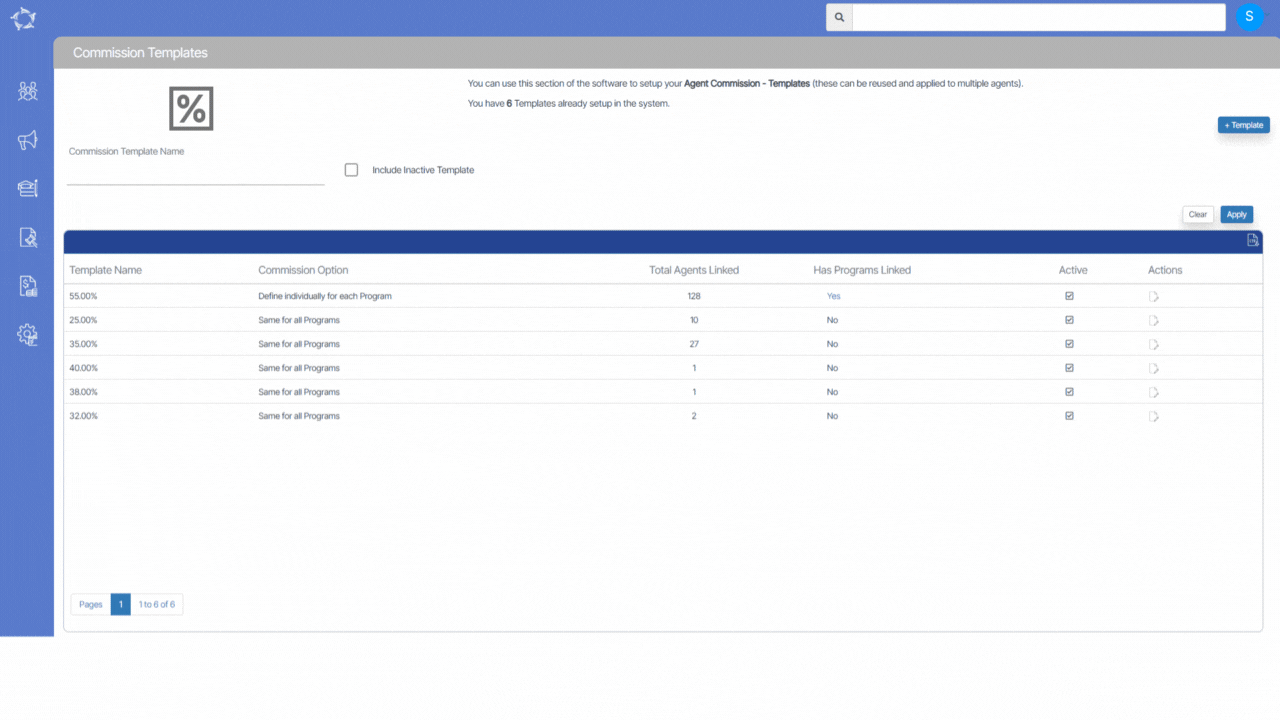
Main Dashboard > Marketing Menu > Commission Templates > +Template Button
Overview
A commission template specifies the percentage amount that will be paid to the Agent for their services. The Commission Template entry screen will let you create the template as per your need. You need to enter the template name and mark the template as Active.
The system will let you create two different types of Commission Templates:
Same for all Programs
The system will allow you to create a commission template that will be the same for all the programs and you can select the template when creating the student application. You can choose from the two different commission types that are explained below:
Fixed Amount for all Programs: By selecting the Fixed Amount for all Programs radio button, You can enter a fixed amount of commission that will be set as the default amount whenever the respected commission template is selected while creating the application or linking agent to an enrolment.
Fixed Percentage for all Programs: By selecting the Fixed Percentage for all Programs radio button, You can enter a fixed percentage of commission that will be set as the default whenever the respected commission template is selected while creating the application or linking agent to an enrolment.
Define individually for each Program
The system will allow you to create a Commission Template individually for a specific program when the Define individually for each Program radio button is selected. Enter the Commission Template name and select the save button first. Then you need to select the +Program Commission button from where you can choose the specific program for this commission template.
Note: You can either select the Agent commission Type or Program from the Program Commission screen. The system will not allow you to select both fields at the same time for the commission template.
The field name and Explanation of the field are given below:
Field Name
Explanations
Agent Commission Type
This is a user code in TEAMS and you can select the Agent Commission Type from the dropdown field.
Program
Select the Program for the commission template from the dropdown field.
Main Dashboard > Marketing Menu > Commission Templates
Overview
A commission template specifies the percentage amount that will be paid to the Agent for their services. The Commission Template welcome screen will show you some basic information about the Commission Template and will allow you to search, edit and create commission template for the agent. You can edit the commission template by selecting the icon.
You can create new commission templates by selecting the +Template button.
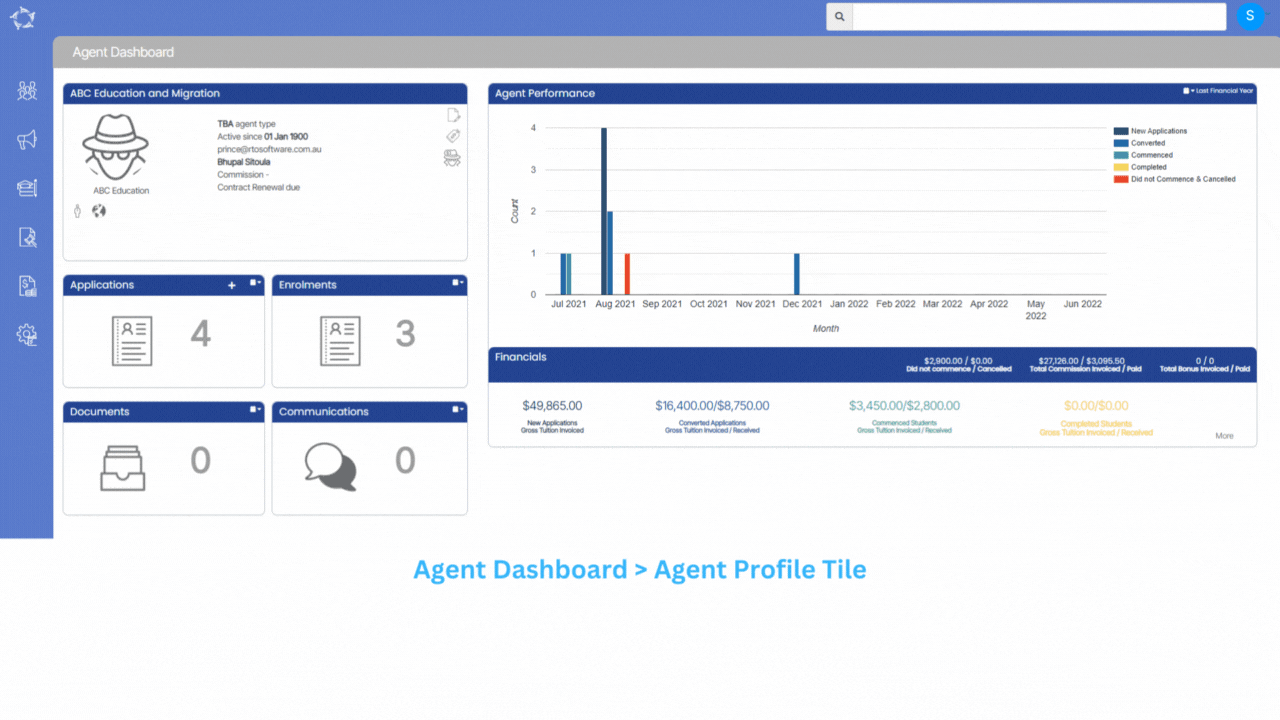
Each CRICOS RTO that has collaboration with agents, needs to monitor the agent performance in order to make up their mind in taking certain decisions. On the Agent Dashboard, we have a bar graph that can give you a vast amount of information to keep a check on the agent performance.
This bar graph will display the agent performance for the current financial year. On the right top side of the bar graph, you can see the calendar option. From there, you can change the date range as per your requirement.
The horizontal line of the bar graph will display the months based on what calendar option you select. The vertical line of the bar graph will display the count and that count again varies depending upon the calendar option. The vertical colourful bars in the bar graph will present the data with a tooltip. Once you will move your cursor over the bar, you can see a tooltip based on which colour bar you have moved your cursor to. Each colour represents a different purpose. You can see the colour classification on the right side of the bar graph.
As you can below, the tooltip says Converted Applications 17 for the month of Oct 2022. It means for October month, there are just 12 applications to process for that agent, hence the height of the bar is till count 17.0. So from these colourful bars, you can easily read how many total applications linked with the agent, how many converted, commenced, completed, and did not commence & canceled.
Financials
Just below the bar graph, we have the financials area for that agent. This is easily readable from the labels just below the figures. This gives you the Tuition Fee’s data based on the calendar option you select.
Moreover, there is a more button in this section that will directs you toward the Agent Financial Transaction screen.
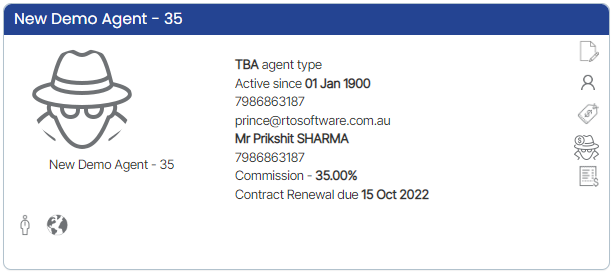
This tile provides you with basic information about an Agent and allows you to perform various actions related to the Agent’s account. Users can upload a profile picture for the Agent and edit their details as needed. Additionally, the tile displays any pending payments for the Agent, providing users with an overview of their financial status. Users can also create bonus invoices for the Agent through this tile, allowing them to reward the Agent for exceptional performance. The tile features different icons that allow you to update the data and perform different actions related to the Agent’s account.
Below is a list of all the reports available under this Marketing menu in the system. You can see the name of the report with either an icon that has the letters CSV in it or an MS Excel icon. Generally, all reports in the system generate a CSV (Comma-separated Values). There will be times when a report generates to Excel, primarily as it requires a page break in it which you can’t do in CSV, however in this menu there are no Excel reports.
Each report listed below is a link to a post where you can understand the report, its parameters and to view an example of the report.
The Agent Dashboard screen will give you a history of the Agent with your college. It is comprised of a number of different tiles that will allow you to navigate to different screens and information linked to the Agent.
The Agent profile tile will give you an overview of the agent’s basic information. A user can upload the Agent picture, edit the details, create bonus invoices, and view pending payments
This is the pending application’s tile and you can convert them from its listing screen
This tile will show you the list of enrolments linked to the agent.
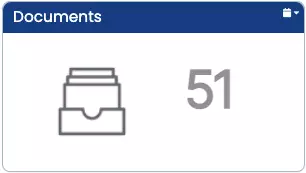
These tiles are common tiles in all the dashboards.
On the Agent Dashboard, we have a bar graph that can give you vast amount of information to keep a check on agent performance.


 icon.
icon.