Campus > Edit Campus > Campus Entry Burger Menu > Bank Account
This screen provides you with a grid displaying the bank details associated with the campus. You can easily view the information in an organised manner. If you need to make any changes to the existing bank details, simply locate the respective entry in the grid and select the edit icon available under the actions column. This will enable you to update the information as required.
Additionally, if you wish to add a new bank account for your Campus, you can conveniently do so using the options provided. This screen offers a user-friendly interface to manage and modify bank details, ensuring accurate and up to date information for your campus and RTO.
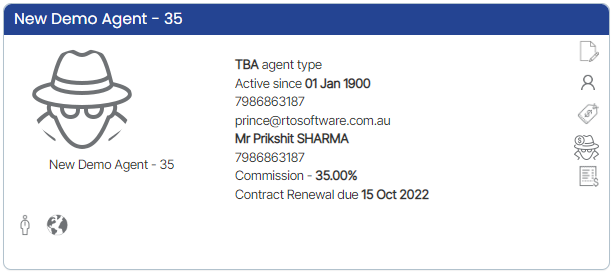
The Agent Dashboard screen will give you a history of the Agent with your college. It is comprised of a number of different tiles that will allow you to navigate to different screens and information linked to the Agent.
The Agent profile tile will give you an overview of the agent’s basic information. A user can upload the Agent picture, edit the details, create bonus invoices, and view pending payments
This is the pending application’s tile and you can convert them from its listing screen
This tile will show you the list of enrolments linked to the agent.
These tiles are common tiles in all the dashboards.
On the Agent Dashboard, we have a bar graph that can give you vast amount of information to keep a check on agent performance.
Select the Refund icon from any of the screens and the system will open the refund screen.
Select the Refund all Check box to refund the full receipted amount.
For a partial refund, you have to manually enter the amount in the Refund Amount field.
Tiles
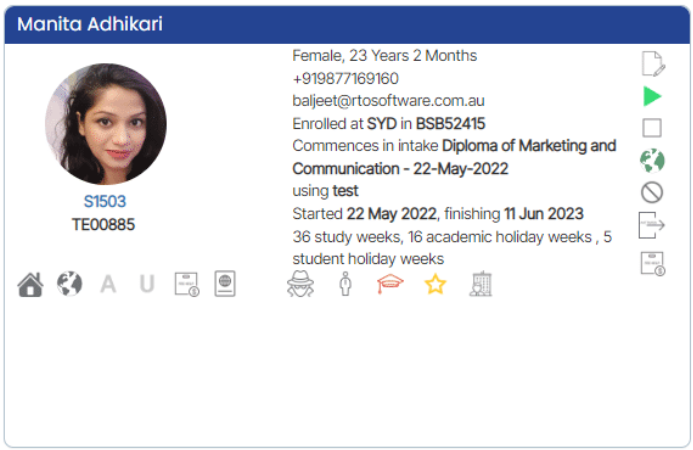
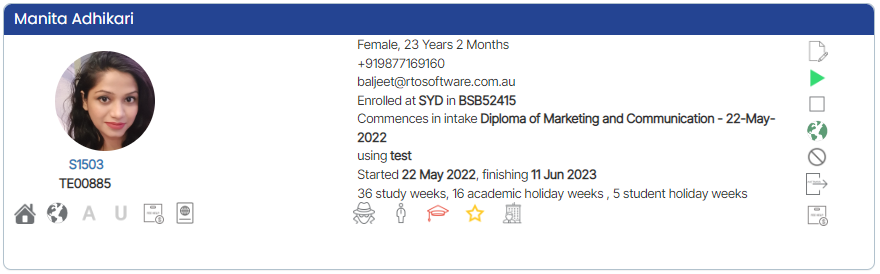
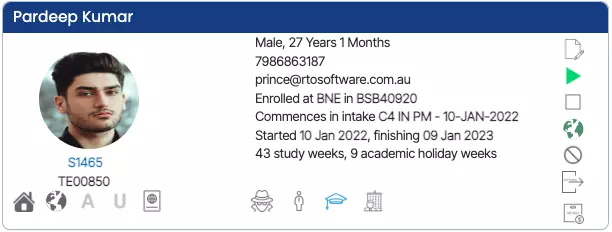
This Tile will show you the basic details of the enrolment and all the icons in this tile are read-only.
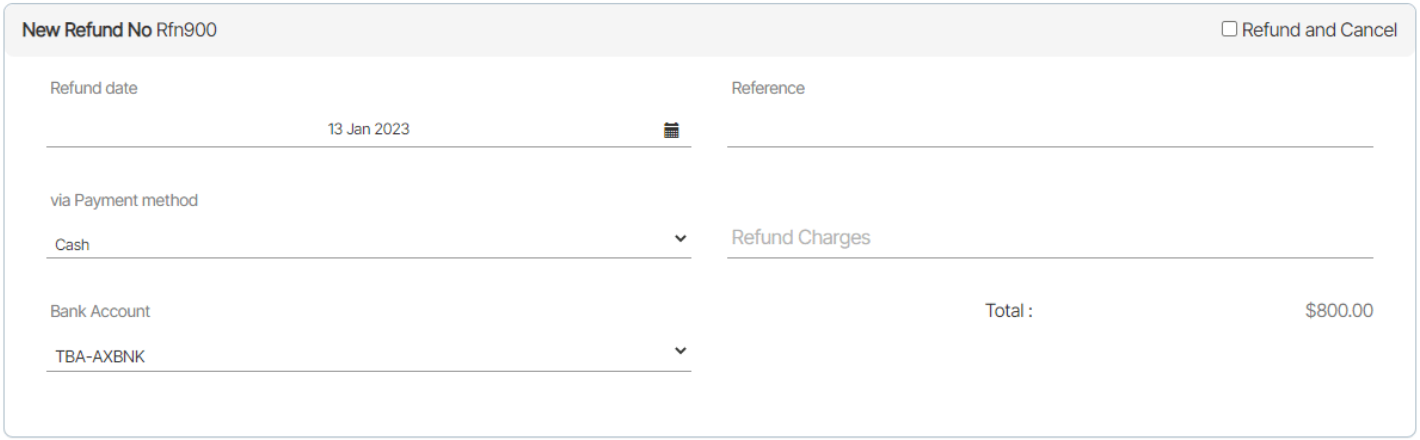
This tile will show you the New Refund No. along with the total refund amount. You can add the Refund date, Reference, Payment method of refund, refund charges, and bank account details in this tile.
This Tile shows you the Receipt details against which the refund can be created. It depends on the total number of refundable receipts according to which the number of tiles will be visible on the refund screen.
After deciding on the refund amount you need to update the details/data in the other fields that I have shown and explained below:
Field Name
Explanation
Refund date
The refund date will be the date on which the refund has been made.
Reference
If you have any reference number against this Receipt then you can update it in this field.
Via payment method
The payment method needs to be selected so that you can get to know how the refund payment method like is it cash, check, or any other method.
Bank Account
You can select the bank if you want to have an entry of refund in the bank.
Refund charges
If you are charging any refund amount then you can update that amount in this field.
Note: Select the Refund and Cancel tick box if you want to cancel that refunded amount from the total invoice amount. For example, if you have an invoice for $5000 and the receipt amount is also $5000. When you do a refund on the receipt amount of $5000, if you select the tick box for Refund and Cancel, then the system will create the refund entry and also cancel the invoice as well. Whereas, the same invoice is for $5000 but there is a receipt for only $3000 and you want to refund that receipted amount. The system will do the refund entry for $3000 and cancel out $3000 from the invoice so the invoice amount will then be only $2000.
After updating the details in the required fields you just need to select the Save button to do the refund.
The system will reload the screen, the system will take you to the enrolment dashboard and you can check the refund by going to the student financial details screen.
A receipt is a written/printed acknowledgment that shows the total amount of the invoice that has been paid by the student. You can do the receipt in the system from the two screens that I have shown below:
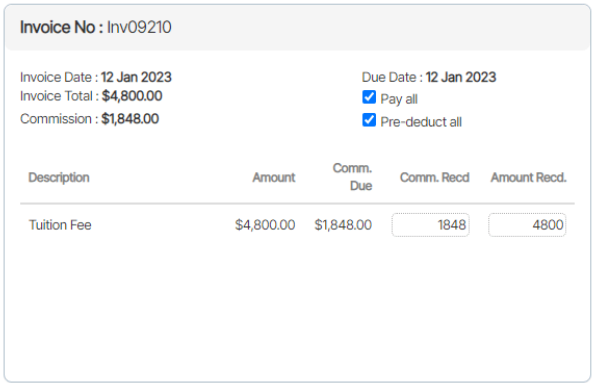
Select the Invoice against which you wanted to create the receipt.
Select the Pay all check box if you want to pay all the invoiced amount and the system will automatically update the amount received field.
Select the Pre-deduct all check box if you want to pre-deduct all the agent commission amount and the system will automatically update the commission received field.
If you want to pay the partial amount then you can manually type the amount in the commission received and the amount received fields.
Tiles
This Tille will show you the basic details of the enrolment and all the icons in this tile are read-only.
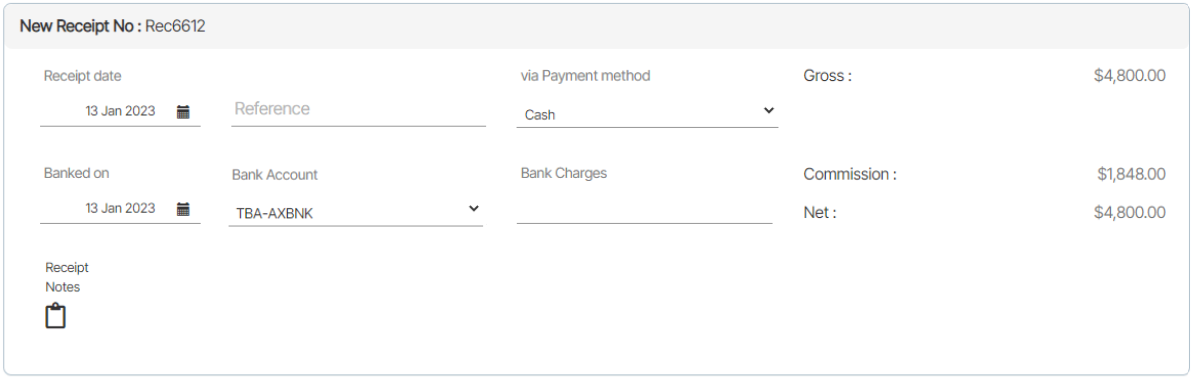
This tile will show you the Receipt number along with a preview of the Gross receipted amount, Commission amount, and Net receipted amount. You can add the Receipt date, Reference, Payment method and other Bank related details in this tile.
This Tile shows you the invoice details against which the receipt can be created. It depends on the instalment plans of the invoices according to which the number of tiles will be visible on the receipt screen.
After deciding on the receipt amount you need to update the data in the fields that are explained below:
Field Name
Explanation
Receipt date
The receipt date will be the creation date of the receipt. Today’s date will be automatically selected by default.
Reference
If you have any reference number against this Receipt then you can update it in this field.
Via Payment method
The payment method needs to be selected when you create the receipt, you can select the multiple payment methods from the payment method dropdown.
Banked on
If you want to update the date for the bank then you can update the date in this field.
Bank account
If you want to add the bank name on the receipt then you can select the bank from the dropdown, only the bank which you have added to the system will be visible in the dropdown.
Receipt Notes
If you want to update any notes for the receipt then you can click on the notepad icon to add the notes. After updating the notes again click on the notepad icon to save the notes.
Bank charges
If the bank is changing any amount on the receipt, you can also update the charged amount in the field.
After entering the details you just need to select the Save button and the system will create the receipt and show you the final step of the screen.
From the final screen, you will be able to see the system is saying that the receipt for enrolment no (TE00885) was created successfully, also there are two buttons on the screen, which I have explained below:
Print Button:
By selecting the Print button you will be able to generate the receipt, Once you select the button, floating window will appear on the screen, you can choose the template from the dropdown and select the generate button to generate the receipt.
Send Button:
By selecting the Send button you will be able to send the created receipt via email to the student. Once you will select the send button the system will take you to the compose email screen. You can choose your email template and select the send button to send the email.
Note: Whatever template you will select the receipt merge field needs to be added to the template, only then the system will print the receipt in the email.
There are two different screens from which you can create invoices. The first option is to navigate to the Enrolment dashboard > Financial tile. From there, you can select the New Invoice icon, which will open the Enrolment Dashboard > Invoice screen.
The second option is to go to the Enrolment dashboard and access the Enrolment Financial details screen. Once there, select the Financial tile and choose the New Invoice icon to open the same Enrolment Dashboard > Invoice screen. These two pathways provide convenient ways to generate invoices within the system, allowing for efficient management of financial transactions.
Below are the steps that you can do to create a new invoice against the enrolment.
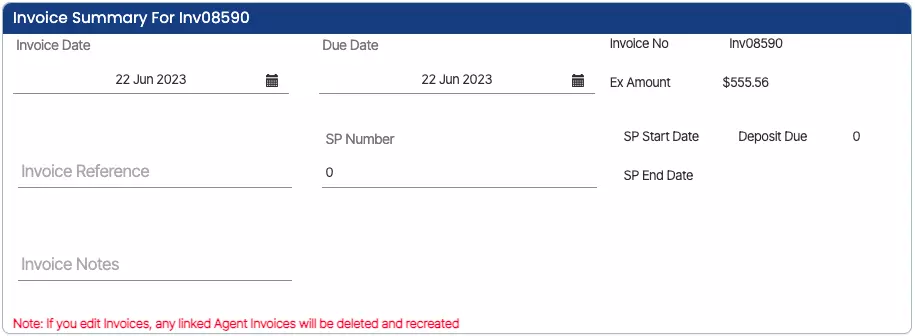
To fill in the necessary details in the Invoice summary tile, begin by selecting the Date of the Invoice. This is the date when the invoice is issued or generated. Choose the appropriate date from the available options.
Next, enter the Invoice Reference. The Invoice Reference is a unique identifier or number assigned to the invoice for tracking and reference purposes. Additionally, if an instalment plan applies to the invoice, you have the option to select it from a drop-down menu. The instalment plan allows for the payment of the invoice amount to be divided into multiple instalments over a specified period. This can be useful for situations where the recipient of the invoice prefers to pay in increments rather than the full amount upfront.
Moving on to the Fee Selection tile, you will find dropdown fields to select the Fee Type and Fee Name. These fields are used to identify the specific fee associated with the invoice. Choose the appropriate Fee Type and Fee Name from the available options in the respective dropdown menus.
If there is any discount applicable to the invoice, you have the option to include the discount-related information. To do so, locate the section designated for discount details, which may be found on the Invoice screen.
Tiles
This tile will show you the basic details of the enrolment and all the icons in this tile are read-only.Please note – This screen will not allow you to make any changes in the profile tile
You can enter the Invoice Date, Invoice Reference, and Instalment Plan for the fee that you have selected. This tile also gives you a preview of the total invoice amount, Discount amount, and Commission due amount.
Under the Fee Selection Tile, you can select the fee type, fee name, and fee amount along with discount with other discount-related details.
The Fee Items tile will show you the overview of the fee items that you have selected under the respective invoice. You can also Edit or Delete any fee item under this tile.
Fields under the Fee Selection tile are explained below:
Fee Selection fields
Explanation
Fee Type
Fee type is a dropdown and one can create a fee type in TEAMS from the User Code Screen, where you can select the type of fees (Tuition fee, Material fee, Application fee)
Fee Name
The fee name is also a dropdown and one can create a fee type in TEAMS from the User Code Screen that will show you the list of the fees and the list of the fees will depend on the fee type that you have selected.
Fee Amount
Once you will select the fees from the fee drop own the system will automatically populate the fee amount in the fee amount field, if you want then you can edit the amount also.
Discount
If you want to give a discount to the student you can enter the amount in the Discount field.
Discount Notes
You can update the Discount note by clicking on the clipboard icon and after entering the notes again you have to click on the clipboard icon to save the notes.
Discount Reason
The discount reason is also a dropdown value if you are entering the amount in the discount then the discount reason is mandatory to be updated.
Total
The total field will show the total amount of the invoice after subtracting the discount and after including the GST.
+ADD
After selecting the details you need to select the add button to add the fee to the fee item grid.
Fields under the Invoices Summary tile are explained below:
Invoice Summary Fields
Explanation
Invoice date
The invoice date will be the date of the invoice and it should be between the enrolment start and end date.
Installment plan
From the instalment plan dropdown, you can select the instalment plan, only those instalment plans will be visible under this dropdown that is linked to programs
In the Agent tab, the system will show you a summary of the agent commission invoices and any payments made with a balance. To see the in-depth information for the commission you can select the more… option.
Below are the steps that you can do by selecting the more option
By selecting the more option the system will open the Agent Financial Details screen for the enrolment. It will show you each commission invoice linked to the enrolment and any payments that have been made or deleted for the agent.
You can edit an Agent Commission invoice using the Edit icon at the top of the grid. This new screen will allow you to edit a particular invoice by selecting the + button before the invoice number.
After selecting the + button, you can change the commission and GST amount, also you can add your desired notes for the invoice by selecting the notes icon under the action column.
After adding your desired notes for the invoice, select the Save button at the top right corner of the ED > Agent Financial Detail screen. After selecting the save button, you will see that the notes icon under the action column turn green which shows that this invoice contains notes.
Note: The system will not allow you to update the commission amount less than what you have paid to the agent for that invoice. However, you can edit the commission amount to more than what you have already paid to the agent for that invoice.
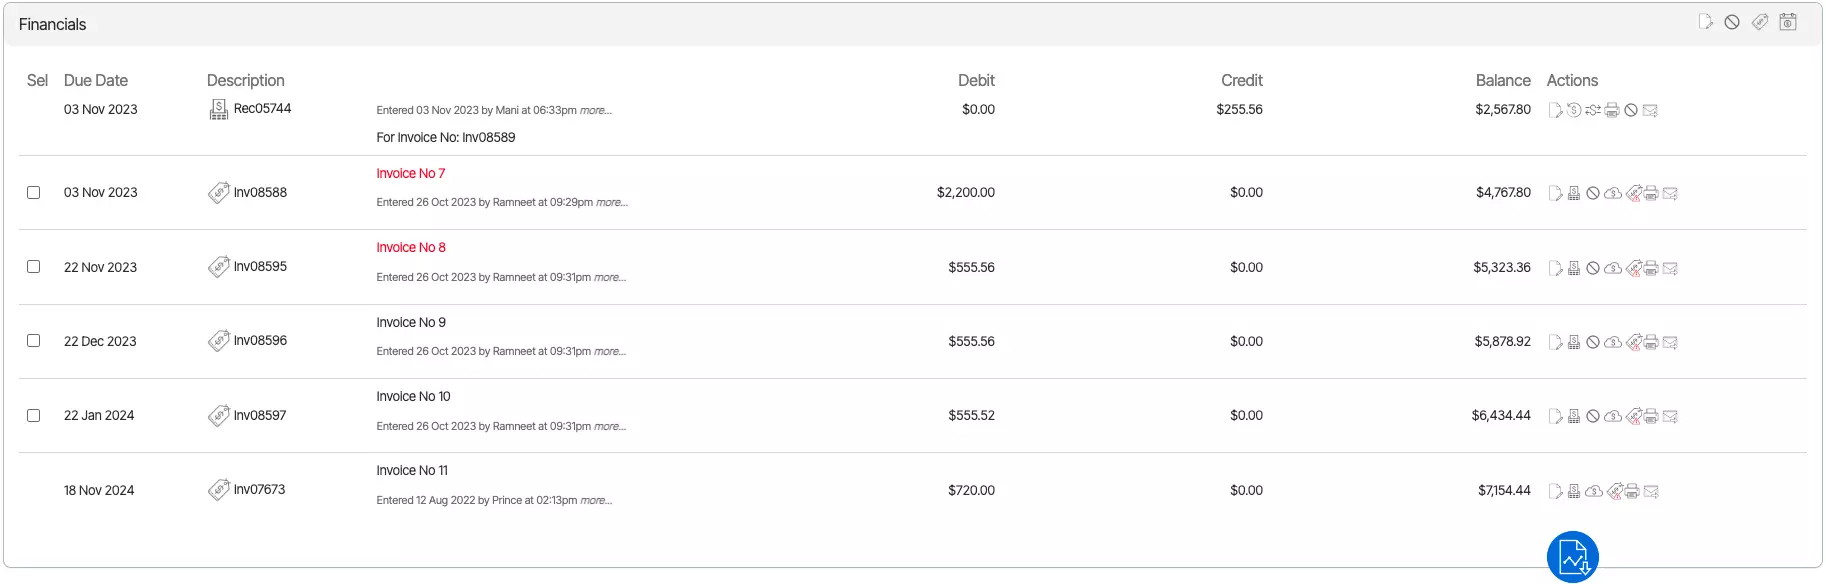
When you are on the Enrolment Dashboard > Financials Tile, you will see the word more… in the right bottom corner of the tile and when you select it, the system will open the Enrolment Dashboard > Student Financials Detail screen, where you will be able to see all the financial details (Invoices, Receipts, Refunds, Transfers, etc) for the enrolment.
Tiles
This tile will show you the basic details of the enrolment and all the icons in this tile are read-only.
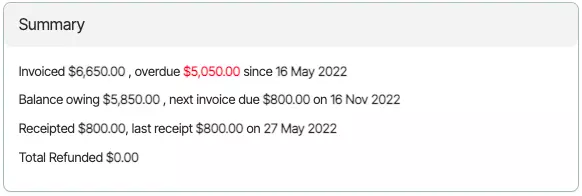
This tile will show you the enrolment financials summary as the total invoiced amount, overdue amount/since, balance owing, next invoice due, total receipted amount, last receipt amount/on a date, and total refund.
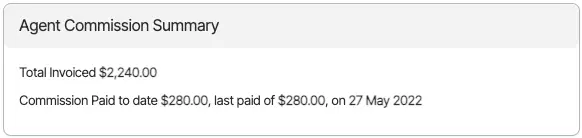
In the agent commission summary tile, you will see the agent financials as the total invoiced amount, paid commission amount, and last paid commission amount/on a date.
Icons under the actions column have been explained below:
Icons
Explanation
This icon will allow you to edit the invoice details in the invoice section and receipt details in the receipt section.
Using the receipt icon, you will be able to create a new receipt against any invoice.
Using this cancel icon you will be able to cancel any invoice and receipt.
This is a negative invoice icon, using this icon you will be able to raise a negative invoice(credit note) against the invoices.
By using this icon you will be able to print the invoice or receipt.
By using this icon you will be able to send the invoice or receipt to the student via email.
The Enrolment Dashboard features a Financial tile that provides functionality related to linking and editing agents. By accessing the Financial tile, you can link an agent from the Students tab to the enrolment. Once the agent is successfully linked, you can proceed to edit the agent’s details from the Agent tab.
The link agent icon within the Financial tile enables you to search for a specific agent and update their information within the enrolment. This allows for the synchronization of the agent’s data with the enrolment. On the other hand, the edit agent icon offers the capability to replace the currently linked agent with a different agent.
Important – If you want to change/edit the agent then make sure there are no payments that have been made for the agent in this enrolment, if the payments have been made then you have to go to the Agent financial screen and delete the payment via selecting the delete button.
To link the Agent you need to do the following steps
Then, you need to select the edit icon and that will show you a link agent floating window.
The linked agent will be visible there, you just need to select the cross icon that is just next to the agent name to remove the current agent.
After that, you need to start typing the new agent code/name in the agent field and the system will show you the list of similar agent that matches your search.
Once you will select the required agent you need to update the agent, the system will reload the enrolment dashboard and will show the new one again with the new invoices.
The Qualification Issued is exported into NAT00130 – Program Completed. This will show you all of your students who completed their enrolments and if you issued them a qualification (Certificate) or statement of attainment (SoA) – it really should match your Qualifications Issued Register.
The very first step you need to do before you do the AVETMISS Export
You need to go to the Main Dashboard > Compliance > Qualification Registered screen where you need to put the dates from 01/01/2022 to 31/12/2022 and if you have different campuses for the academics then you can leave the field as it is otherwise, you can use the parameters as you require and then select the Apply button. OR
You can run the report from Main Dashboard > Compliance > Qualification Issued report with the same parameters and then you can open each enrolment and confirm if the results are there and if not there then you have to run the finishers report for 2022 and see all the finishers and compare it, which enrolment that are in the finishers but is not in the finishers list.
When would you select SOA, FULL and NA
FULL – When the student has Successful results of competent. Credit transfer. RPL then all the subjects needed to be issued that qualification.
SOA – Where you do not have successful results for all of the subjects (if you are withdrawing) but have some subjects with competent then you issue a Statement of Attainment.
NA – This is where you do not have absolutely no results and student has never successfully achieved anything and they withdrew and you want to write the entry to the register to show then you can select NA and results issued.
IMPORTANT – This screen will not show anything if you have not updated the information properly (if you have not selected the Result Issued as Yes and whether you have selected the completed status FULL, SOA or NA) on the Enrolment Dashboard > Training Plan and Result screen > Qualification Information.
It’s our recommendation even if you’re not going to issue a Certificate or Statement of Attainment, all the qualifications to still select this Result issued as Yes have the completion Type as NA (not applicable) because it will show in the registered and to the auditor that you have processed as it was withdrawn or they have overdue fees.
For Example – If you have an enrolment where you have a competent result and a credit transfer, and the students have overdue fees and you’re not going to issue, but they’re finished, and they’ve left. If you don’t write to the register, the qualification issue register that they did, It’s not applicable you issued that you’re not going to do one and the auditor may question you on why aren’t there. Because they have a competent result or a credit transfer? That way. At least there’s an entry in the register that it’s not applicable. You didn’t issue it because they have overdue fees. Or they withdrew.
NOTE – On the Qualification Registered screen, you will only see one entry for one enrolment and if the student has more than one enrolment then you need to select yes more in the reissued column which will show you different entries on the screen, but you will not see multiple entries for the one enrolment in different rows. It will be always kept historically under the yes more section.
Important actions to complete on the Qualification Issued Registered
If you want to remove the agent linked with the student enrolment then you can delete it by using the delete button on the agent tab from the Enrolment Dashboard > Financial tile.
IMPORTANT– The system will not allow you to delete the agent if there is any agent payment has been made. You need to delete the agent payment first to delete the agent.
Below are the steps to delete the agent and agent payments.
Go to the Enrolment Dashboard > Financial Tile > Agent Tab and then select the more option.
Select the delete icon to delete the agent payment.
Once you select the delete icon the system will show you the popup message on top of the screen. (Are you sure you want to delete the agent payment #). You can select OK to delete or cancel to leave it as it is.
Once the payment has been deleted, you will be able to remove the agent from the enrolment.
You need to go back to the enrolment dashboard > Financial Tile > Agent Tab
Select the delete icon to delete the agent.
The system will reload the screen and the agent will get removed from the enrolment.