compliance
Mandatory details to verify USI
Unique Student Identifier (USI) serves as a lifelong education number for individuals. Not only does it provide a unique identifier, but it also maintains an online record of the vocational education and training (VET) a student has undertaken.
If a student already possesses a USI number, they can simply update it in the Unique Student Identifier field, and then proceed to update all USI-related information before selecting the save button. Upon saving the changes, the screen will refresh, presenting the student with a Verify button and a Use Manually Verified tick box option. This streamlined process ensures that educational records are accurate and easily accessible, benefiting both students and educational institutions alike.
Verify USI – When you select this button, the request gets sent to the https://www.usi.gov.au/providers/verify-student-usi site and you can check the status of the USI from the USI request screen in the system.
Use Manually Verified – You can select this tick box if you already have verified the USI from the https://www.usi.gov.au/providers/verify-student-usi site.
Required information with explanation:
- Country of Residence: Here you need to select the country from the dropdown to where the student belongs.
- Country of studying in: Here you need to select the country from the dropdown in which the student is studying which is Australia.
- Country of Birth: Here you need to select the country of birth of the student from the dropdown.
- Town of Birth: Here you need to enter the town of birth of the student.
- Default USI contact method: Here you need to select a suitable USI contact method.
Further, you need to select a document from the dropdown to support the USI verification
- For instance: If you have selected a Visa (With a Non-Australian Passport) then you must provide the passport number.
- You may also select the tickbox “Copy passport no from the overseas screen” if you have updated the correct passport number on that screen.
- At last, you need to select the country from the dropdown where the passport is issued.
Note: Select the tickbox “Does this student have one name” if the student has a single name.
Compliance Dashboard – Bulk Flagging of Overseas Enrolments
We have introduced a new tick box to update the Overseas status for multiple enrolments. Now, when you navigate to the Compliance Dashboard and access the Enrolment is not flagged as Overseas listing screen, you’ll notice the Overseas Enrolment tick box next to each student’s number in the grid as well as above the grid.
To update this status in bulk, simply select the desired tick boxes corresponding to the students you want to include, then proceed to the Overseas enrolment tick box located above the grid. After making your selections, select the Update button. The system will promptly display a confirmation message at the top of the screen, asking for your confirmation to save the records. By selecting OK, the system will refresh the screen, and the chosen records will no longer appear in the grid. This signifies that the update has been successfully applied, and the “Overseas” status has been modified for the selected enrolments.
Training location Missing Screen – New Campus and Training Location Dropdown
Now, you will notice the addition of new dropdown menus, specifically Campus and Training Location. These dropdowns offer a convenient way to filter and update training locations in bulk. With these options, you can select both filters simultaneously, streamlining the process of updating training locations.
IMPORTANT – You will notice that initially, only the campus dropdown is visible. Once you have selected your desired campus, the system will dynamically reveal the Training Location dropdown for your convenience. Afterwards, it’s essential to proceed by checking the appropriate tick boxes corresponding to the enrolment numbers and then from the training location dropdown, select the specific training location. Finally, complete the process by hitting the “Update” button.
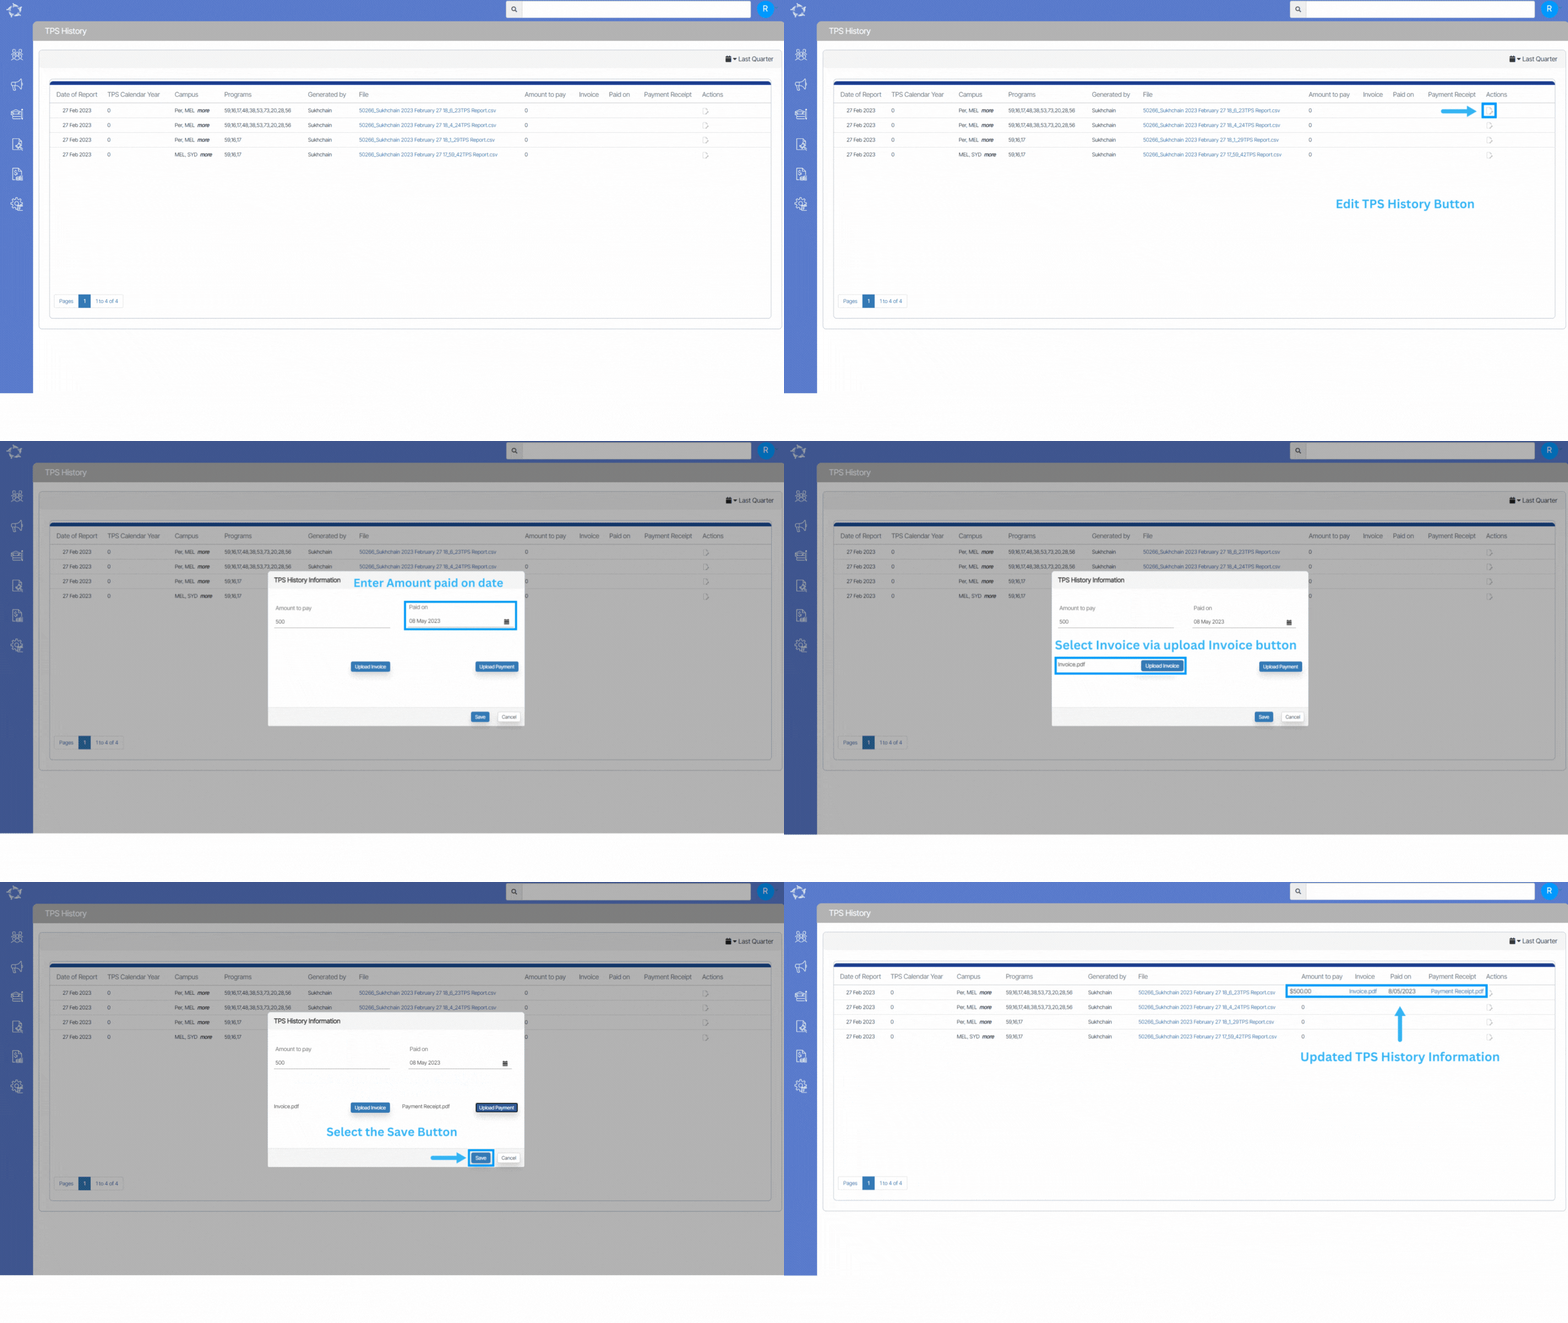
TPS History Information
Main Dashboard > Compliance Menu > TPS History
This screen describes the functionality of managing payment information. Through the use of an edit icon and a popup dialogue box, you can easily update payment details such as the amount, date, and supporting documents like invoices and receipts. This enables convenient tracking of payment statuses for specific TPS records.

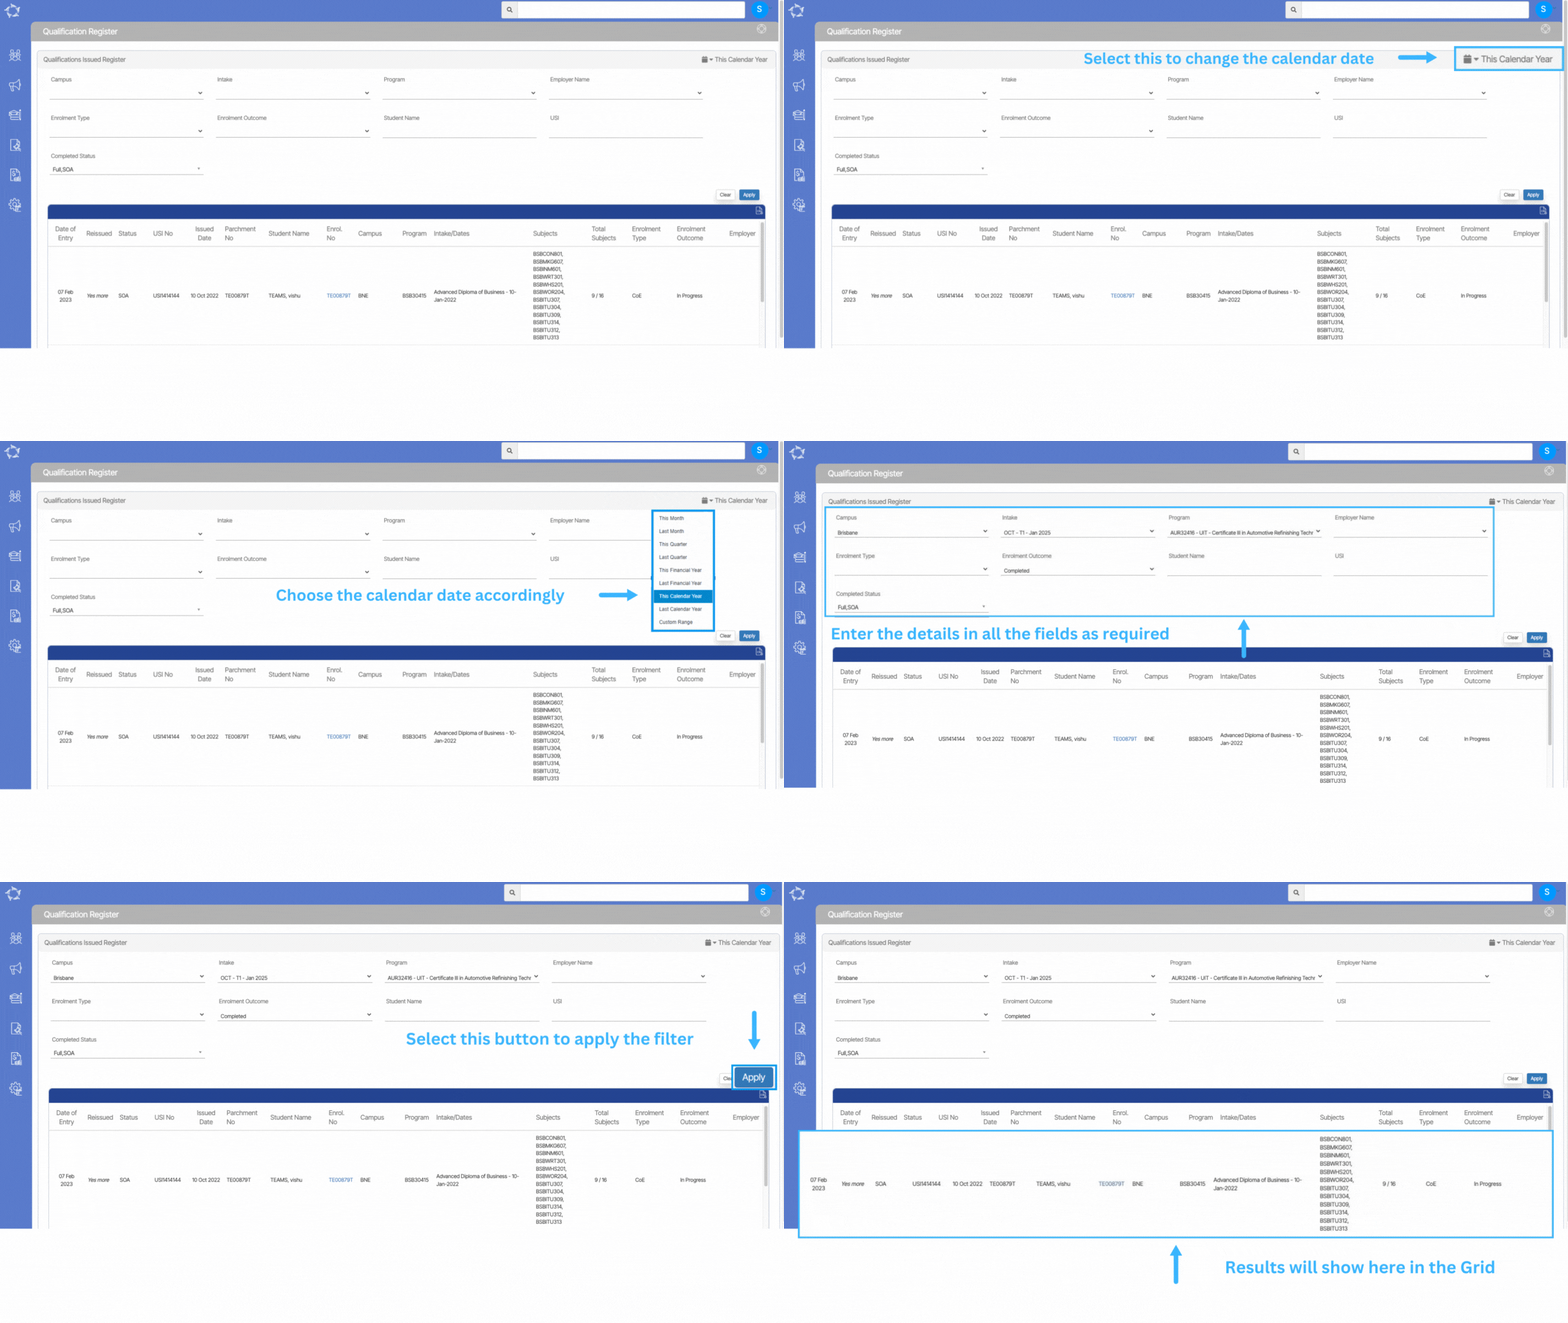
Qualification Register
Main Dashboard > Compliance Menu > Qualification Register
The qualification-issued register is a record-keeping system used to track and manage the qualifications that you have issued to students. Its primary purpose is to help manage and track the qualifications that have been issued to students who have completed a particular course or program.
This screen is further divided into two sections:
- Parameters Grid
- Listing Grid
Parameters Grid:
There are different fields available under the grid from which you can filter out the Qualification issued to the students as per your own requirement. Further explanation of these fields is provided below:
| Field Name | Explanation |
|---|---|
| Campus | If you need qualifications-issued register for multiple campuses, you can select the tick box for each campus from the dropdown. |
| Intake | Select Intakes from the dropdown field |
| Program | Select various programs from the dropdown field |
| Employer Name | Select employer from the drop-down field |
| Enrolment Type | Select enrolment type from the drop-down. |
| Enrolment Outcome | Select the enrolment outcome from the drop-down. |
| Student Name | Enter the student’s name in this field. |
| USI | Enter the student’s USI in this field. |
| Completed Status | Select the completed status from the drop-down field. |
Listing Grid:
The Listing grid will show you the qualifications-issued register as per the parameters that you have selected. In the listing grid, you can see the qualifications that you have issued to students and other information related to the qualification of the students.

