New change in Timetable

Dashboard > Academics > Timetable

Overview

Earlier for Timetables, there was a limitation to select only 1 campus similar to Term Breaks. With this new change, you can select multiple campuses while adding or editing a Timetable.

Click on the Timetable Icon from the Academics tile.

You can select multiple campuses from the dropdown as shown below.

IMPORTANT: Please be aware that the Intakes, Programs and the Term Breaks will only appear for the Campuses selected.

After filling in all the details for the timetable and selecting the campus(es), click on next and follow the rest of the steps as always.

How and when to Cancel an Enrolment?

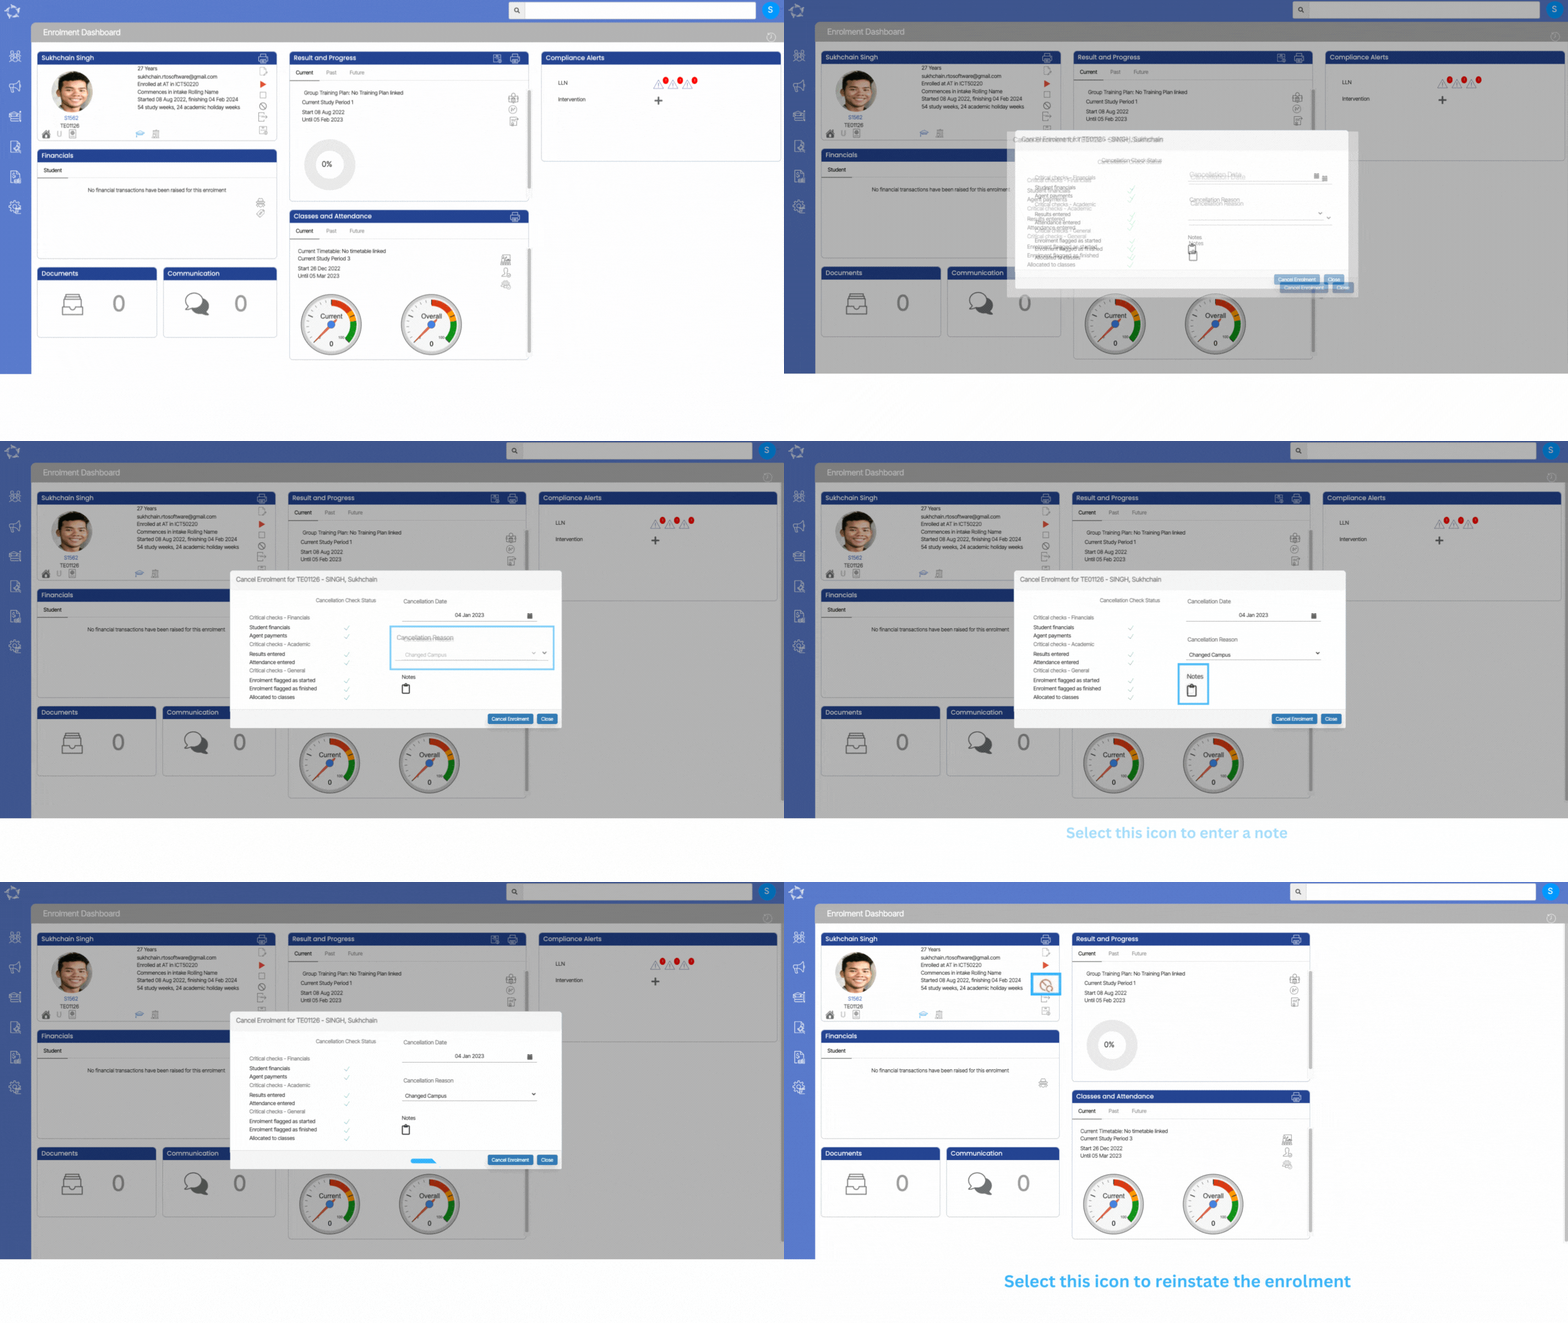
Enrolment Dashboard > Enrolment Profile Tile > Cancel Icon

history of changes

When you select the Cancel icon, a popup will show on the screen. This popup will show you the list of all the critical checks that the system will go through before cancelling any enrolment. If all the critical checks have a green tick in front of them, that means that you are eligible to cancel the enrolment. But, if the check status shows the red cross instead of a green tick then it means that you have to fix it and then only you will be allowed to cancel the enrolment

When all checks result in a green tick then you can cancel the enrolment. Just enter the Cancellation Date, Cancellation Reason and Note.

IMPORTANT: There are some checks you can fix before cancelling if those results in a fail. For example, Enrolment flagged as started or Enrolment flagged as finished. One can easily unstart or unfinish the enrolment from Enrolment Dashboard and then you can cancel the enrolment. By cancelling enrolment, the system will also cancel all the invoices which do not have any transactions related to them. The compliance tile will be hidden after cancelling an enrolment. Also, you will not see any action button on any of the tiles.

What does the Total Allocation column in Attendance and Results show

The system shows you two numbers in this column such as 23/30.

The first number is how many students are currently allocated to the class (23 in the above example).

The second number is the maximum capacity for the class (30 in the above example).

For the currently allocated number showing in red above, the system is identifying that the class has not reached its minimum capacity. For example, Room 808 has been setup with a minimum capacity of 26, however only 23 students have been allocated to the class and that is why 23 is in red.

The system will also show the maximum capacity number in red if the total students allocated to the class is more than the maximum capacity set for the class room