Campus – Contact Log

Campus > Edit Campus > Campus Entry Burger Menu > Contact log

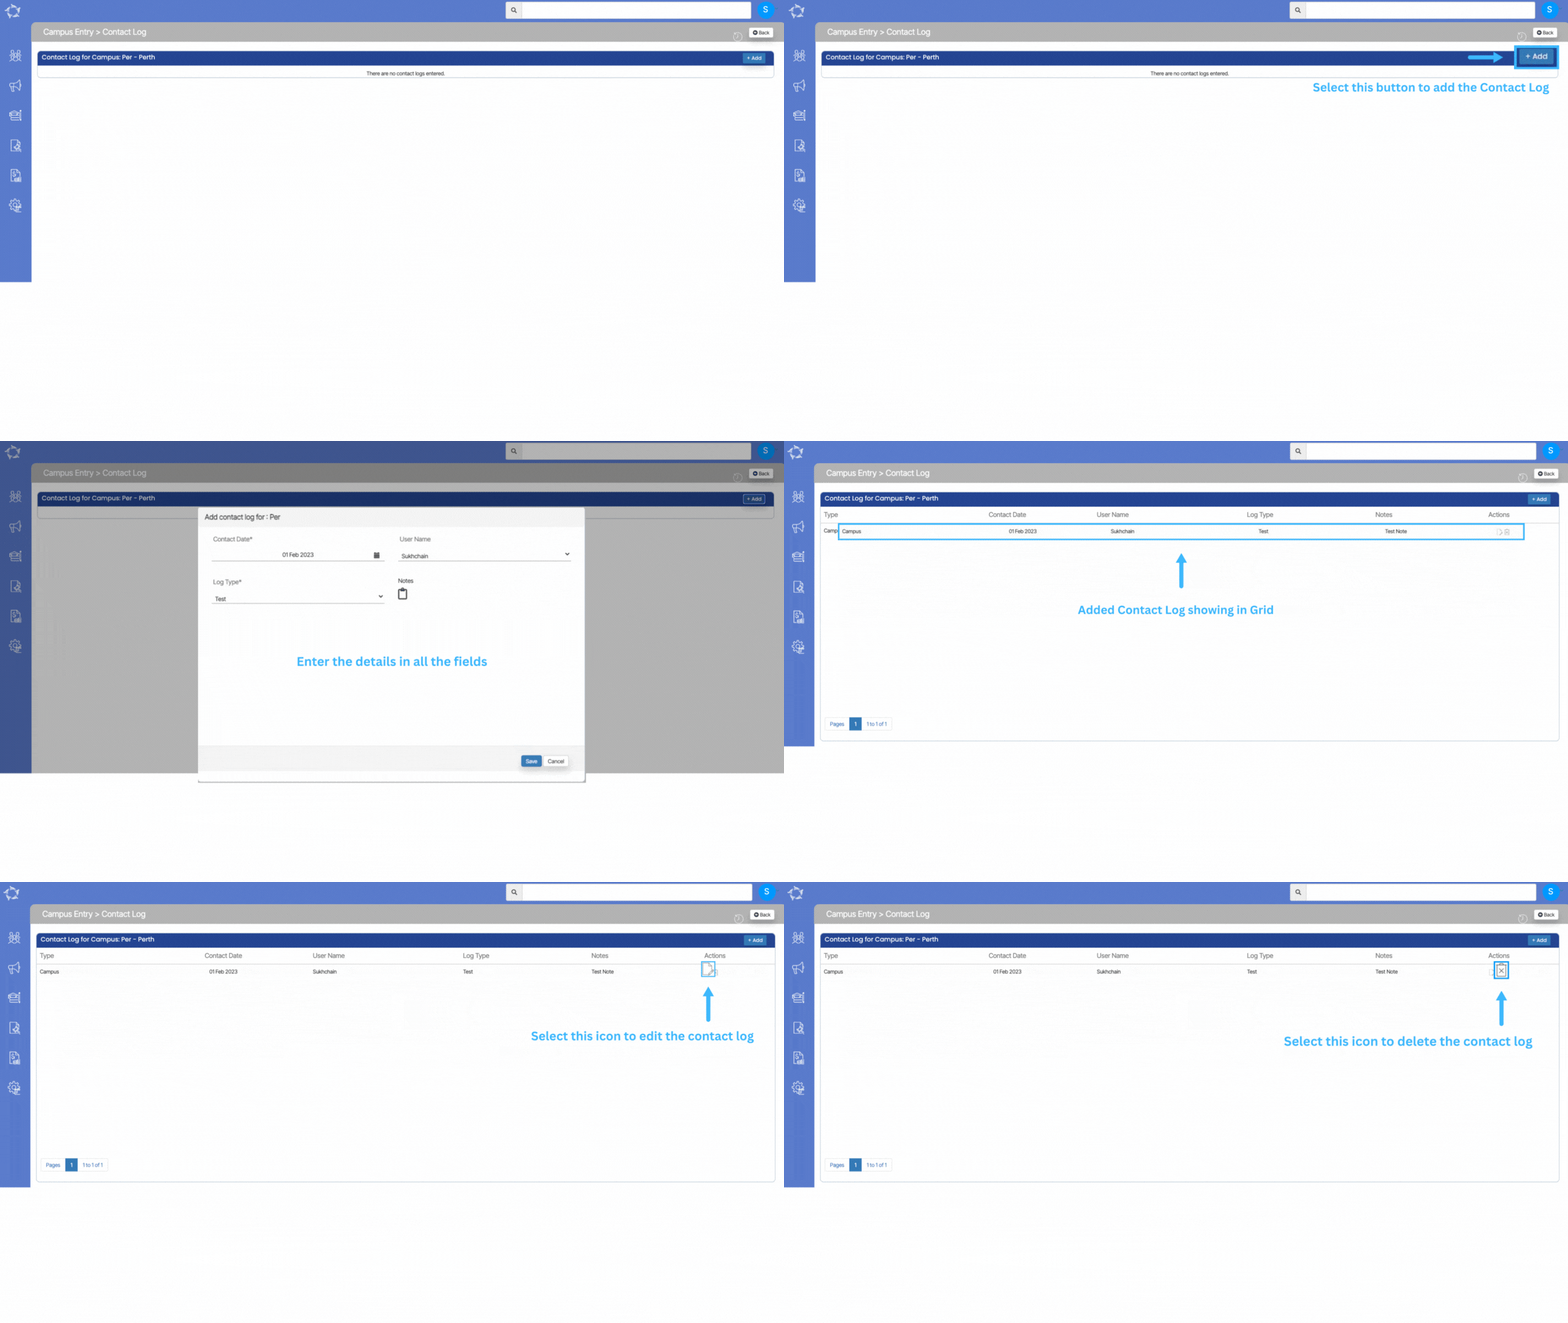
The campus contact log screen will allow you to create the contact log against the campus. You can add contact log details of the campus by selecting the +Add button.

When you select the +Add button, a popup window will appear where you can select the contact log details and once it is updated it will show you the details in the grid.
Explanation of the fields

FieldsExplanation
Contact DateThis is a mandatory field and you can select the contact date from the calendar icon
User NameThe username which you have used to log in to teams will auto-populate here.
Log TypeThis is a mandatory field and it is a user ode in TEAMS. Based on the user code created in TEAMS, you can select the log type
NotesHere you can write the notes for your own reference.

Campus – Contact

Campus > Edit Campus > Campus Entry Burger Menu > Contact

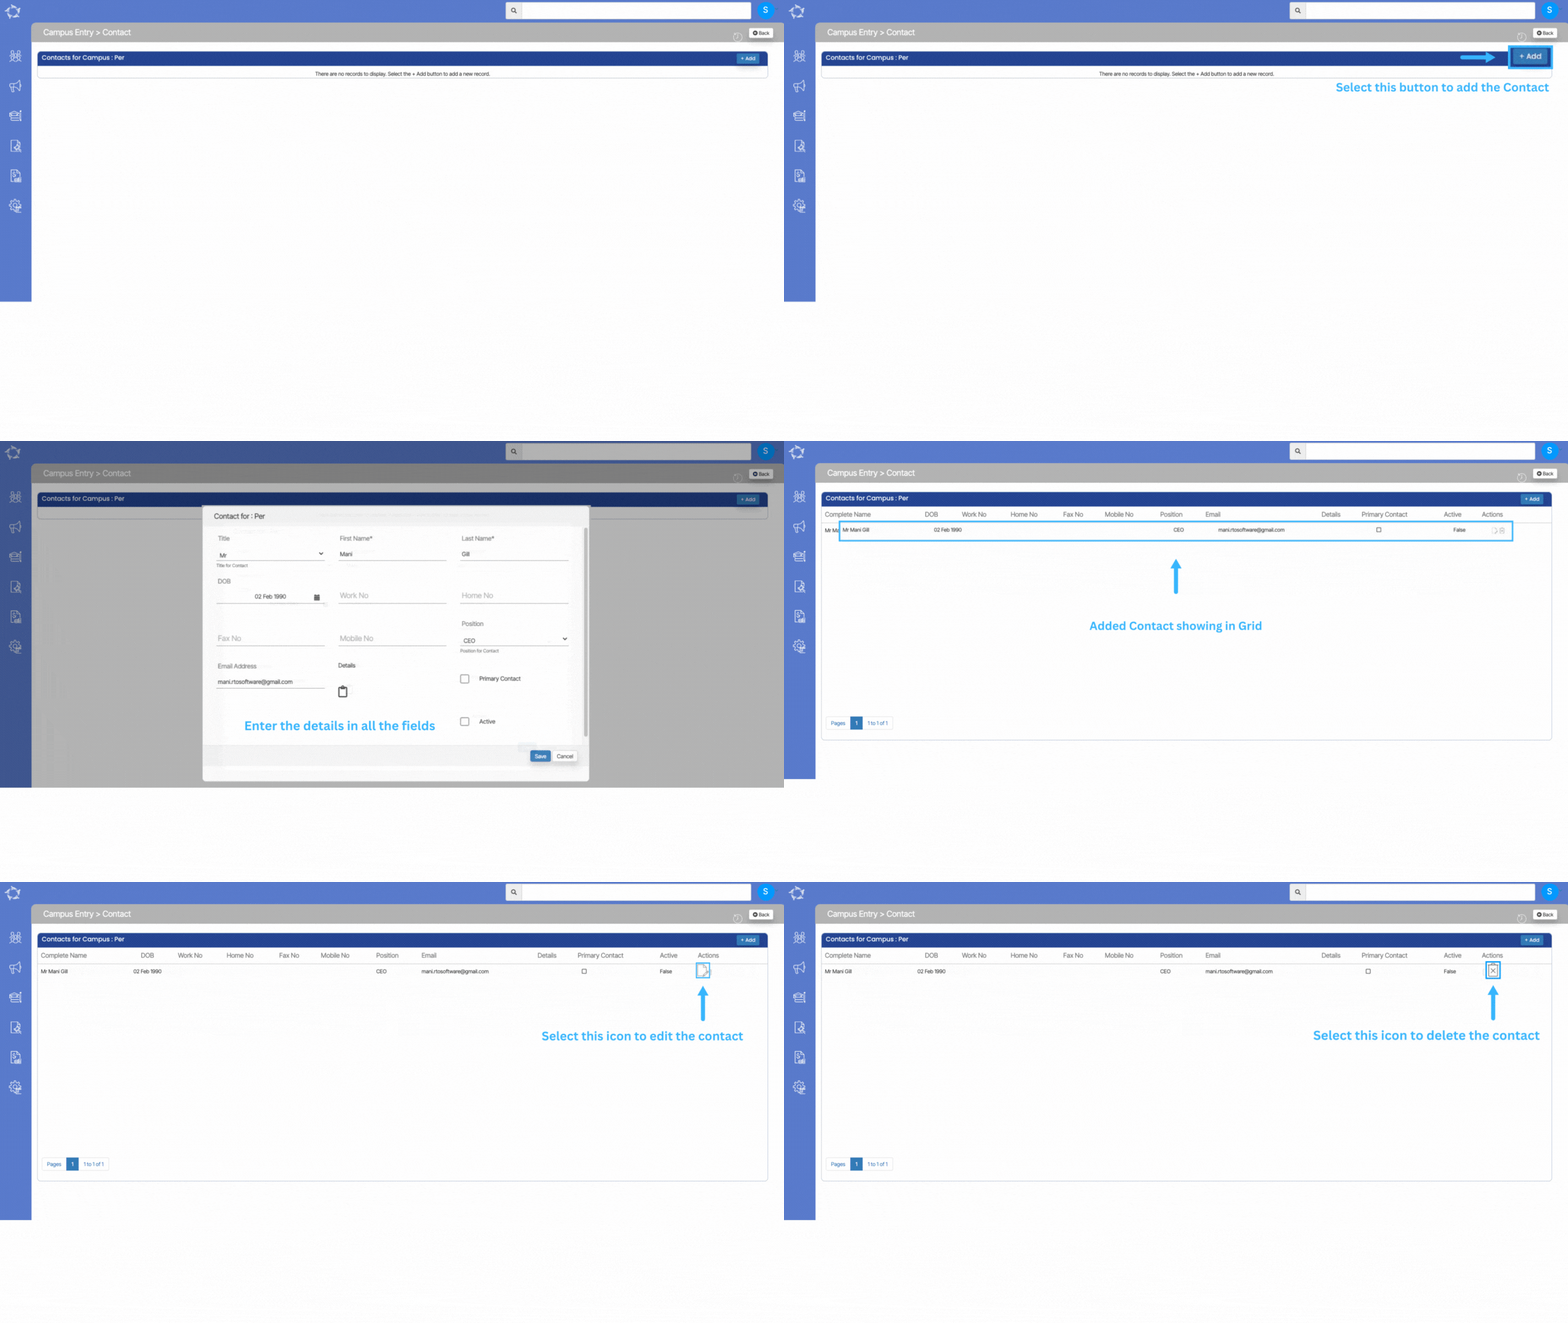
When you select the contact option from the burger menu, you will be taken to the campus entry > contact screen. This screen will allow you to add the others contact details.

Select the +Add button, a popup window will appear where you can add the contact details of the concerned person.

Explanation of the fields below:

FieldsExplanation
TitleYou can select a title (Mr., Miss) etc
First NameFirst name of the contact person
Last NameLast name of the contact person
DOBDOB of the contact person.
Work NoWork number
Home NoHome number
Fax NoFax number
Mobile NoMobile number
PositionSelect the organisational position of the contact person from the dropdown
Email AddressEmail address of the contact person
DetailsYou can write any reference details under the notes.
Primary ContactYou can select this tickbox if the contact person is the primary contact person of the campus.
ActiveSelect the box to make the contact details active.

Campus – Bank Account

Campus > Edit Campus > Campus Entry Burger Menu > Bank Account

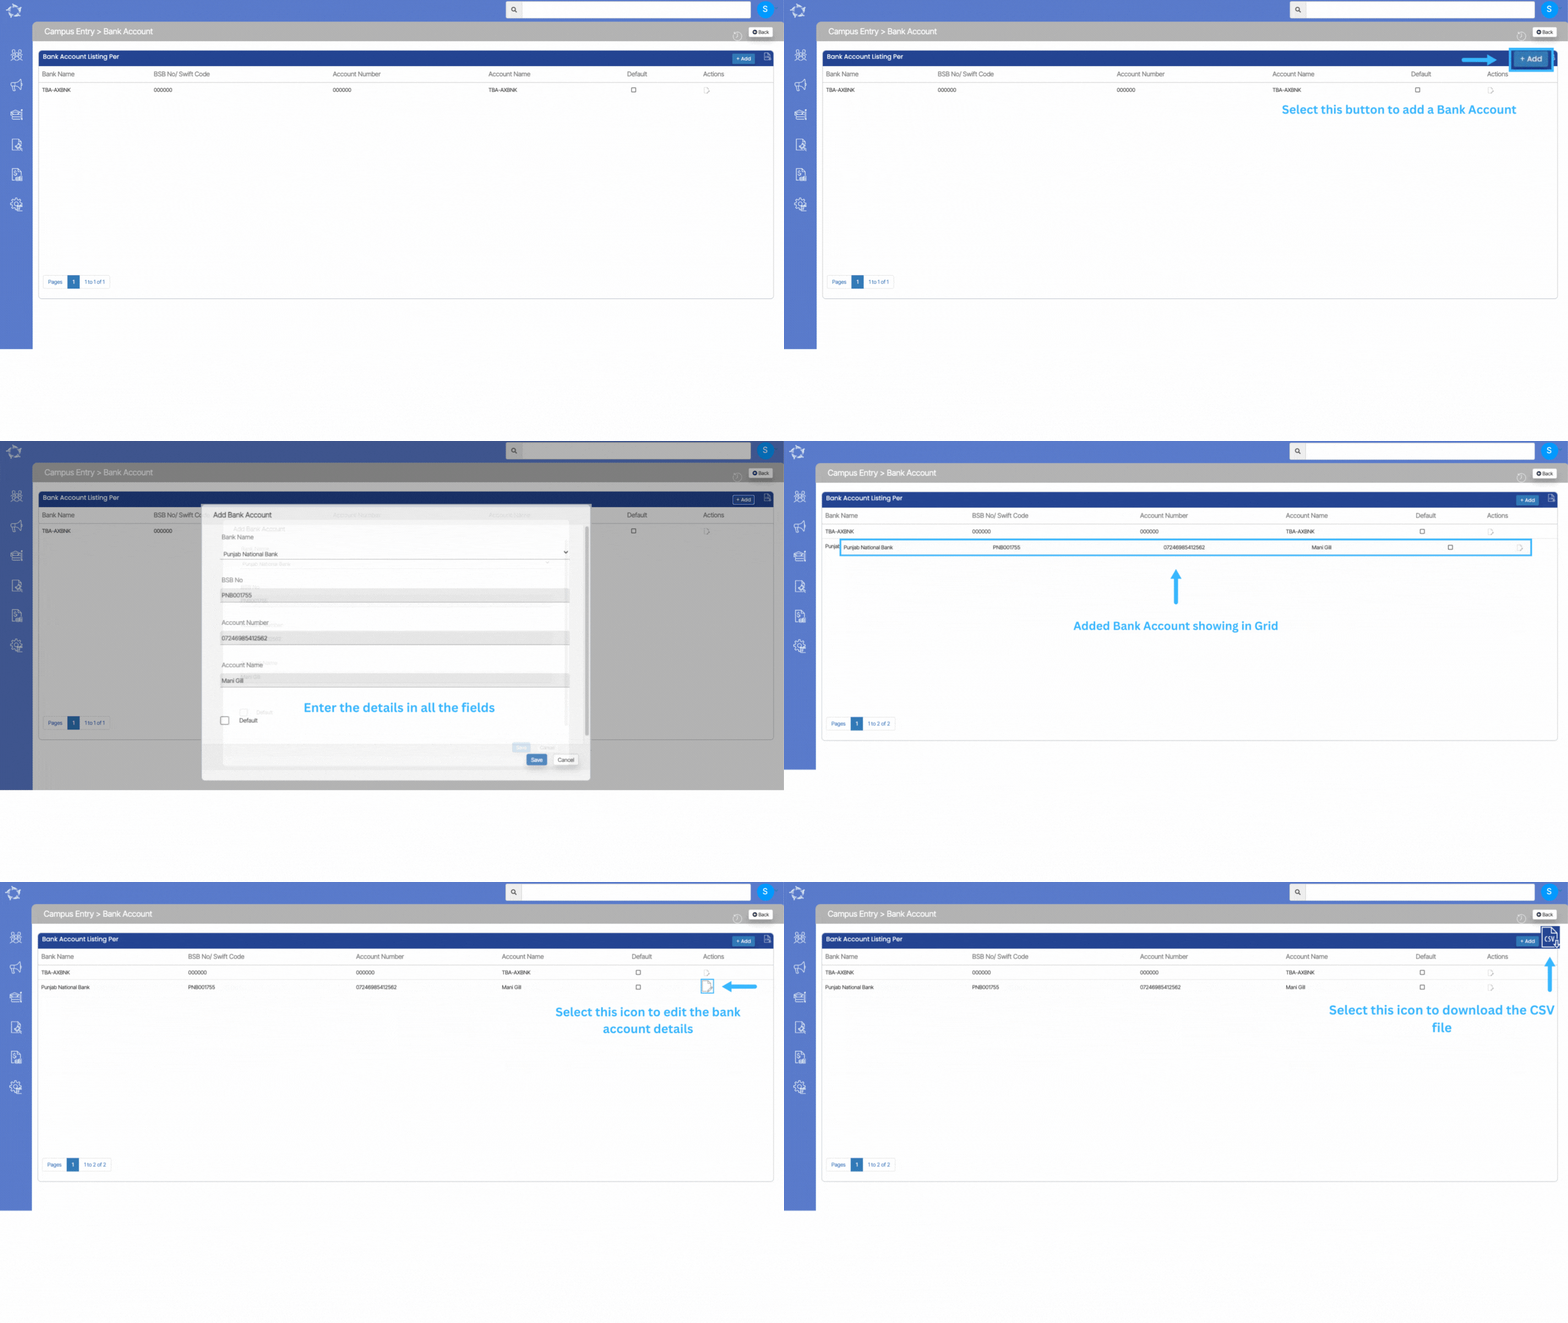
This screen provides you with a grid displaying the bank details associated with the campus. You can easily view the information in an organised manner. If you need to make any changes to the existing bank details, simply locate the respective entry in the grid and select the edit icon available under the actions column. This will enable you to update the information as required.

Additionally, if you wish to add a new bank account for your Campus, you can conveniently do so using the options provided. This screen offers a user-friendly interface to manage and modify bank details, ensuring accurate and up to date information for your campus and RTO.

Campus – Linked program

Campus > Campus Entry Burger Menu > Linked Programs

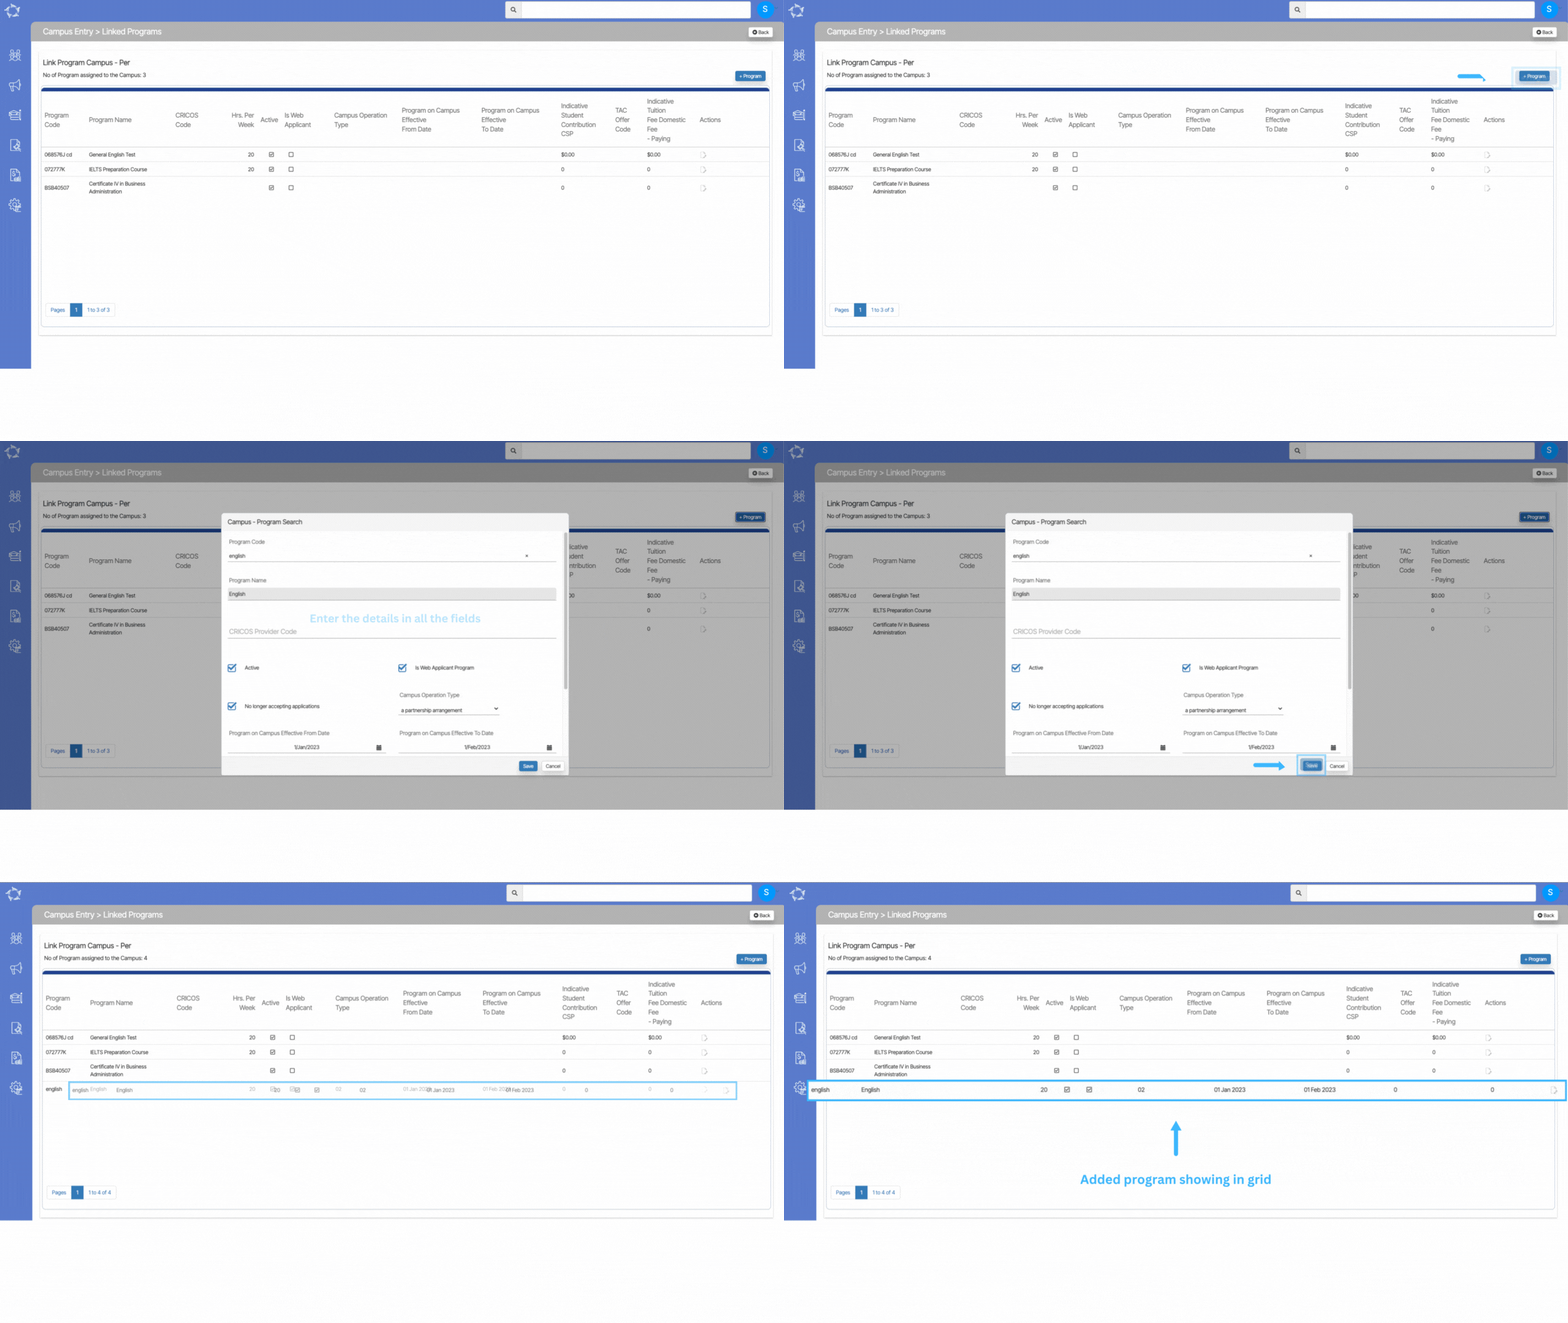
The screen provides an overview of all the programs within the grid that are associated with the campus. To establish a connection between a program and the campus, you can simply click on the +Program button. This action allows you to link the desired program to the campus, enabling easy access and management of the program’s information within the system.

Explanation of the fields below:

FieldsExplanation
Program CodeIt is a magic search field where you have to type the three initials of the program code and it will show you the programs with those initials and you can select the code as per your need.
Program NameIt will be auto-populated when you select the program code.
CRICOS Provider CodeIn this field, you can write the CRICOS Provider code.
ActiveYou need to select the Active tick box to make the Program active.
Is Web Applicant ProgramYou can tick this box if the program is a web applicant program.
No Longer Accepting ApplicationsIf you do not want the program to accept applications then you can select this tick box.
Campus Operation TypeThere are two types of campus operation either you can select a stand-alone arrangement or a partnership arrangement.
Program on Campus effective from dateYou can select the date from when the program is effective on campus.
Program on Campus effective to dateYou can select the date till the program will be effective on campus.
Indicative Student Contribution CSP
TAC offer CodeYou can select the TAC offer code from the dropdown
Indicative Tuition Fee Domestic Fee – Paying

Campus – Address

Campus > Campus Entry Burger Menu > Address

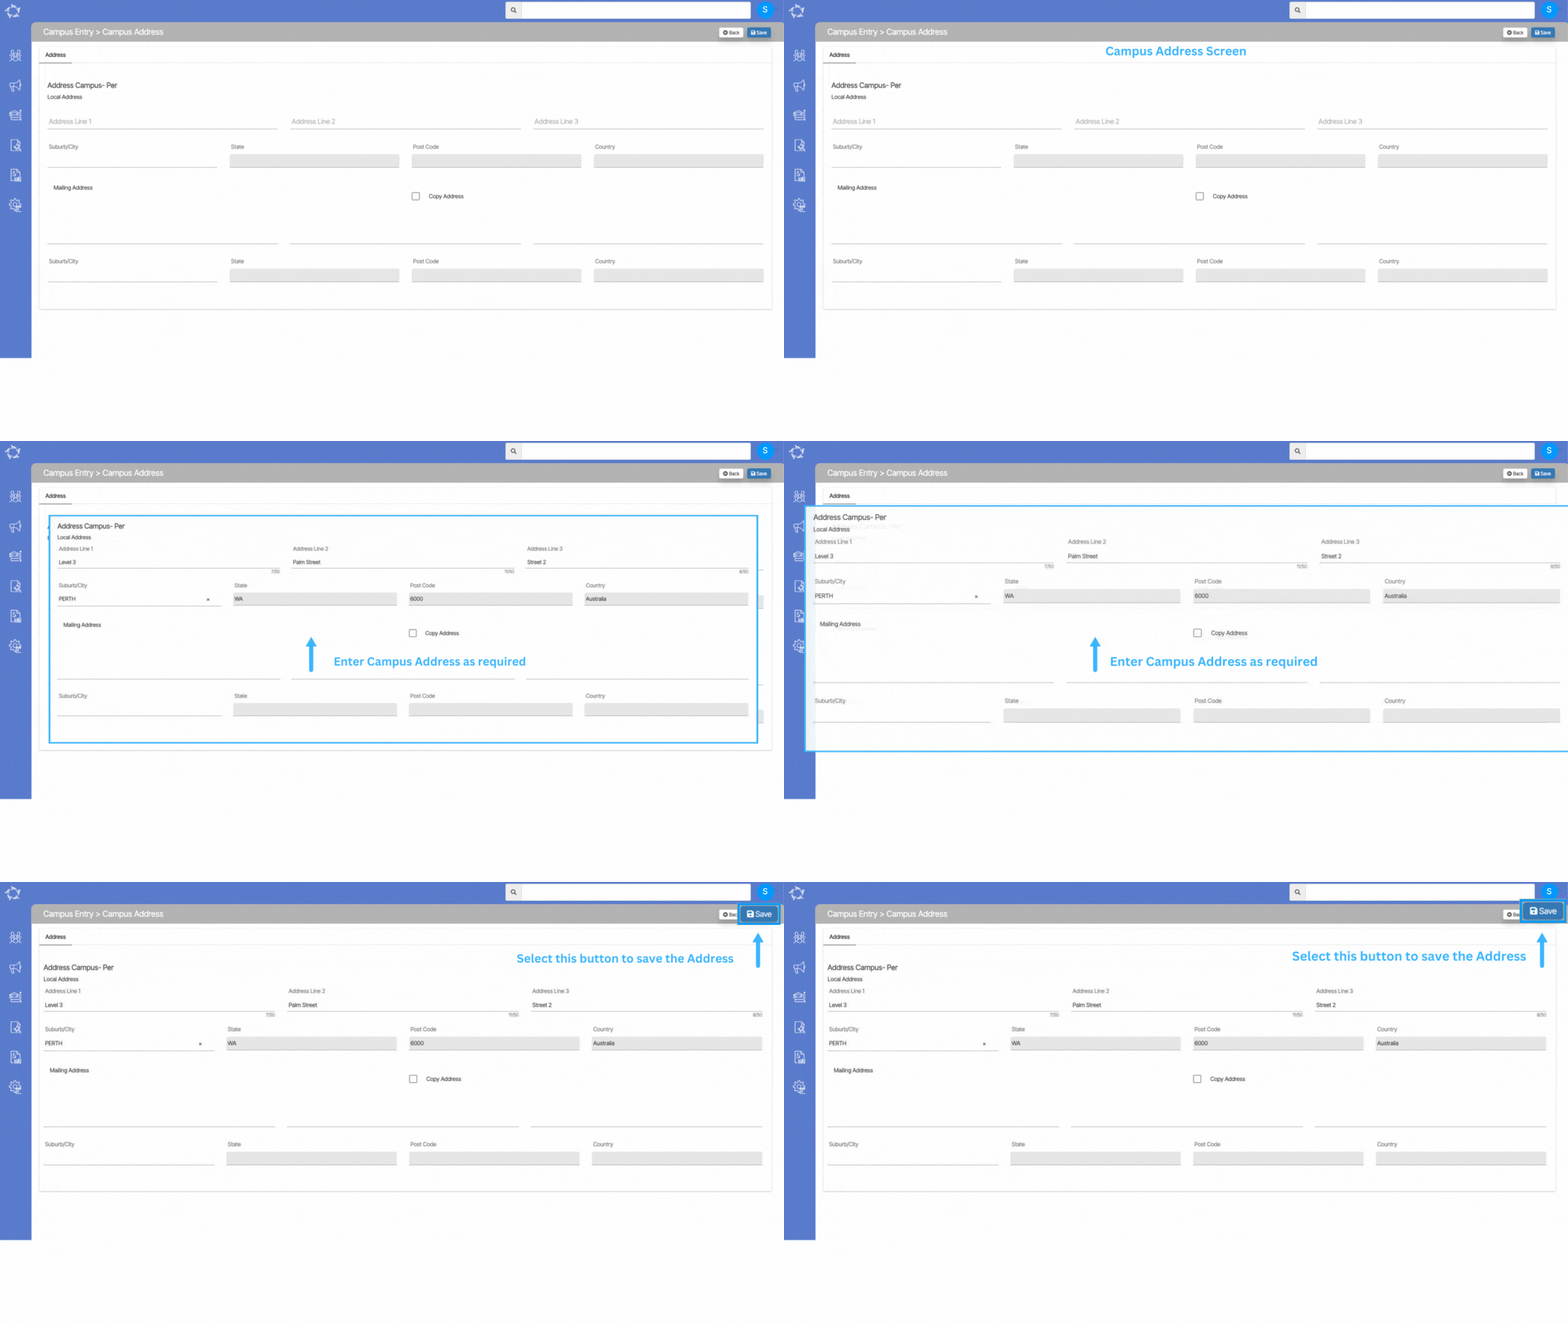
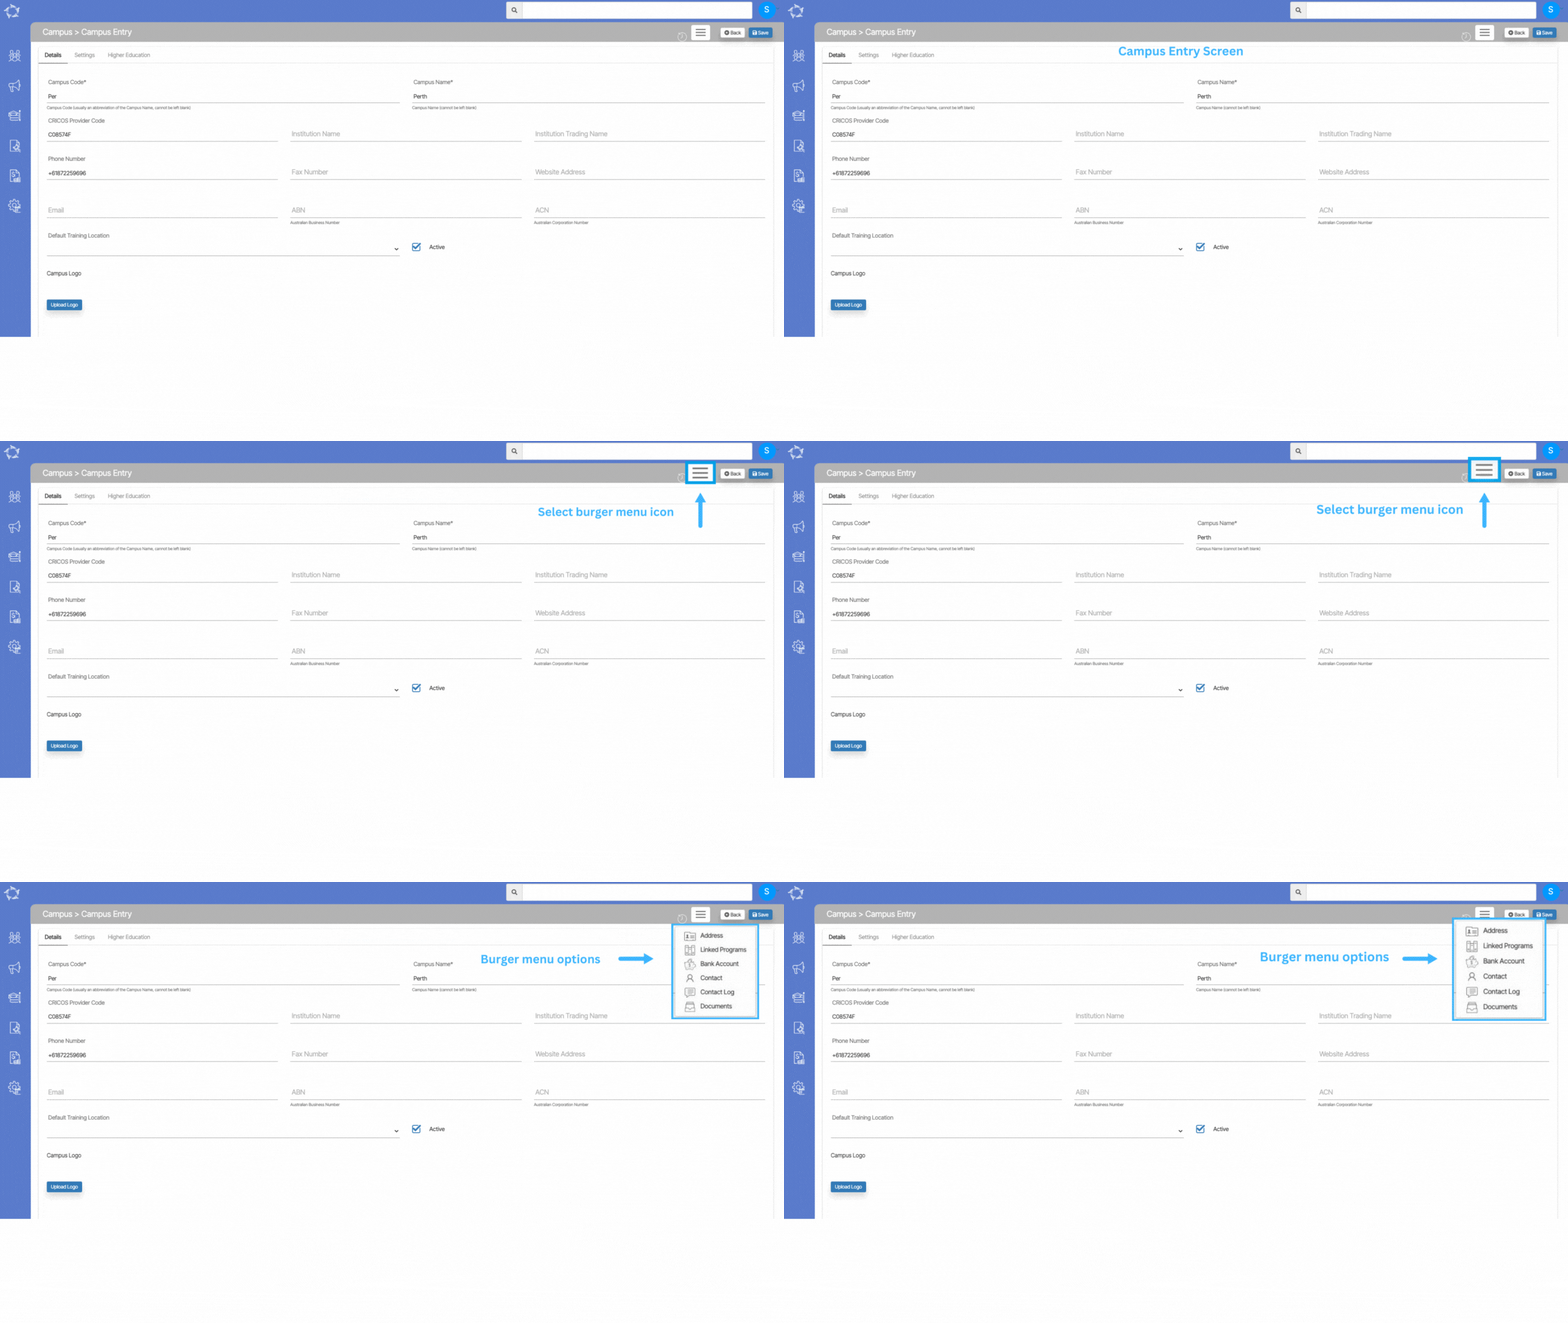
By choosing the address option, you gain access to the campus address screen, which allows you to add or modify both the local and mailing addresses associated with the campus.

Within this screen, you will find separate sections dedicated to the local address and the mailing address. Each field within these sections is designed to be self-explanatory, ensuring clarity and ease of use. Whether you need to update the physical location details or specify the address for receiving mail, this screen provides a straightforward interface to input and edit the necessary information for both types of addresses.

Campus – Burger Menu

Main Dashboard > Academics > Campus > Edit Campus > Campus Entry Burger Menu

After setting up the Campus and saving it, you will see a Burger Menu icon displayed on the Campus Entry screen. Selecting this icon will open a menu offering various options. Here are some of the options available under the burger menu:

Campus

Main Dashboard > Academic menu > Campus

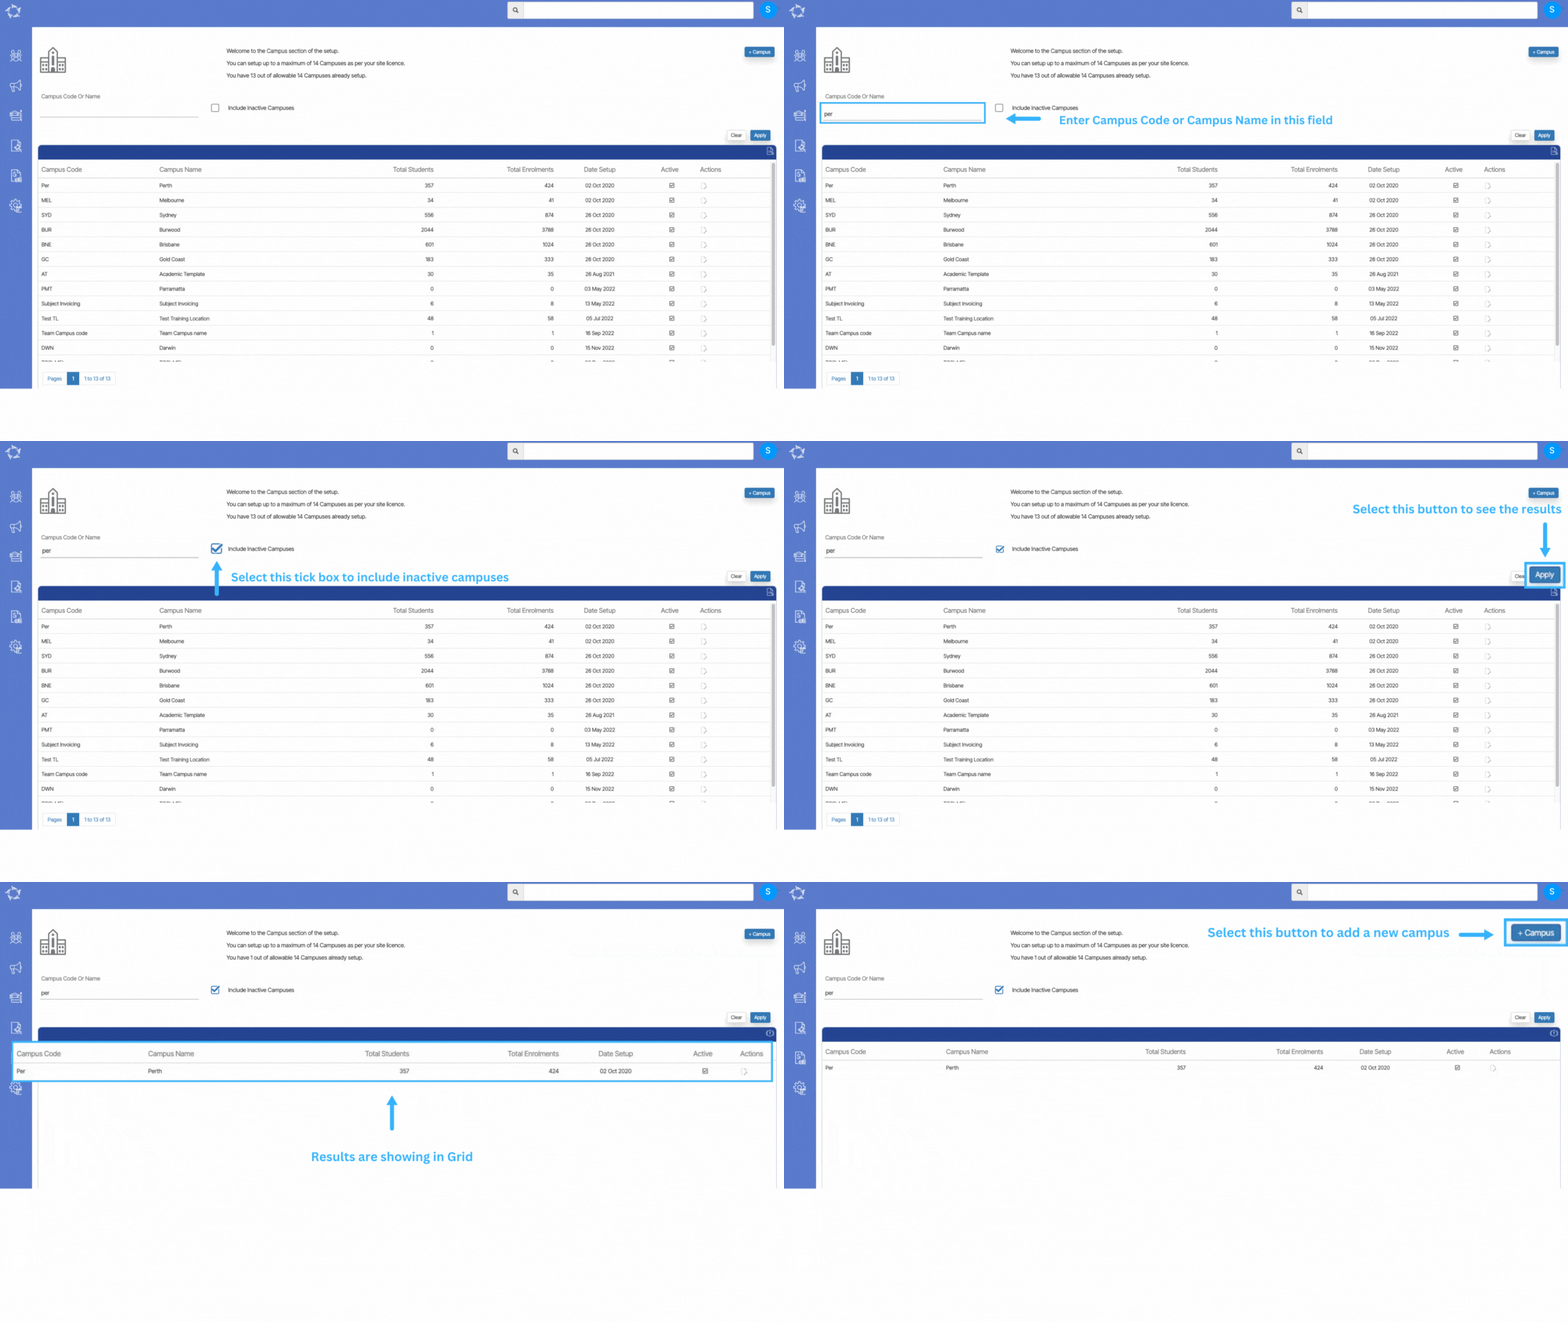
The campus screen will show you the total number of campuses as per your site licence. To find a particular Campus, you can search for it using either its code or name. If you want to see Campus/es that are no longer active, you can choose to include them in your search results by selecting the box Include Inactive Campuses and selecting the Apply button. This can be useful when you need to manage both active and inactive subjects.

IMPORTANT – If you have a setup of up to 5 campuses as per your site licence and you have only set up 3 campuses then you will be able to add a new campus from the +Campus button. if you have set up 5 campuses in the system then you will not be able to see the +campus button on the welcome screen. The site licence only allows you to add 5 campuses for your RTO.

Intakes

Main Dashboard > Academics menu > Intakes

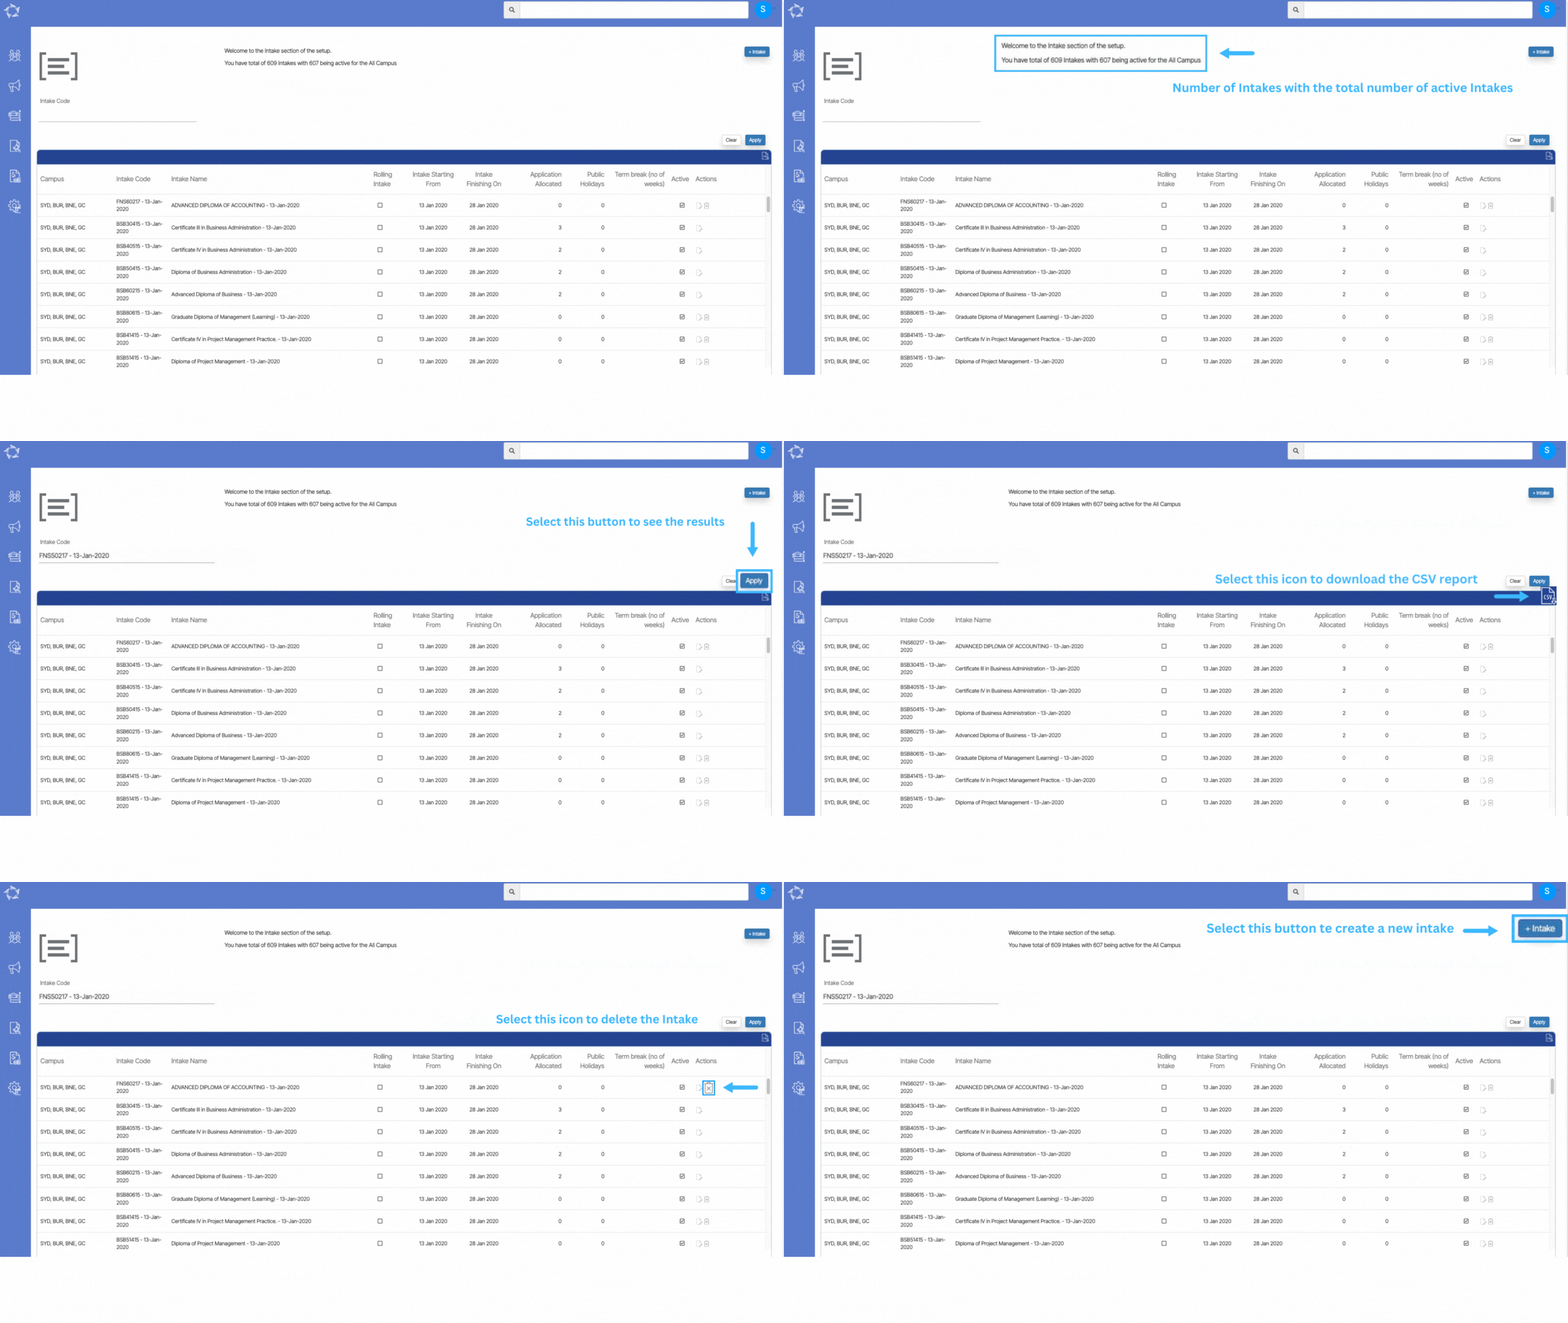
The Intakes welcome screen will show you the basic information about the intakes in the grid that are active in your database. You can search for a specific intake with the Intake code in the search field and then hit the enter key or select the Apply button. The system will show you the relevant searched data in the grid.

You will also be able to edit the intake by selecting the edit icon under the actions column or you can add a new intake from the + Intake button.

Agent Dashboard

Main Dashboard > Marketing Menu > Agent Dashboard

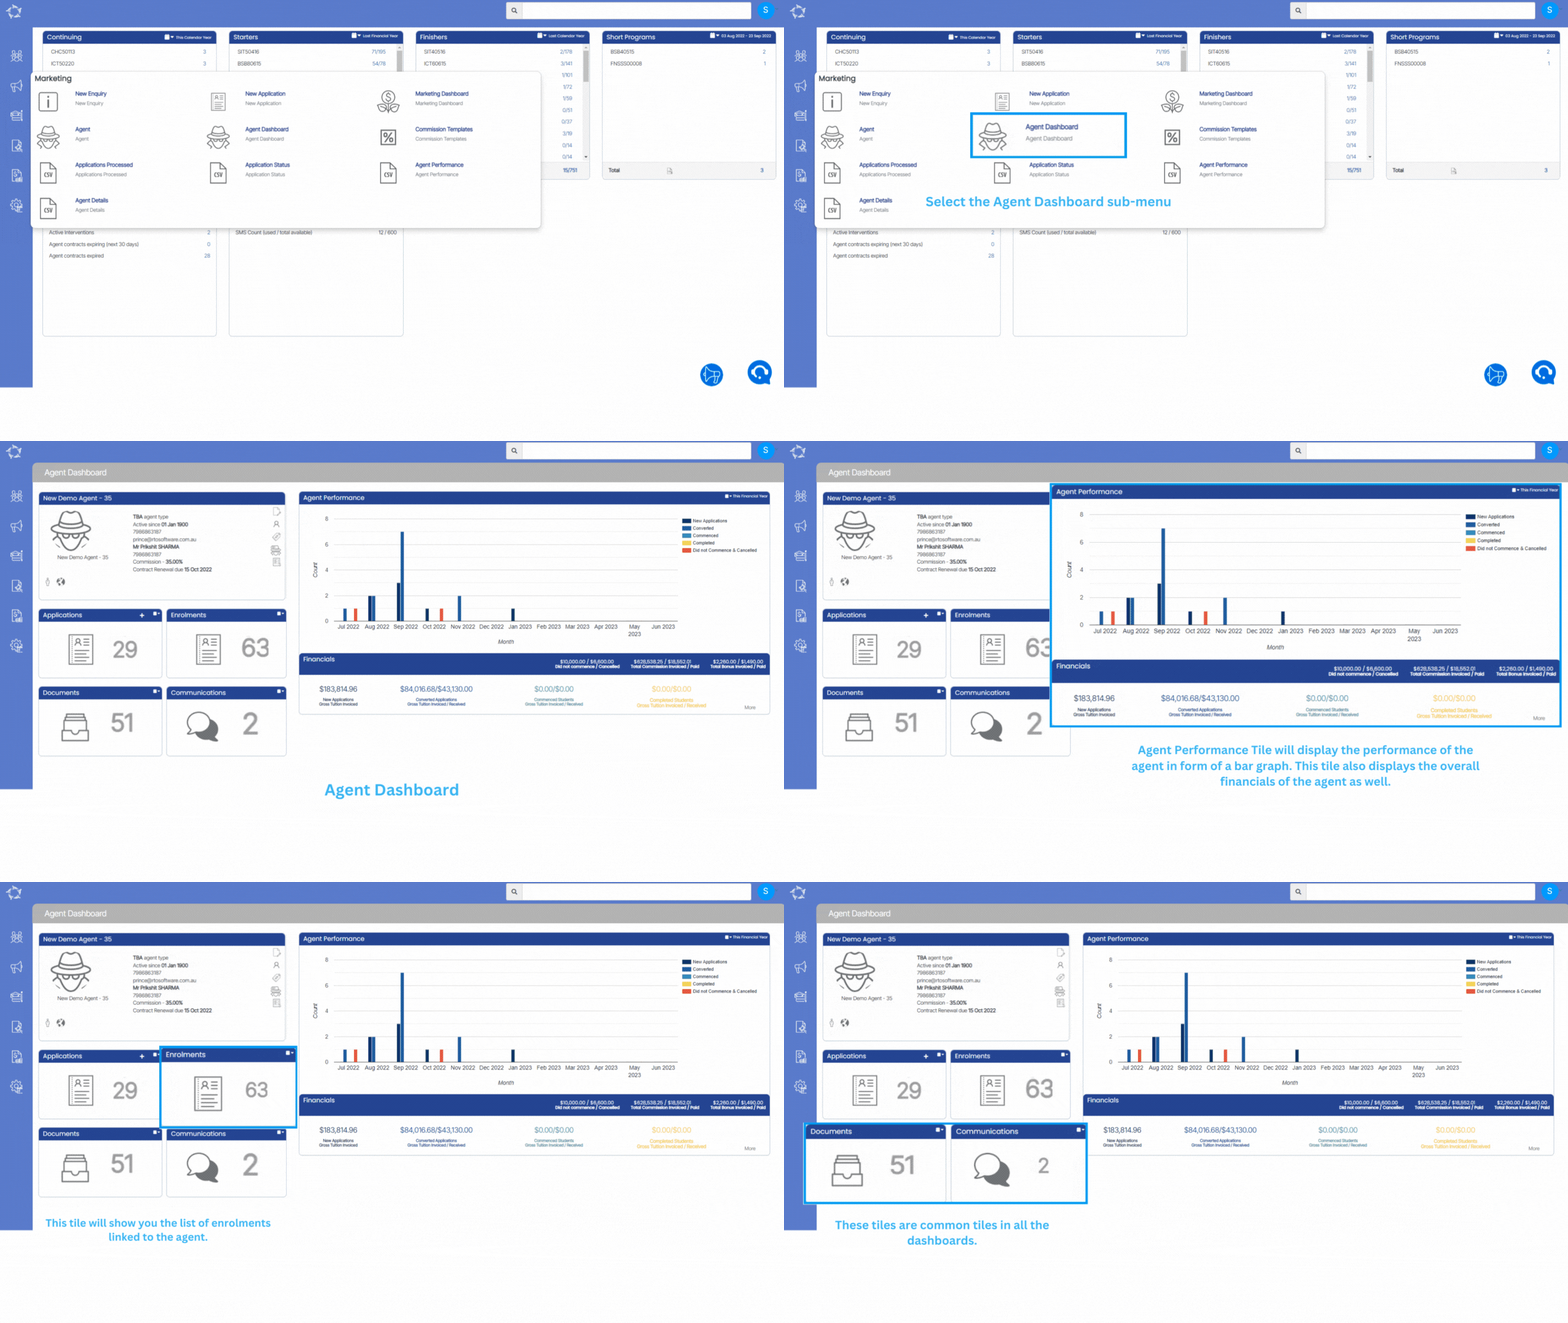
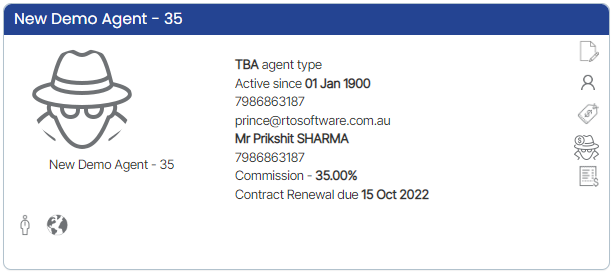
The Agent Dashboard screen will give you a history of the Agent with your college. It is comprised of a number of different tiles that will allow you to navigate to different screens and information linked to the Agent.

To Search Agent, please select Agent Search.

Tiles


The Agent profile tile will give you an overview of the agent’s basic information. A user can upload the Agent picture, edit the details, create bonus invoices, and view pending payments
This is the pending application’s tile and you can convert them from its listing screen
This tile will show you the list of enrolments linked to the agent.

These tiles are common tiles in all the dashboards.

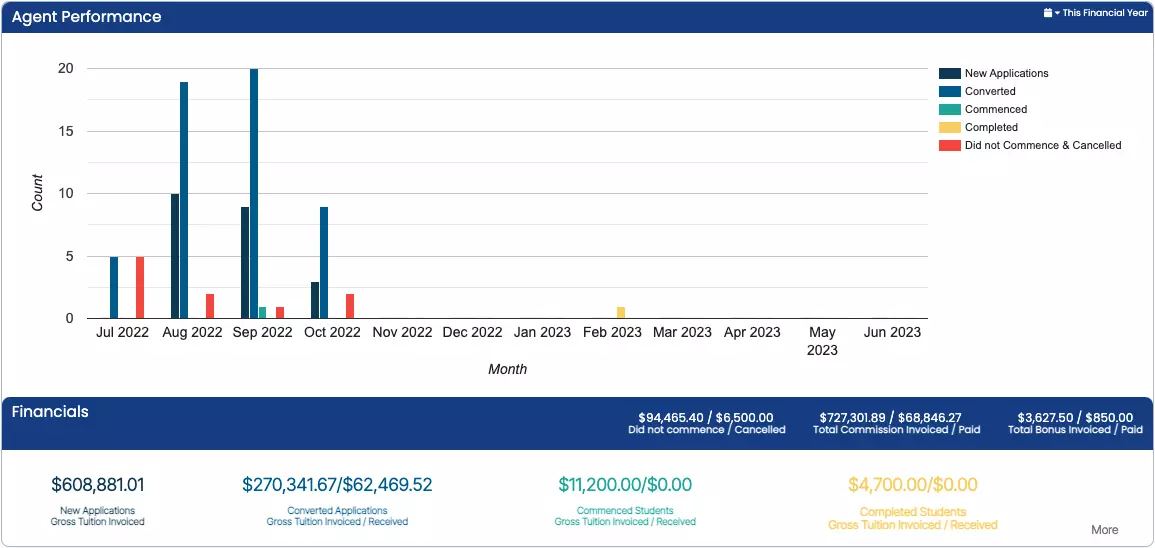
On the Agent Dashboard, we have a bar graph that can give you vast amount of information to keep a check on agent performance.

Group Training Plan

Main Dashboard > Academic menu > Group Training Plan

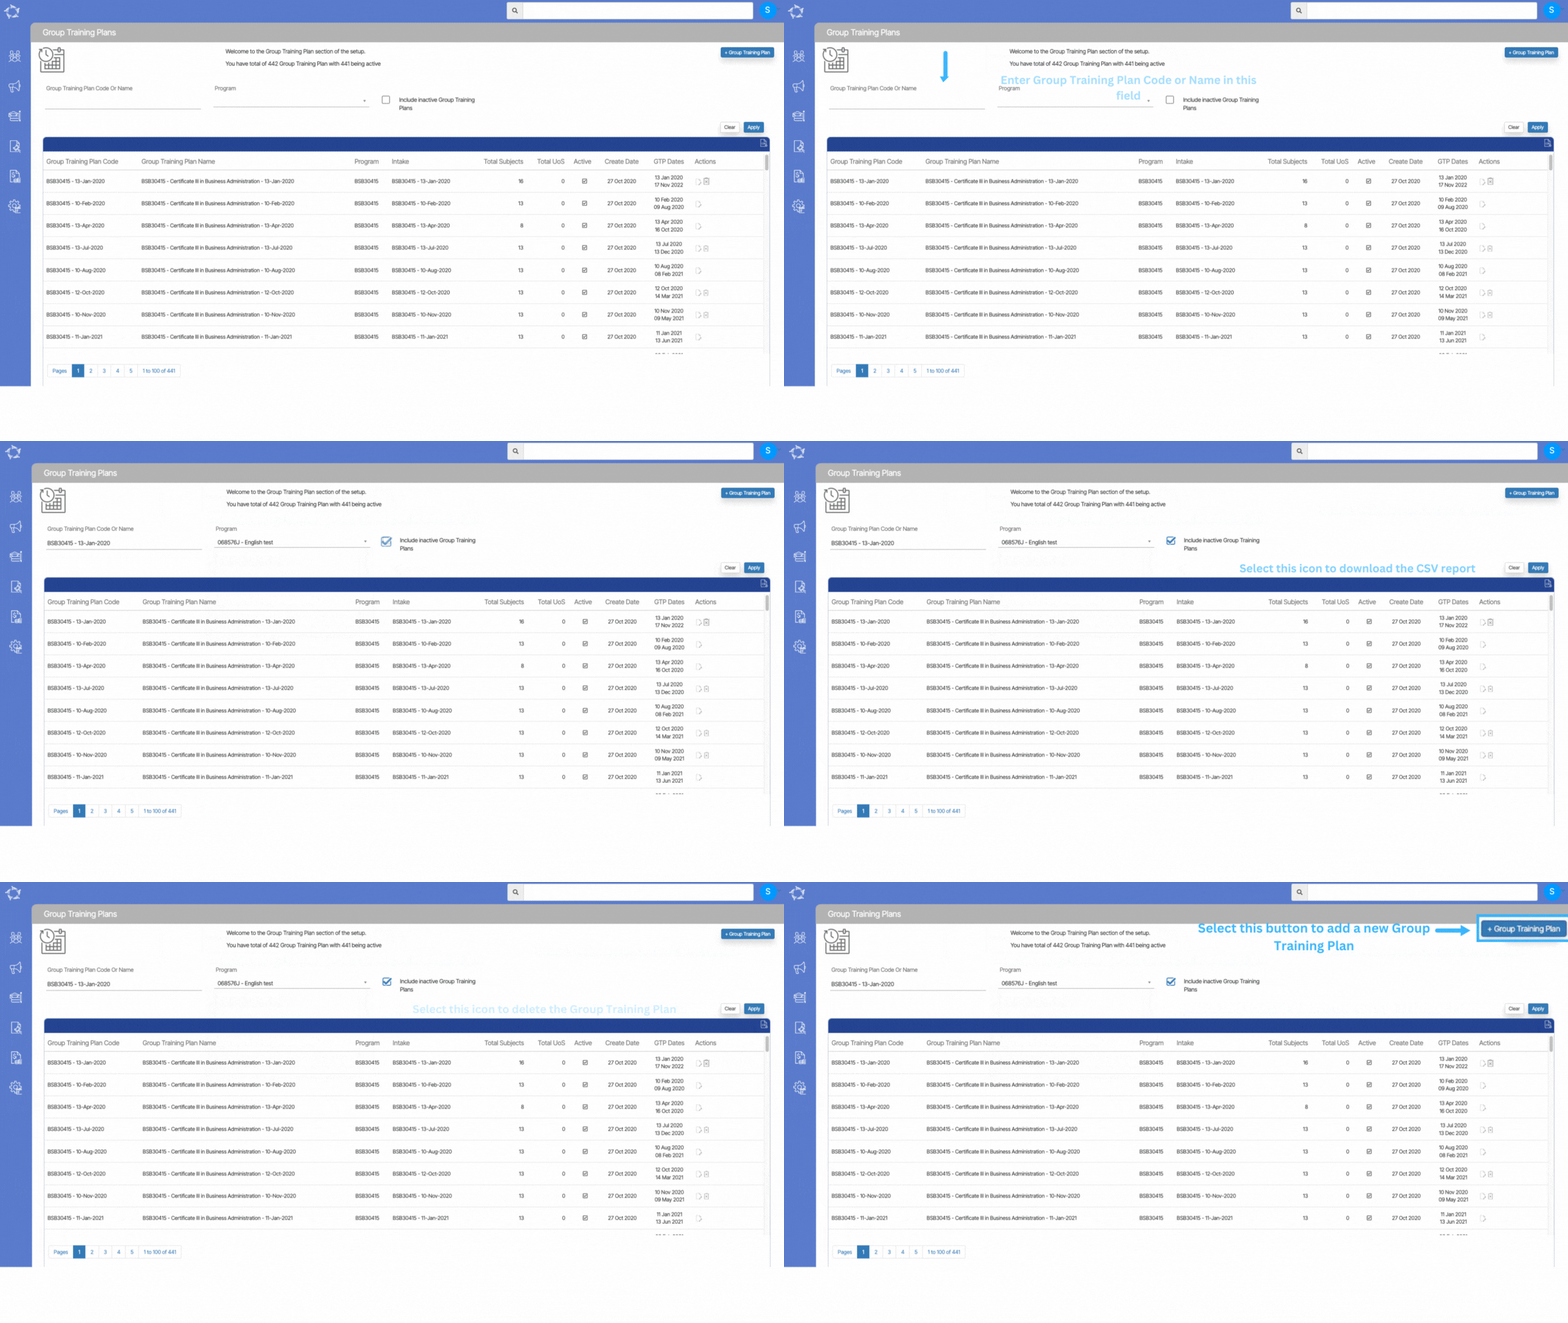
The Group Training Plan is used to define the Subjects/unit’s date in the system. The Group Training Plan welcome screen will give you the basic information regarding the GTP’s created in the system and will allow you to search, add and edit group training plans from this screen.

Select here to know more about the icons under the actions column. You will also be able to download the csv file from the csv Icon