Overview
What is Moodle?
Moodle is a learning platform designed to provide educators, administrators and learners with a single robust, secure and integrated system to create personalized learning environments.
How to setup Moodle actions and alerts in TEAMS?
In TEAMS, we are mapping 3 processes:
- Moodle Login creation of new user – TEAMS will create a username and password for students to log in to Moodle.
- Enrolling Students into Subjects – For each subject in an enrolment, Moodle will create a course for students. e.g. 10 Subject -> 10 Courses will be created by Moodle. (Course is another word for the subject in the Moodle)
- Updating final results from Moodle to TEAMS – In this section, Results competent, and not yet competent are updated in TEAMS from Moodle.
How To Setup Moodle Actions:
- From the Main Dashboard, you need to go to the System Admin menu > Automated System Actions.
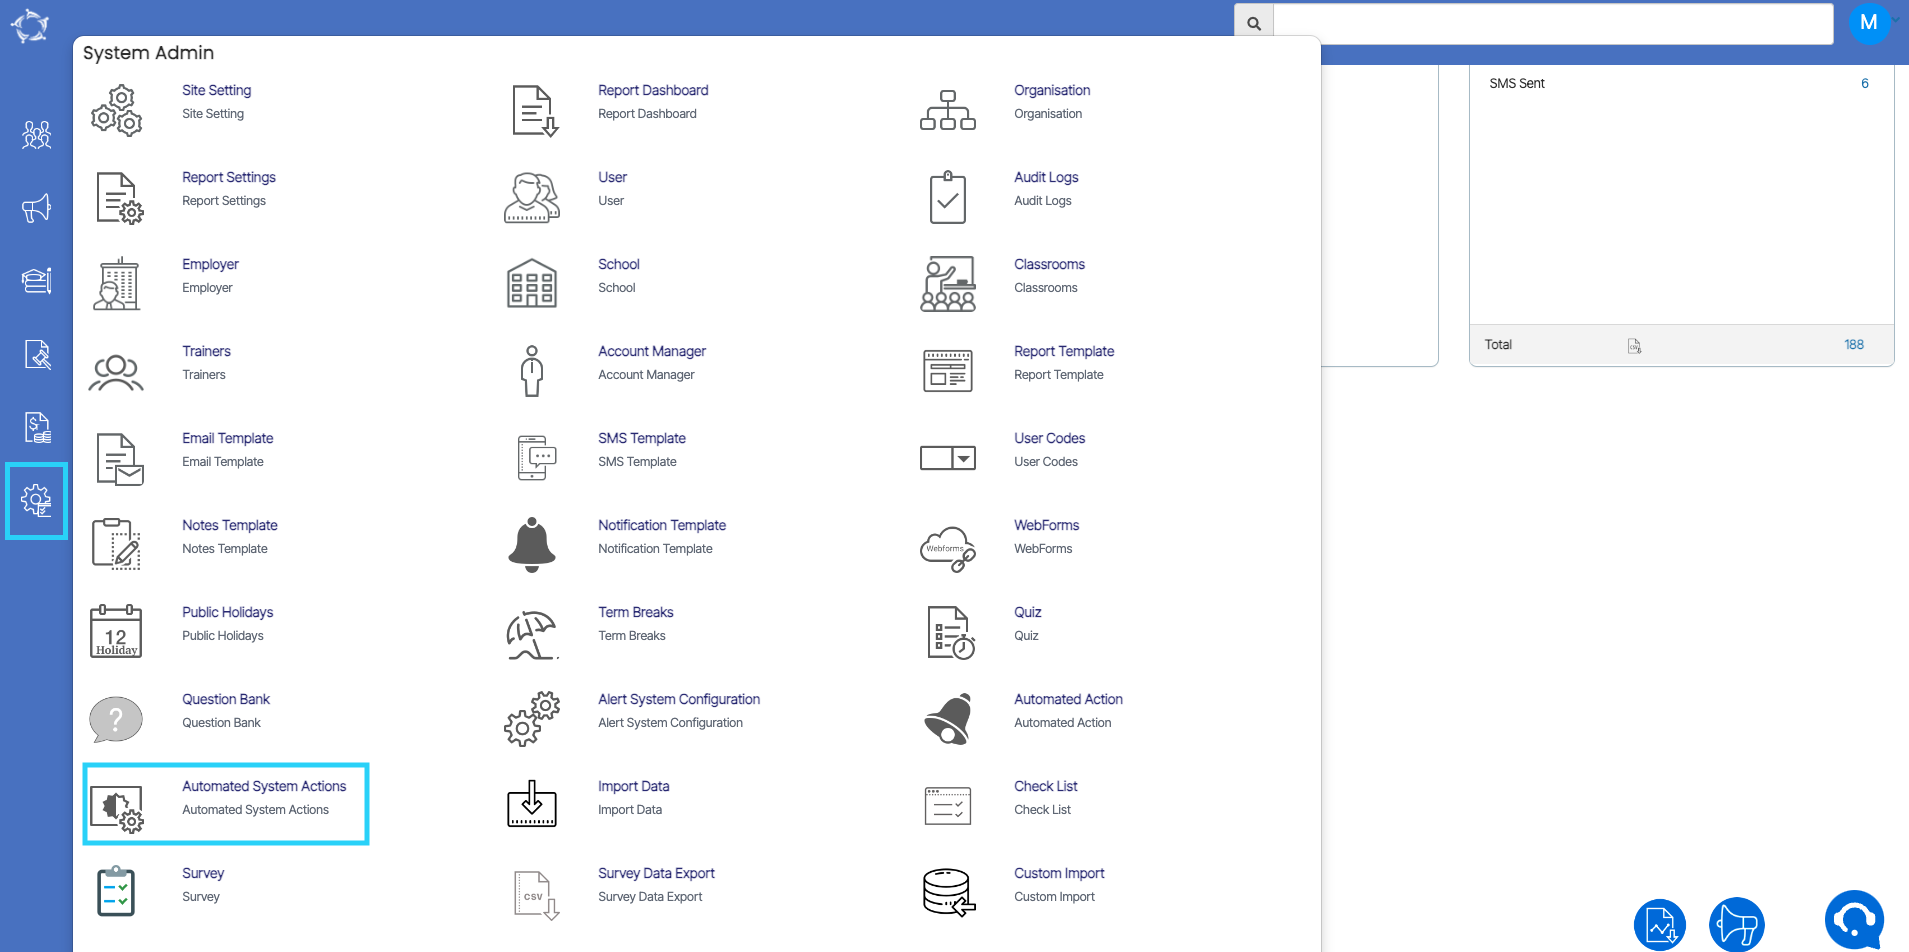
- Now select the +System Actions Button on the right hand side of the welcome screen.
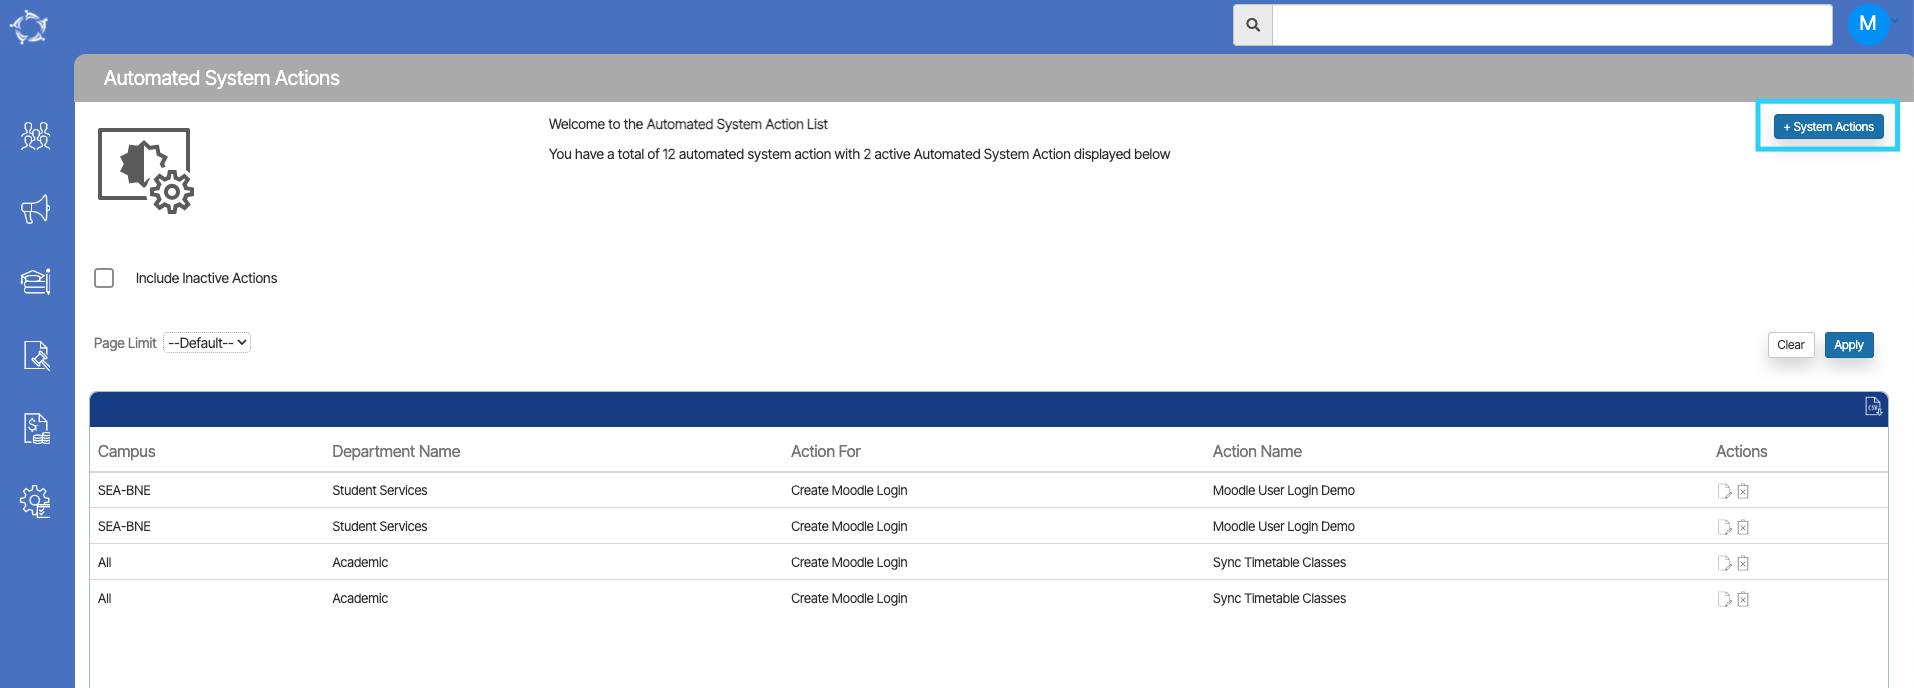
- Below is the Automated System Actions Entry screen which appears when you select the +System Actions button. Here you can create actions.
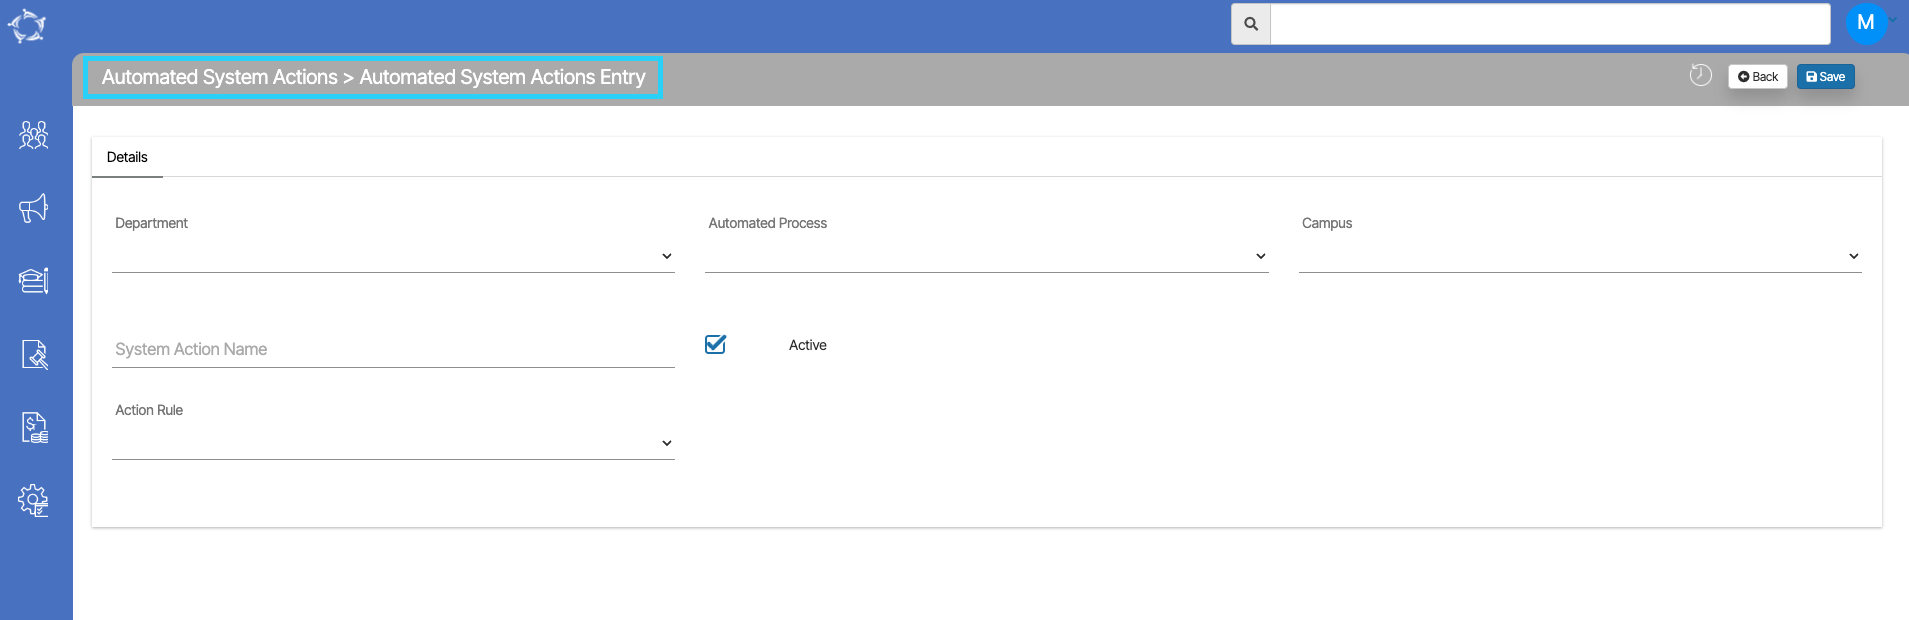
Steps To Create Moodle Actions
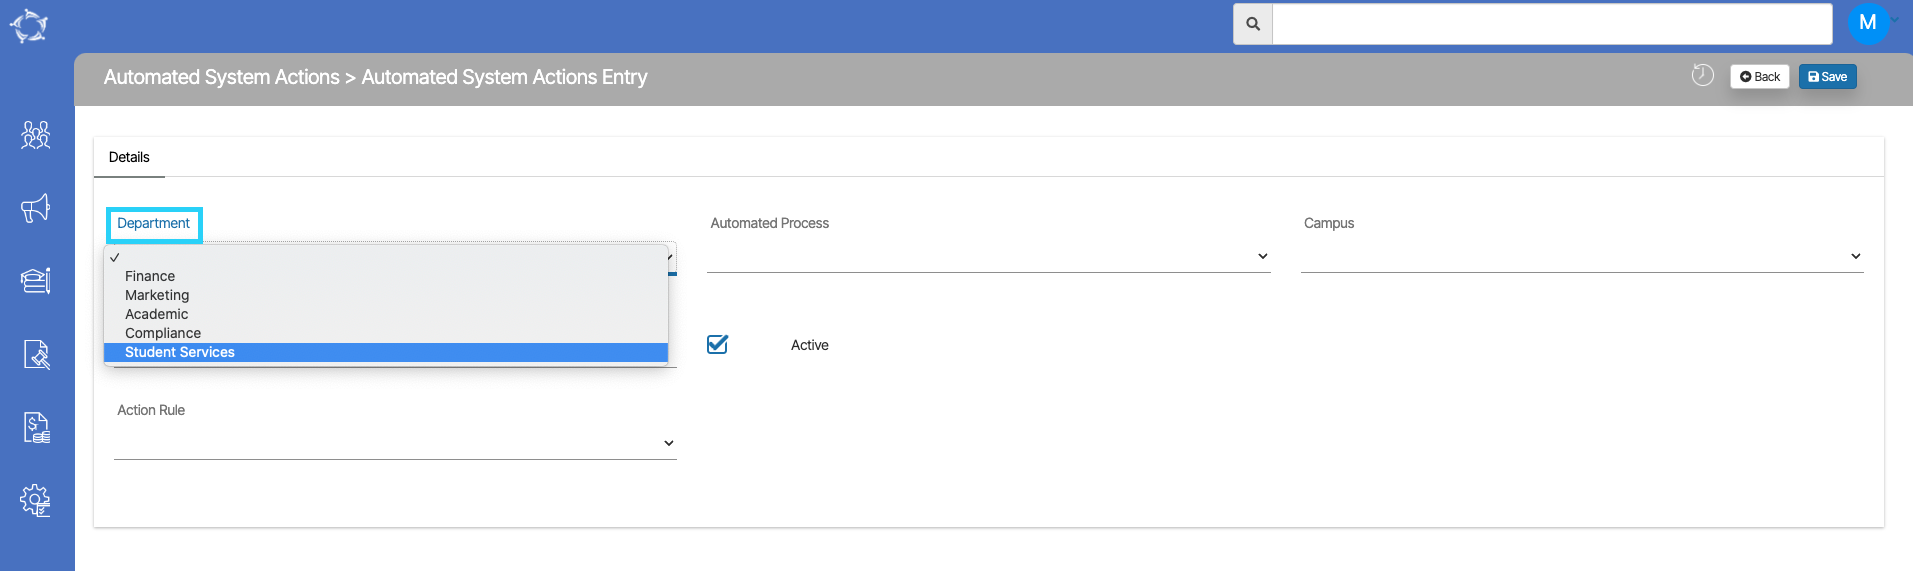
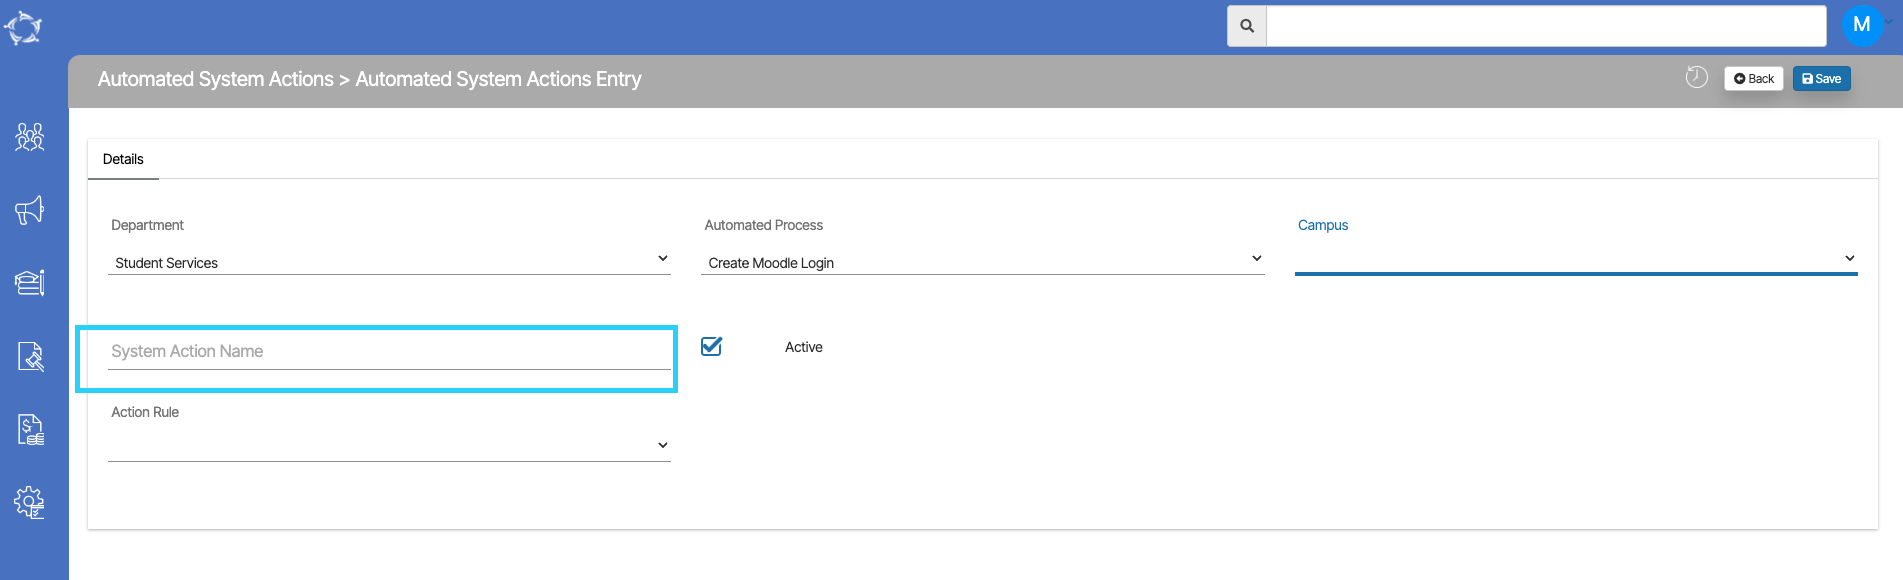
- Select the Department from the drop-down(Now Moodle Action is a part of student service, so you must select the “Student Services” option from the drop-down).
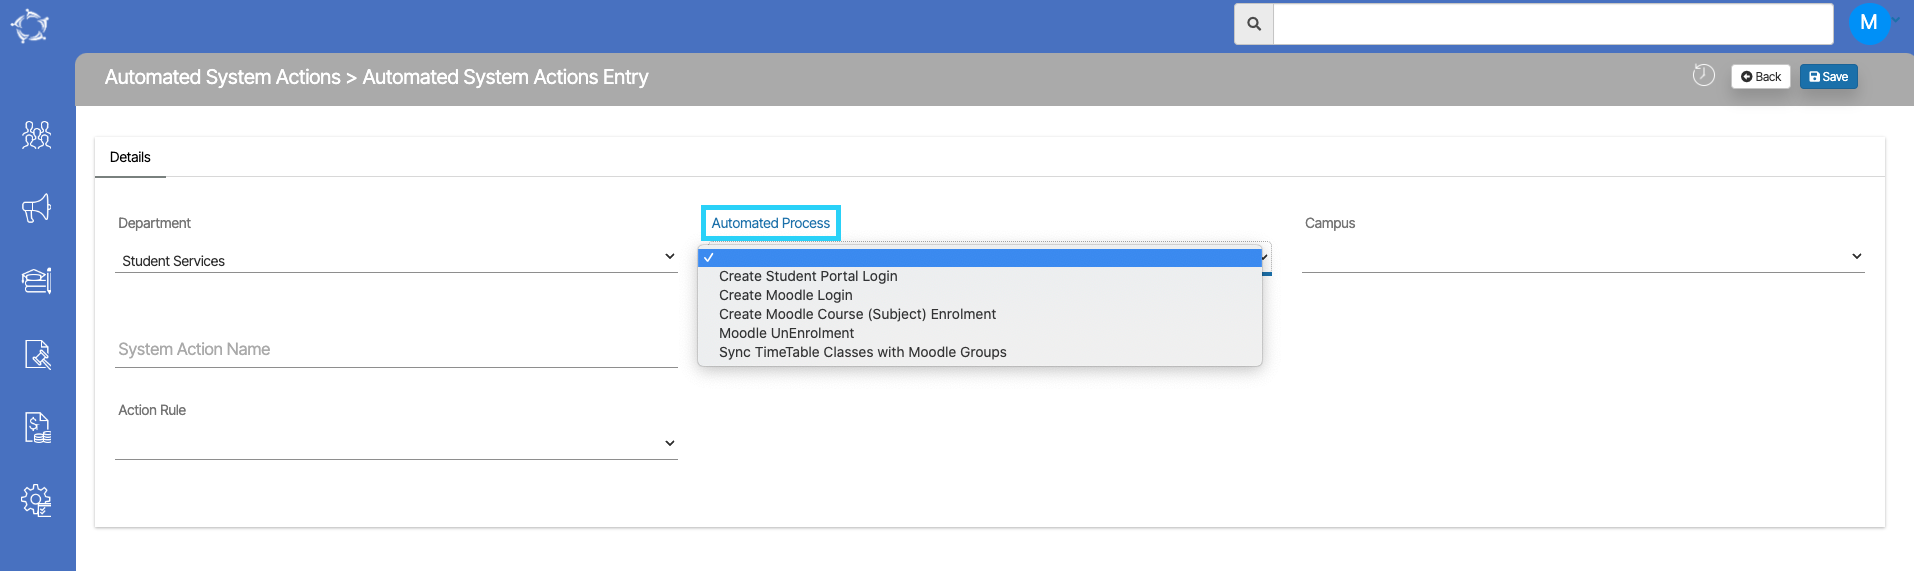
- Select the Automated Process from the dropdown as we are creating the Moodle Alert, we are selecting the Create Moodle Login option). As an example, we have shown some processes below:
1. Create Student Portal Login
2. Create Moodle Login
3. Create Moodle Course(Subject) Enrolment.
4. Moodle UnEnrolment
5. Sync Timetable Classes with Moodle Groups
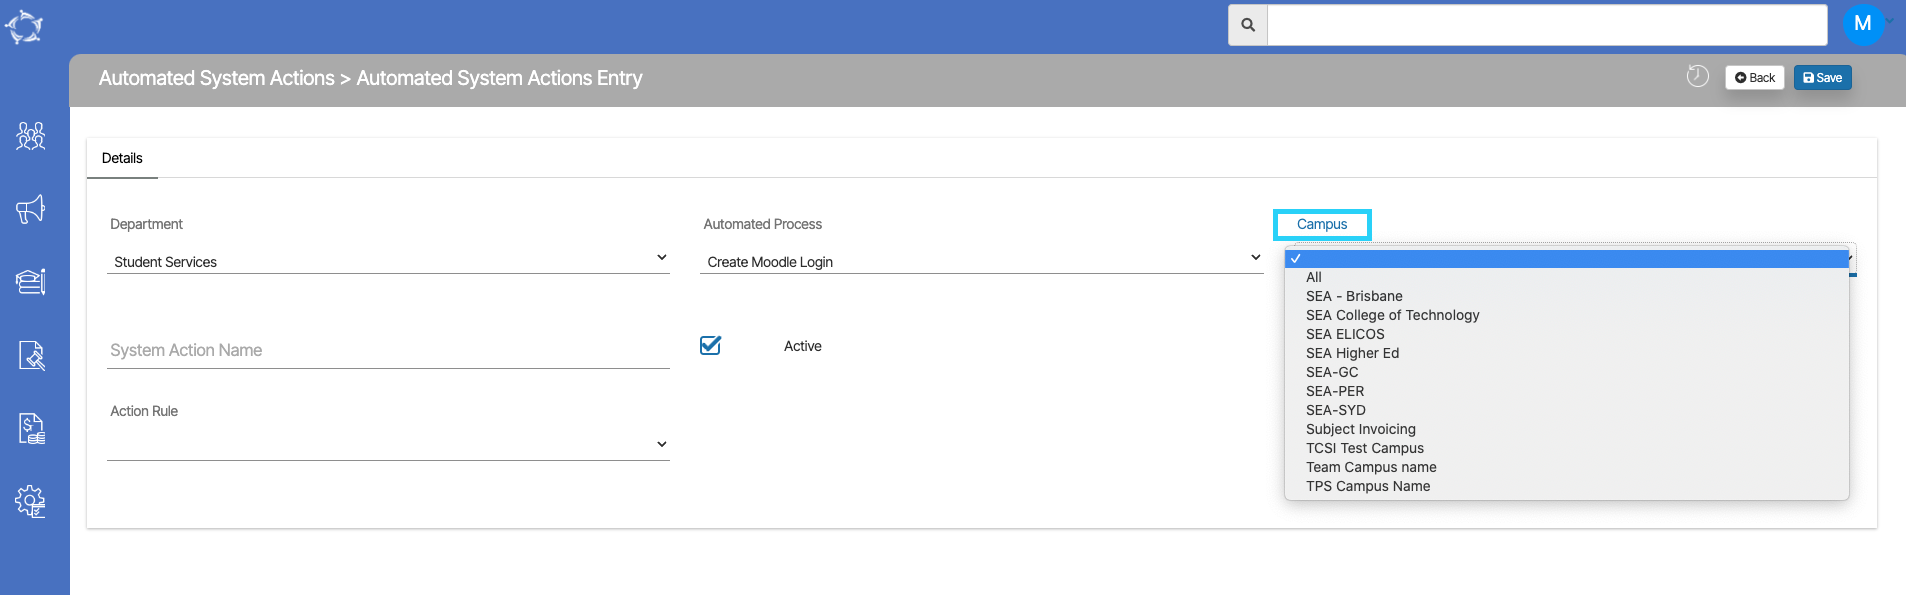
- Select the Campus from dropdown.
- Give the Appropriate System Action Name in the given field.
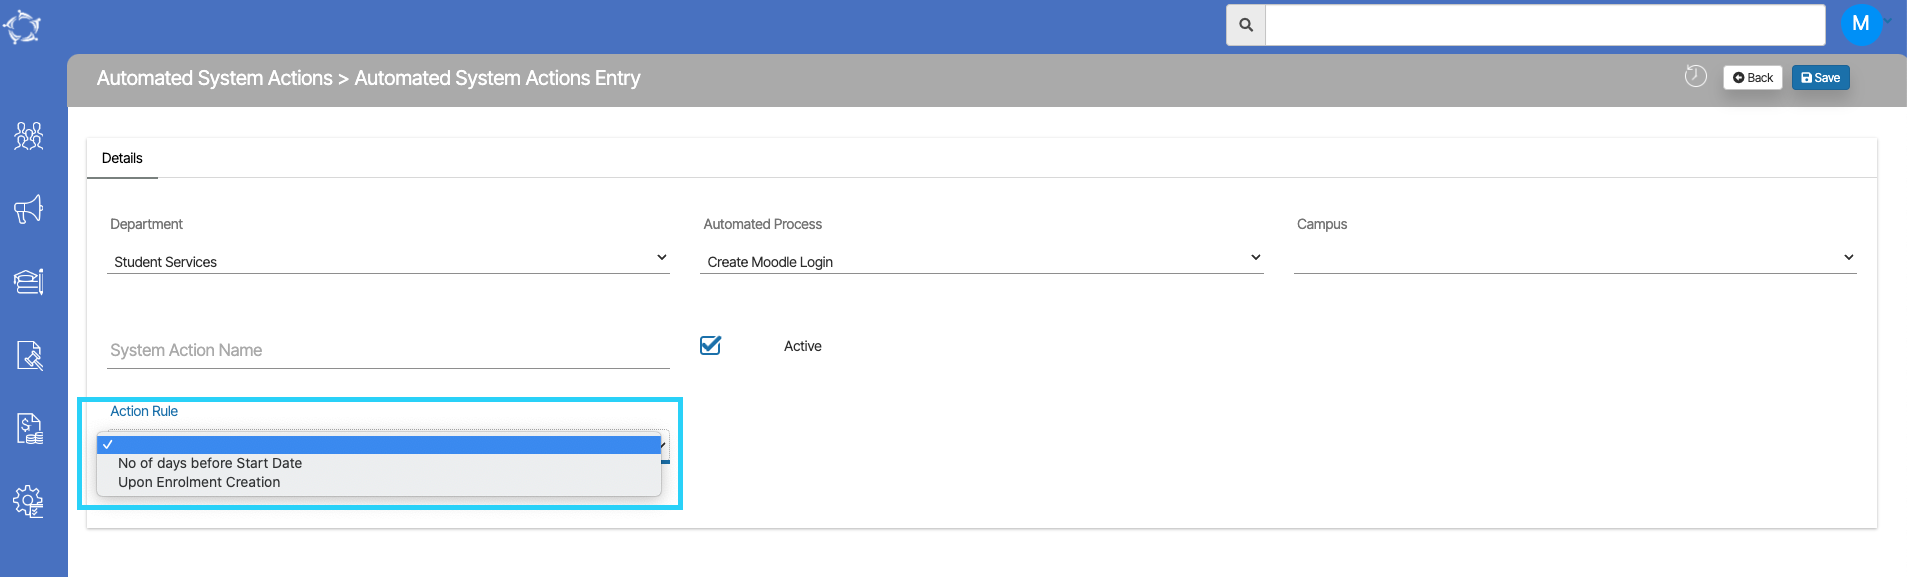
- Now select the Action Rule from the dropdown. Here we have two types of Action Rules:
1. No. of days before Start Date(Enrolment Start Date)
2. Upon Enrolment Creation
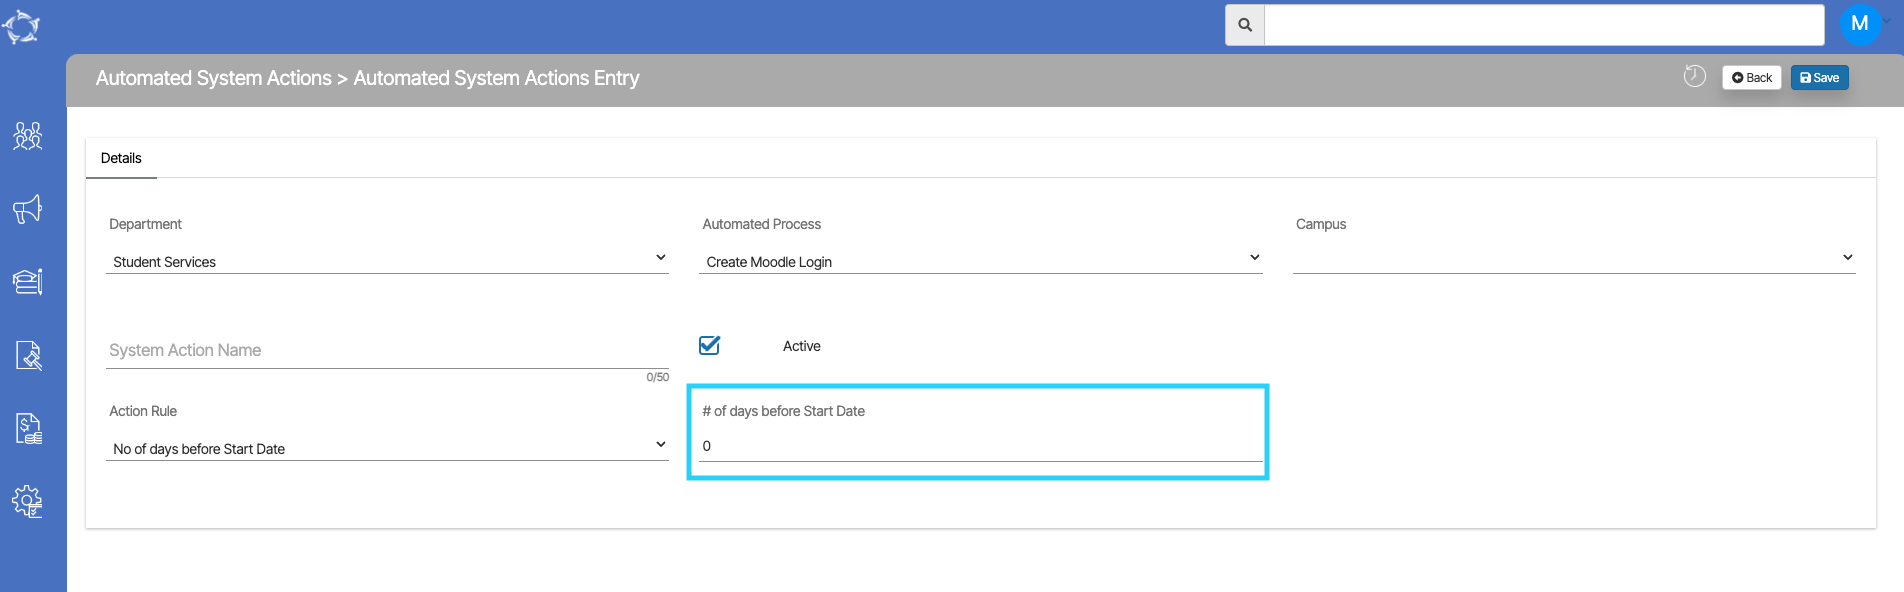
- If you selected the first type (No. of Days before Start Date) then, you need to enter the number value in the given field.
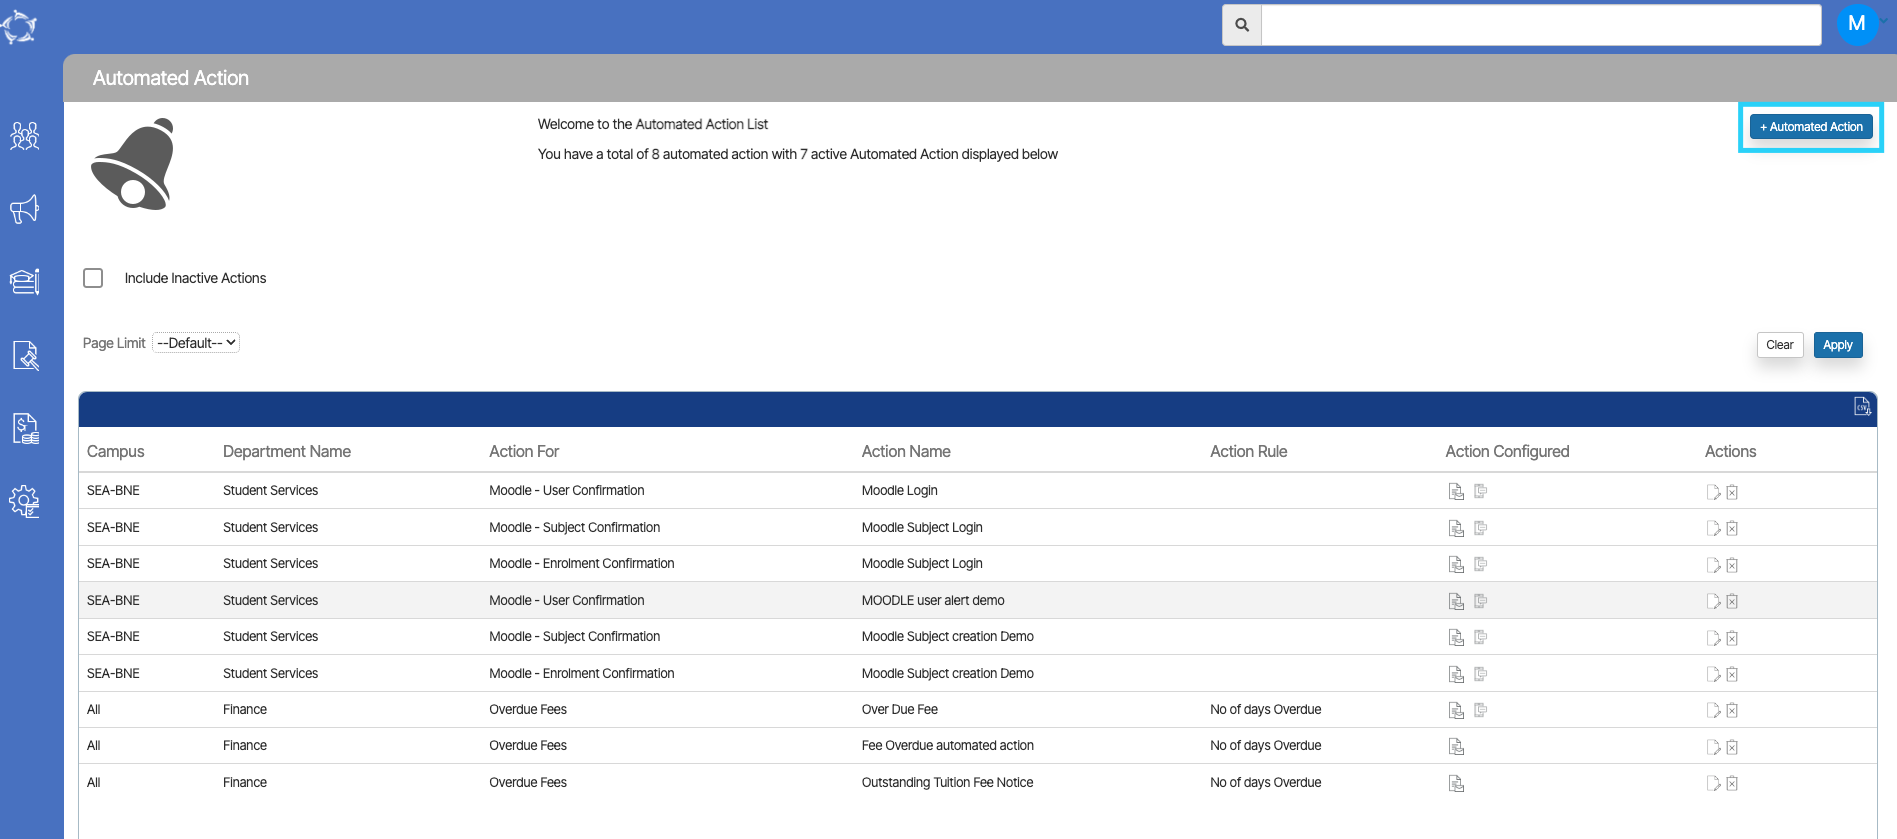
Now After filling in all the above details, select the save button in the right top corner. It will save the records for current Action. You can see all the saved records on the Automated System Actions Welcome Screen. From there you can edit or delete the records as per the requirements easily.
Steps to Create Moodle Alerts
Moodle Alerts will send SMS and Emails to the students to those who created the Moodle login.
- From the Main Dashboard, select the System Admin icon and then the Automated Action menu. You will be taken to the Automated Action welcome screen Select the +Automated Action button on the right hand of the screen.
- Upon selecting the Automated Action Button, you will be presented with the Automated Action Entry screen.

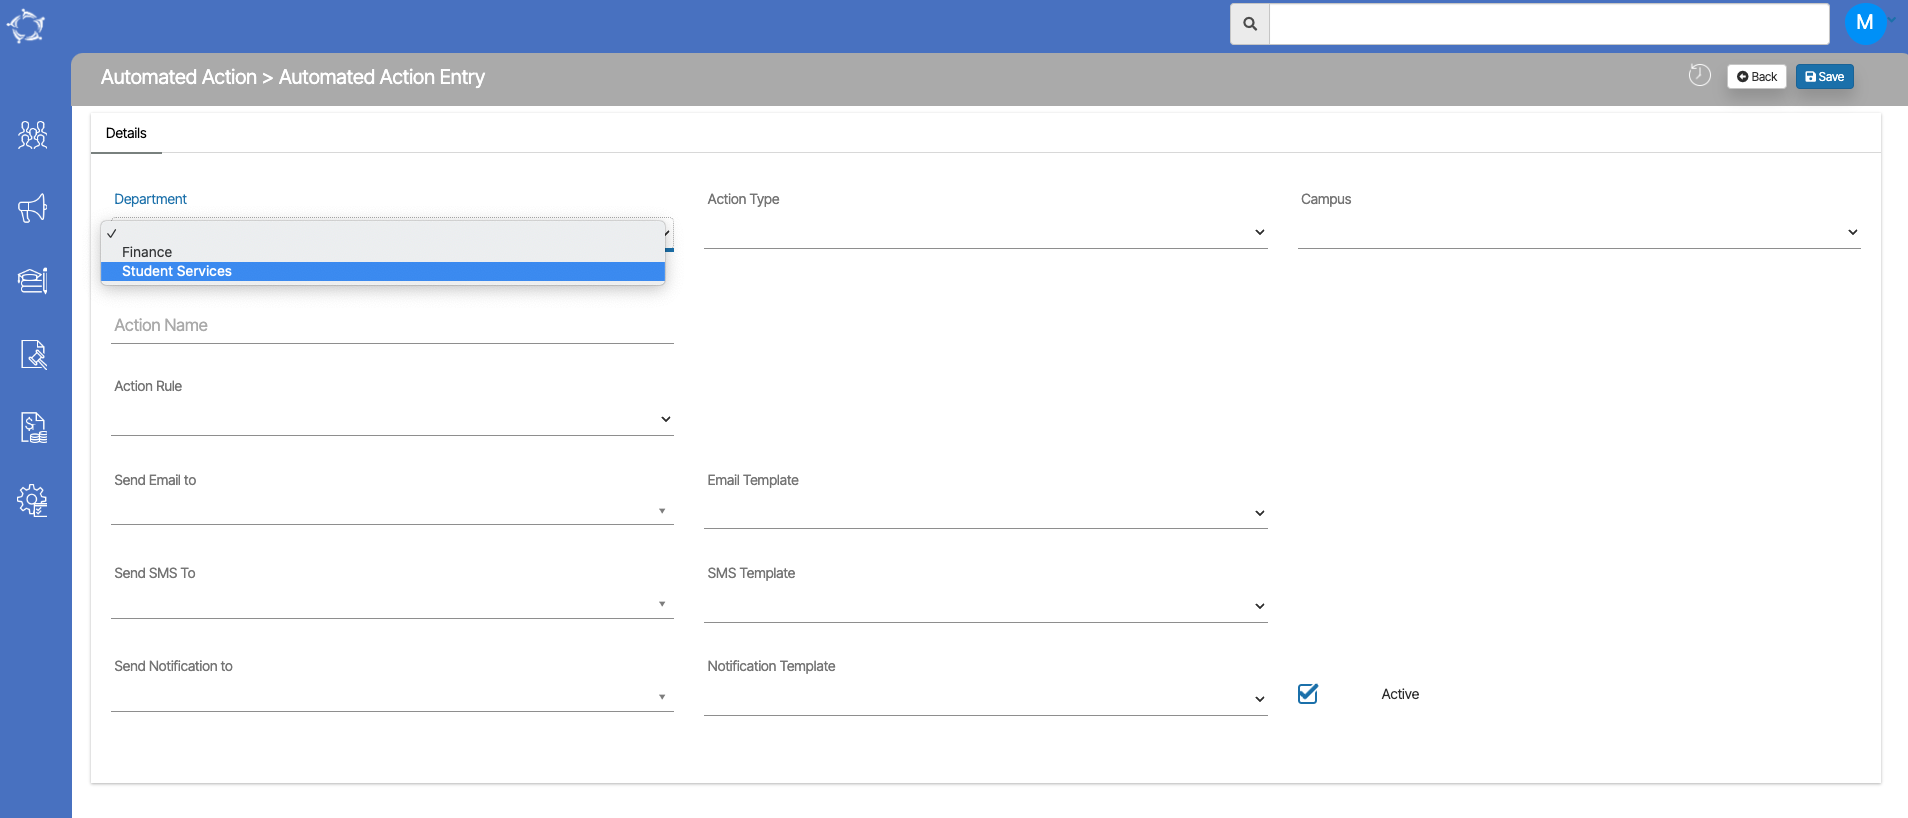
- From the Department drop-down select Student Services as Moodle Alerts is a part of student service.
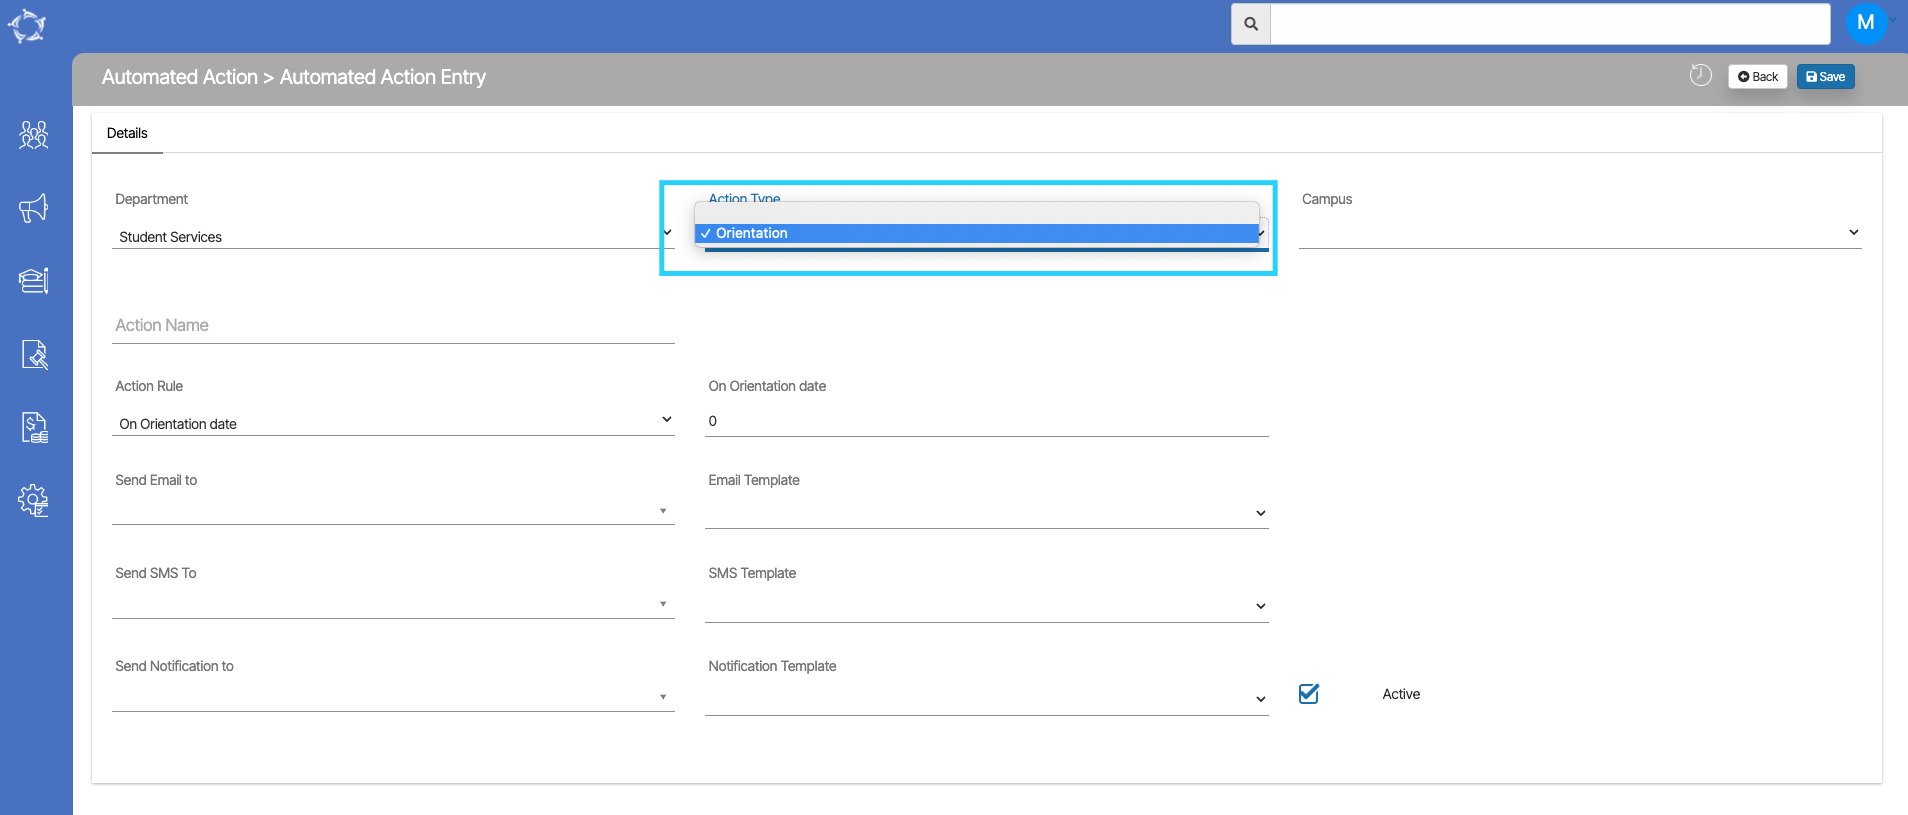
- Select the Action Type from the drop-down. Here, you can select different types of Moodle actions based on actions you have created in TEAMS.
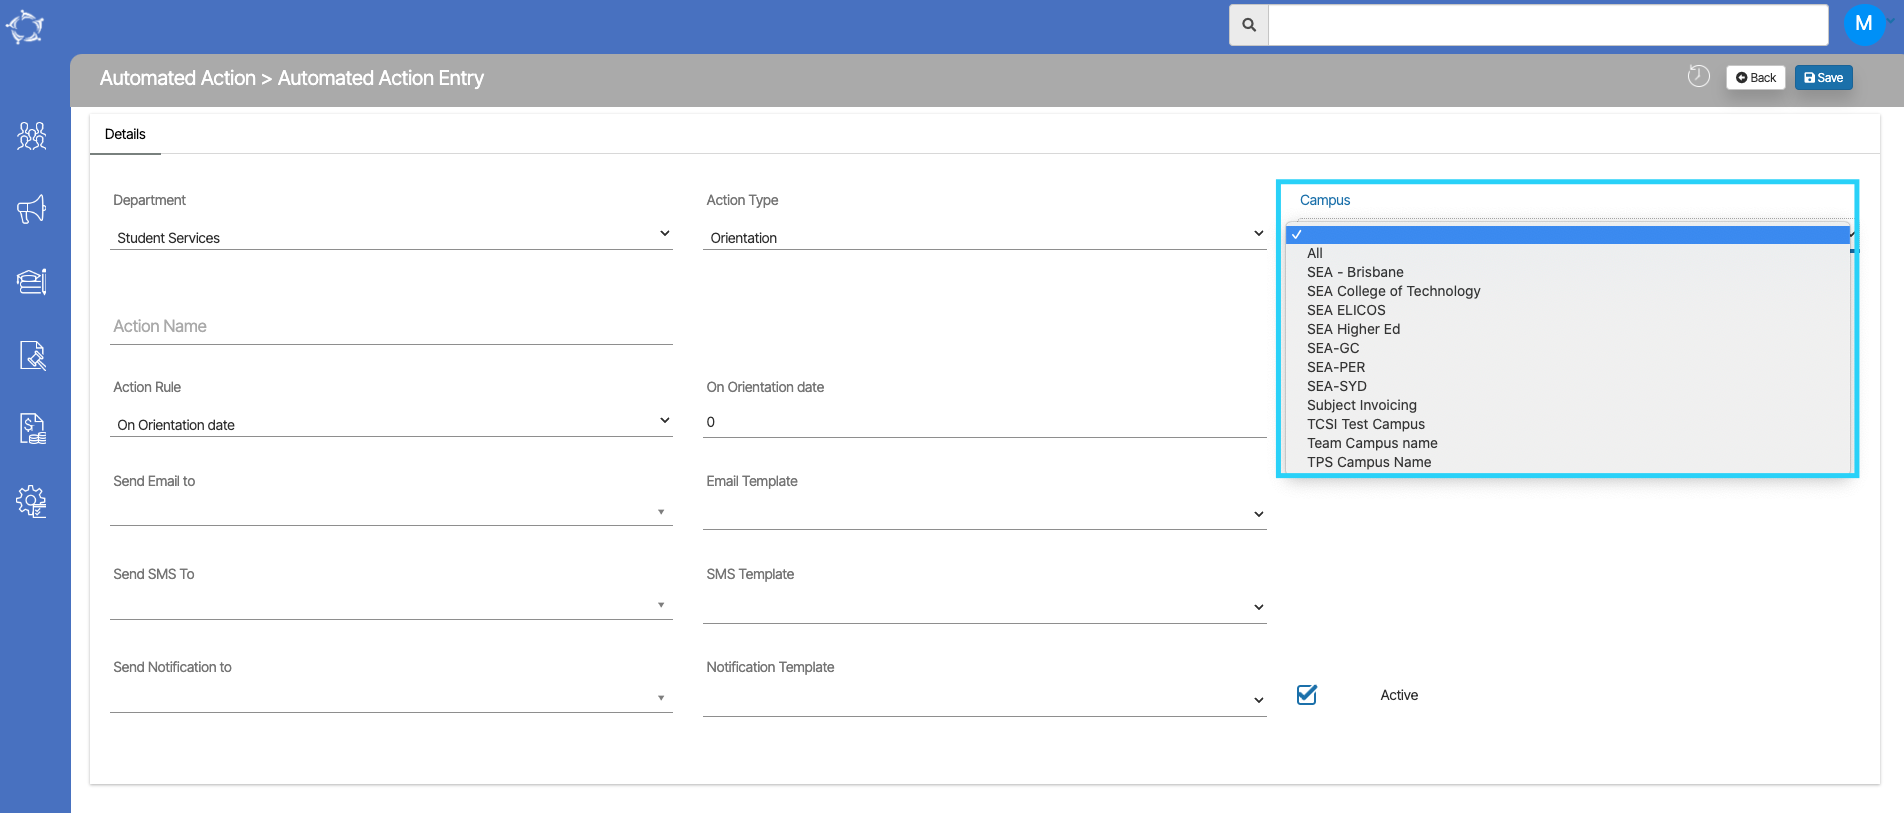
- Select the Campus from the dropdown.
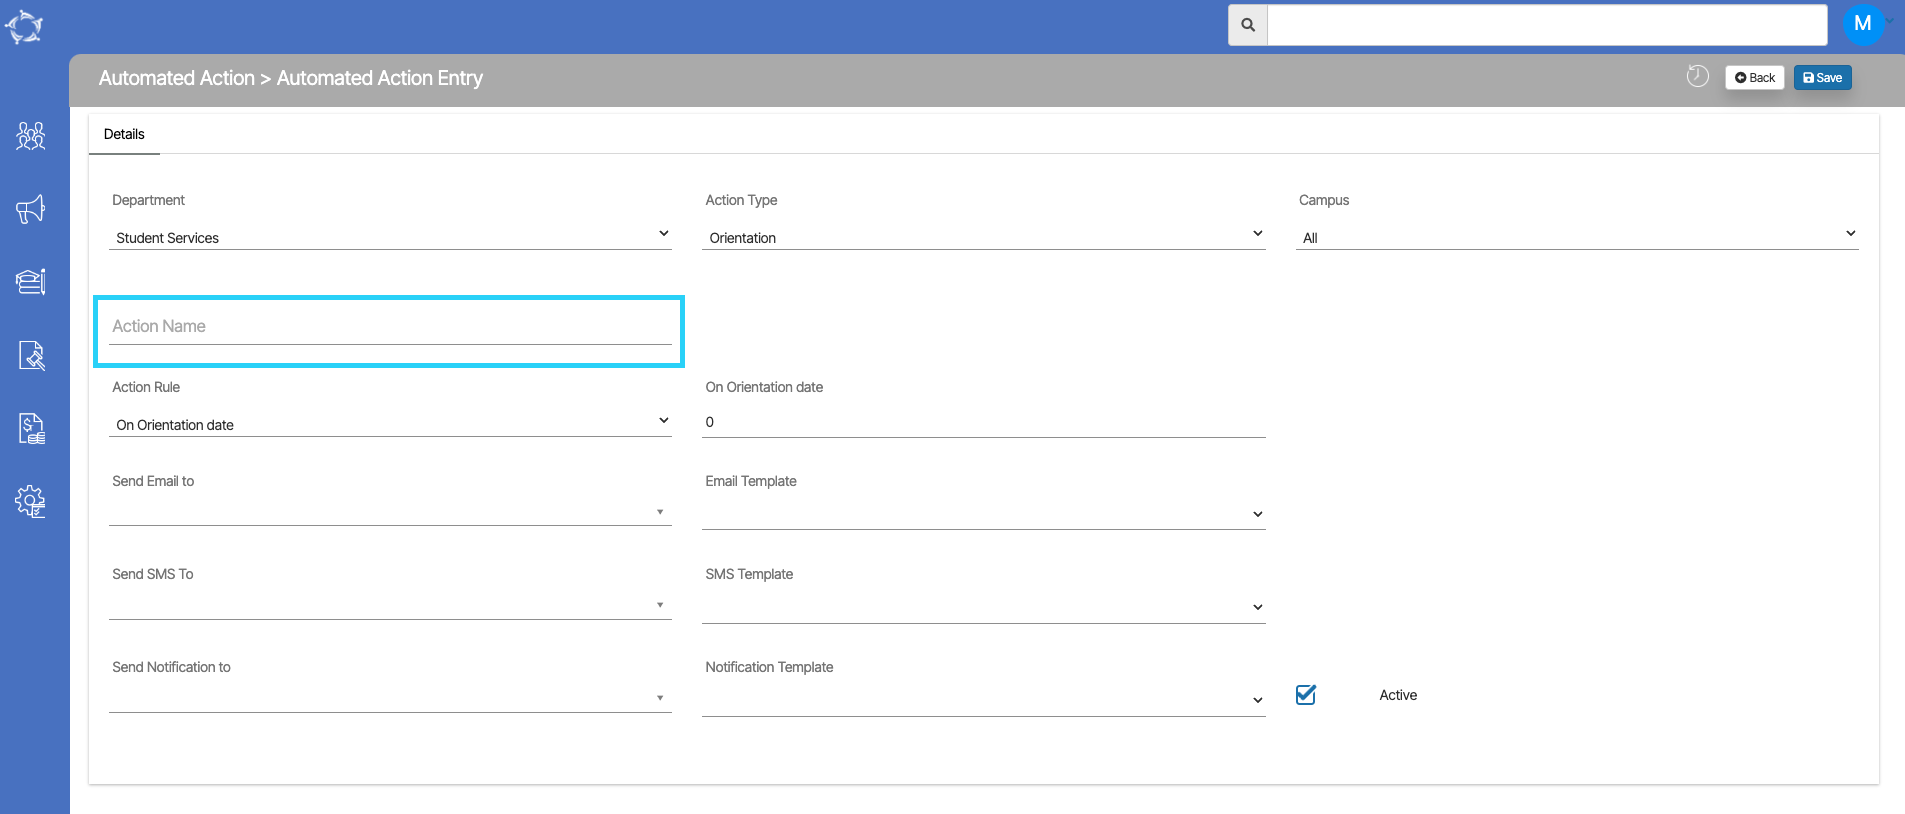
- Give the proper Action Name for the current Alert. Please note that the Action Name should be written with 50 words as the character limit is set to 50 words.
- After giving the name, you need to select the Action Rule from the dropdown. Here for the Orientation Action type, only three options are available:
1. No of days before orientation date
2. No if days after orientation date
3. On orientation date
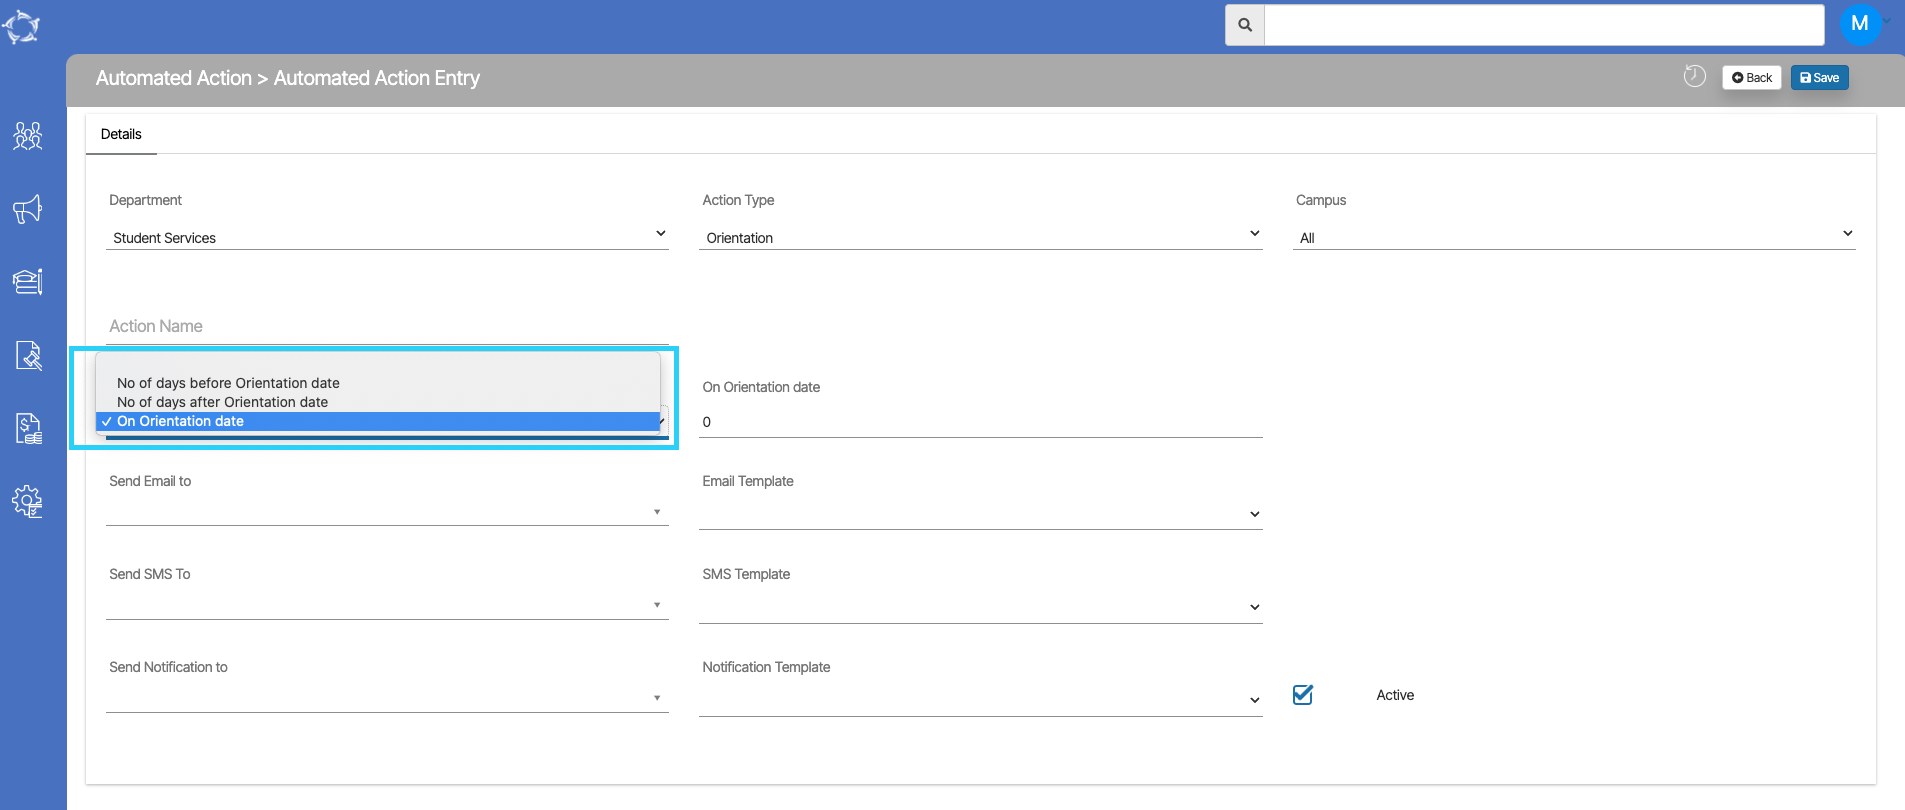
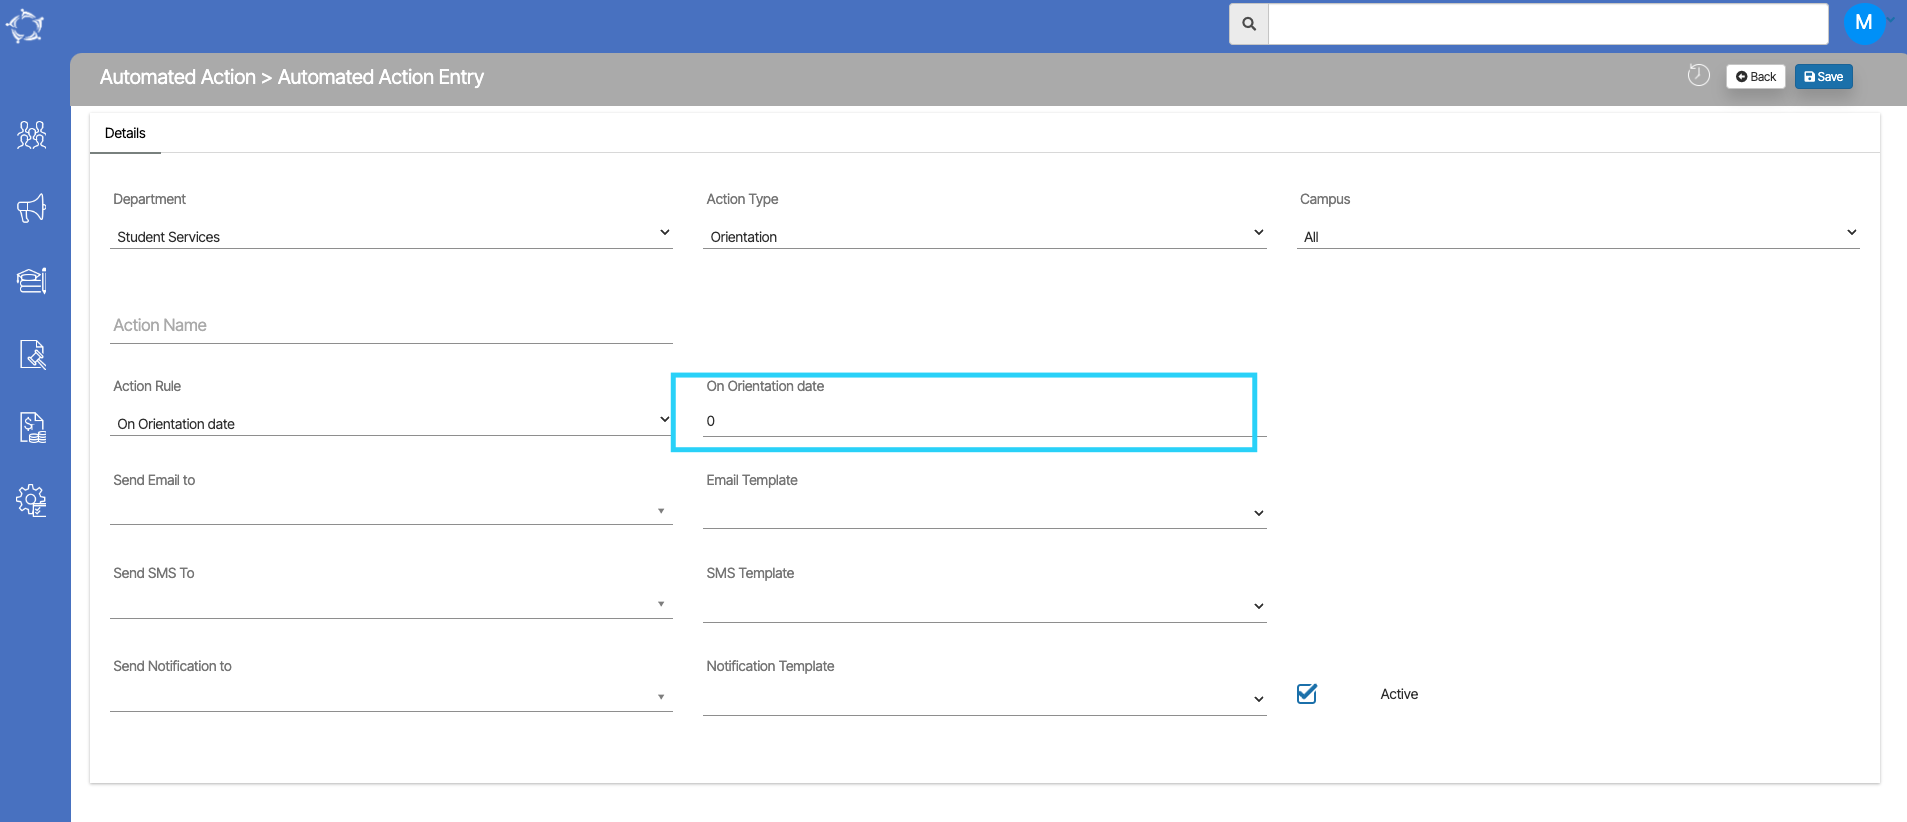
- On Selection of the Action Rule, a new field On Orientation date appears on the screen. Type in the Orientation date.
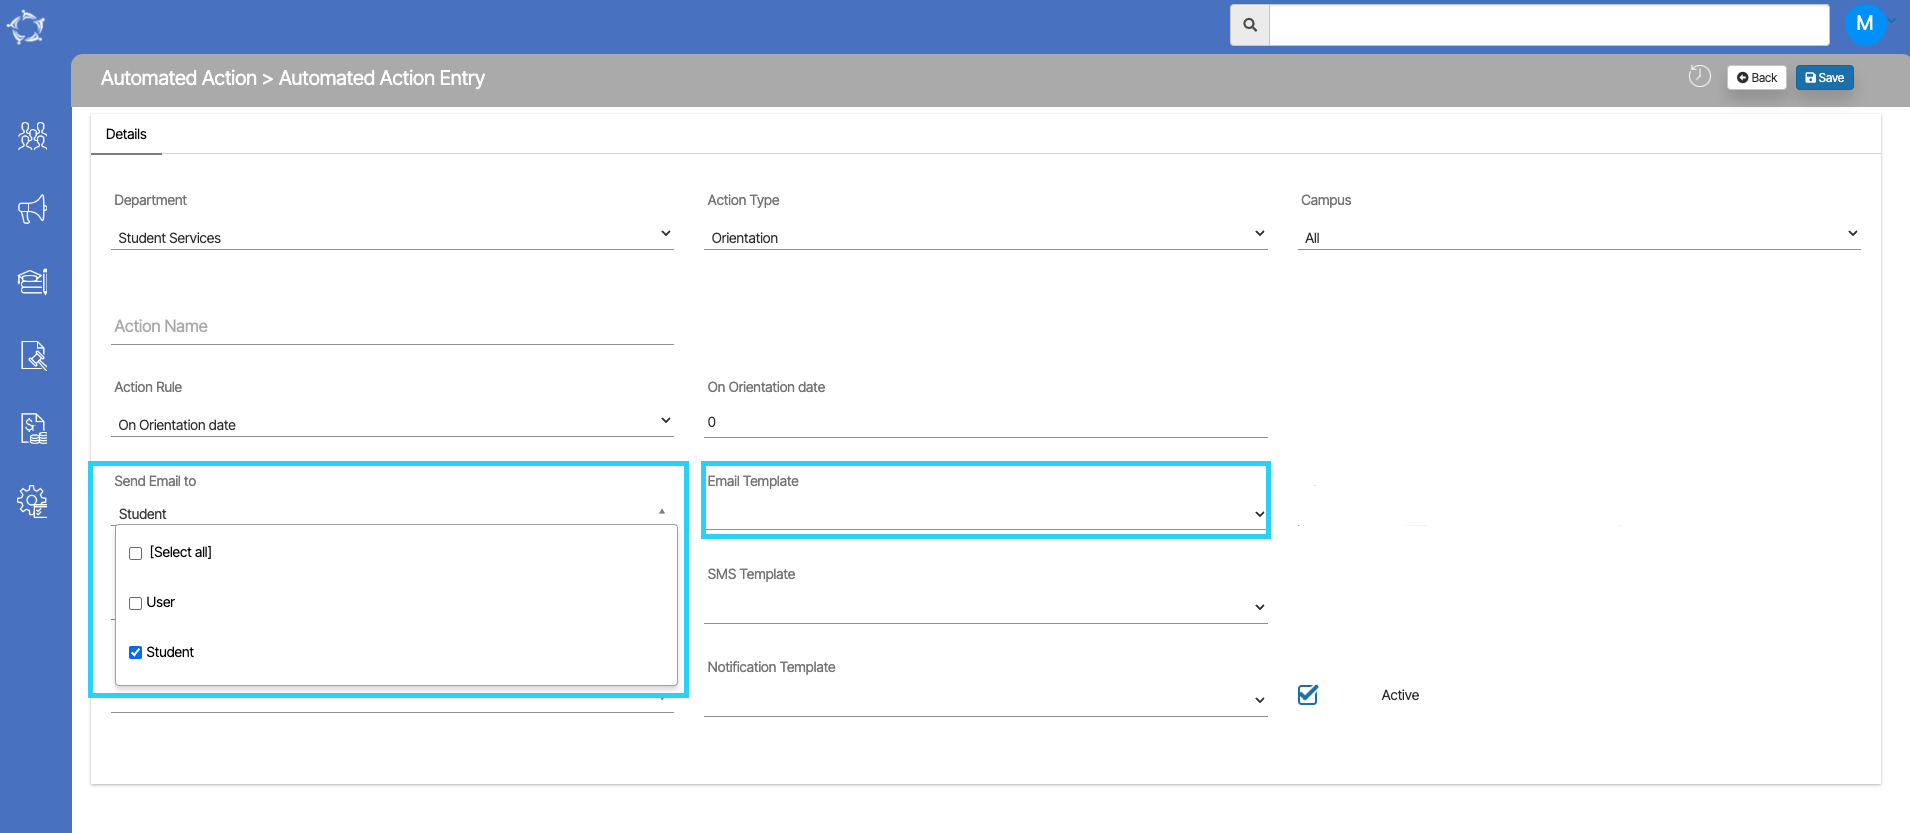
- Now select the option (user or student) from the dropdown to send an Email to. Once you select the send email to, the Email Template field will appear and this field will show you student level email template.
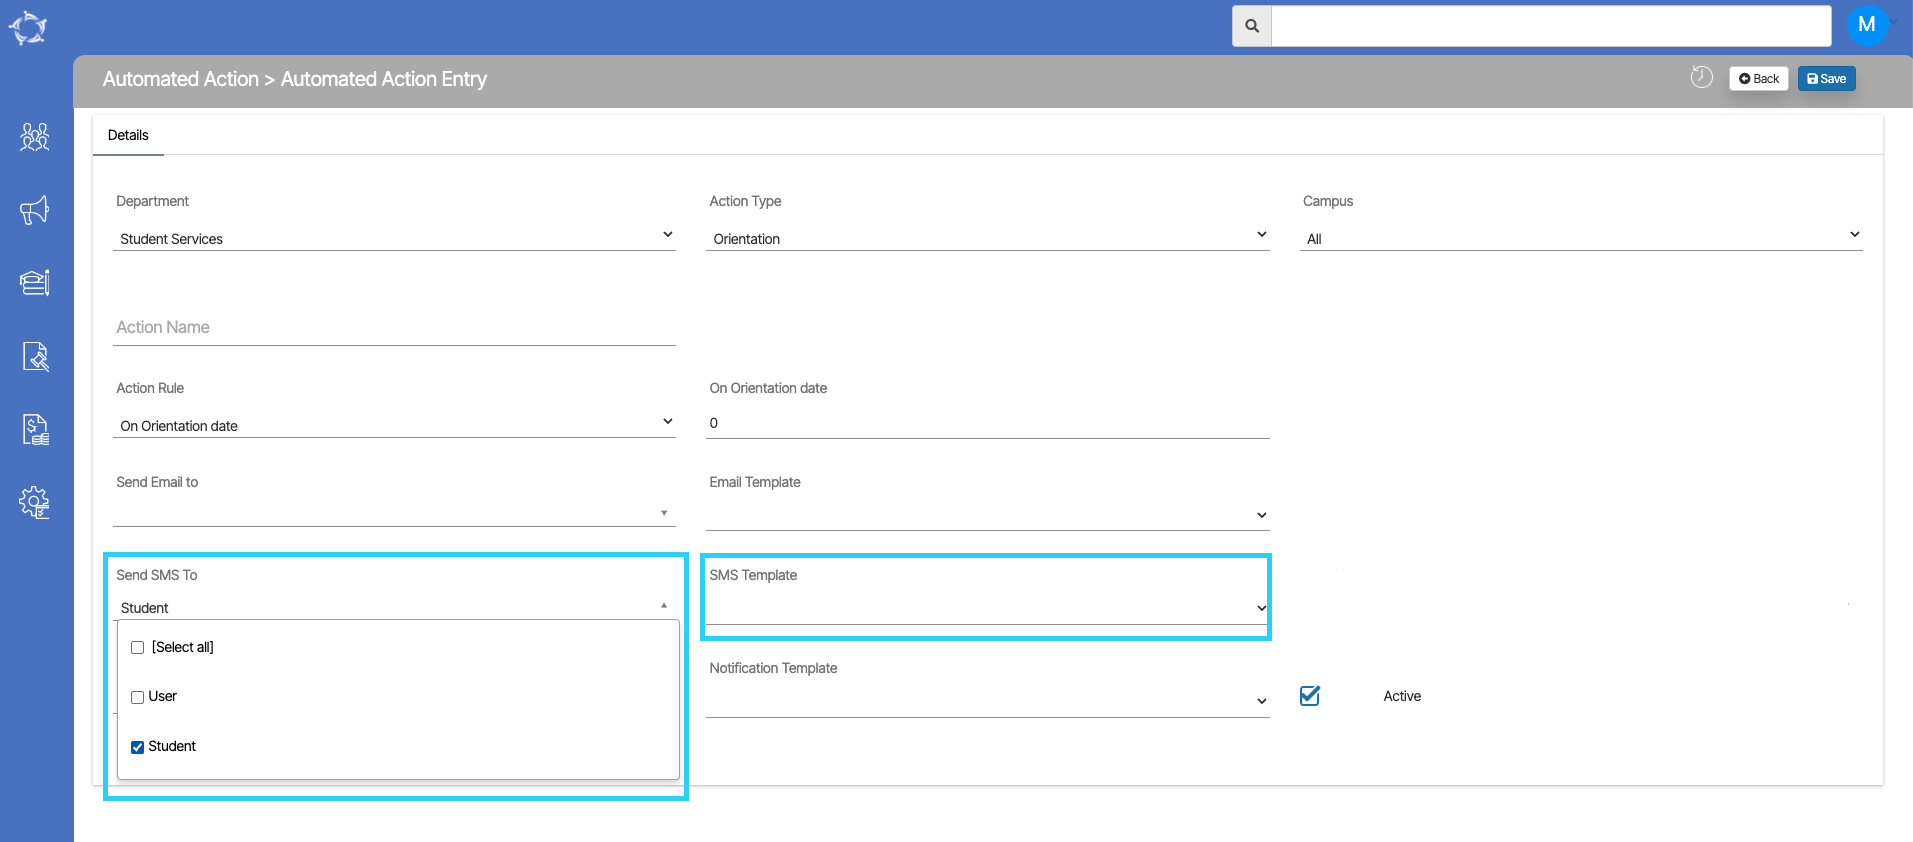
- If you are creating the action to send via SMS then you need to select the option (user or student) from the Send SMS to dropdown. Once you select the send SMS to, the SMS Template field will appear and this field will show you student level SMS template.
Once you have completed all the above steps, you need to select the save button on the right top corner of the page. This will save your record, and you can see this record on the Automated Action Welcome Screen. Also, you can edit or delete these entries easily from this screen.