Enrolment Dashboard > Enrolment Profile Tile > Visa and/or CoE Information Icon
This Screen will allow you to view the Visa/CoE information of the student and enrolment. If you wish to link the enrolment to the student visa information then you need to go to the Student Dashboard > Visa/CoE information screen.
Note: You won’t be able to edit/add Visa/CoE at the enrolment level.
When you select this icon on the Enrolment Dashboard, it will take you to the View Visa/CoE details screen where you can view the Visa and/or CoE information for the enrolment.
Follow the Below Steps to Re-Instate an enrolment:
To Re-Instate an enrolment mean to un-cancel the enrolment. You can do this by clicking on the Re-Instate icon.
After clicking on this, a pop-up message will appear on your screen asking you about un-canceling the linked invoices to the enrolment.
If you want that all the linked invoices with this enrolment are also re-instated then click on OK, otherwise click on Cancel. A message will appear on your screen confirming the re-instate of an enrolment.
IMPORTANT: If you click OK, then the system will reinstate all the canceled invoices linked to that enrolment not only those canceled during canceling enrolment.
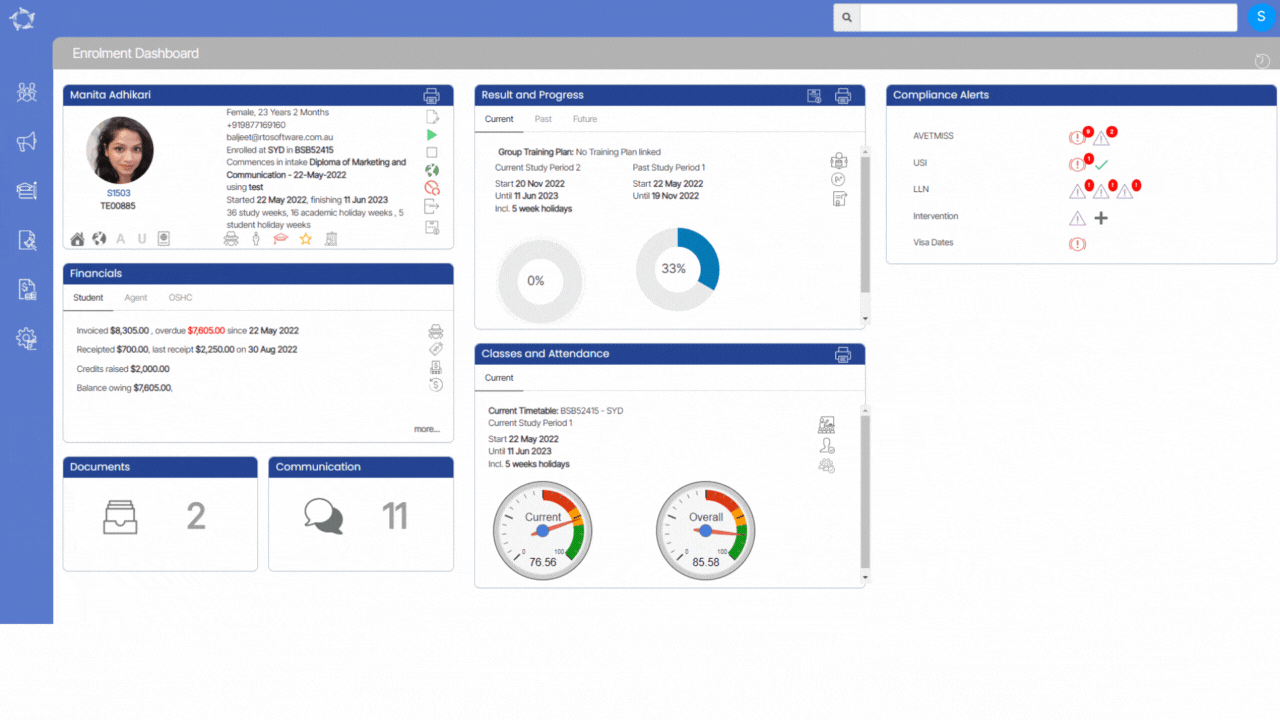
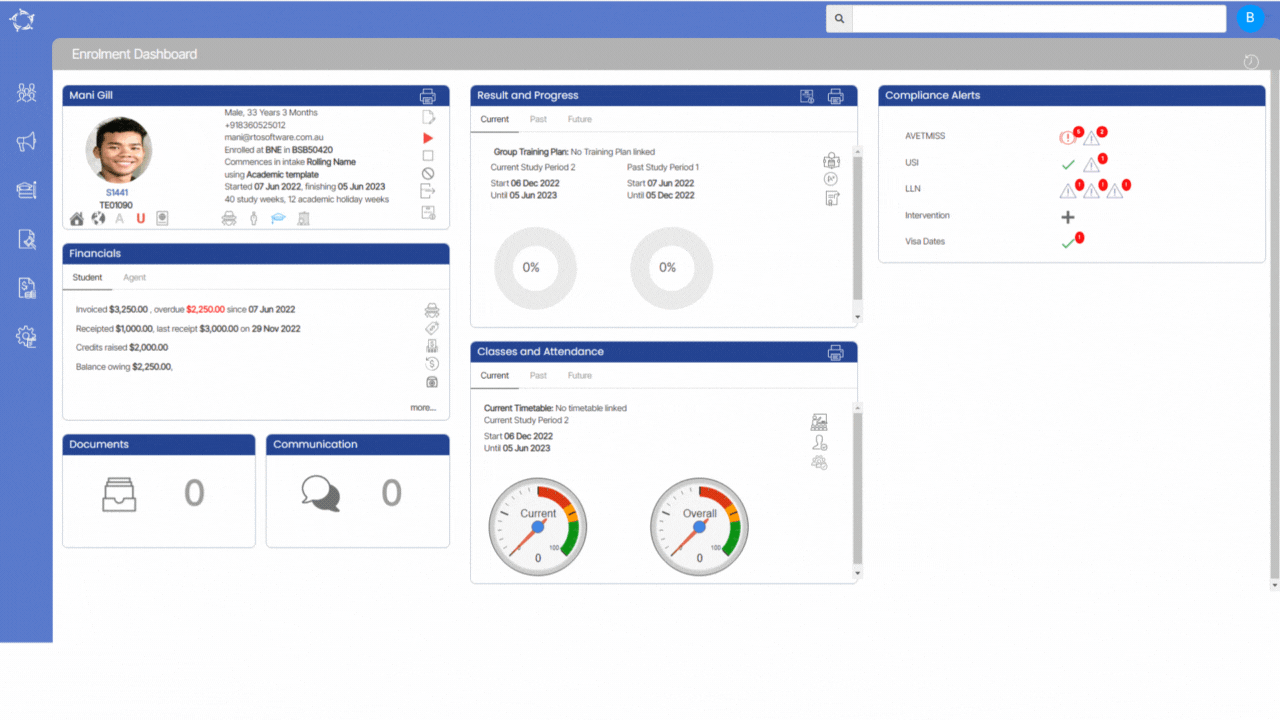
On the Enrolment Dashboard, Under the Student Profile Tile 2nd vertical icon allows you to start the enrolment. It has three different colors – white, red and green- indicating whether enrolment is yet to start, not yet started or started. You can start the enrolment by clicking on this icon.
The white icon indicates the enrolment is yet to start i.e. enrolment start date is in the future.
The red icon indicates that the enrolment’s start date was in the past and it is not yet started.
The green icon indicates that the enrolment is started.
Note: It will give you the count of all the communication you have done so far with the student, agent or employer (depending upon the screen you are using the communication tile for). If you have sent new emails or SMS or have created any contact logs today and anyone who is viewing the dashboard today, then the system will show a red bubble with a count for the new log/s.
How to use Communication Tile
Select the communication.
It will open the communication log screen for you. You can see all the communications via emails or SMS that you have with the student from TEAMS. If you have entered any contact logs, it will show you those logs as well in this tile.
If you wish to send an Email, SMS or create a contact log, click on the Burger menu.
You will see three options:
Click on the below links to learn more about the options and how to use them:
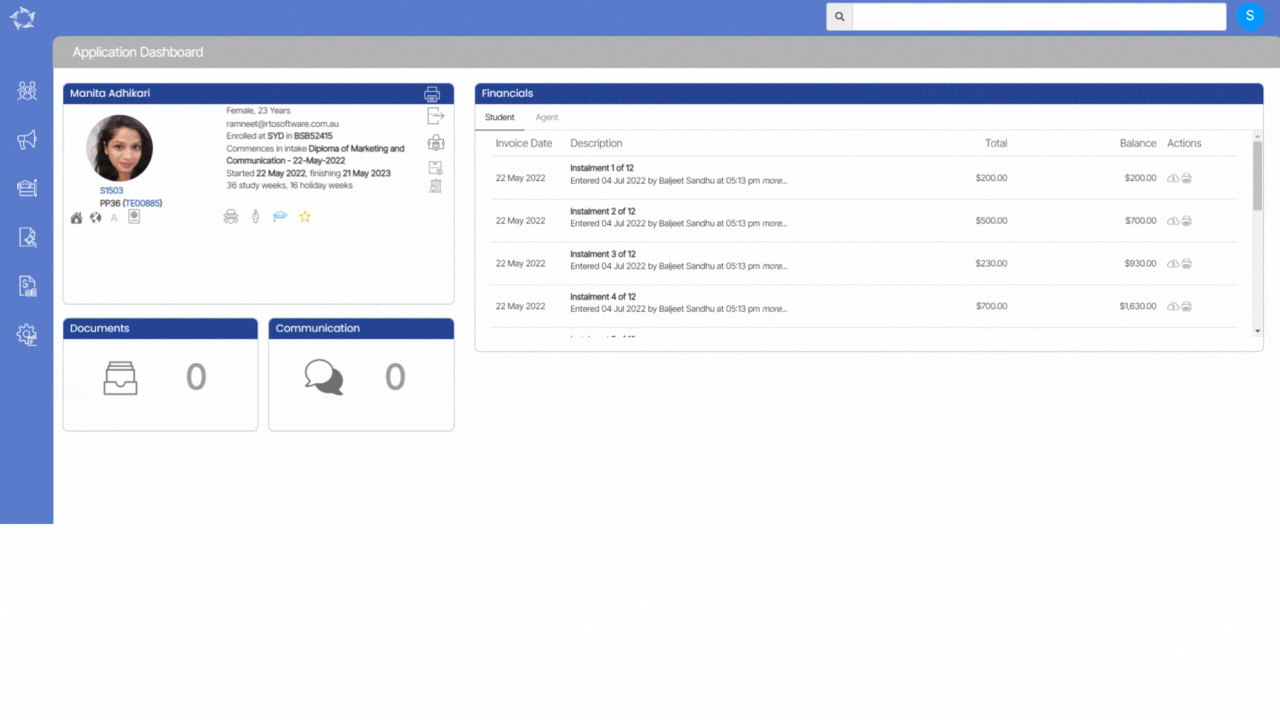
TEAMS has a documents tile on every dashboard/setup screen that we have, be it an Applicant Dashboard, Application Dashboard, Student Dashboard, Enrolment Dashboard or Agent Dashboard. The documents tile works the same way on every dashboard. This tile allows you to manage your documents for students, agents, employers, trainers and even for programs and campuses as well. This post will help you to understand the documents tile.
How it looks on the setup screens
Setup screens such as the campus entry screen, program entry screen, and trainers entry screen will show it under the Burger Menu. However, the process to upload documents is the same everywhere.
How to upload documents
Select the documents tile and It will open the documents log screen for you.
You can see all the documents that are already there. (Please note, some of the documents that are already there are system generated documents such as certificates, offer letters etc).
Select the Add button to upload document/s.
Select one or multiple documents from your system to upload.
You can enter notes for the document/s that you are going to upload by selecting the Notes icon.
Select your document type from the dropdown. This will help you to identify the types of documents you upload.
IMPORTANT: The document type is a user code and if you cannot see a specific document type then you can create one from the User Code screen
Select the tick box for Public Document if you wish to show this on the student portal.
Select the Upload button to upload your document/s.
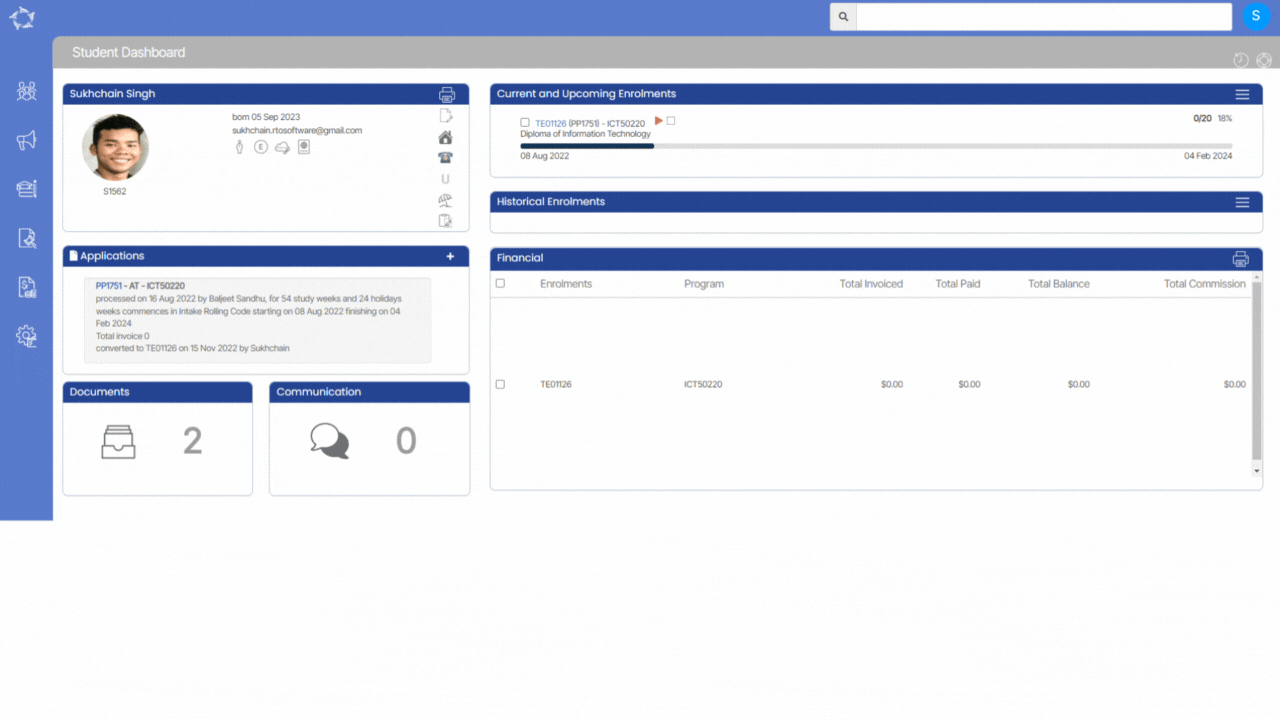
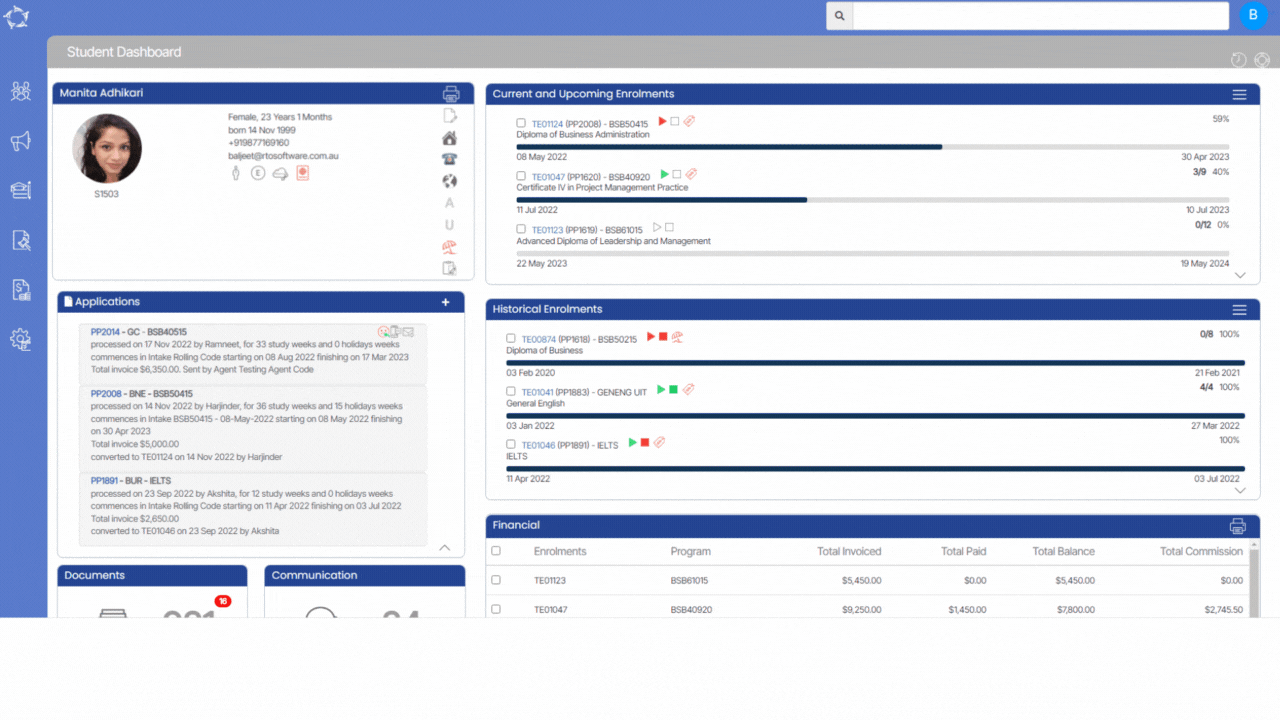
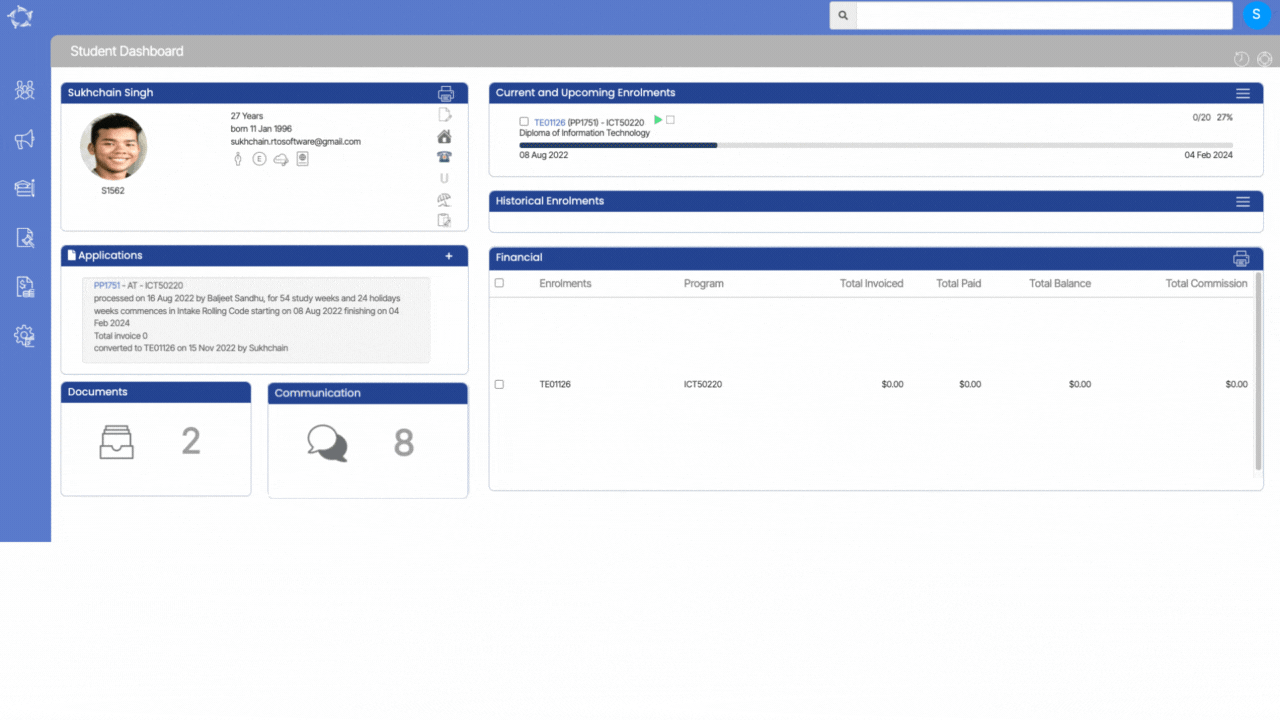
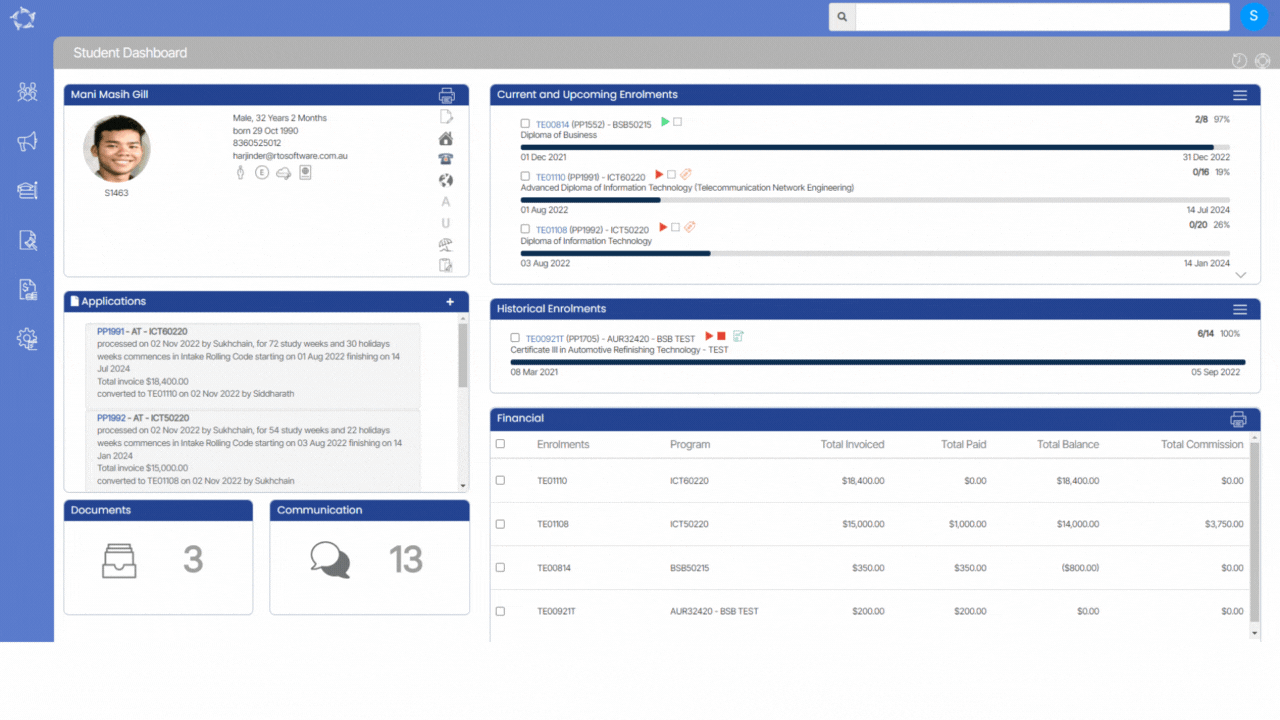
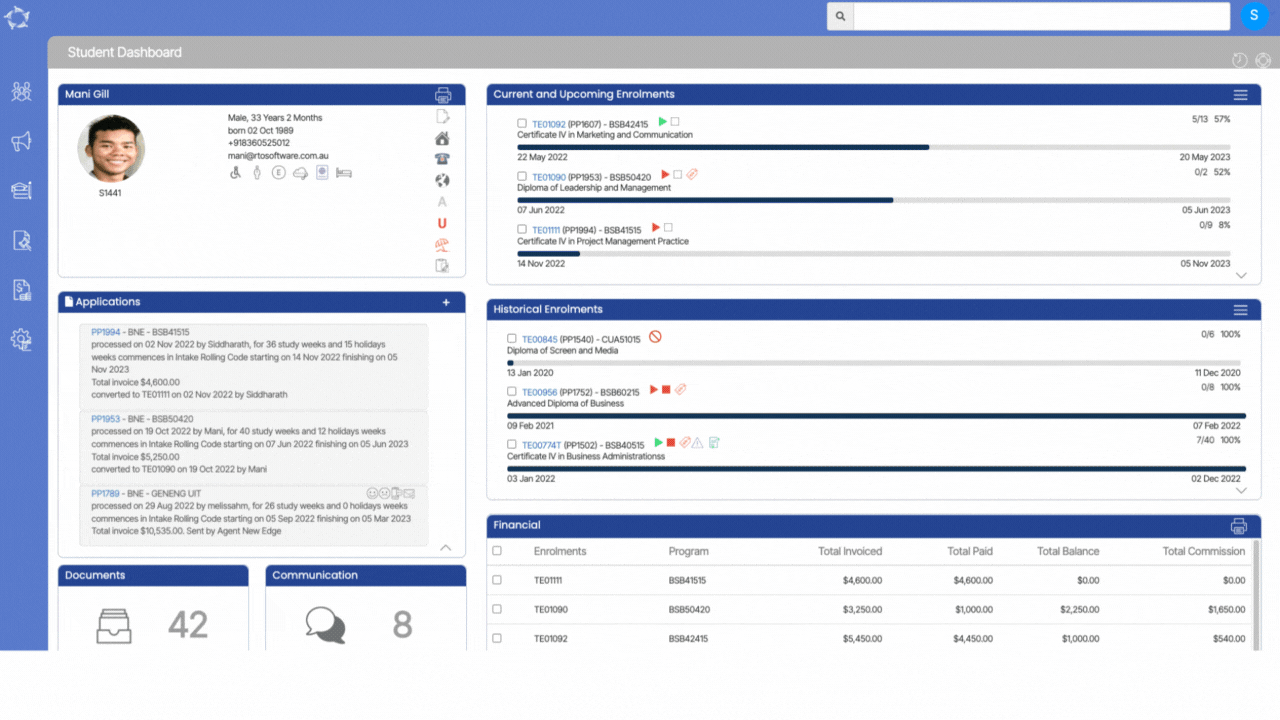
Student Dashboard > Current and Upcoming Enrolments Tile
Overview
This tile will show you all the current and future enrolments of the students along with the basic details of the enrolment. With each enrolment listed in this tile, we are showing some basic details of the enrolments like enrolment start & end date whether the enrolment is not yet started, started, finished etc
IMPORTANT: It is not necessary that you will be seeing all the icons above the bar. It will only show the icons related to the enrolments.
For example, If there is no overdue fee for enrolment then you will not see the overdue fee icon.
To know more about the Current and Upcoming Tiles, please see below:
Once you place the cursor on the dark blue bar, the system will show you the arrived status of the enrolment in the tooltip that X number of weeks have been completed out of Y number of weeks.
The dates under the bar are the start date and the end date of the enrolment which will be visible for each enrolment listed in the Future and Upcoming enrolment tile. According to the arrived weeks, the system will calculate the enrolment completed percentage which is showing as 57% for the enrolment and also according to the count of successfully completed subjects, the system will show you the completed subjects / total subjects, for example, 5 subjects have been successfully completed out of a total of 13 subjects.
If a student has more than 3 active/current/upcoming enrolments then only 3 enrolments will be visible on the “Current and Upcoming Enrolments” rest of the enrolments will be hidden. To unhide the other enrolments you need to click on the highlighted arrow and the system will expand the tile and show you the other enrolments too.
Also, you will be able to see a burger menu on this tile so that you can easily send SMS, email, print offer letter and edit enrolment dates.
This screen allows you to add/edit the Next of Kin details of an applicant and a student. All the fields on this screen are very basic and explanatory.
IMPORTANT – Once the Applicant is converted to a student then you won’t be able to add/edit any details at the applicant level. However, you can make the changes from the Edit Student screen.
Application Dashboard > Application Profile Tile > Training Plan and Results Icon
This screen is all about the subjects/modules/units linked to the application, their start and end date, results and results date. It is visually distributed in 3 tiles (Applicant Profile tile, Group Training Plan, and Training Plan and Results tile) for Training Plan and Results tile, you can edit the dates, results, and many more.
Group Training Plan Tile
This tile displays the information related to how the system is populating subject dates. You can also change the subject dates by using one of the given options in this tile. Also, it will allow you to allocate a group training plan to the application.
When selecting the icon , the pop window will appear on the screen and you can select the appropriate GTP from the dropdown and select the SAVE button.
Once you select the save button, the screen will show you the pop message on top of the screen with your site name saying the below-highlighted message. Select OK to continue or Cancel.
Training Plan and Results tile
This tile will show you all the subjects and different columns related to the subjects. You can edit the results and their dates, send emails and SMS from the Actions column.
Note – You can also add new subjects, when you select the + icon, the pop window will appear.
There are two radio buttons and you can select the desired radio button and update the filters accordingly.
Program linked to the Application or – You can select this radio button if you want to add the subject that is linked to the program. It will show you drop down for the subject code that is linked with the program
From the full list of Subjects in the system – You can select this radio button if you wish to add the subject from the list of subjects in the system. This is a magic search field and you can search for the desired subject.
Please note – Other fields are very basic and self-explanatory and you can update those fields accordingly.
You can add the holidays at the Student level from the Holiday icon as you can see below:
Once you select the Holiday icon on the Student profile tile, it will take you to the holiday screen and there you can add the Holidays by selecting the +Holiday button.
Note: Holiday type is a dropdown and if you want any holiday type to be set up on your TEAMS site then you need to go to the User Codes screen.
When you select the +Holiday button, the popup window will open on the screen and there you can add the holiday start date, and end date and select the holiday type from the dropdown. You can also add holiday notes as shown below.
Once you have selected all the above parameters then you need to select the tick boxes as per your requirements.
Apply holidays to this Enrolment- If you select this tick then the added holidays will get linked to the enrolment.
Extend Enrolment dates – If you select this tick box, the enrolment end date will get extended as per the selected date range for the holidays. If the enrolment start date is 08/05/2022 and the end date is 06/08/2023 and you have applied the holiday dates for 3 weeks, then the enrolment end date will extend to27/08/2023 as 3 weeks will get added to the enrolment.
Extend Enrolment subject dates?– When you select this tick box, the Enrolment’s subject dates will get extended automatically.
When all the above steps are done then you will see the applied holidays on the holiday screen, also if you want to edit or delete the holidays then you can select the edit icon or delete icon.
NOTE – Once the holidays are applied to the Student, then the holiday’s icon will change to red color
This tile will show you all the historical enrolments of the students along with the basic details of the enrolments. It will show you all the past enrolments whose end date is less than today’s date.
IMPORTANT: – It is not necessary that you will be seeing all the icons above the bar. It will show you only 3 historical enrolments. However, if you want to see more than 3 historical enrolments you need to click on the arrow placed at the right corner of the Historical Enrolment of the tile.
To know about the Historical enrolments tile, please see below:
Once you place the cursor on the dark blue bar, the system will show you the past status of enrolment in the tooltip that X number of weeks have been completed out of Y number of weeks.
If the enrolment is flagged as started but not finished, then it will show you the Arrived. weeks x of Y.
If the enrolment is not flagged as started then the system will show you the status asNot Started.
If the enrolment is flagged as started and finished, then the system will show you the status as Finish
The dates under the bar are the start dates and end dates of enrolment which will be visible for each enrolment listed in the historical enrolment tile. According to the weeks, the system will calculate the enrolment completed percentage which is showing 100% for the enrolment and also according to the count of successfully completed subjects. The system will show you the completed subjects for example 3 subjects are completed out of a total of 9 subjects.
If a student has more than 3 enrolments then only 3 enrolments will be visible on the Historical Enrolment tile. The rest of the enrolments will be hidden. To unhide the other enrolments you need to click on the highlighted arrow and on the system will expand the tile to show you more historical enrolments.

 on the Enrolment Dashboard, it will take you to the View Visa/CoE details screen where you can view the Visa and/or CoE information for the enrolment.
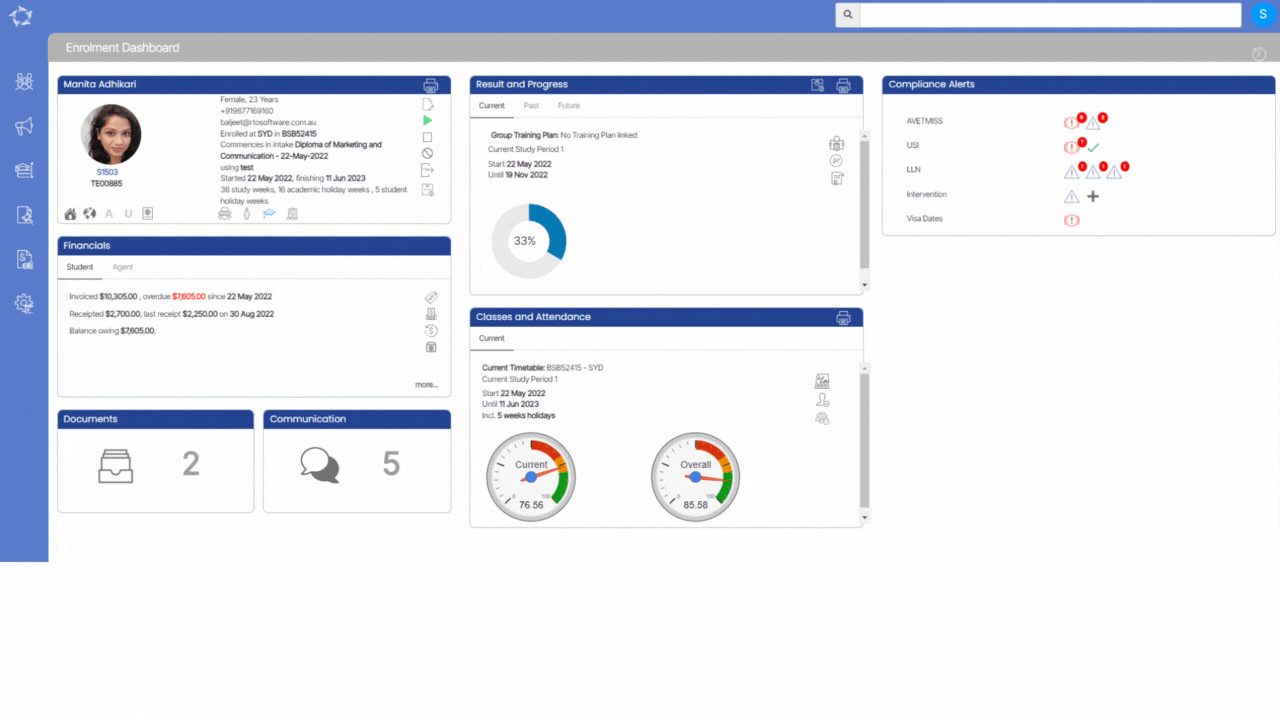


 , the pop window will appear on the screen and you can select the appropriate GTP from the dropdown and select the SAVE button.