Subject – AVETMISS Settings

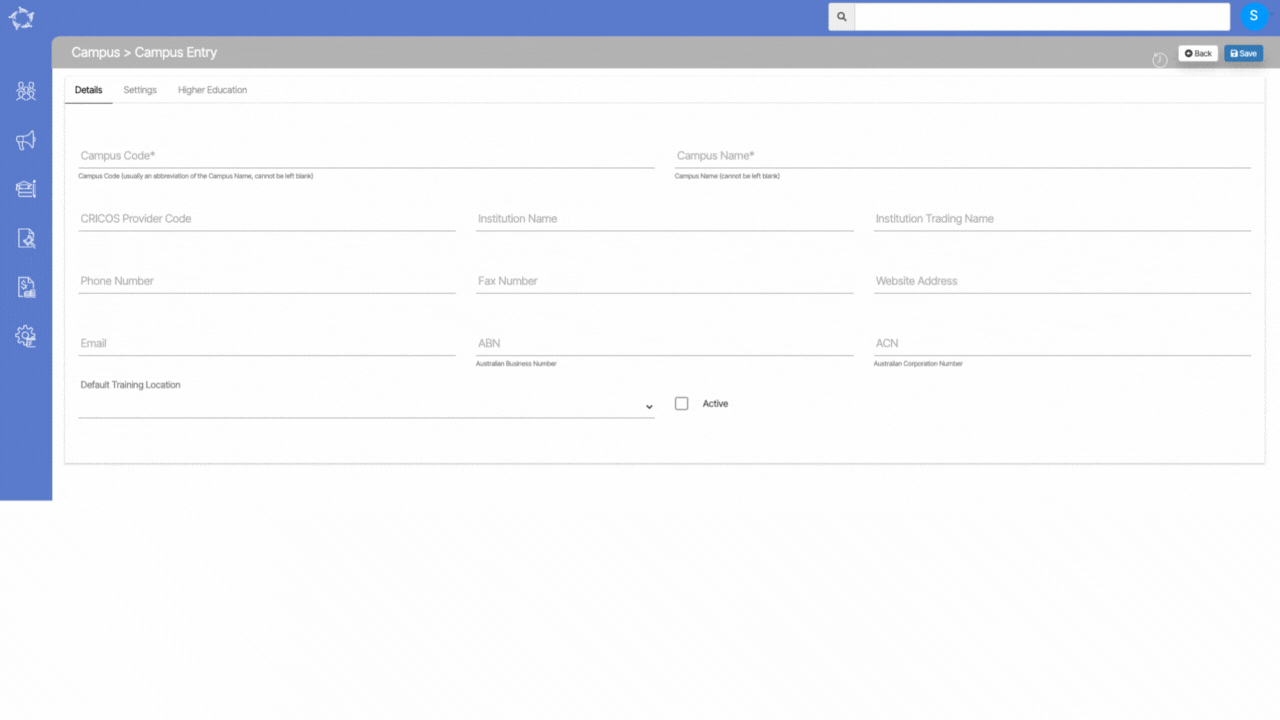
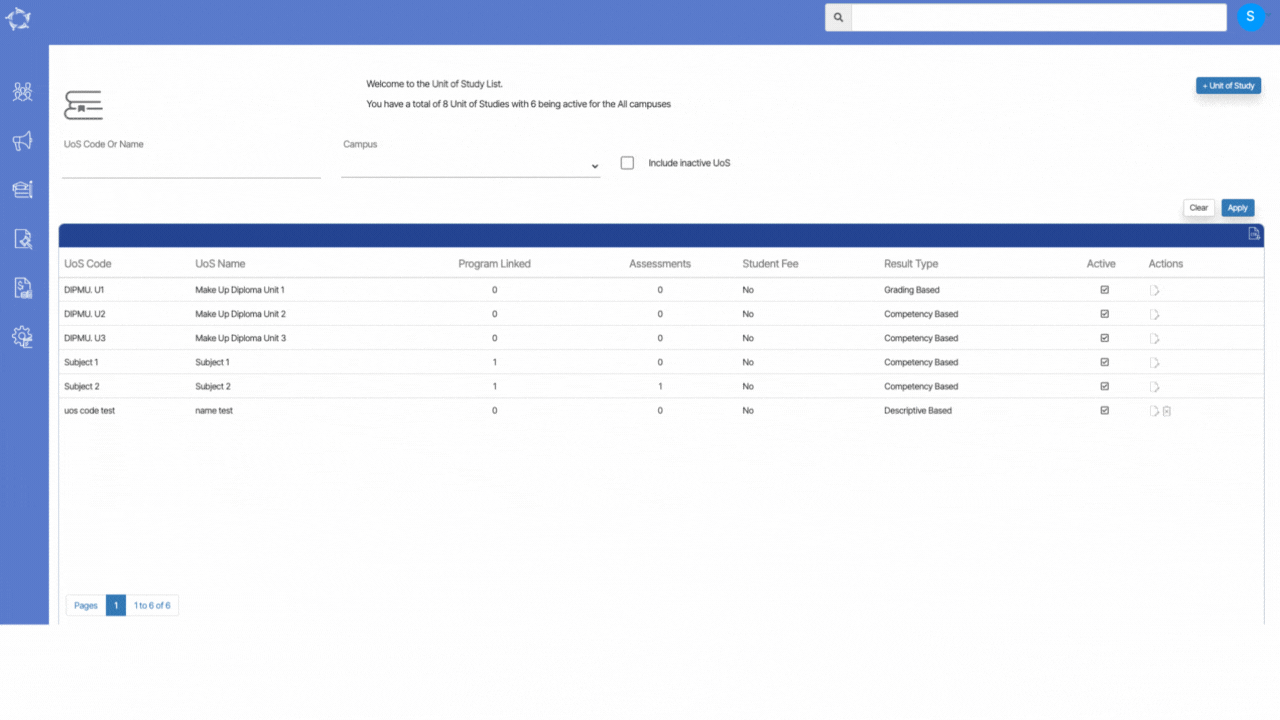
Subjects > Subjects Entry Burger Menu > AVETMISS Settings

Colleges set up AVETMISS (Australian Vocational Education and Training Management Information Statistical Standard) settings for subjects to ensure compliance with the national data reporting requirements for vocational education and training in Australia. AVETMISS is a standard framework that governs the collection, reporting, and analysis of data related to vocational education and training activities.

By setting up AVETMISS settings for subjects, you can accurately capture and report data on student enrolments, completions, qualifications, and other relevant information.

When you access the AVETMISS Settings option, it will open the Subject AVETMISS screen. This screen allows you to input and manage the AVETMISS details for the subjects. Within the Subject AVETMISS screen, you can add the necessary AVETMISS information for each subject individually.

IMPORTANT – It is crucial to update the AVETMISS settings for subjects before conducting an AVETMISS export. Failure to update these settings in the system can result in errors during the AVETMISS submission process. The AVETMISS data, including subject details, is exported into the NAT00060 file format, which is used for reporting vocational education and training data.

Explanation of the fields below:

FieldsExplanations
InternalWrite the value as 100 if the subject is taught onshore only. The other two fields automatically have a 0 value.
ExternalWrite the value as 100 if the subject is taught offshore only. Then the internal and workplace field automatically have a 0 value.
WorkplaceWrite the value as 100 if the subject is taught at the workplace level only. Then the internal and external fields automatically have a 0 value.
Pre-Dominant Delivery ModeIt is a read-only auto-populated field that changes according to the delivery type method selected.
Nominal HoursHere you can add the nationally agreed nominal hours of the subject.
Field of EducationYou can select the field of education from the dropdown.
Funding Source NationalIf you are 100% CRICOS for your VET subject you would select the funding source national as overseas 31 (International onshore client – other revenue). However, if you deliver offshore for student then you would change it from an Enrolment subject AVETMISS level.
VET Recognised SubjectSelect this box to make the subject VET recognised.
Do not include in AVETMISS SubmissionSelect this tick box if you do not want to include the subject in the AVETMISS submission.

Campus Entry Screen

Main Dashboard > Academics > Campus > Campus Button

On the Campus Entry screen, you will see three different tabs as shown below:

Details Tab – Where you can add the details of the campus.

Settings Tab – You can set up the settings as per your need.

Higher Education – You can add the filters as per your requirements.

Explanations of the fields on the Details Tab are below:

FieldsExplanation
Campus CodeYou can enter the campus code in this field. usually, it may an abbreviation of the campus name. It is a mandatory field. 
Campus NameYou can add the name of the campus in this field. it is a mandatory field.
CRICOS Provider CodeIn this field, you can add the campus CRICOS provider code.
Institution NameIn this field, you can add the name of the institute.
Institution Trading NameIn this field, you can business/trading name of the institute.
Phone NumberIn this field, you can add the contact details of the institute.
Fax NumberFax number can be added in this field.
Website AddressHere you can web address of the institute.
EmailHere you can add the official email address of the institute.
ABNYou can add Australian Business Number in this field.
ACNYou can add the Australian Corporation Number in this field.
Default training locationFrom the dropdown menu, you can select the default training location.
ActiveTo make the campus active this tick box should be ticked
Upload LogoYou can select this button to upload the campus logo.

Explanations of the fields on the Settings Tab are below:

FieldsExplanation
Use Close of BooksThis tick box gives you two radio buttons – Roll Over, and Date.
InvoiceYou can set up the invoice prefix for eg AC1234, here AC is a prefix of the invoice number. you can set the format of the invoice for eg. if you want it alpha-numeric, you can choose the series from the Next no field for eg AC1235, In the Suffix, you can add the last number of the invoice for eg AC1234CB. 
ReceiptYou can set up the recept prefix for eg R455, where R is a prefix of the receipt number. you can set the format of the receipt for eg. if you want it alpha-numeric, you can choose the series from the Next no field for eg R456, In the Suffix, you can add the last alphabet/number of the receipt for eg R456C.
OSHC PaymentYou can set up the OSHC payment prefix for eg Q212, where Q is a prefix of the OSHC payment number. you can set the format of the OSHC Payment number for eg. if you want it alpha-numeric, you can choose the series from the Next no field for eg Q213, In the Suffix, you can add the last alphabet/number of the OSHC payment number for eg Q213H.
OSHC InvoiceYou can set up the OSHC invoice prefix for eg I798, where I is a prefix of the OSHC invoice number. you can set the format of the OSHC invoice number for eg. if you want it alpha-numeric, you can choose the series from the Next no field for eg I799, In the Suffix, you can add the last alphabet/number of the OSHC invoice number for eg I799G.
Invoicing Terms
1st Invoice Due
GST % RateYou can add or edit GST % in this field.
Application/Enrolment Start date
Application/Enrolment Create date
RTO Operated Offshore
Grace Period in days
Qual. Indicator State
Email AddressYou can add the official email address of the campus.
Template
Course Progress Study Period length
Attendance Study Period length
What do you report students in PRISMS on?From the dropdown menu, you can select if you want to report a student’s attendance or course progress in the PRISMS report.
Set Orientation Date days before start dateYou can set up that before how many of the start date you want the orientation in this field.
Program basedChoose this radio button if you want the invoicing method to be program based. 
Subject basedChoose this radio button if you want the invoicing method to be program based.

Explanations of the fields on the Higher Education Tab are below:

FieldsExplanation
Campus Effective From DateEnter the campus effective from the date in this field.
Campus Effective To DateEnter the campus effective to date in this field.

Agent Search

Marketing > Agent Dashboard > Search Agent

This screen will allow you to search for an agent. You can simply type the agent name or agent code in the search field and it will show the relevant suggestions where you can select the appropriate agent. Once you have searched and selected the agent then the system will open Agent Dashboard for you.

Assessment Entry Screen

Assessments > Add Button > Assessment Entry

When you select the +Add Button, the system will open the Assessment Entry screen for you. On the Assessment Entry screen, you will see different fields on the Details tab. Enter the details in all the fields and save.

Explanation of the Assessment Entry Screen is below:

FieldsExplanation
Object Type*This is a mandatory field and you need to select the object type such as Subject, UoS, etc from the dropdown.
Based on the object type selected, the system will show you another field as a select a subject or select UoS.
The field will be a magic search field and you can search and select the required field accordingly.
Assessment CodeEnter the Assessment Code
Assessment NameEnter the Assessment Name
Assessment DescriptionEnter the Assessment Description in this field.
Sequence NoEnter the Sequence no in this field.
Parent AssessmentSelect this tick box if you want this Assessment as a Parent Assessment.
ActiveSelect this tick box to make the assessment Active.
Allow Multiple document?Select this tick box to Allow Multiple document for the specific assessment
Allow Grading?Select this tick box to Allow Grading for the specific assessment
Allow ResubmissionSelect this tick box to Allow Resubmission for the specific assessment

Send an SMS

history of changes

TEAMS gives you the functionality to send out SMS/s to students, employers, and agents. You will see this option on all the listing screens and in the communication tile. You either can send the SMS/s in Bulk by using the listing screens or you can send individual SMS by using the communication tile on different dashboards that we have such Applicant Dashboard, Student Dashboard, Application Dashboard, Enrolment Dashboard, Agent Dashboard, etc. No matter what screen you choose to send out the SMS/s, the steps to use this functionality are the same everywhere. This post will explain to you how you can use the “Send an SMS” option.

  • Select the “Send an SMS” option.
  • This will open a popup window.
  • Select your SMS template if you already have added to TEAMS, so that you do not have to manually type in your message. However, this is not a mandatory field to select, if you do not have an SMS template, you can leave it blank.
  • If you have selected the SMS template, the text message will be automatically updated in the message area. However, if you haven’t selected any SMS template, you can type in your text message manually.
  • Select the “Send” button to send out the SMS.

Add/Edit Agent

These screens will allow you to add/edit the information about the Agent. You can find these screens under:

Agent Dashboard > Agent Profile Tile > Edit Agent Details Icon

Marketing Menu > Agent Listing screen > +Agent Button

Note – When you select the Offshore Agent tick box, the Overseas address tab will get visible and you won’t be able to select the Local Address tab.

Note – Below tables will give you an explanation of details tab and other tabs(contact information, local address and overseas) are self explanatory tab where you add contact information and agent’s address

Details Tab

FieldExplanation
Agent IDIt is a read-only system-generated field that will automatically populate Agent’s ID.
Agent CodeAgent Code (usually an abbreviation for reports). Cannot be left blank.
Agent NameName of the Agent (generally the name of the Agent’s Organisation). Cannot be left blank.
Legal NameThe legal name of the Agent (if different from their organisation or brand name).
ABNYou can enter the Australian Business Number in this field.
ACNYou can enter the Australian Company Number in this field.
Offshore AgentSelect this tick box if the agent is offshore (overseas).
Agent TypeThis is user code and based on the user code created in TEAMS, you can select the agent type from dropdown.
Agent Links to all CampusesIf your RTO has multiple campuses then you can select this tick box.
CampusYou can select the specific campus from the dropdown field. This field will be visible if the Agent Links to all campuses check box is un-tick.
Agent is Active?If you do not select this tick then the agent will not appear on the required screens.
No Longer accepting new ApplicationsBy select this tick box, the agent will not appear for the new applications.
Account ManagerThis is user code and based on the user code created in TEAMS, you can select the account manager from dropdown.
Marketing SourceThis is user code and based on the user code created in TEAMS, you can select the marketing source from dropdown.
RegionThis is user code and based on the user code created in TEAMS, you can select the region from dropdown.
Contract Expiry DateAgent’s contract expiry date.
Charge GSTSelect this tick box to charge GST on the agent’s commission.
Pre-deducted commissionSelect this tick box if you wish to pre deduct the commission while creating the receipts for the students.
Pay CommissionIf you select this tick box, the system will show different fields related to pay the commission
Commission Template – This will be the default commission set for the agent
Optional Commission templates – This will show you commission’s list from which you can select any optional commission.
Optional Commission TemplateYou can select optional commission template from the dropdown field
Vendor CodeEnter the Vendor code of the agent in this field
Purchase Order NoEnter the Purchase order number of the agent in this field
Purchase Order AmountYou can enter the Purchase order amount in this field
Agent LoginYou can enter the Agent Login ID in this field
Agent Admin PasswordYou can enter the Agent Admin password in this field

Unit of Studies

Dashboard > Academics menu > Unit of Studies

The Unit of Study is where the students enrolled in a unit to undertake the required study and to complete the assigned assessment pieces as per the unit outline.

When you are on the UoS welcome screen, you will be able to search, edit and view UoS that are already in your database and you can also add a new +Unit of Study in the system.

Explanation of the fields on the Unit of Study Screen is below:

FieldsExplanation
UoS CodeThis search field will allow you to search for the specific UoS with their Code and Name.
CampusYou can select the Campus from the Dropdown.
Include inactive UoSIf you select this tick box, then it will show all the inactive UoS.
Apply buttonOnce you applied the filters, you can select the Apply button to see your desired search or simply select the enter key.
+ Unit of StudyYou can select this button if you want to add a new UoS in the system

Assessment – Documents

Assessments Entry Screen > Burger Menu > Documents

On this screen, you will be able to see the documents in the grid that are already linked with the assessment and you can also add the documents for an Assessment. When you select the +Add button, the system will show the files on your local system and as per your need, you can select your desired document to upload.

After selecting the document, a popup window will appear and you will be able to see the document there. You can select the document type and you can also add notes for the document. Then select the Upload button.

An explanation of the fields is below:

FieldsExplanation
Upload DateThis will show you the current date and you will not be able to change the date as it is auto populated and read only.
NotesYou can write notes for your own reference by selecting the notes icon.
Document TypeThis is a user code in TEAMS and based on the user code created, you can select the document type
Document NameIt will show the name of the document which you have selected.
Public DocumentSelect this box if you want to make the document public on the student portal.

AGD – Applications Tile

Main Dashboard > Marketing Menu > Agent Dashboard > Applications Tile

Overview

In the Applications Tile, we show all the pending applications linked to the Agent. You can convert, decline and perform other actions to the applications from this listing screen.

This screen is divided into two sections.
1) Filters/Parameters
2) Listing Grids

Filters/Parameters:

To open this screen, you would have selected the Applications Tile link from the Agent Dashboard. Based on the date range you have selected on the Application Tile, the system will open the screen and populate the information in this section. For example, it will show you the start and end dates that were used in the tile. You can add a New Application with this agent by selecting the +Application button.

Select here to know more about the filters/parameters.

Listing Grid

In this grid, we are displaying the list of all pending applications. We are showing the Applications Processed Date, App No, Student Name, Campus, Program, Start Date, End Date, Intake, Application Type, Marketing Source, Agent, Account Manager, Status, and Actions columns. All of these columns are self-explanatory.

Select here to know about the Icons under the Actions column and Burger Menu

How to select Applications?

Use tick boxes to select applications if you wish to send email/SMS, create a contact log, print letters and start enrolments in bulk. After selecting the students, pick the option from the burger menu and you are one step away to finish your heap of work in one go.

Or if you wish to select all students at once, use the tick box present right beside the Processed Date column.

AGD – Enrolments Tile

Main Dashboard > Marketing Menu > Agent Dashboard > Enrolments Tile

Overview

In the Applications Tile, we show all the enrolments that are linked to the Agent.

This screen is divided into two sections.
1) Filters/Parameters
2) Listing Grids

Filters/Parameters:

To open this screen, you would have selected the Enrolments Tile link from the Agent Dashboard. Based on the date range you have selected on the Enrolments Tile, the system will open the screen and populate the information in this section. For example, it will show you the start and end dates that were used in the tile.

Select here to know more about the filters/parameters.

Listing Grid

In this grid, we are displaying the list of all enrolments. We are showing the Student No, Enrolment No, Student Name, Campus, Program, Intake, Enrol. Start-End Date, Enrolment Status, Previous/Future Program, and Overdue Amt columns. All of these columns are self-explanatory.

Select here to know about the Icons under the Actions column and Burger Menu

How to select Enrolments?

Use tick boxes to select enrolments if you wish to send email/SMS, create a contact log, print letters and start enrolments in bulk. After selecting the students, pick the option from the burger menu and you are one step away to finish your heap of work in one go.

Or if you wish to select all students at once, use the tick box present right beside the Student No column.