How to link Subjects to an Enrolment?

To link subjects to an enrolment, go to Enrolment Dashboard > Result and progress tile > Training Plan and Results Icon. Once you select the icon, the system opens the Training Plan and Results screen.

This screen is about the subjects linked to the enrolment, their start and end date, results and result date. This screen is visually distributed in 2 sections where you can edit the dates, and results, link the trainers, mark the assessments and many more. To link subjects, you need to go to the second section which is called the results grid.

IMPORTANT – Before linking any new subject to an enrolment, please make sure that it is added in the system on the subjects screen or the subject is linked with the program on the program > subjects screen. It is recommended to check the correct subject codes on training.gov.au before adding them to the system.

Now, to link subjects to the enrolment, you need to select the Subject Icon. When you select this icon, it will expand the screen and you will be presented with all the subjects related fields in the grid itself.

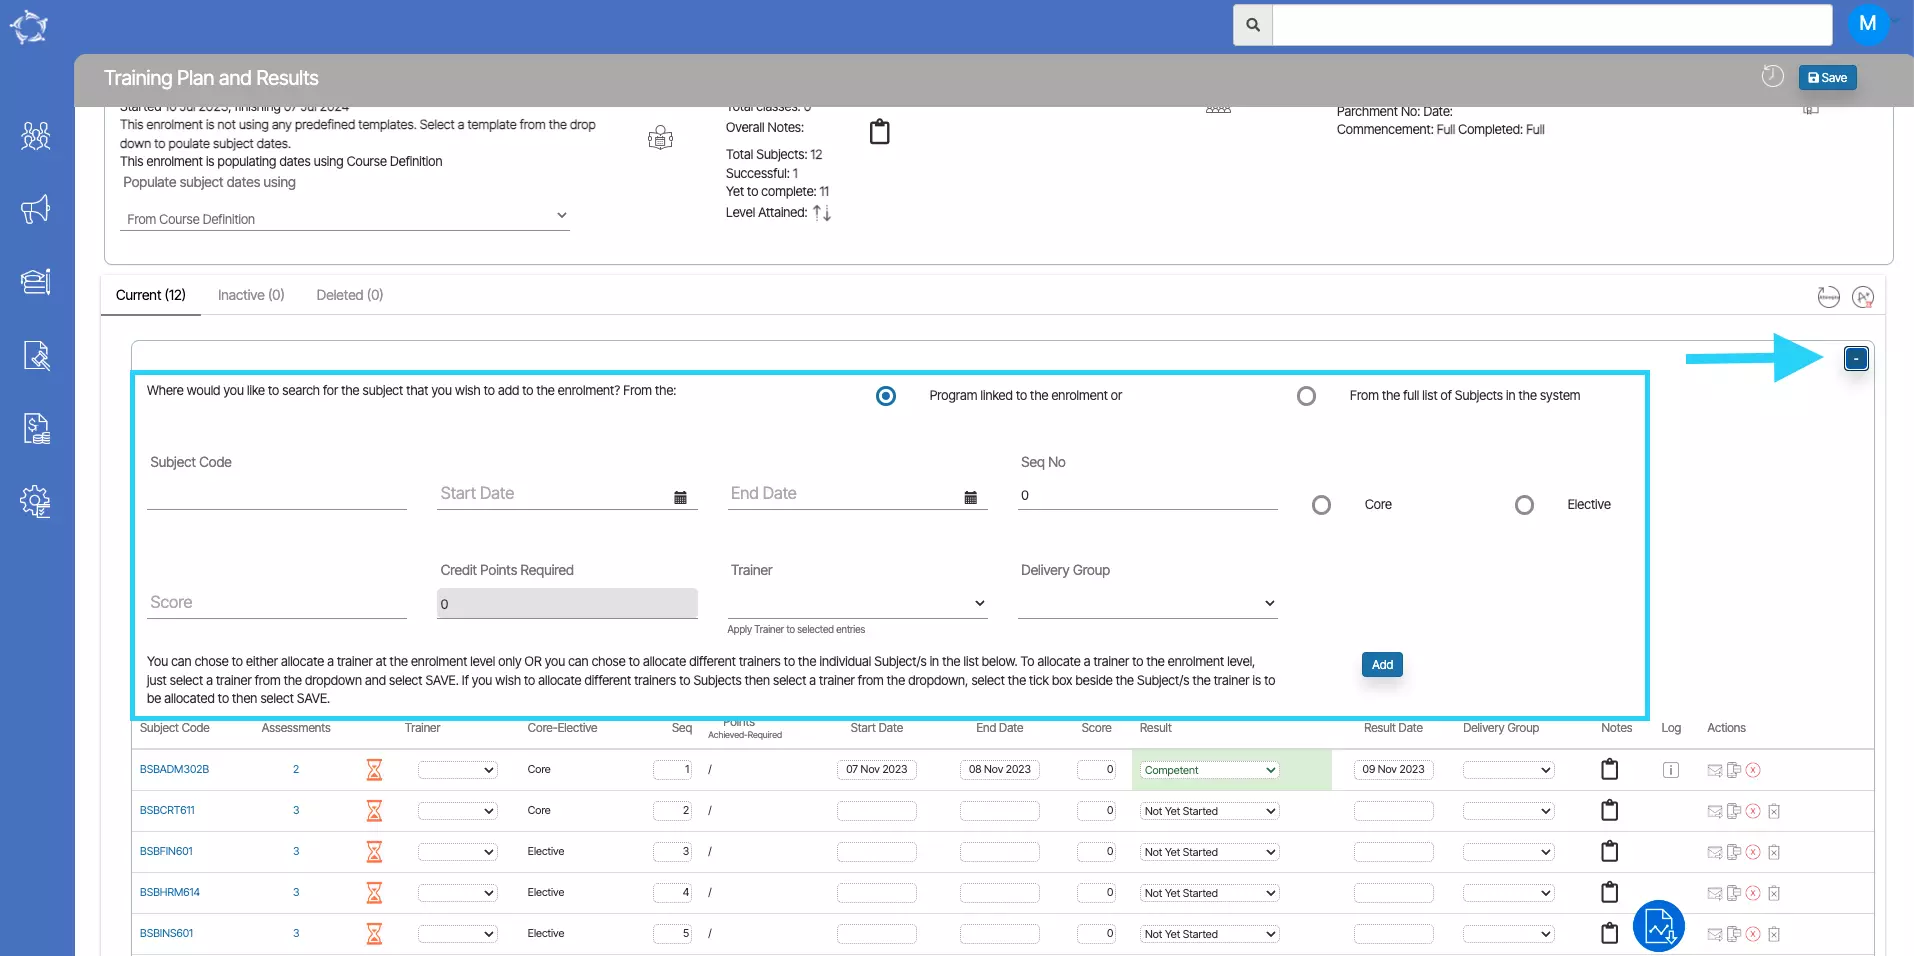
Note – There are two Radio buttons that will help you to search the subject that you wish to link to the enrolment and based on the radio button selected the system will show you the subjects in the Subject Code search field.

Program linked to the enrolment – The “Program linked to the enrolment” radio button will be selected by default. This will show only the program’s subject in the Subject Code field.

From the full list of subjects in the system – When you select this radio, the Subject Code field will show you all the system’s subject codes that are not linked with the program.

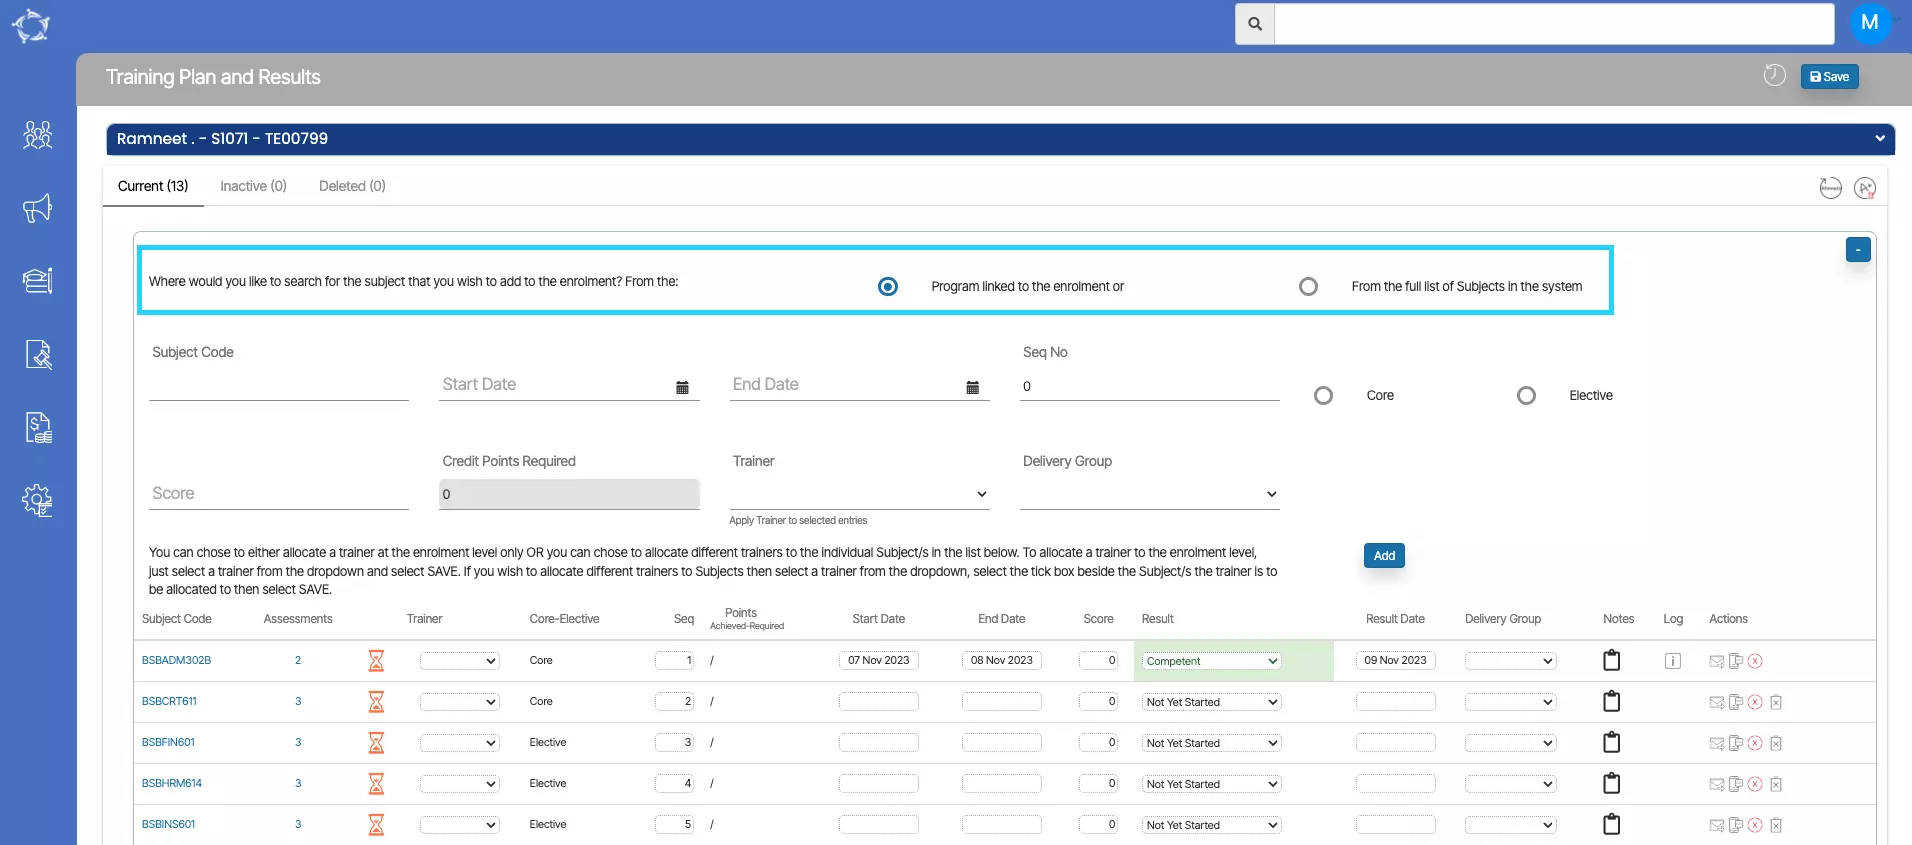
Other fields explanations

Subject Code – search the subject with the subject code which will show you all the suggestions under the search field. Select the correct one.

Start Date and End Date– Select the subject dates from the calendar. Please make sure that the dates that you are selecting, should lie between the enrolment dates.

Seq No – Add the sequence number of the subject.

Core/Elective – Select any of the one radio buttons as it is mandatory to mention if the subject is code or elective.

Score – When you add a score, the credit points required field will be auto-populated.

Trainer – you can select the trainer and delivery group from the dropdown. You can choose either to allocate a trainer at the enrolment level only OR you can choose to allocate different trainers to the individual Subject/s. If you wish to allocate different trainers to Subjects then select a trainer from the dropdown.

Delivery Group – Select the delivery group from the dropdown.

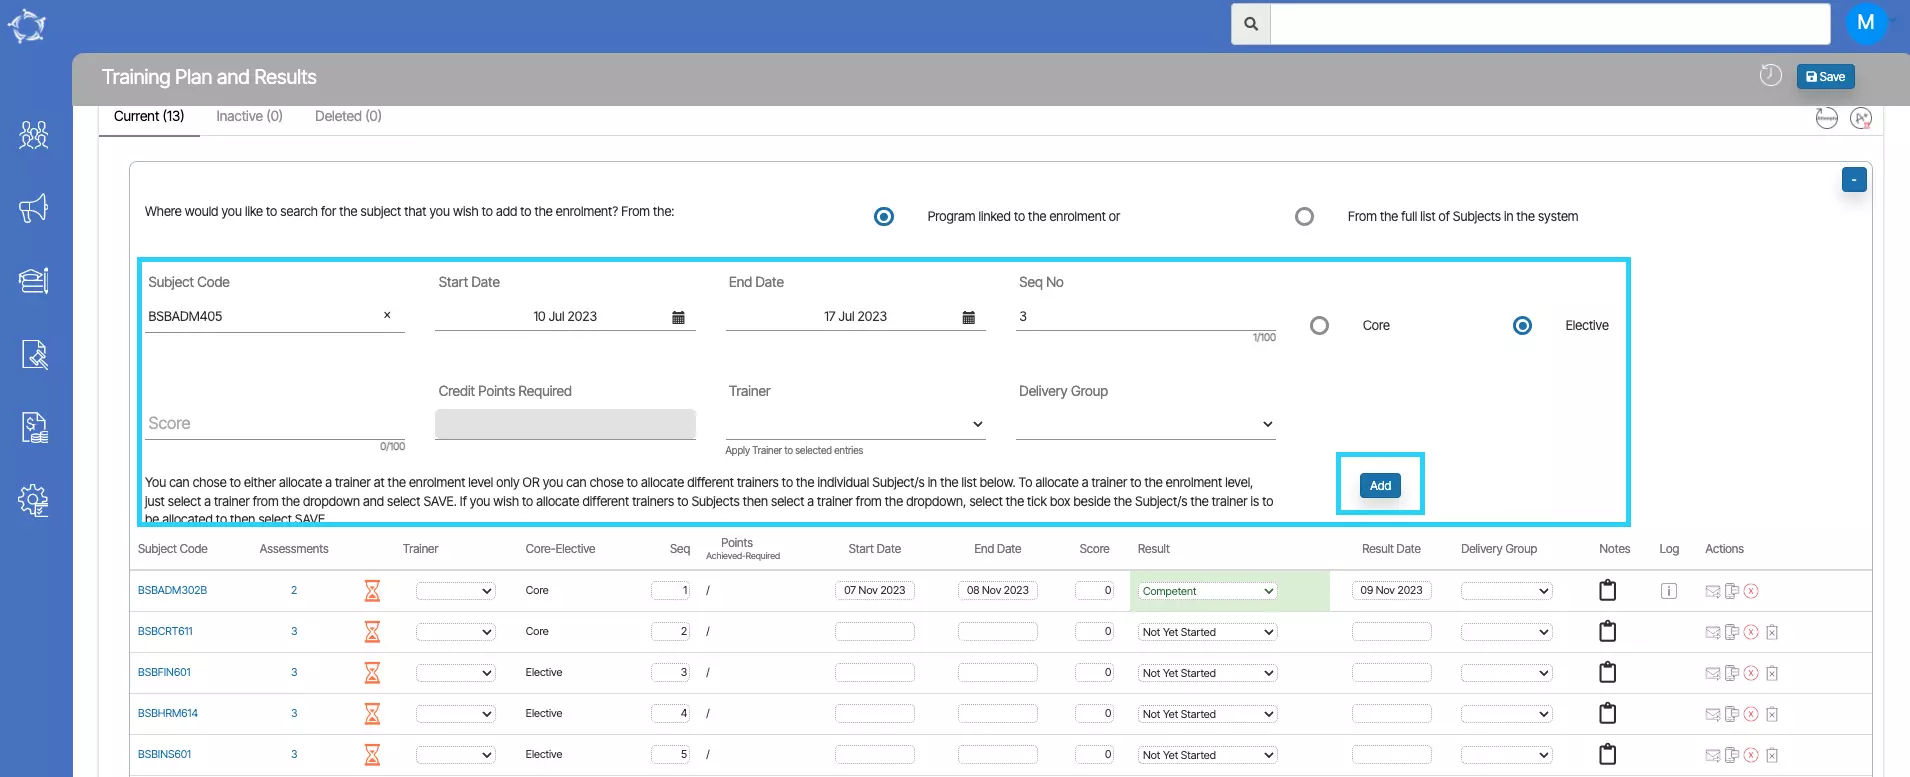
Once you have updated all the above steps, select the Add button. Upon selecting the button, the system will refresh the screen and update the subject in the grid.

How to change your password

To change your password you need to do the following steps.

  • Login into TEAMS
  • Go to the account profile section as shown below and click on the profile dropdown.
  • Select the option for Edit my details.

  • Once you will select the “Edit my details” a floating window will appear in front of you.
  • On the floating window, enter the details as per the given fields on the password tab, hint text is also visible for all the fields.

  • Once you will update the details in all the fields on the Password tab, you just need to select the update button and the new password will get updated.
  • Now from now onwards you have to login into TEAMS with the new password.

NOTE: – New password or the current password should not be the same, otherwise the system will show you the below error message and will not let you save the password.

How do I link commission templates to an agent?

When the “Pay Commission” is turned on but the commission template is not linked with the agent, it can cause issues. This means that the system has enabled the commission calculation but it is not properly set up to assign commissions to specific agents

To link the agent commission template and raise the agent invoices, you can follow the following steps:

  • The first step is to select the main menu icon for Marketing, followed by selecting the icon for Agent. This action will direct the user to the Agent Welcome List screen. From there, the user can search for a specific agent by using the search bar or by scrolling through the list of agents displayed.
  • Once the user has accessed the Agent Welcome List screen, the next step is to select the agent by entering their code or name and clicking the Apply button. The system will then search for the agent and display the relevant information on the screen.
  • To edit the agent’s information, the user needs to locate the Edit icon in the Actions column of the agent’s record and select it.
  • When accessing the agent entry screen, it is possible to see whether the pay commission tick box is selected or not. However, it is important to note that the commission templates must also be selected in order for the system to properly calculate and allocate commissions. This can be done by using the “Default Commission Template” dropdown menu.
  • In addition to the “Default Commission Template” dropdown, there is also another dropdown menu available on the agent entry screen that allows the user to select optional commission templates. These templates are typically used when an agent is eligible for commissions based on multiple sales.
  • After selecting the appropriate commission template/s for the agent and making any necessary changes to their information, the next step is to click on the save button to save the changes.

How do I link an Agent to an enrolment?

Main Dashboard > Enrolment Dashboard > Financial Tile

If the agent was not initially linked to the enrollment process, it is now possible to establish this connection directly from the enrollment dashboard. By utilizing the agent linking feature, you gain access to a comprehensive range of information and capabilities related to financial transactions. These functionalities empower you to efficiently handle financial transactions and ensure accuracy in financial records.

To link an agent with an enrollment, please follow the steps below:

  1. Access the Enrollment Dashboard.
  2. Navigate to the Financial tile, located directly below the enrollment student profile tile.
  3. Click on the agent icon within the student financial tile to open a pop-up window for agent linking.
  4. Utilize the magic search field within the pop-up to search for the desired agent. As you type, the search suggestions will display matching agents.
  5. Select the appropriate agent from the suggestions and click the update button. The screen will refresh, and the agent tab will appear in the financial tile.

The agent is linked but the commission is still not calculating for an enrolment

From the Enrolment Dashboard > Financials Tile > Agent tab it shows that there is no financials for the agent linked to the enrolment, this could be because the Agent is not set with Pay Commission.

To raise the agent commission the Pay Commission should be turned on and at least one commission template should be linked to the agent which is explained below.

  • Select the main menu icon for Marketing and then the icon for Agent. This will take you to the Agent Welcome List screen where you can search to find the Agent.
  • Enter the Agents code or name and select the Apply button. The system will search and display the agent and you then just need to select the Edit icon in the Actions column as highlighted below.
  • On the Agent entry screen select the tick box for Pay Commission as shown below:
  • After selecting the Pay Commission tick box, two new fields with drop downs will show for Default Commission Template and Optional Commission Templates.
  • You must select at least one Default Commission Template from the drop down for the system to calculate commission for the agent. You can only select one Default Commission template.
  • If the agent sometimes receives different commission percentages, you can always select other commission templates in the Optional Commission Template drop down. The system will allow you to select more than one from this list.

Now you need to go back to the enrolment dashboard, select the edit icon from the agent tab as shown below:

In the pop up window select the Update button as shown below. By doing this the system will refresh the screen and will have calculated and created, where relevant, the commission invoices for the enrolment.

Why isn’t the agent commission calculating?

There could be a number of reasons why the system is not calculating an agent’s commission invoices for an enrolment. The following posts will help you identify the reason.

How to setup Subject Fees for Programs and Subjects?

Dashboard > Academics > Subjects

  • To set up fees for the Subjects, you need to go to the Subjects > Subjects Entry screen > Details tab. Here you can enter the Subject fee in the Default Amount field.

Dashboard > Program > Burger Menu > Subjects

  • To set up fees for the Subjects at the Program level, then you need to go to the Program Burger Menu and select Subjects from the pop up.
  • Once you have selected the Subjects option, it will take you to the Program Subjects screen and there you need to select the Edit icon under the Actions column for the particular subject, you wish to enter the subject fee.
  • Upon selecting the edit icon, the floating window will open on the screen, where you can add the amount for the subject and select Save.

When to add the fee at the program subject screen?

If for any subject which is common in two or more programs but the fee for each program is different for that subject. Then in such a case, you can add that program-specific fee for the subject at the program subject screen.

Business Rules

The system will fetch the fee amount from the program subject screen. If the fee amount field is blank there then the system will fetch it from the subject entry screen.

What are Preferences and how do I use the screen?

Overview

Preferences are linked to an Enquiry Type of student or employer. They are a way to record:

Student – what campus and programs they are interested in receiving information about.

Employer – what campus and programs they are interested in having their staff complete studies in.

You can only access Preferences through the Enquiry screen using the Fab Dial icon

A new screen will open and you follow these steps to enter preferences for an enquiry.

Step 1 – select the a Campus from the dropdown.

Step 2 – select the Program from the dropdown list.

Step 3 – select the + Add button and the system will add it to the grid below. You can enter as many preferences as you like for an enquiry.

Can’t see a SAVE button in the screen?

Unlike other screens in the system, this screen will auto save when you have selected a Campus and Program and selected the + Add button.

What does the Total Allocation column in Attendance and Results show

The system shows you two numbers in this column such as 23/30.

The first number is how many students are currently allocated to the class (23 in the above example).

The second number is the maximum capacity for the class (30 in the above example).

For the currently allocated number showing in red above, the system is identifying that the class has not reached its minimum capacity. For example, Room 808 has been setup with a minimum capacity of 26, however only 23 students have been allocated to the class and that is why 23 is in red.

The system will also show the maximum capacity number in red if the total students allocated to the class is more than the maximum capacity set for the class room

No SAVE button on the screen?

If you are entering data and you cannot see a SAVE button, this could be due to one of two reasons –

1. You do not have permissions to add or edit data. You should talk to your manager to confirm if you have permissions in the system to do this.
2. There is a small number of screens in the system where it will auto save what you enter or edit. These screens include:

Attendance
New Enquiry (Student & Employer types) > Preferences screen