Changes on Training Plan and Results screen – History

The training plan and result screen will give you an overview of the subjects linked to enrolment and their results. We have made some latest new enhancements changes to the Training Plan and Results Screen.

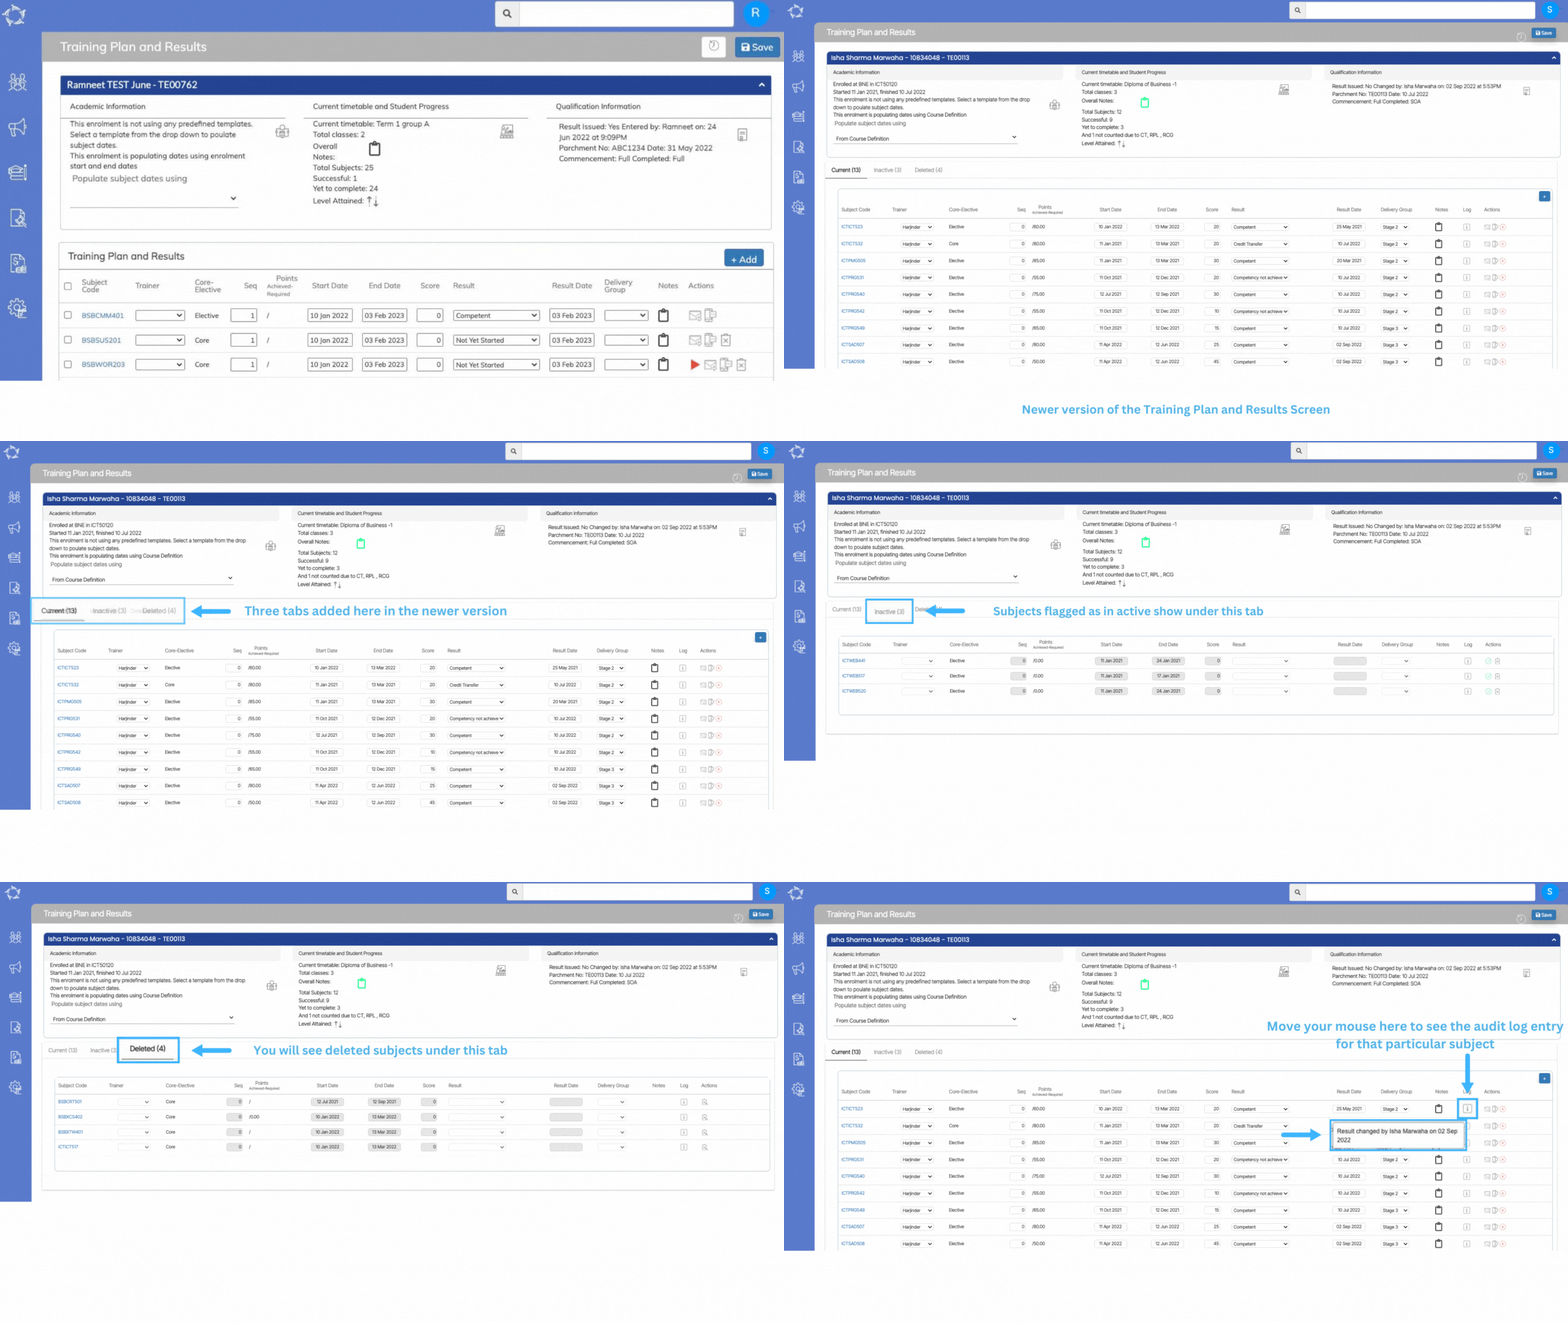
In the new look of the Training Plan and Results screen, You will see three new tabs on the screen above the grid.

Current – Subjects currently linked to the enrolment will be shown under this tab.

Inactive – In this tab, you will see all the subjects flagged as inactive. To make any subject inactive, select this icon  under the actions column in the current tab. And the system will ask for your confirmation and by selecting OK, the system will move the subject from the current tab to the Inactive tab and flag the subject as inactive. To reinstate any inactive subject to active you can select this icon  and again the system will ask for your confirmation. Confirming the same the system will flag the subject active and move it back to the current tab.

Delete – To Delete a subject from the current or inactive tab, select this icon you can see the deleted subject under the deleted tab. You can also restore the deleted subject by selecting this icon  under the actions column. Once you have given the system confirmation, it will restore the subject to the tab from where it was deleted. It can be either inactive or current. Also, If you have added and saved notes for any subjects on this screen the system will show you the notes in green color.
Training Plan and Results Screen > New look – History

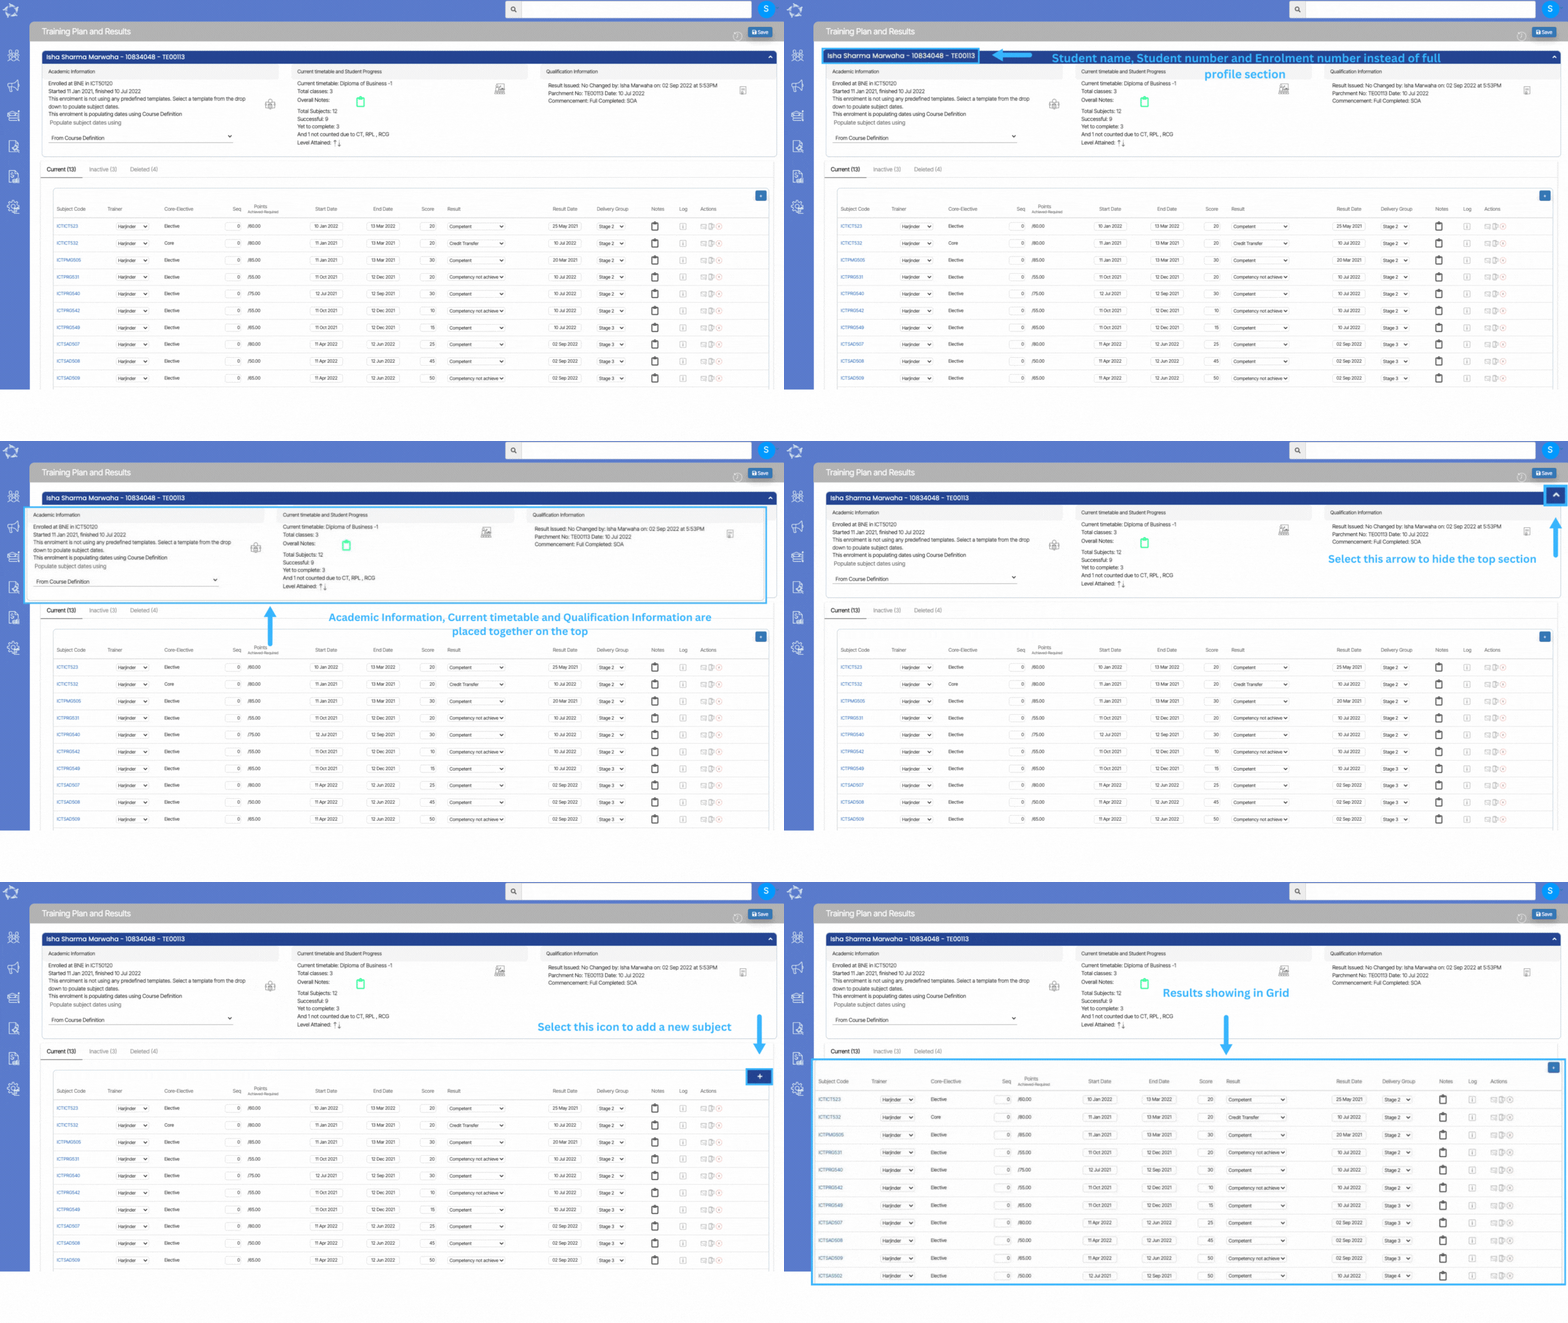
We recently visually changed the look of the Training Plan and Results Screen. With this new look of the screen, it is now easy for a user to view all the subjects at once without having to scroll too much.

How the screen looks now:

The screen works the same as it used to work, it’s just the visuals that we have changed. You will no longer see the profile section for the student. However, you will be able to see the student’s name and enrolment number in the header.

Other sections such as Academic Template, Current timetable & Student Progress and Qualification Information are placed together on the top section of the screen and more.

Transition Student Screen – History

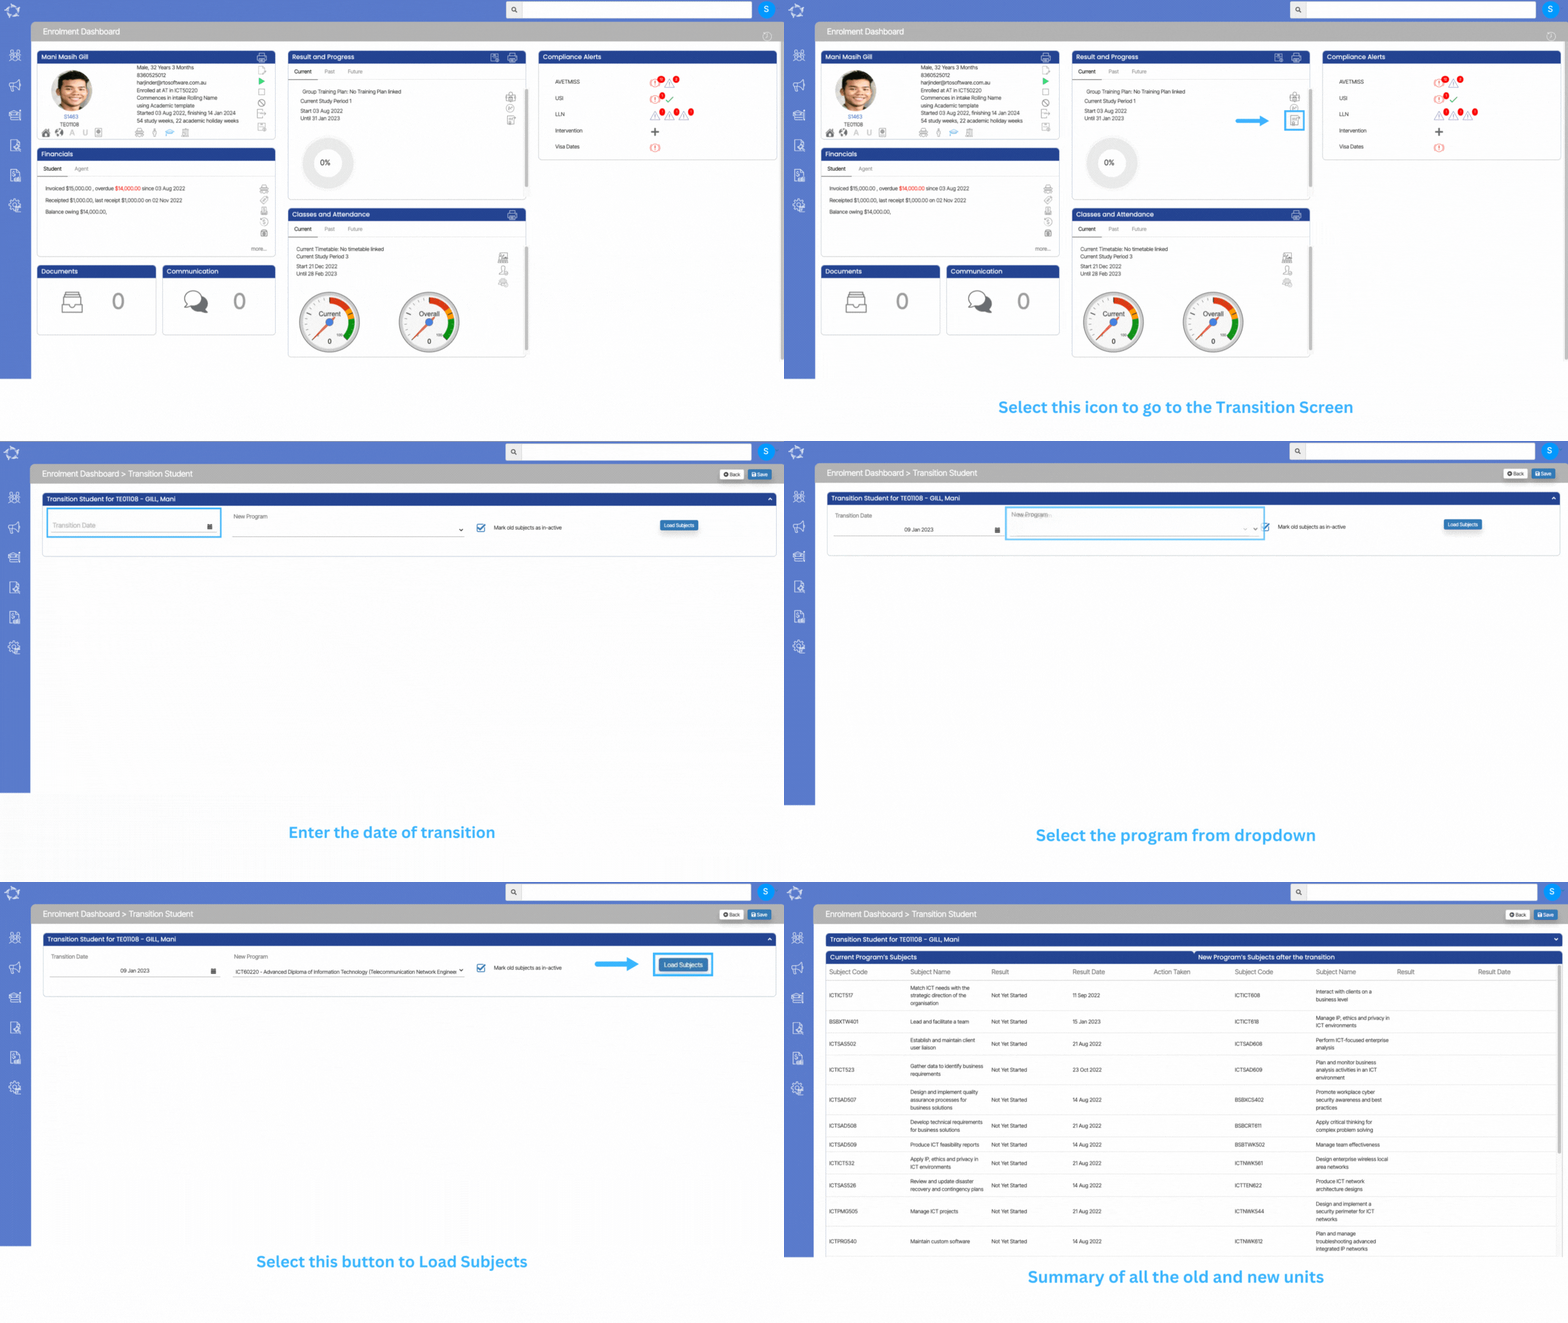
We have made some of the latest changes in the Transition Student Screen. This screen can be found under Enrolment Dashboard > Result and Progress Tile > Transition Enrolment icon.

Below are the steps that you need to follow when you do a Transition.

  • Enter the date of transition. Basically when the transition took place. It can or cannot be the same as the current date.
  • Select the program in which you are going to transit the student’s enrolment.
  • By default, the tick box for Mark old subjects as in-active will be selected. It’s vital that you do not untick this tick box so that the system can link the correct subjects with the enrolment according to the new program code in which you are going to move the student’s enrolment.
  • Select the button for Load Subjects.
  • Upon selecting the button, the system will refresh the screen and give you a summary of all the old and new units.

IMPORTANT – If the transition date for a student is 01 July 2022 and today is 11 July 2022, then update 01 July 2022 as the transition date.

Enrolment Dashboard – History

Here are some of the latest changes that we have made to the Enrolment Dashboard.

Date UpdatedWhat Screen / Report
12 Jan 2023Cancel Enrolment – UnAllocate Timetable
17 Nov 2022Visa Information – New column Expiry date
20 Oct 2022Changes – Transition Process
01 Sep 2022Intervention Screen
14 Jul 2022Transition of Enrolment
21 July 2022How to Re-Instate an Enrolment in TL?
02 May 2022Edit Enrolment – New Actual End Date Field

Edit Enrolment – New Actual End Date Field

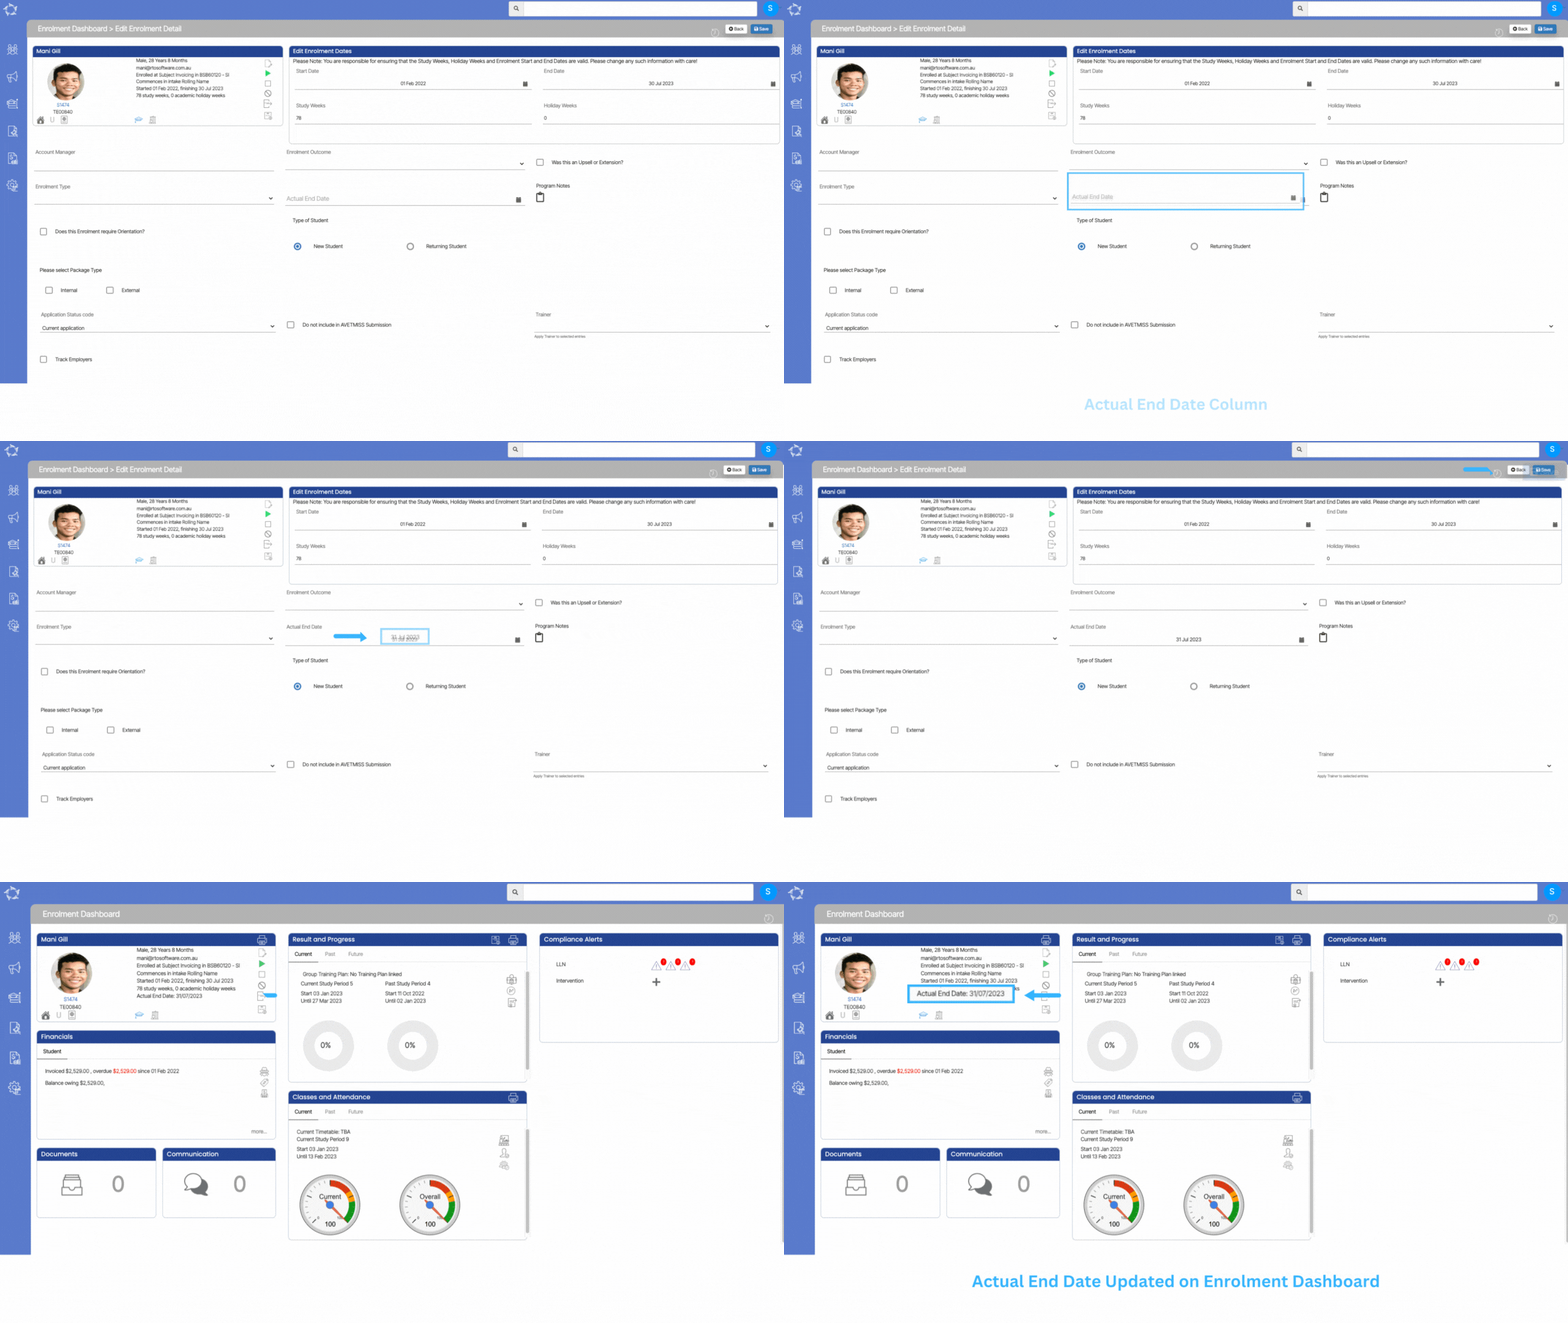
We have added a new field in the system called Actual End Date in the Edit Enrolment screen. The Actual End date is just the data entry field and it is not going to calculate the duration for you for the enrolment. This is just for the purpose to see the date when a student actually finished the study.

So, when you update and save the Actual End date in the edit enrolment screen, it will get populated on the profile section on the Enrolment Dashboard as you can see below:

IMPORTANT: It’s the Enrolment End Date that is being used in the AVETMISS reporting, not the Actual End Date. If you want the system to use the actual end date in AVETMISS reporting, please update the actual end date in the enrolment end date field.

Enrolment Status Column – Application Processed Report

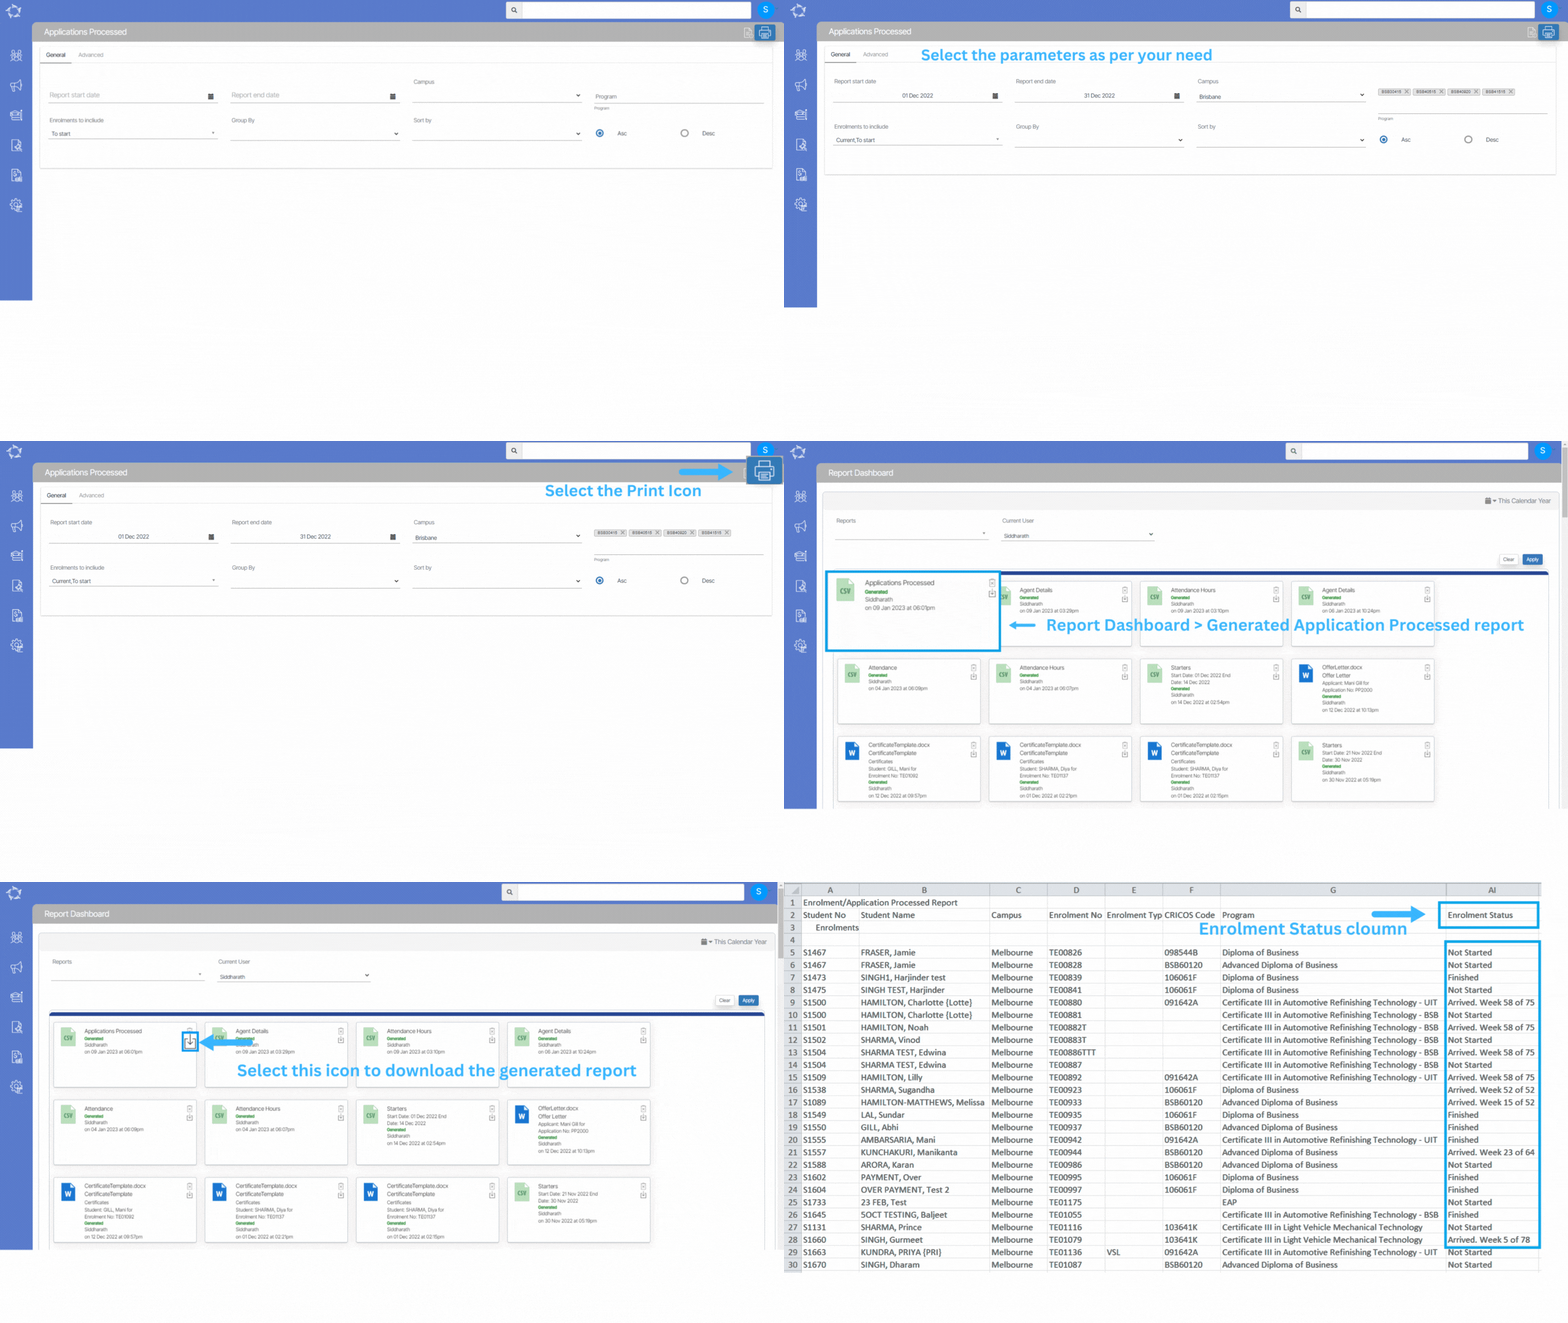
We have introduced a new column ‘Enrolment Status’ in the Application Processed Report. This column will show you the status of the enrolment if it is current, not yet started or finished.

IMPORTANT – In this report, you will see the records of applications and enrolments as well but it will only show the data for the enrolments in the enrolment status column.

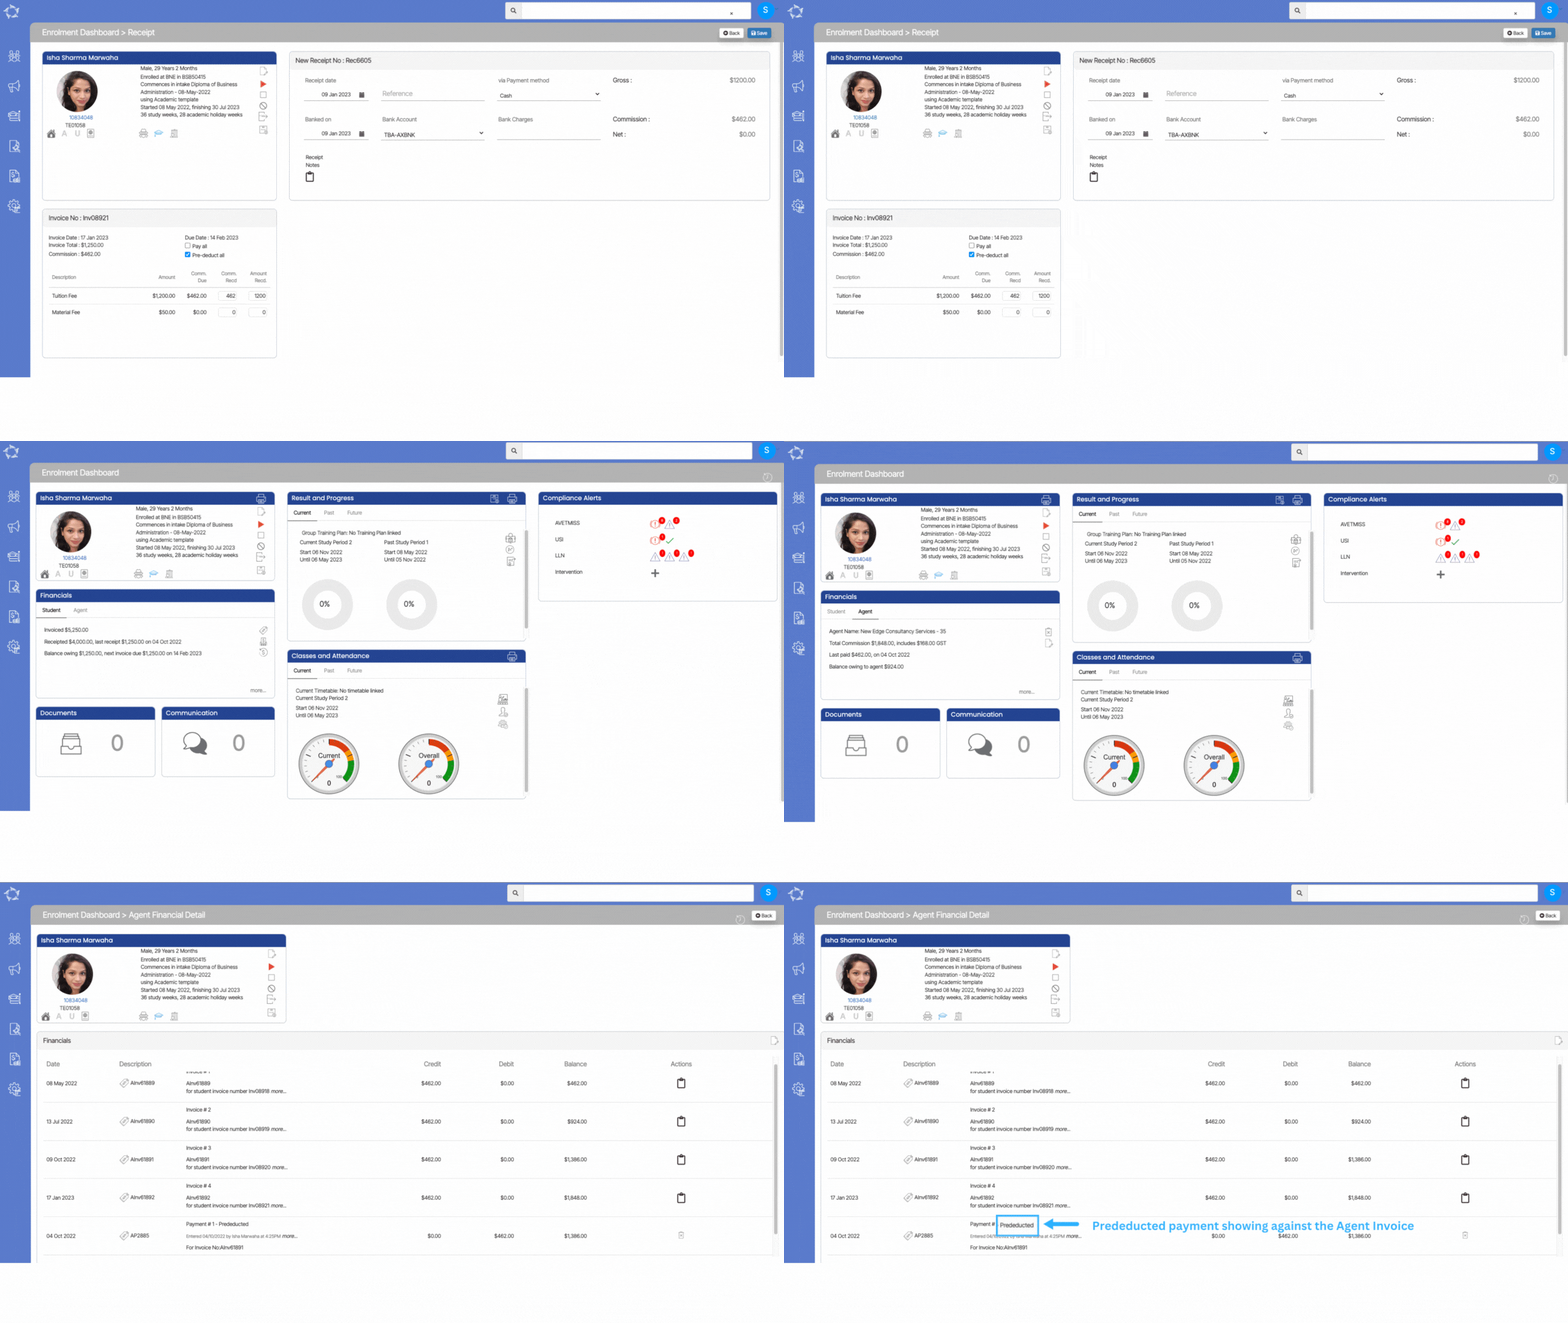
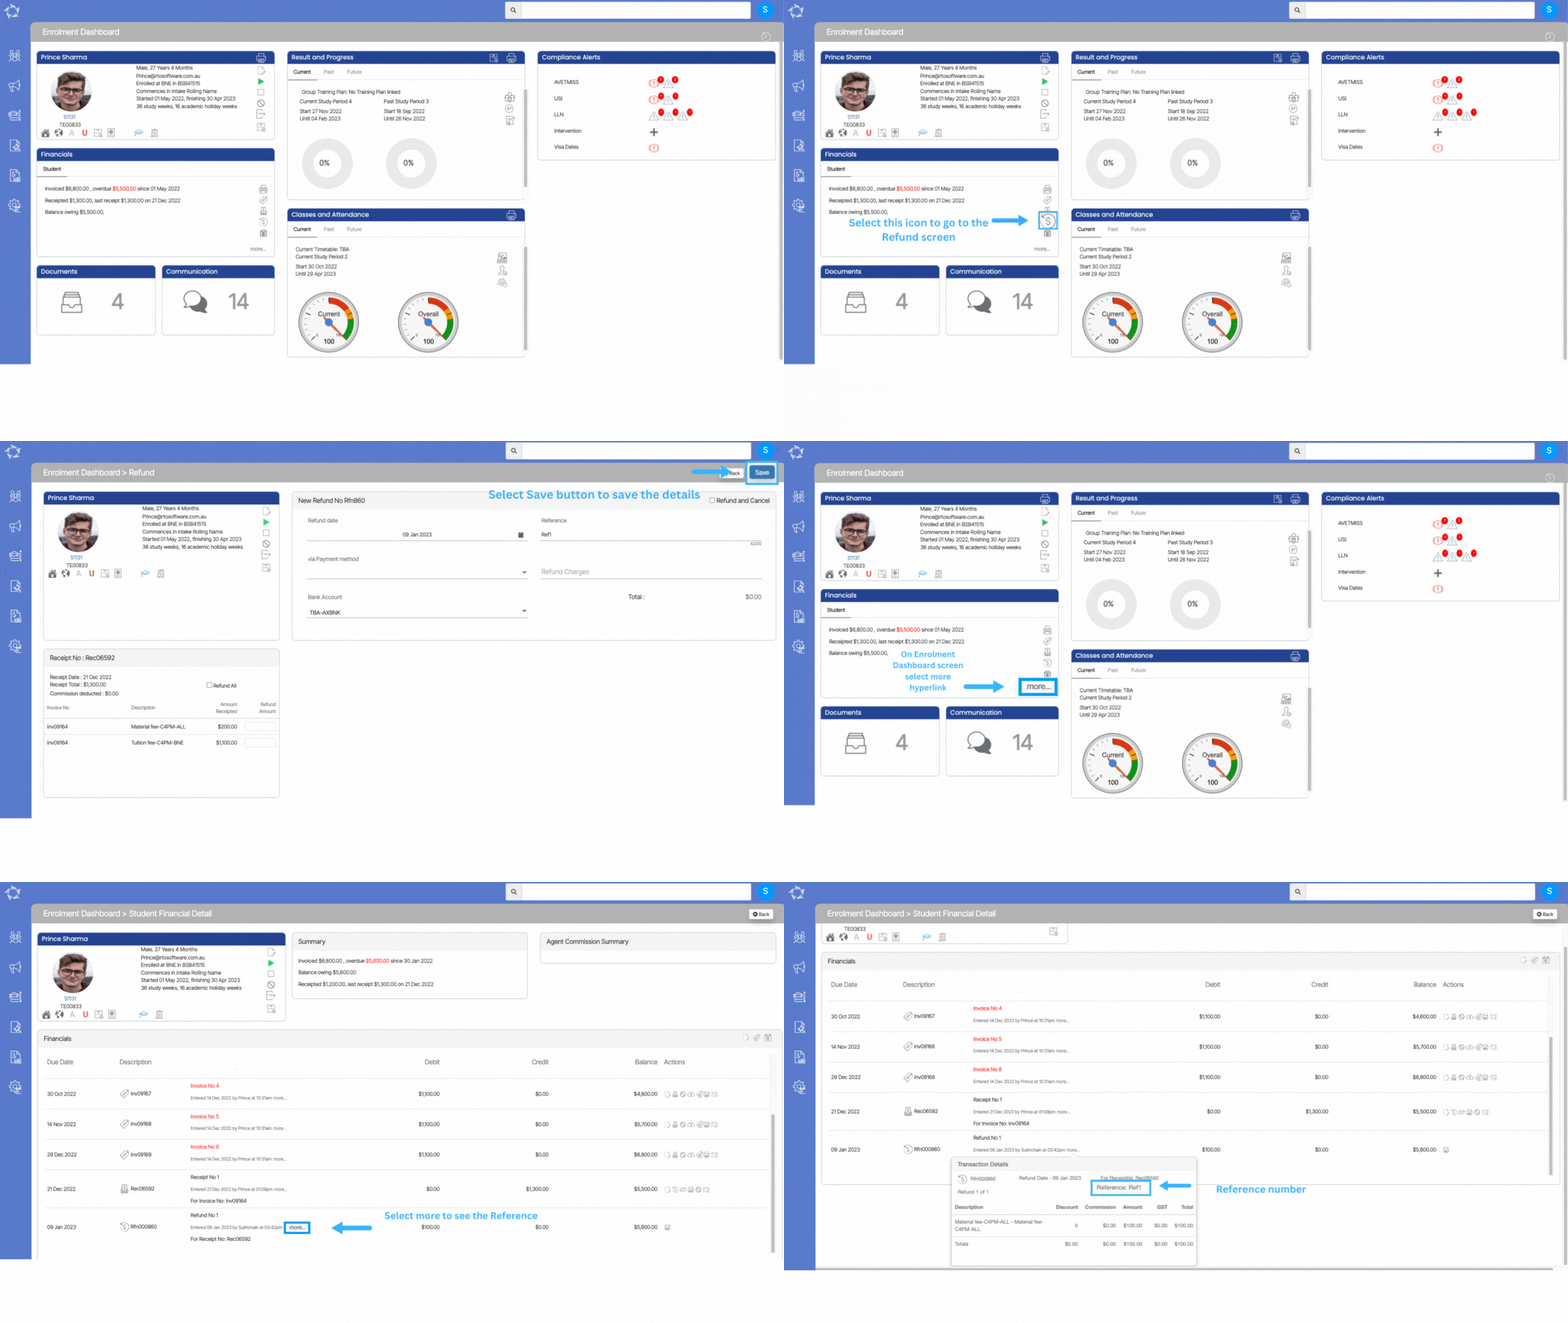
Added Reference in the Refund

Now we are also displaying the reference in the refund transaction details on the student financial screen.

Note – You will be able to see the reference value entered while creating the refund and also you can print the reference value in the refund report as well.