Dashboard > Academics > Programs > Program Entry settings Screen
Earlier on the Programs > Settings screen, we used to show a tick box for Allow Flexible Study Sequence but now we have changed the tick box and label name from “Allow Flexible Study Sequence” to “Study Sequence for this Program” and introduced two radio buttons Fixed and Rolling next to the Study Sequence for this Program.
If you have any queries, please do not hesitate to contact us on 1300 85 05 85 or email us via support@rtosoftware.com.au
We have added a new parameter in the Continuing List screen, which is accessed from the Continuing tile on the Dashboard as shown below:
When you are in the Continuing List screen select the Advanced Search option as shown below:
You will then see the new Show only Smart and Skilled enrolments. Select this option and select the Apply button to see those specific enrolments.
Please Note: for a Smart and Skilled enrolment to show in this list the enrolment must be flagged as one. To do this go to the Enrolment Dashboard and from the profile tile select the Enrolment AVETMISS Settings icon as shown below:
The Enrolment AVETMISS Settings screen will open and in the bottom right hand corner you will see the tick box for Smart and Skilled enrolment as shown below.
From the Enrolment Dashboard > Classes & Attendance tile > Classes icon on the Classes Listing screen there used to be an option to select the Study Period or the Dates. In order to make it more user friendly, we have removed the Study Periods option from the Choose new Classes for Allocation section as shown below.
On selecting the Show Classes button, you will be able to view all the available classes for the date range you entered.
After selecting the class/s you wish to allocate to the enrolment you then select the next button and complete the steps of the process.
NOTE: we have also changed the Classes Listing Screen that you see from the Enrolment Dashboard > Classes & Attendance tile > Classes icon
In the screen shot below, this is how the old Classes Listing Screen used to look like with the Study Periods column which made it hard for a user to read.
We have removed the Study Periods column and now it looks like this.
If you have any queries, please do not hesitate to contact us on 1300 85 05 85 or email us via support@rtosoftware.com.au
Earlier for Timetables, there was a limitation to select only 1 campus similar to Term Breaks. With this new change, you can select multiple campuses while adding or editing a Timetable.
Click on the Timetable Icon from the Academics tile.
You can select multiple campuses from the dropdown as shown below.
IMPORTANT: Please be aware that the Intakes, Programs and the Term Breaks will only appear for the Campuses selected.
After filling in all the details for the timetable and selecting the campus(es), click on next and follow the rest of the steps as always.
Earlier for Term Breaks, there was a limitation to select only 1 campus. With this new change, you can select multiple campuses when applying the Term Breaks.
Click on the Term Breaks Icon from the System Admin tile.
You can select multiple campuses from the dropdown as shown below.
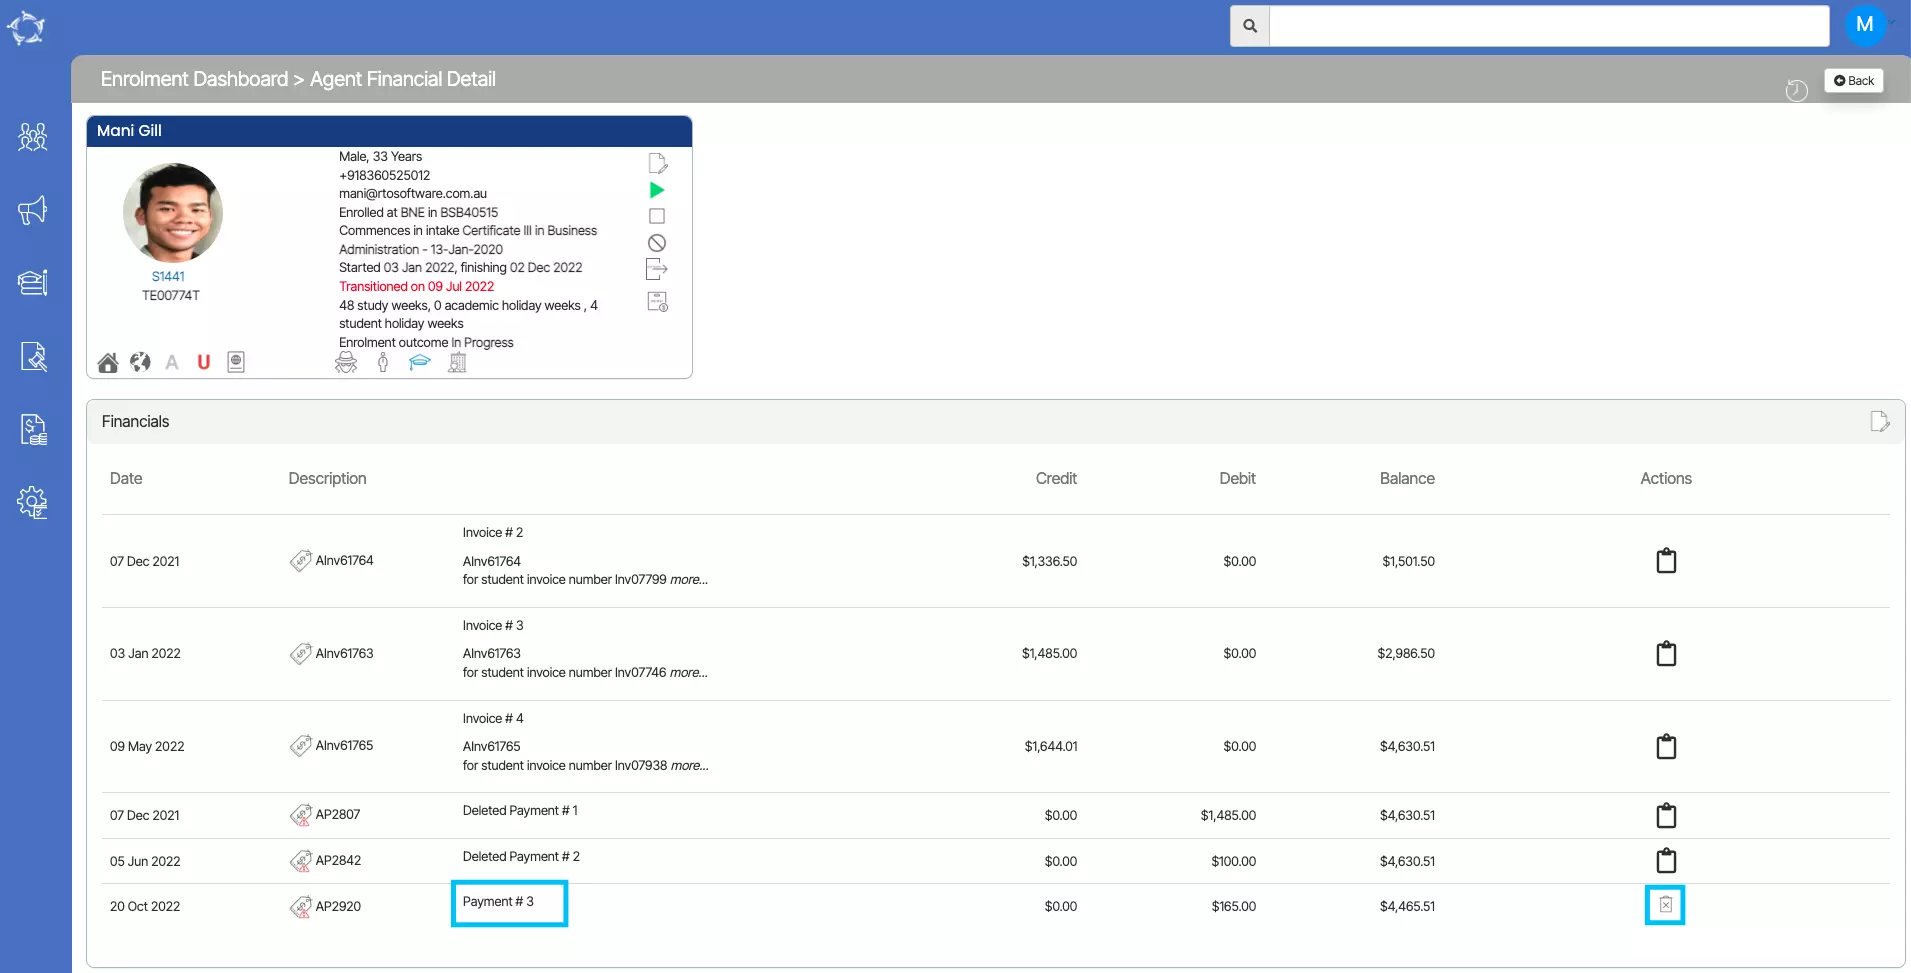
We have added a delete icon on the Agent Financial screen and now you can delete agent payments made for the students/enrolments.
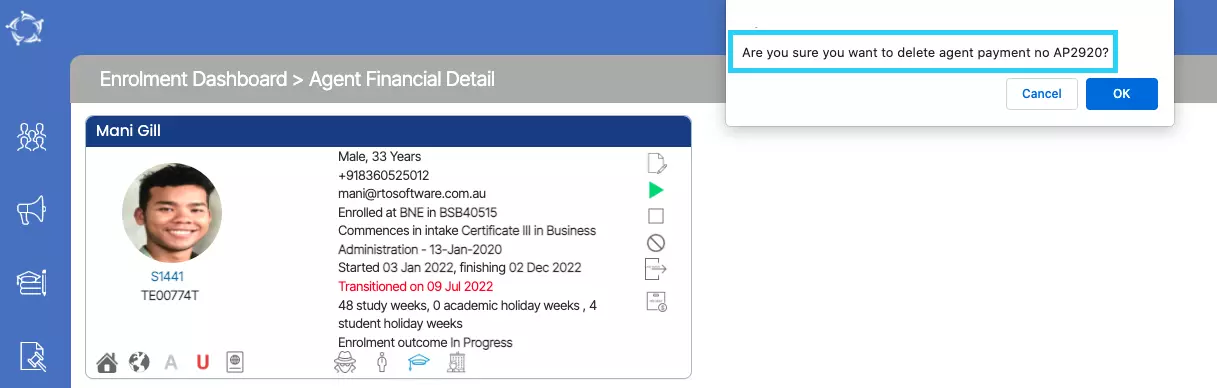
Once you select the delete icon, a pop-up will appear on your screen to confirm to delete the agent payment with the payment number. You can select OK to continue or Cancel to leave.
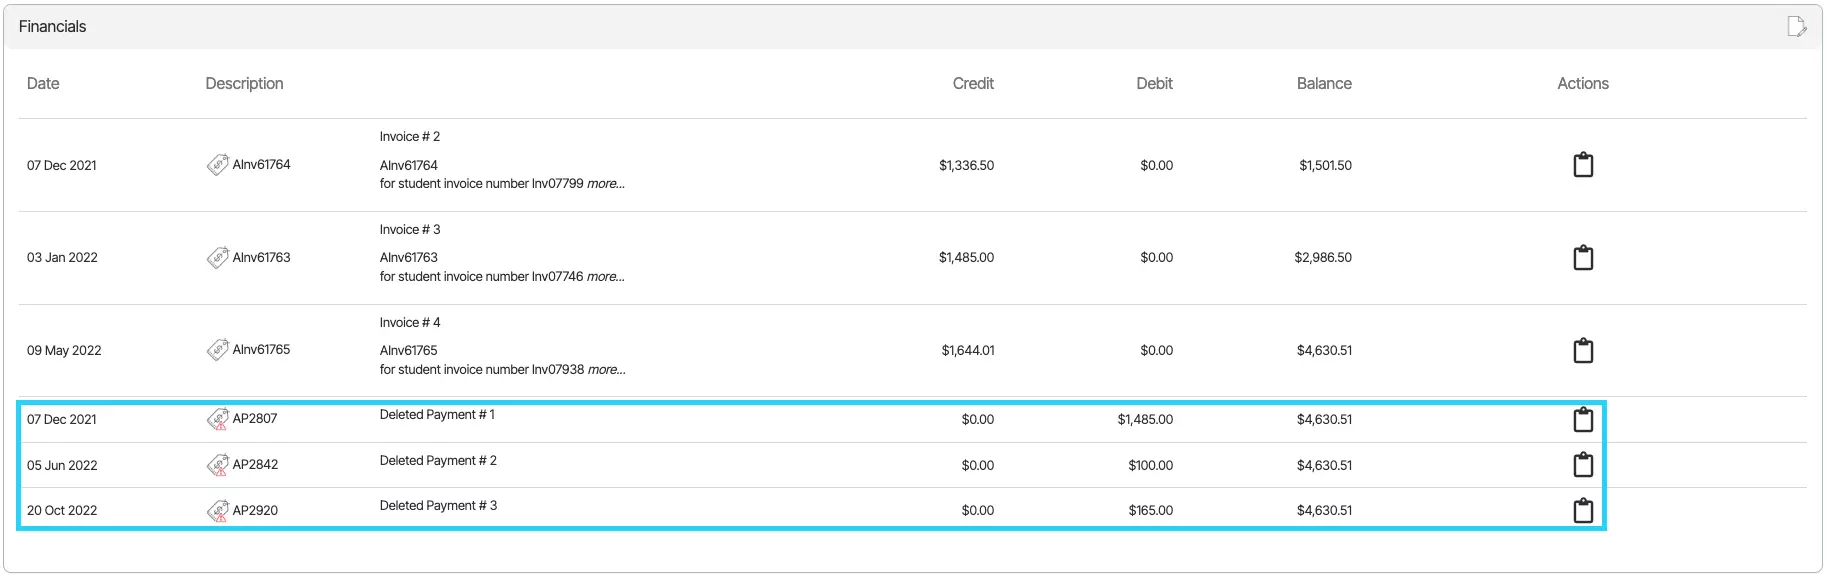
When you select OK, you will see the deleted payment details in the grid.


 on the Classes Listing screen there used to be an option to select the Study Period or the Dates. In order to make it more user friendly, we have removed the Study Periods option from the Choose new Classes for Allocation section as shown below.