| Merge Fields | Objects | Explanation |
|---|---|---|
| {Agent Code} | ||
| {Agent Name} | ||
| {Agent Phone Number} | ||
| {Agent Mobile Number} | ||
| {Agent Fax Number} | ||
| {Agent Email Address} | ||
| {Agent Legal Name} | ||
| {Agent ABN} | ||
| {Agent Default Commission} | ||
| {Agent Vendor Code} | ||
| {Purchase Order Number} | ||
| {Purchase Order Amount} |
 Sukhchain Singh
Application/Enrolment Merge Fields
| Merge Fields | Objects | Explanation |
|---|---|---|
| {Orientation Date} | ||
| {Enrolment Start Date} | Enrolment’s Start Date | |
| {Enrolment End Date} | Enrolment’s End Date | |
| {Enrolment Finished} | Enrolment’s Finish Date | |
| {Enrolment Started} | This field will show you Started | |
| {Enrolment Outcome} | ||
| {Enrolment Duration} | The system will show you the total number of the Enrolment week i.e. the sum of study and academic holiday weeks | |
| {Enrolment Study Weeks} | ||
| {Program Name} | ||
| {Enrolment Number} | ||
| {Program Code} | This field will show you the Program Code updated on the program entry screen | |
| {Program Descriptive Code} | This field will show you Program Descriptive code updated on the profram entry screen | |
| {Enrolment Type} | ||
| {Program Descriptive Name} | This field will show you the Program code updated on the Program entry screen | |
| {Program CRICOS Name} | ||
| {Intake} | ||
| {Campus Name} | ||
| {External Package Name} | ||
| {External Package Start Date} | ||
| {Internal Package Name} | ||
| {CoE No} | ||
| {CoE Start Date} | ||
| {CoE End Date} |
Report Template
Main Dashboard > System Admin menu > Report Template
The Report Template screen in TEAMS offers users a valuable tool for generating various types of reports with ease. It serves as a comprehensive guide that enables the customisation of report formats, including essential documents such as offer letters, academic documents, invoices, receipts, and letters of warning. By providing a structured framework, the Report Template screen ensures that information is organised logically and presented in a clear and consistent manner across different reports.
This feature streamlines the report creation process, saving time and effort while maintaining professional standards. Whether it’s crafting official communication or documenting financial transactions, TEAMS’ Report Template screen empowers you to generate high-quality reports efficiently.
Select the below links, which will help you to understand the process of Report Template in TEAMS
What’s New – Agent Pending Payments
Below is a list of all the changes or new items we have added to this screen.
Date Updated | What Screen/Report |
2022 05 05 |
Bank Account
Main Dashboard > Finance > Bank Account
The Bank Account screen allows you to manage your linked bank accounts effortlessly. From this screen, you can view your existing bank accounts, add new ones, or make changes to the existing ones.
If you wish to add another bank to the campus then you can select the +Add button.
Once you select the +Add button, a floating window will open on the screen. Fill in the required information in the provided fields, Enter your account holder name, followed by the account number and the associated bank’s name. Ensure the accuracy of the details entered to avoid any transactional issues. Double-check the information before proceeding to the next step. Once all the necessary fields have been completed, click the “save” button to finalize the process.
You can also edit or remove existing bank accounts by clicking on the respective icons next to each account.
Below is the explanation of the fields
| Fields | Explanation |
|---|---|
| Bank Name | Add Bank Name here. |
| BSB No/Swift Code | Add your bank BSB No/Swift Code. |
| Account Number | Add account number in this field. |
| Account Name | Add the Bank account holder’s name here. |
| Address | You can add your bank address in this field. |
| Active | Tick this box if you want to active this Bank Account. |
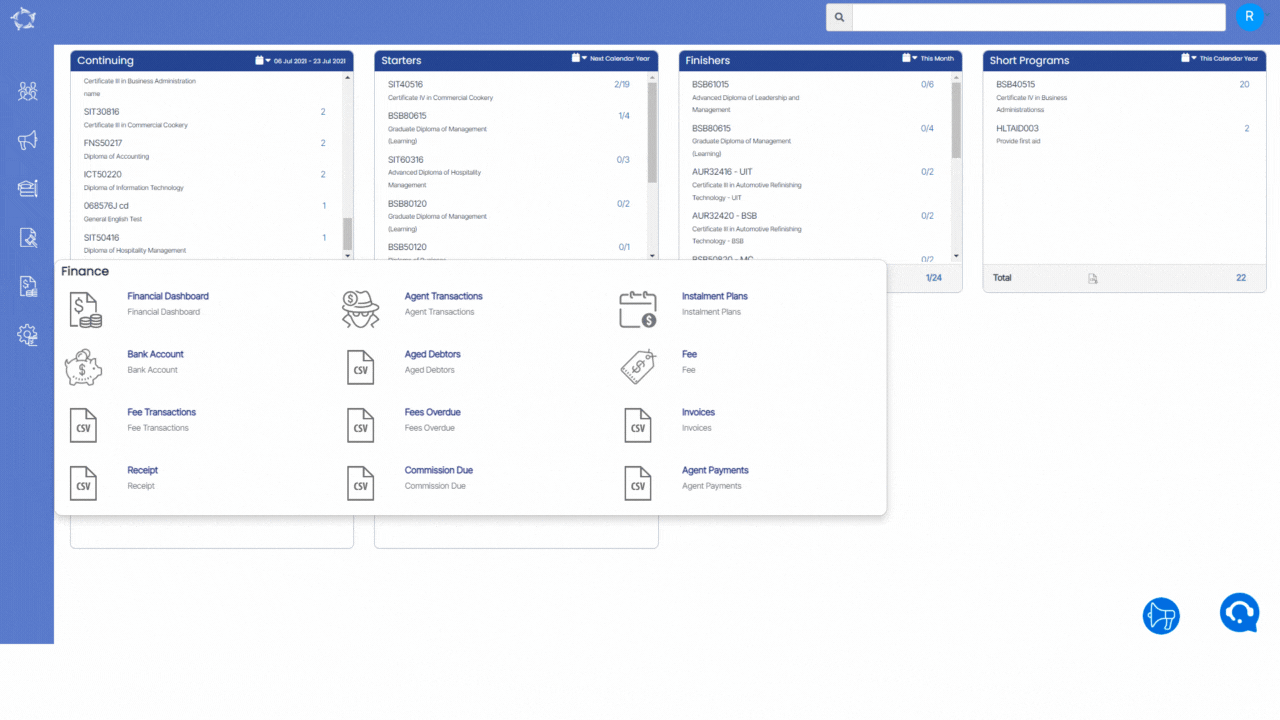
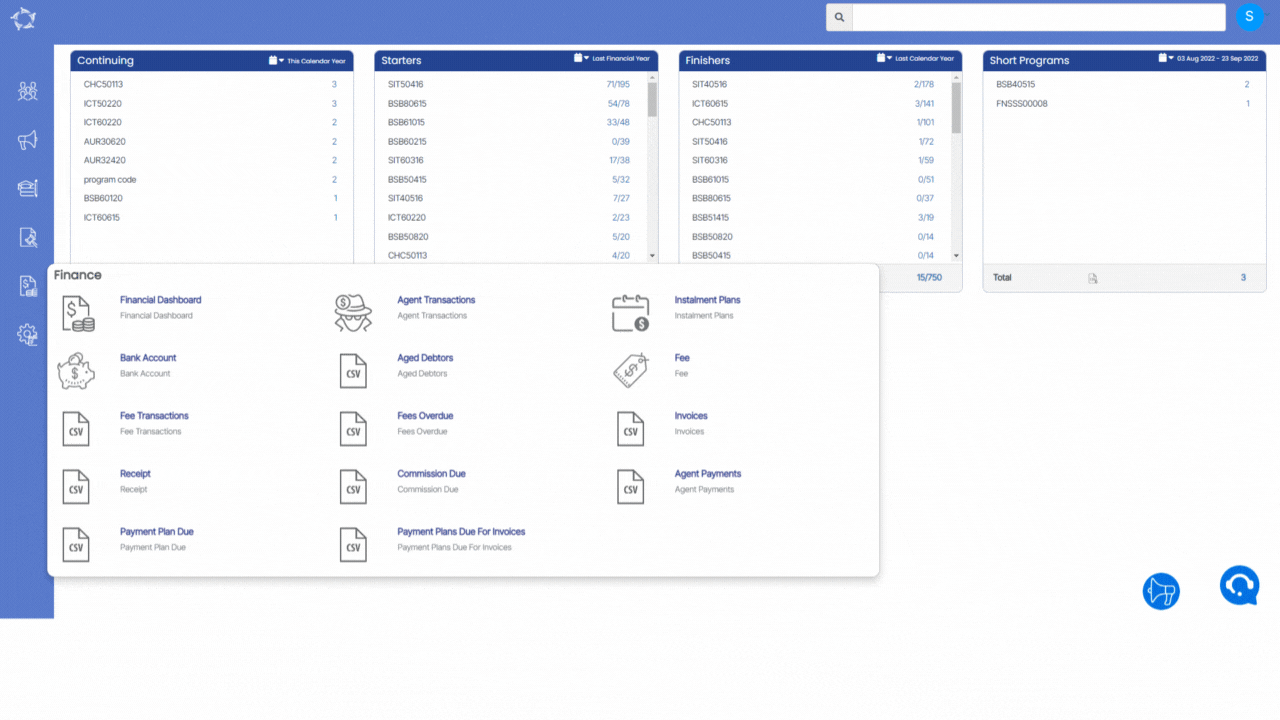
Instalment Plans
Main Dashboard > Finance > Instalment Plans
Overview
An instalment plan is a financial arrangement that enables students to pay their tuition fees in smaller, more manageable amounts over a specified period of time, instead of paying the entire amount upfront. it can help make education more accessible and affordable for students who may not have the financial means to pay the full amount at once.
The instalment plans welcome screen is divided into two sections:
1) Filters/Parameters
2) Listing Grids
Filters/Parameters:
The filters/parameters section under the Instalment Plans welcome screen allows you to search for instalment plans using the Instalment Plan Name and Code in the search field. Additionally, you can choose to include inactive instalment plans by selecting the Include Inactive instalment plan tick box. The + Instalment Plan button allows you to add a new instalment plan to the system.
Listing Grid:
The listing grid displays all of the active instalment plans that currently exist in the database. Users can use this information to manage and track existing instalment plans, ensuring that they are being used effectively and efficiently.
Icons – Click here to learn more about how to use these icons

Instalment Plan Step 2
Instalment Plans > + Instalment Plan button
Follow the below steps to add the Instalments to the Instalment Plan:
- Select the + Instalments button to add the new Instalment Plan to the system.
- Once the +Instalments button is selected, it will display the Instalment detail screen where you will see different fields.
- Enter details in the relevant fields and select the Save button.
- You will see the instalment plan in the grid, you can edit your instalment plan as well.
- Select Finish to finish to create the instalment plan
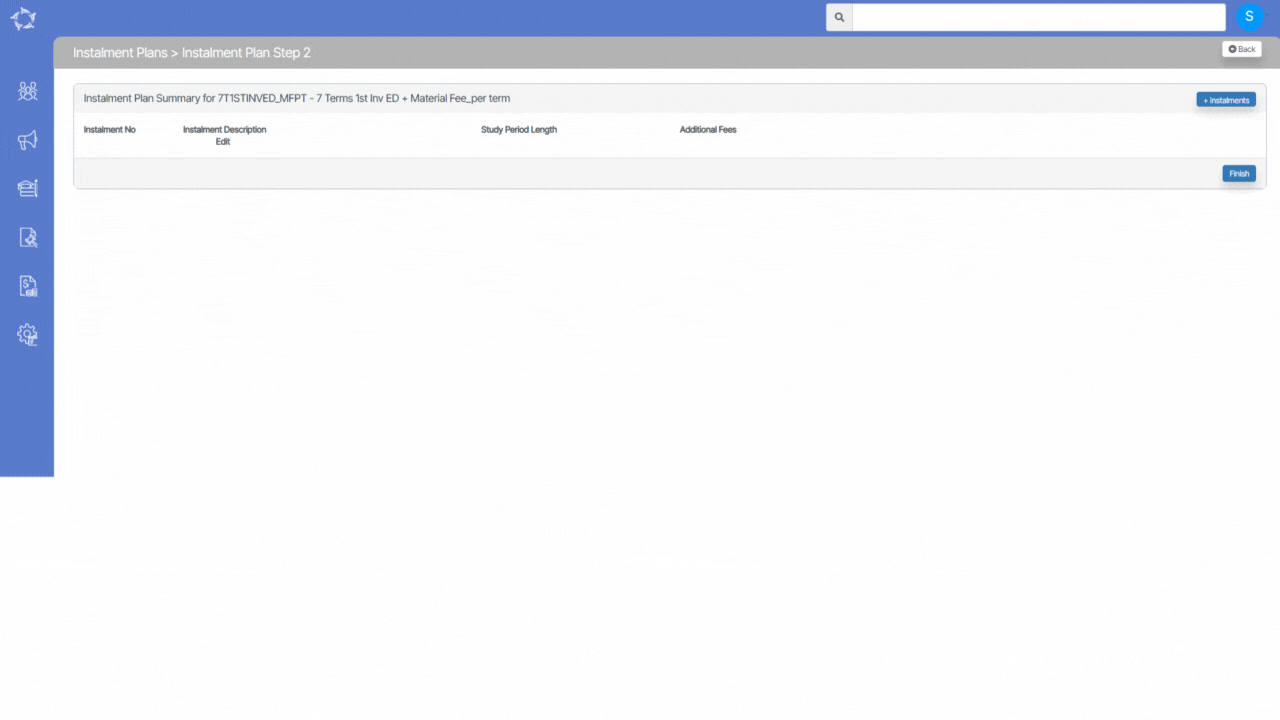
Below is the Explanation of the fields:
| Fields | Explanation |
|---|---|
| Instalment No. | Select instalment no. from dropdown list. |
| This is Deposit Invoice | Select this tick box if it is a deposit invoice. |
| Number of Days/Weeks/Months | You can add a number of days/weeks/months. |
| Days/Weeks/Months | You can select days weeks or months from dropdown list. |
| Study Period length | Enter the Study period length |
| In/Before/After | You can select before or after from dropdown |
| Enrolment date that relate to this instalment | You can select enrolment date from the dropdown list. |
| Invoice Due Date no of Days after the Invoice date | You can add invoice due date no of Days after the Invoice date. |
| Additional Fees | Select additional fees from dropdown list if any. |
| Copy these rules to future installments | Tick this box if you want these rules for your future installments. If you tick this box then In/Before/Months field will be selected as On and the Enrolment date that relate to this instalment field will show days in dropdown list |
