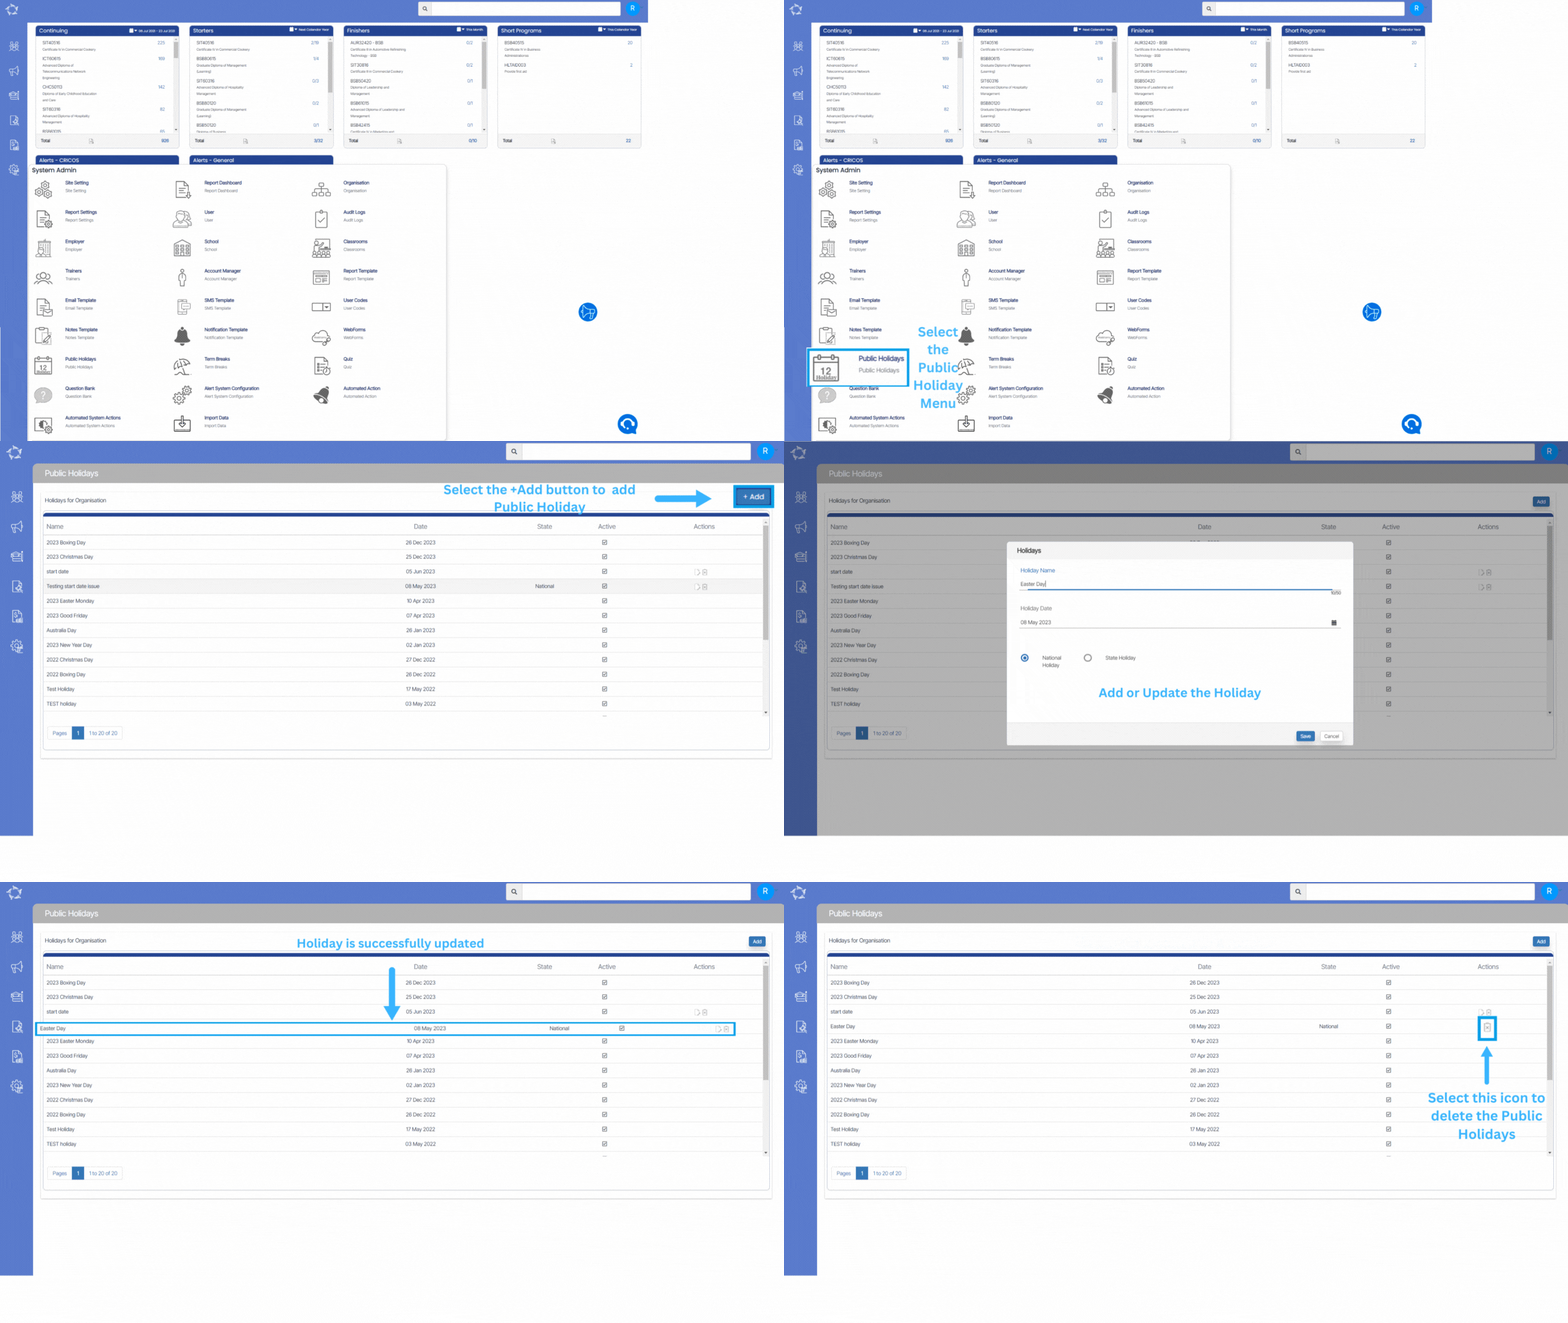
The Public Holidays screen provides you with a comprehensive view of all the existing public holidays on your TEAMS site. It is displayed in a grid format, highlighting the relevant details of each holiday. In order to add new public holidays, you can locate the Add button situated at the top right corner of the screen.
Within this screen, you will find icons for editing and deleting holidays. The edit icon allows you to modify the details of a specific holiday, such as changing the name or date. By clicking on the delete icon, you can permanently remove a holiday from the system. These icons provide convenient options for managing and maintaining an up-to-date list of public holidays.

Below is the explanation of the fields
| Fields | Explanation |
|---|---|
| Holiday Name | Enter the desired name for the Holiday Name field. |
| Holiday Date | Please select the date for the holiday. |
| National | When you select the radio button as a National holiday, it will display National in the State column on the holidays screen |
| State | When you select the radio button for State, the system will show you a dropdown next to the State radio button and you can select states manually by selecting the tick boxes. Once you select and save, you will be able to see those selected states in the grid on the public holidays screen. |
| Save | Select the “Save” button to add the holiday. |
| Cancel | Use the “Cancel” button to abort the process of adding a holiday. |


