Overview
We have five Word reports that you can customise in TEAMS:
- Offer Letters
- Academic Docs: These are used to customise certificates, transcripts, records of results, completion letters, statements of attainments, etc. that you wish to print for the students.
- Invoices: This report template is used to customize the student invoices.
- Payments: This is used for the refunds and receipts templates.
- Letters and warnings: You can use this report template to customise your fee warnings, attendance warnings, and also to create student ID cards etc.
How to download the Master Template of any Report in TEAMS
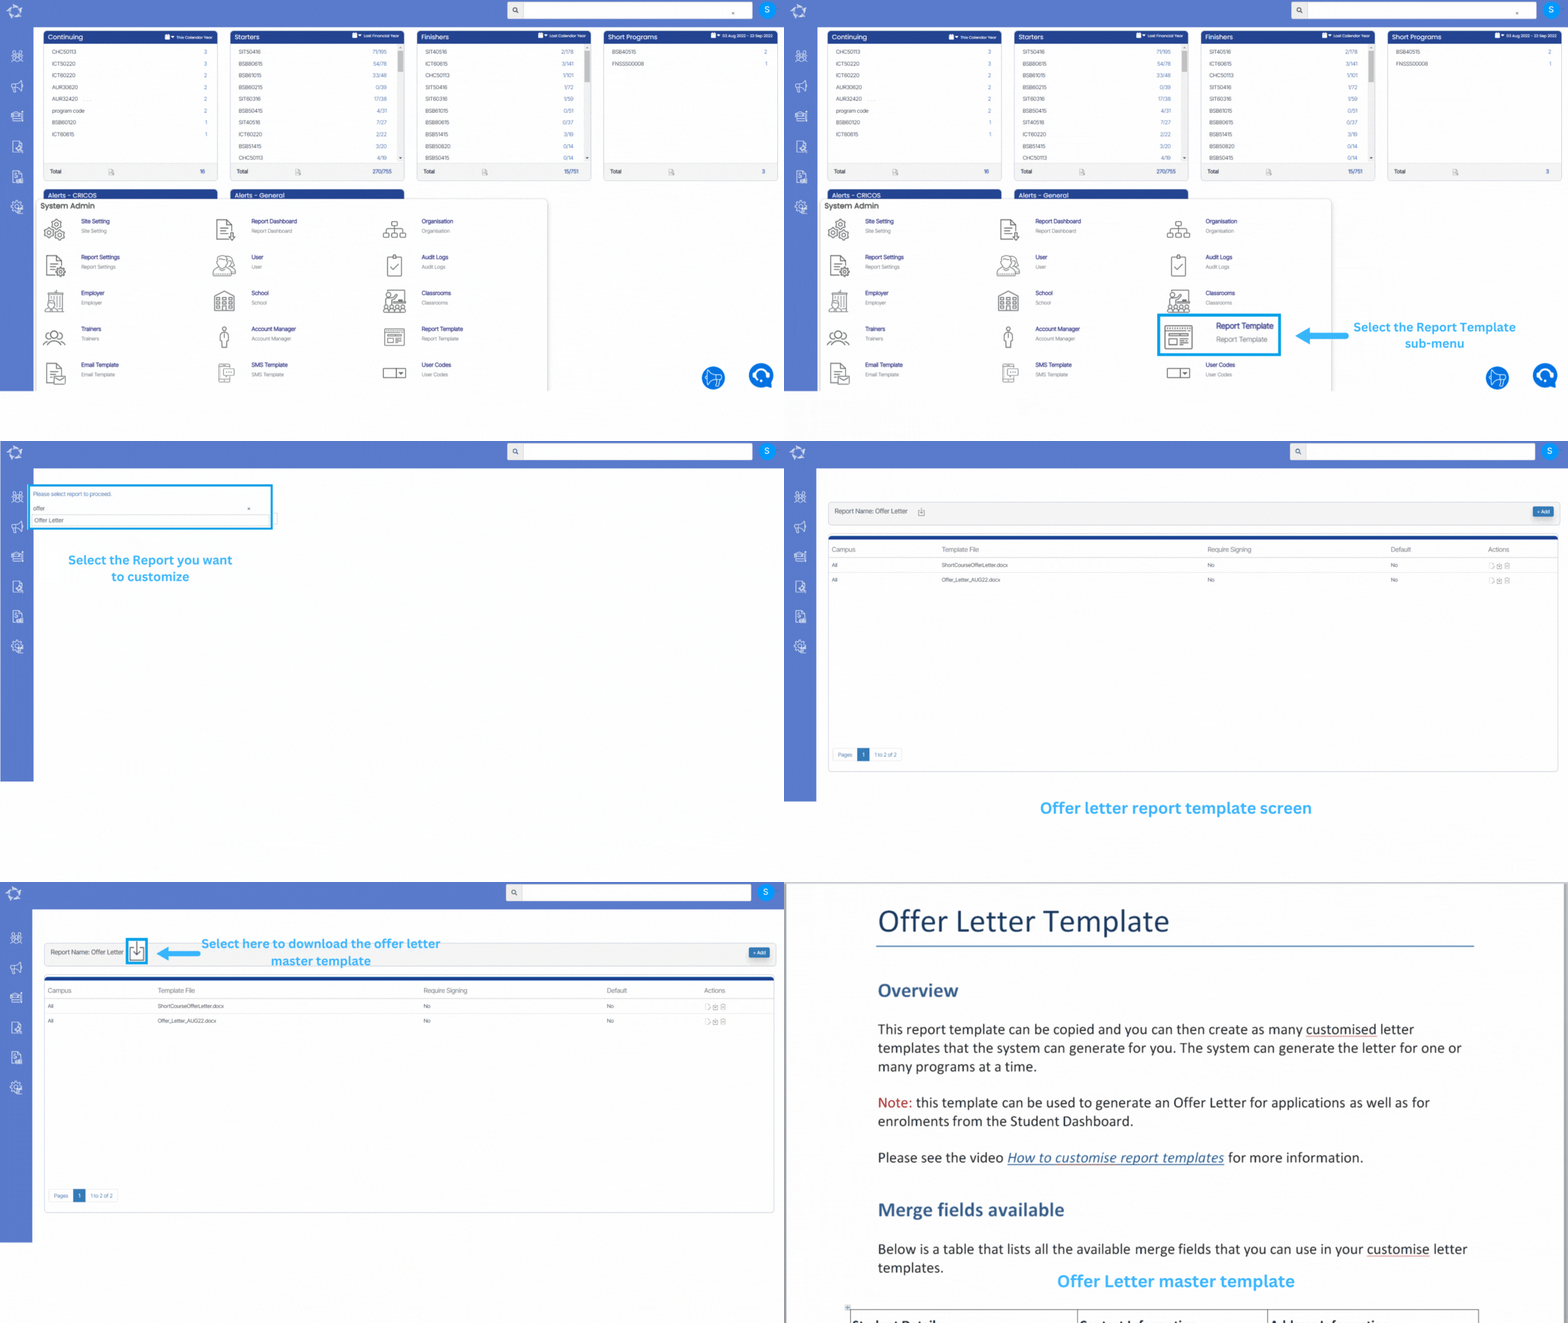
- First, you need to go to the Main Dashboard > System Admin > Report Template Screen
- Select the report in the search field to proceed. For example, if you are going to search for an offer letter then try typing 3 initial letters of it and the system will show you all report templates starting with those 3 initials. Simply select the required one.
- Once you selected it, the screen will refresh and shows you the customised offers in the grid.
- Now if you are going to customise any new offer letter, you need to select, the download icon beside the report name. This will download the Master version of the offer letter template which will help you to customise the offer letter for your RTO.
Below are the steps and explanations to customise the report template in TEAMS.
When you download any master template, it will show you some basic information about the template at the start and then shows you different sections that we have in every word report. You will find two categories of merge fields.
- Individual Merge Fields
- Table Merge Fields
Individual Merge Fields
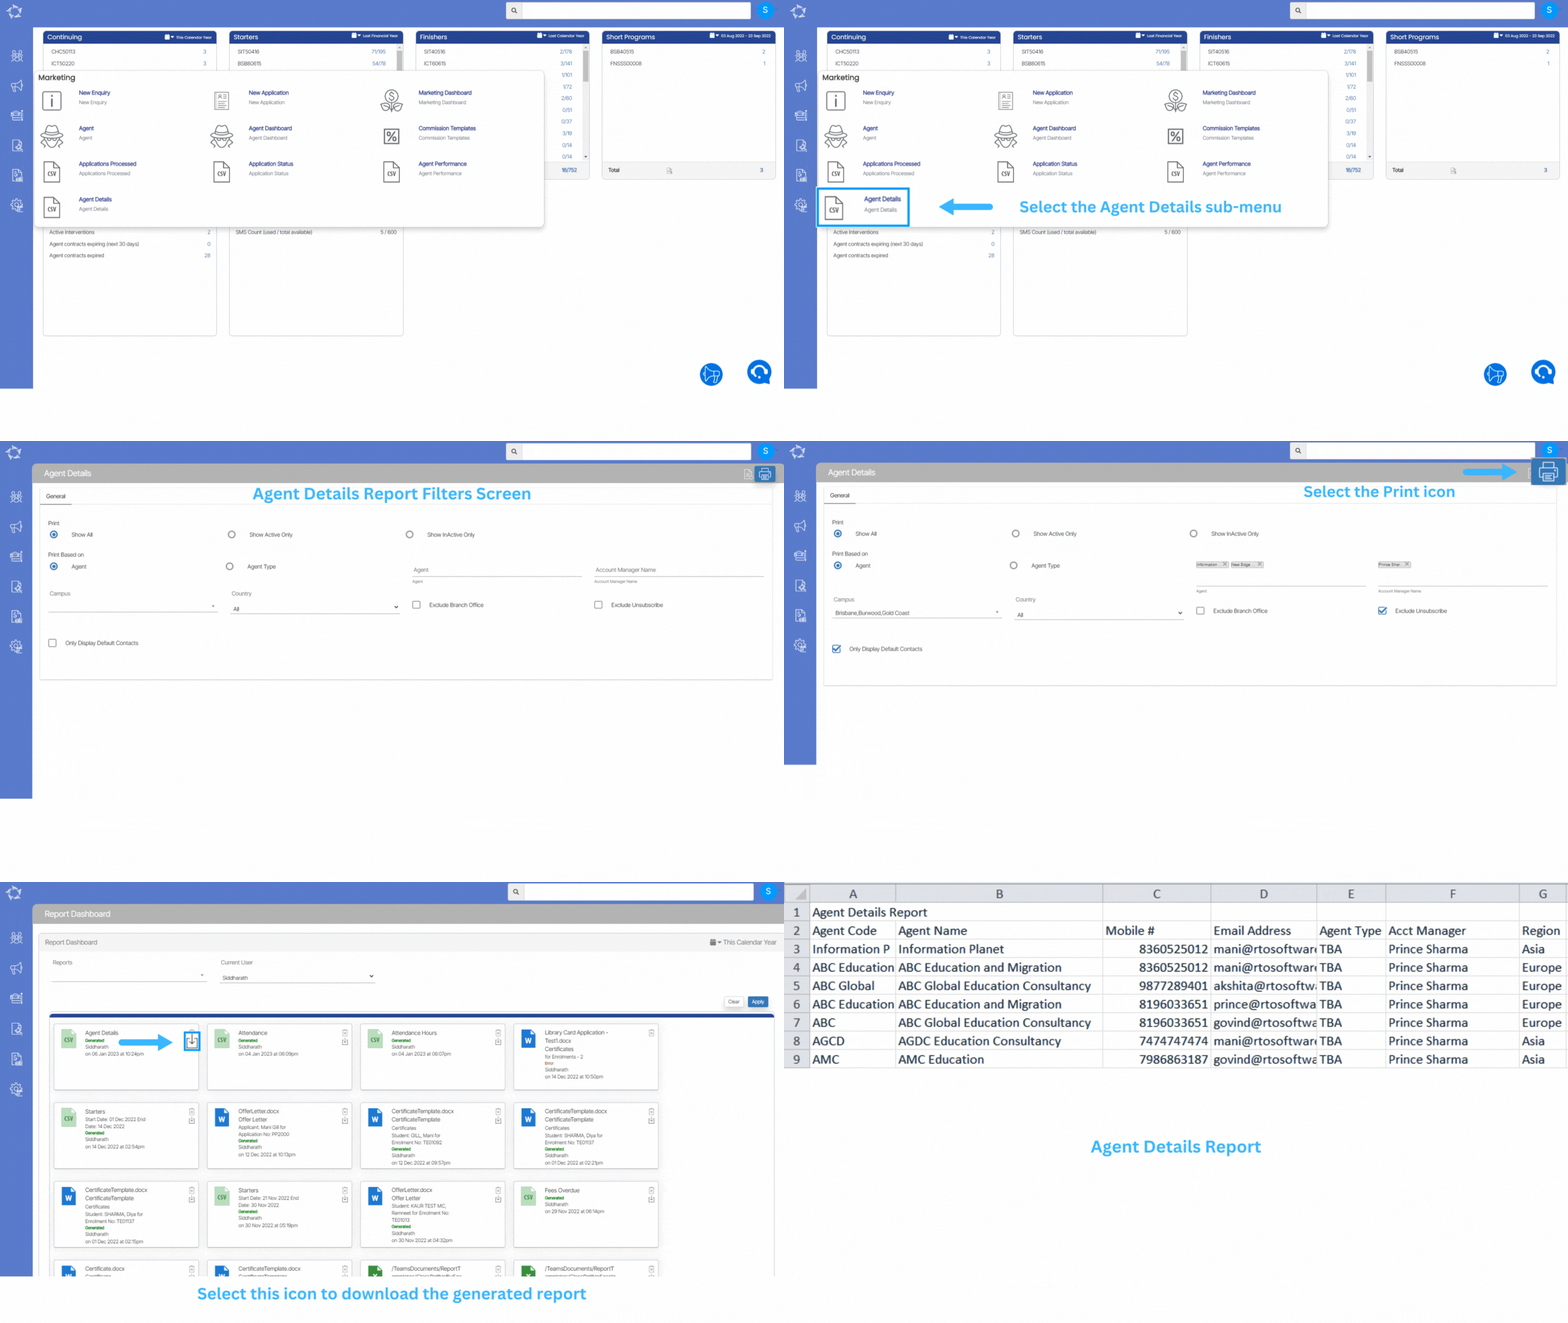
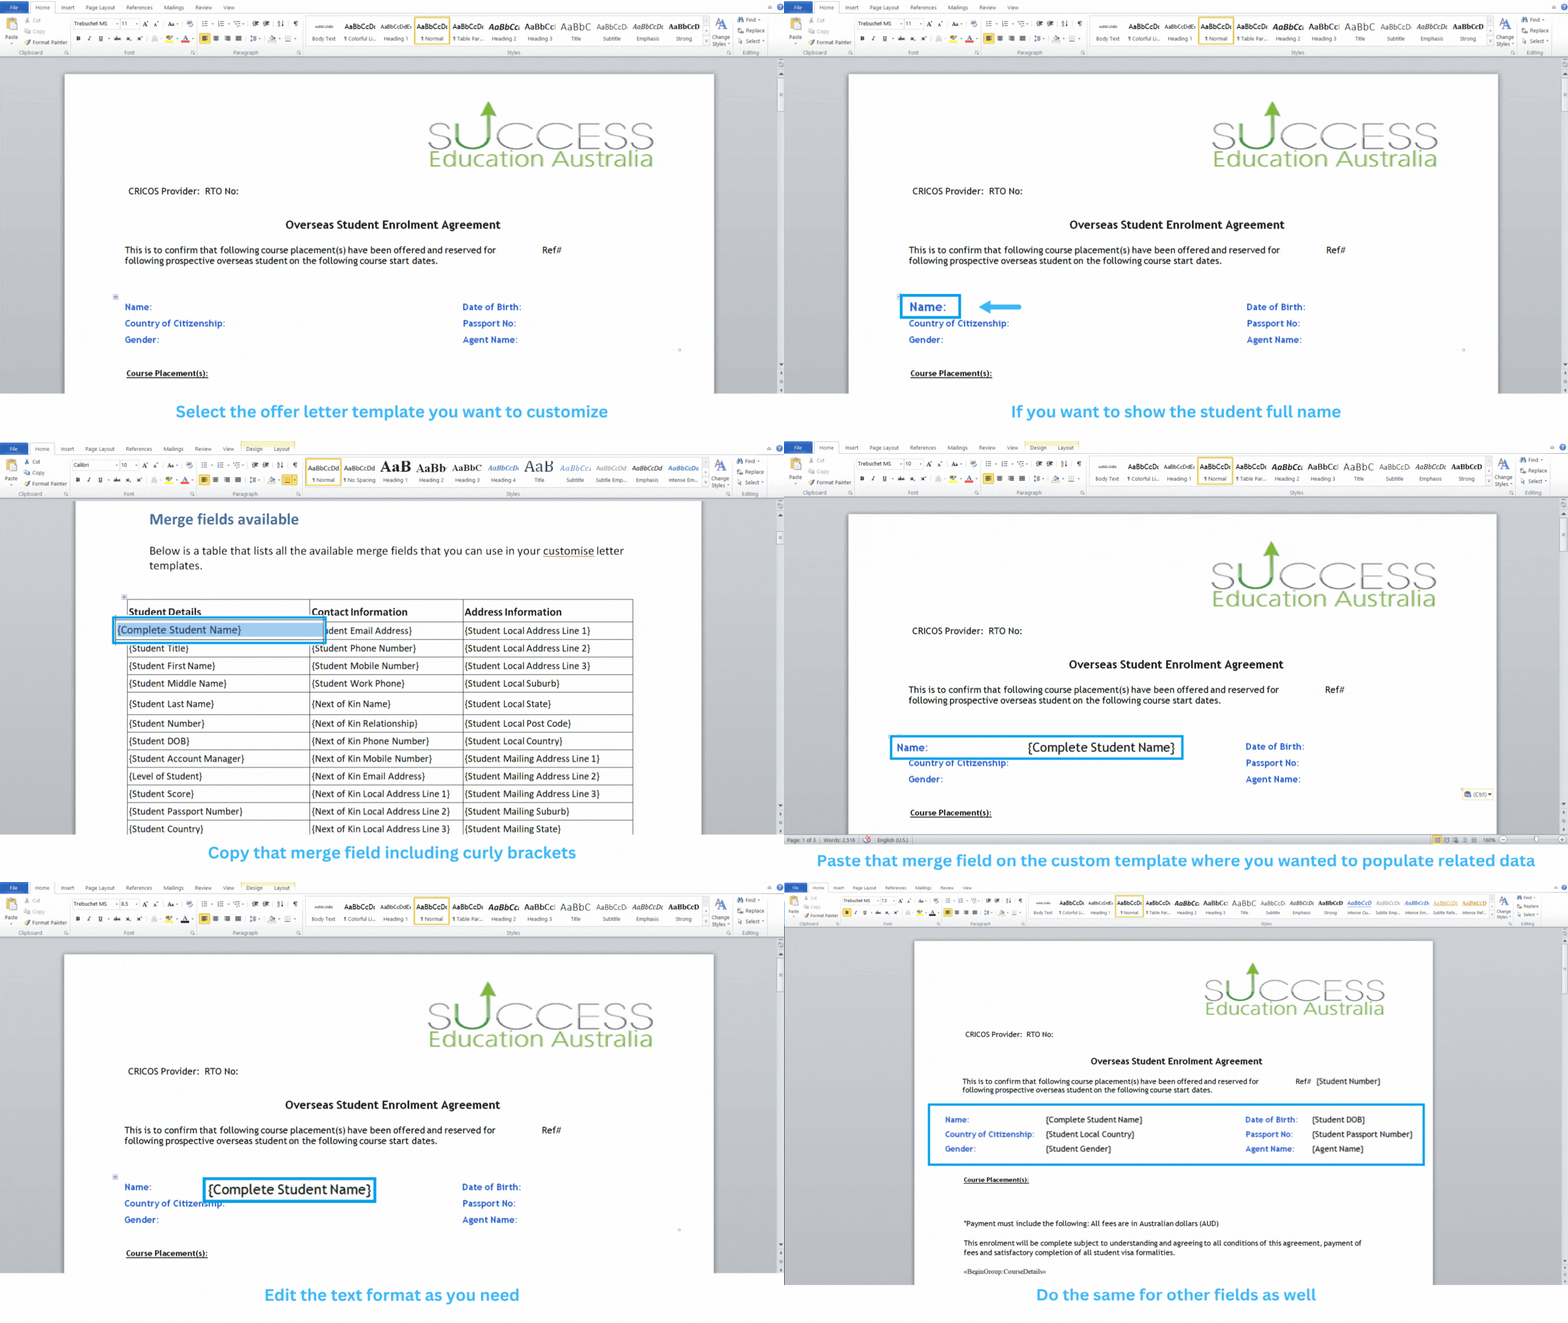
Anything in the curly brackets in the template is merge field and so let’s say you want to populate a student number or student name in your customised version then you need to copy and paste this merge field into your custom template so that every time when you generate any report, it will populate student number automatically for you. That’s how the merge fields will work for you for the students, enrolments, agents, and employers.
In the custom template, you can see that this table has basic information about the student like name, DOB, gender, and so on if you want the system to print this data for you then you need to copy all the individual merge fields related to the fields and to do so, you can simply copy the merge field from the master template and paste it. You can also edit the text format(font and size) of the merge fields according to your preferences.
IMPORTANT – If you are copying any merge field from the master template then you must copy it including the curly brackets. if you simply copy the text then the system will not print any data in your customised template.
Tables
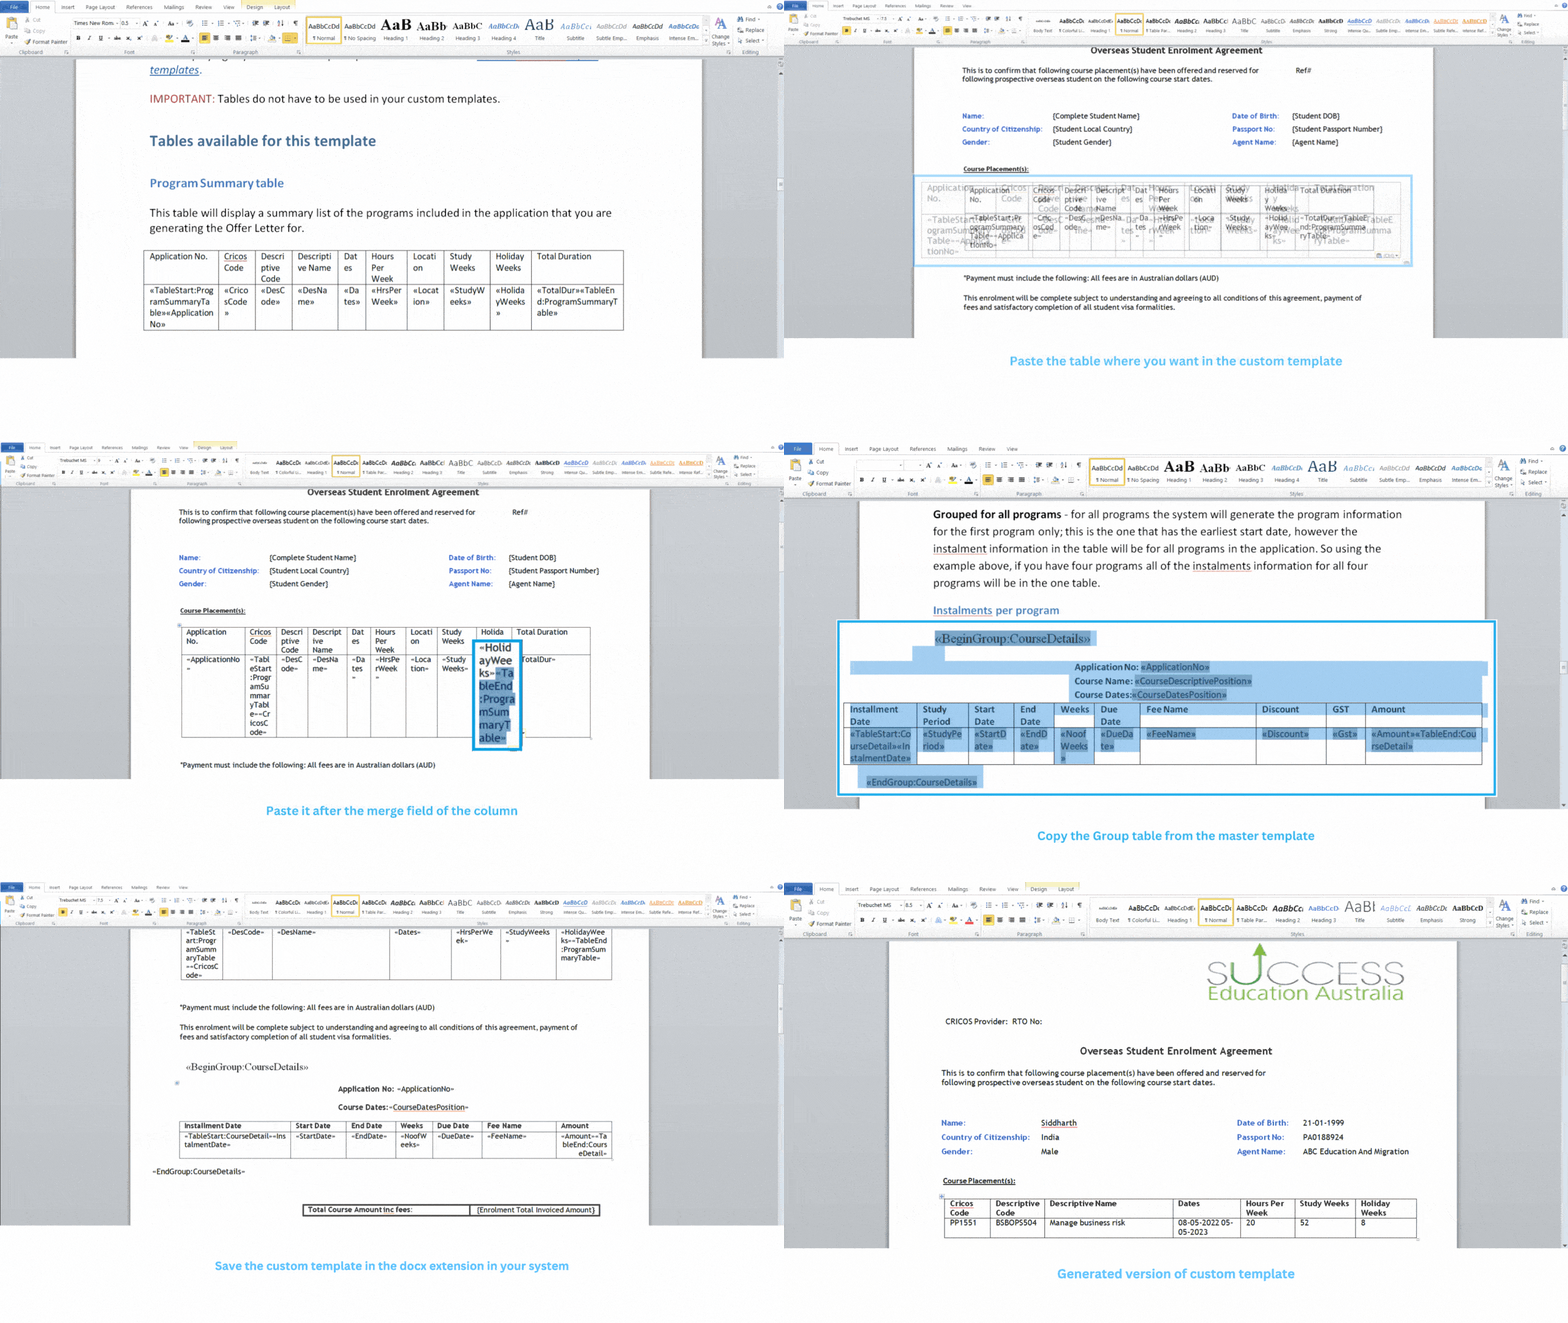
let’s say the student is enrolled into a program and you want to print the application number, Program descriptive code, Program descriptive name, and application dates then you need to find a table with all the required merge field columns and simply copy the whole table and paste it into the template that you are customising. In case, If you do not need any columns from the table you copied from the master template then you can delete those columns in your custom template.
How to use table merge fields in the report
- If you don’t want the default first column of the table or you wanted to adjust the first column position, then you need to cut the «TableStart:ProgramSummaryTable» merge field and paste it before the merge field of the column that you wanted to be first in the table. Then you can delete or adjust that first column in your table.
- The same rule applies to the last columns as well. For Example, In this table, the total duration is the last column and you don’t want the table to print the total duration columns in your custom template and you want the Holiday Weeks to be the last column in this table. Then in such case, you need to copy the merge field that is «TableEnd:ProgramSummaryTable» and paste it into the holiday weeks column after the holiday weeks table merge field.
IMPORTANT – Always remember whenever adding tables in your custom template, kindly check there are always table start and table end merge fields present in the first and last column of the table respectively.
Also, we have group tables in the master templates that will print the merge fields along with the data in the grid for the table. For example, course details table, here application no, course name and course dates are merge fields and under this, you will see the grid having columns instalment date, Study Period, Start Date, End Date etc.
You need to select the whole group table from this merge field «BeginGroup:CourseDetails» from the master template till «EndGroup:CourseDetails» and paste it into your custom template. You can adjust or delete the other table columns along with their merge fields but the «BeginGroup:CourseDetails» and «EndGroup:CourseDetails» merge fields should never be deleted or adjusted in the custom template.
Once all the editing is done, save the document with the name of the offer letter in Word document format i.e docx extension into your system and upload the custom template in the Report Template screen.
