Enrolment Dashboard > Result and Progress tile > Test Result icon
In the system, we do have a screen from where you can enter the IELTS, PTE, TOEFL, and (etc) scores. You can find this screen under Enrolment Dashboard > Result and Progress Tile > Test Results icon.
Once you will select the Test Result screen the system will open the screen in a new tab that will show you the test results that you have entered into the system for that enrolment.
To add a new test result, you just need to select the +Add button.
By selecting the +Addbutton the system will open a floating window where you can enter the results.
In the below table all the fields that are on the test result floating window, have been explained:
Fields
Explanation
Test Date
In the Test Date, you can select the date of the test for which you want to enter the scores.
Test Name
The Test name is a dropdown field from where you can select the type of test.
Test Location
The Test location is a dropdown from where you can select the location of the test. This is a User code screen and you can add other locations also in the dropdown.
L: Score
In the L: Score you can enter the score for the listening.
R: Score
In the R: Score you can enter the score for the Reading.
W: Score
In the W: Score you can enter the score for the Writing.
S: Score
In the S: Score you can enter the score for Speaking.
Use of English
Preparation.
G: Score
In the G: Score you can enter the score for the Grammar.
Overall Score
Enter the Overall Score in this field.
CEFR Level
Select CEFR Level from the dropdown.
Other English Level
Enter Other English Level in this field.
Notes
In the Notes, you can enter the notes for the test results.
Select the Refund icon from any of the screens and the system will open the refund screen.
Select the Refund all Check box to refund the full receipted amount.
For a partial refund, you have to manually enter the amount in the Refund Amount field.
Tiles
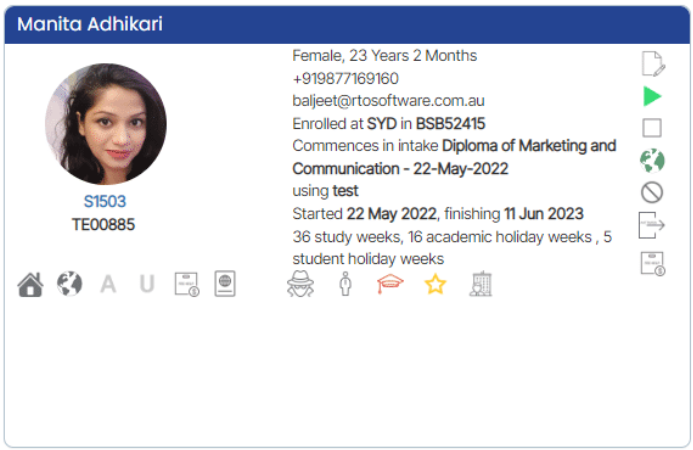
This Tile will show you the basic details of the enrolment and all the icons in this tile are read-only.
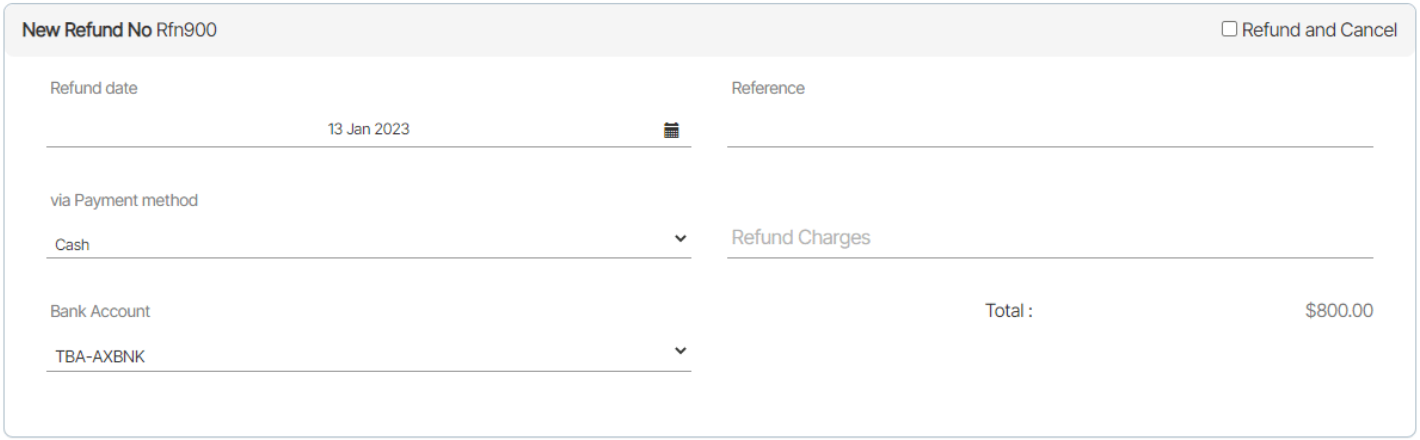
This tile will show you the New Refund No. along with the total refund amount. You can add the Refund date, Reference, Payment method of refund, refund charges, and bank account details in this tile.
This Tile shows you the Receipt details against which the refund can be created. It depends on the total number of refundable receipts according to which the number of tiles will be visible on the refund screen.
After deciding on the refund amount you need to update the details/data in the other fields that I have shown and explained below:
Field Name
Explanation
Refund date
The refund date will be the date on which the refund has been made.
Reference
If you have any reference number against this Receipt then you can update it in this field.
Via payment method
The payment method needs to be selected so that you can get to know how the refund payment method like is it cash, check, or any other method.
Bank Account
You can select the bank if you want to have an entry of refund in the bank.
Refund charges
If you are charging any refund amount then you can update that amount in this field.
Note: Select the Refund and Cancel tick box if you want to cancel that refunded amount from the total invoice amount. For example, if you have an invoice for $5000 and the receipt amount is also $5000. When you do a refund on the receipt amount of $5000, if you select the tick box for Refund and Cancel, then the system will create the refund entry and also cancel the invoice as well. Whereas, the same invoice is for $5000 but there is a receipt for only $3000 and you want to refund that receipted amount. The system will do the refund entry for $3000 and cancel out $3000 from the invoice so the invoice amount will then be only $2000.
After updating the details in the required fields you just need to select the Save button to do the refund.
The system will reload the screen, the system will take you to the enrolment dashboard and you can check the refund by going to the student financial details screen.
A receipt is a written/printed acknowledgment that shows the total amount of the invoice that has been paid by the student. You can do the receipt in the system from the two screens that I have shown below:
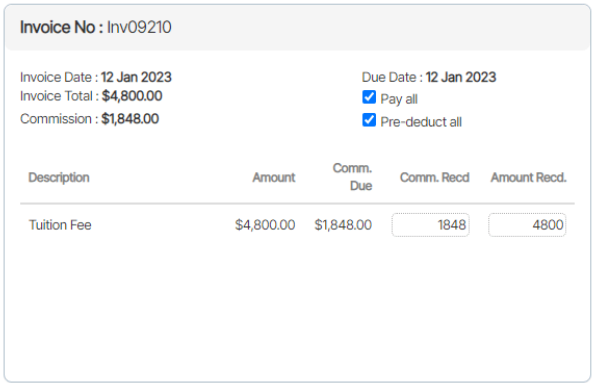
Select the Invoice against which you wanted to create the receipt.
Select the Pay all check box if you want to pay all the invoiced amount and the system will automatically update the amount received field.
Select the Pre-deduct all check box if you want to pre-deduct all the agent commission amount and the system will automatically update the commission received field.
If you want to pay the partial amount then you can manually type the amount in the commission received and the amount received fields.
Tiles
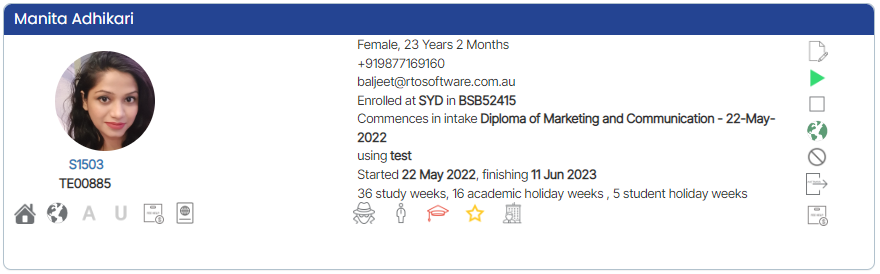
This Tille will show you the basic details of the enrolment and all the icons in this tile are read-only.
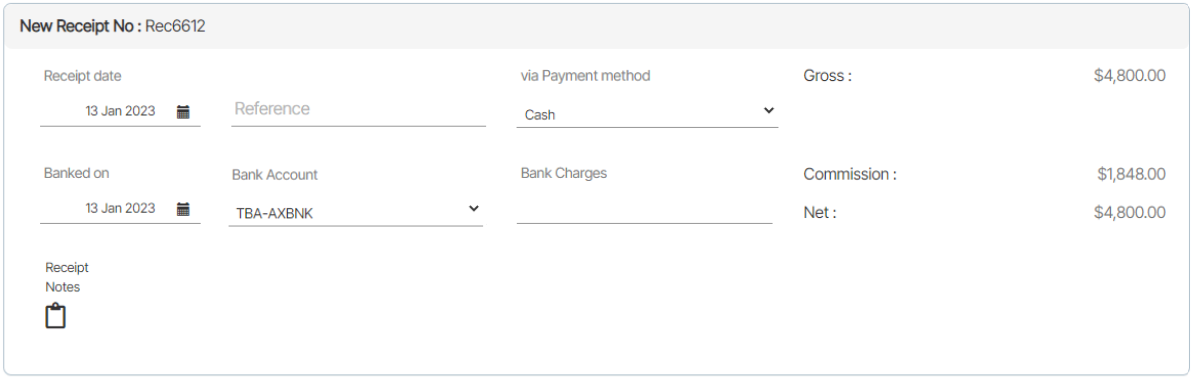
This tile will show you the Receipt number along with a preview of the Gross receipted amount, Commission amount, and Net receipted amount. You can add the Receipt date, Reference, Payment method and other Bank related details in this tile.
This Tile shows you the invoice details against which the receipt can be created. It depends on the instalment plans of the invoices according to which the number of tiles will be visible on the receipt screen.
After deciding on the receipt amount you need to update the data in the fields that are explained below:
Field Name
Explanation
Receipt date
The receipt date will be the creation date of the receipt. Today’s date will be automatically selected by default.
Reference
If you have any reference number against this Receipt then you can update it in this field.
Via Payment method
The payment method needs to be selected when you create the receipt, you can select the multiple payment methods from the payment method dropdown.
Banked on
If you want to update the date for the bank then you can update the date in this field.
Bank account
If you want to add the bank name on the receipt then you can select the bank from the dropdown, only the bank which you have added to the system will be visible in the dropdown.
Receipt Notes
If you want to update any notes for the receipt then you can click on the notepad icon to add the notes. After updating the notes again click on the notepad icon to save the notes.
Bank charges
If the bank is changing any amount on the receipt, you can also update the charged amount in the field.
After entering the details you just need to select the Save button and the system will create the receipt and show you the final step of the screen.
From the final screen, you will be able to see the system is saying that the receipt for enrolment no (TE00885) was created successfully, also there are two buttons on the screen, which I have explained below:
Print Button:
By selecting the Print button you will be able to generate the receipt, Once you select the button, floating window will appear on the screen, you can choose the template from the dropdown and select the generate button to generate the receipt.
Send Button:
By selecting the Send button you will be able to send the created receipt via email to the student. Once you will select the send button the system will take you to the compose email screen. You can choose your email template and select the send button to send the email.
Note: Whatever template you will select the receipt merge field needs to be added to the template, only then the system will print the receipt in the email.
There are two different screens from which you can create invoices. The first option is to navigate to the Enrolment dashboard > Financial tile. From there, you can select the New Invoice icon, which will open the Enrolment Dashboard > Invoice screen.
The second option is to go to the Enrolment dashboard and access the Enrolment Financial details screen. Once there, select the Financial tile and choose the New Invoice icon to open the same Enrolment Dashboard > Invoice screen. These two pathways provide convenient ways to generate invoices within the system, allowing for efficient management of financial transactions.
Below are the steps that you can do to create a new invoice against the enrolment.
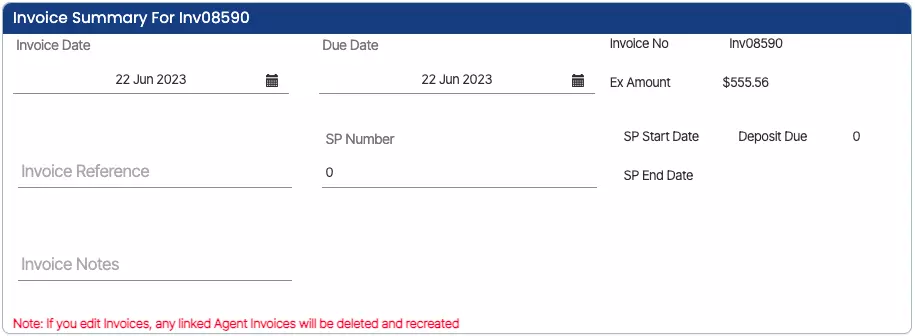
To fill in the necessary details in the Invoice summary tile, begin by selecting the Date of the Invoice. This is the date when the invoice is issued or generated. Choose the appropriate date from the available options.
Next, enter the Invoice Reference. The Invoice Reference is a unique identifier or number assigned to the invoice for tracking and reference purposes. Additionally, if an instalment plan applies to the invoice, you have the option to select it from a drop-down menu. The instalment plan allows for the payment of the invoice amount to be divided into multiple instalments over a specified period. This can be useful for situations where the recipient of the invoice prefers to pay in increments rather than the full amount upfront.
Moving on to the Fee Selection tile, you will find dropdown fields to select the Fee Type and Fee Name. These fields are used to identify the specific fee associated with the invoice. Choose the appropriate Fee Type and Fee Name from the available options in the respective dropdown menus.
If there is any discount applicable to the invoice, you have the option to include the discount-related information. To do so, locate the section designated for discount details, which may be found on the Invoice screen.
Tiles
This tile will show you the basic details of the enrolment and all the icons in this tile are read-only.Please note – This screen will not allow you to make any changes in the profile tile
You can enter the Invoice Date, Invoice Reference, and Instalment Plan for the fee that you have selected. This tile also gives you a preview of the total invoice amount, Discount amount, and Commission due amount.
Under the Fee Selection Tile, you can select the fee type, fee name, and fee amount along with discount with other discount-related details.
The Fee Items tile will show you the overview of the fee items that you have selected under the respective invoice. You can also Edit or Delete any fee item under this tile.
Fields under the Fee Selection tile are explained below:
Fee Selection fields
Explanation
Fee Type
Fee type is a dropdown and one can create a fee type in TEAMS from the User Code Screen, where you can select the type of fees (Tuition fee, Material fee, Application fee)
Fee Name
The fee name is also a dropdown and one can create a fee type in TEAMS from the User Code Screen that will show you the list of the fees and the list of the fees will depend on the fee type that you have selected.
Fee Amount
Once you will select the fees from the fee drop own the system will automatically populate the fee amount in the fee amount field, if you want then you can edit the amount also.
Discount
If you want to give a discount to the student you can enter the amount in the Discount field.
Discount Notes
You can update the Discount note by clicking on the clipboard icon and after entering the notes again you have to click on the clipboard icon to save the notes.
Discount Reason
The discount reason is also a dropdown value if you are entering the amount in the discount then the discount reason is mandatory to be updated.
Total
The total field will show the total amount of the invoice after subtracting the discount and after including the GST.
+ADD
After selecting the details you need to select the add button to add the fee to the fee item grid.
Fields under the Invoices Summary tile are explained below:
Invoice Summary Fields
Explanation
Invoice date
The invoice date will be the date of the invoice and it should be between the enrolment start and end date.
Installment plan
From the instalment plan dropdown, you can select the instalment plan, only those instalment plans will be visible under this dropdown that is linked to programs
In the Agent tab, the system will show you a summary of the agent commission invoices and any payments made with a balance. To see the in-depth information for the commission you can select the more… option.
Below are the steps that you can do by selecting the more option
By selecting the more option the system will open the Agent Financial Details screen for the enrolment. It will show you each commission invoice linked to the enrolment and any payments that have been made or deleted for the agent.
You can edit an Agent Commission invoice using the Edit icon at the top of the grid. This new screen will allow you to edit a particular invoice by selecting the + button before the invoice number.
After selecting the + button, you can change the commission and GST amount, also you can add your desired notes for the invoice by selecting the notes icon under the action column.
After adding your desired notes for the invoice, select the Save button at the top right corner of the ED > Agent Financial Detail screen. After selecting the save button, you will see that the notes icon under the action column turn green which shows that this invoice contains notes.
Note: The system will not allow you to update the commission amount less than what you have paid to the agent for that invoice. However, you can edit the commission amount to more than what you have already paid to the agent for that invoice.
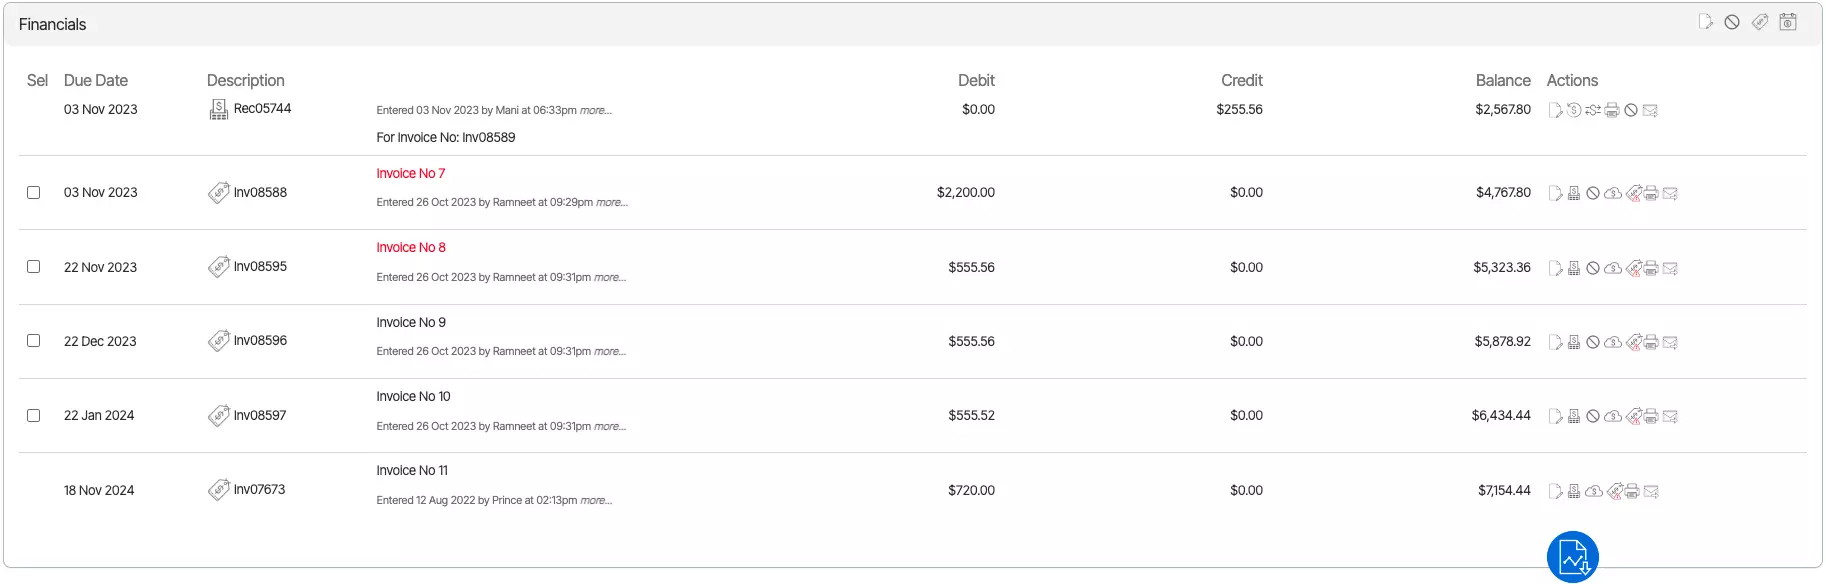
When you are on the Enrolment Dashboard > Financials Tile, you will see the word more… in the right bottom corner of the tile and when you select it, the system will open the Enrolment Dashboard > Student Financials Detail screen, where you will be able to see all the financial details (Invoices, Receipts, Refunds, Transfers, etc) for the enrolment.
Tiles
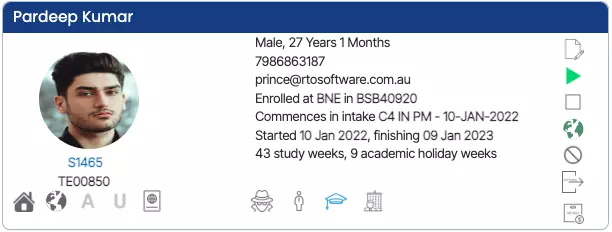
This tile will show you the basic details of the enrolment and all the icons in this tile are read-only.
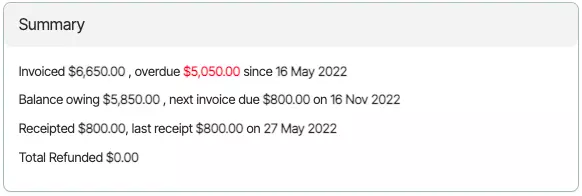
This tile will show you the enrolment financials summary as the total invoiced amount, overdue amount/since, balance owing, next invoice due, total receipted amount, last receipt amount/on a date, and total refund.
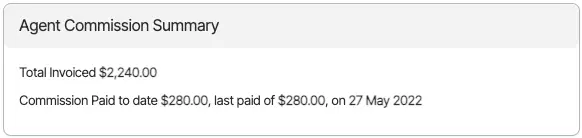
In the agent commission summary tile, you will see the agent financials as the total invoiced amount, paid commission amount, and last paid commission amount/on a date.
Icons under the actions column have been explained below:
Icons
Explanation
This icon will allow you to edit the invoice details in the invoice section and receipt details in the receipt section.
Using the receipt icon, you will be able to create a new receipt against any invoice.
Using this cancel icon you will be able to cancel any invoice and receipt.
This is a negative invoice icon, using this icon you will be able to raise a negative invoice(credit note) against the invoices.
By using this icon you will be able to print the invoice or receipt.
By using this icon you will be able to send the invoice or receipt to the student via email.
The Enrolment Dashboard features a Financial tile that provides functionality related to linking and editing agents. By accessing the Financial tile, you can link an agent from the Students tab to the enrolment. Once the agent is successfully linked, you can proceed to edit the agent’s details from the Agent tab.
The link agent icon within the Financial tile enables you to search for a specific agent and update their information within the enrolment. This allows for the synchronization of the agent’s data with the enrolment. On the other hand, the edit agent icon offers the capability to replace the currently linked agent with a different agent.
Important – If you want to change/edit the agent then make sure there are no payments that have been made for the agent in this enrolment, if the payments have been made then you have to go to the Agent financial screen and delete the payment via selecting the delete button.
To link the Agent you need to do the following steps
Then, you need to select the edit icon and that will show you a link agent floating window.
The linked agent will be visible there, you just need to select the cross icon that is just next to the agent name to remove the current agent.
After that, you need to start typing the new agent code/name in the agent field and the system will show you the list of similar agent that matches your search.
Once you will select the required agent you need to update the agent, the system will reload the enrolment dashboard and will show the new one again with the new invoices.
If you want to remove the agent linked with the student enrolment then you can delete it by using the delete button on the agent tab from the Enrolment Dashboard > Financial tile.
IMPORTANT– The system will not allow you to delete the agent if there is any agent payment has been made. You need to delete the agent payment first to delete the agent.
Below are the steps to delete the agent and agent payments.
Go to the Enrolment Dashboard > Financial Tile > Agent Tab and then select the more option.
Select the delete icon to delete the agent payment.
Once you select the delete icon the system will show you the popup message on top of the screen. (Are you sure you want to delete the agent payment #). You can select OK to delete or cancel to leave it as it is.
Once the payment has been deleted, you will be able to remove the agent from the enrolment.
You need to go back to the enrolment dashboard > Financial Tile > Agent Tab
Select the delete icon to delete the agent.
The system will reload the screen and the agent will get removed from the enrolment.
This tile will give you a summary of all the financial transactions of the student and Agent.
Tabs
Student
All the financials related to the student enrolment will be visible under the Student tab. You will be able to see the total invoiced amount, overdue amount, total receipted amount, total overpaid, and the balance owed.
Agent
Under the agent tab, you will be able to see the agent name that is linked to the enrolment, total commission, last paid, and the total balance owing.
This tile will show you all the application’s financial details under the Student and Agent tabs. You can edit the invoice from the edit icon and you can also print the invoices.
IMPORTANT – You are only allowed to make the changes from this tile if the application is not converted otherwise you can make changes from the Enrolment Dashboard.
Student Tab
On the Student tab, only student-related financials will be visible and you will be able to see the Invoice date, description of the invoice, Total amount and Balanceamount also there will be an action column that includes edit, online payment, and print the invoice.
Columns
Explanations
Invoice Date
This column will show you the invoice dates.
Description
This column will show you the number of instalments for the application. You can also select more… to view the invoice details.
Total
This column displays the total amount of a particular invoice.
Balance
It will show you the balance amount if any deposit due is updated while creating the application after subtracting the deposit due.
Actions
Under the action column, there are 2 actions listed for each invoice the Edit icon and the print icon.
Agent tab
The agent tab will show you the invoice amount related to the agent.
On the agent tab, the system will show you the agent invoice date, description, invoice amount and balance amount.
Edit
This icon will allow you to edit the invoice
Print
This icon will allow you to print application invoice