The Current Students Report will be used to confirm that the data for each student currently studying with you is correct. For example, if you are preparing to submit your student data to NCVER for 2022 then you would look for all enrolments that are continuing to study within the calendar year. The dates you would enter for this report would be 01 Jan 2022 to 31 Dec 2022.
A current/continuing student enrolment is for example, where a student’s enrolment start date may have been in 2020 and their enrolment end date is either in 2022 or in say 2023. As long as the enrolment is flagged as started then it should be in the submission and you need to confirm the student level data in this step is correct.
Whereas, let’s say a student’s enrolment start date was in 2020 but their enrolment end date was in 2021, then they would not be a continuing/current student studying in 2022 and should not be in the export for 2022. Once the report has generated you need to open it and focus on the following columns to answer specific questions.
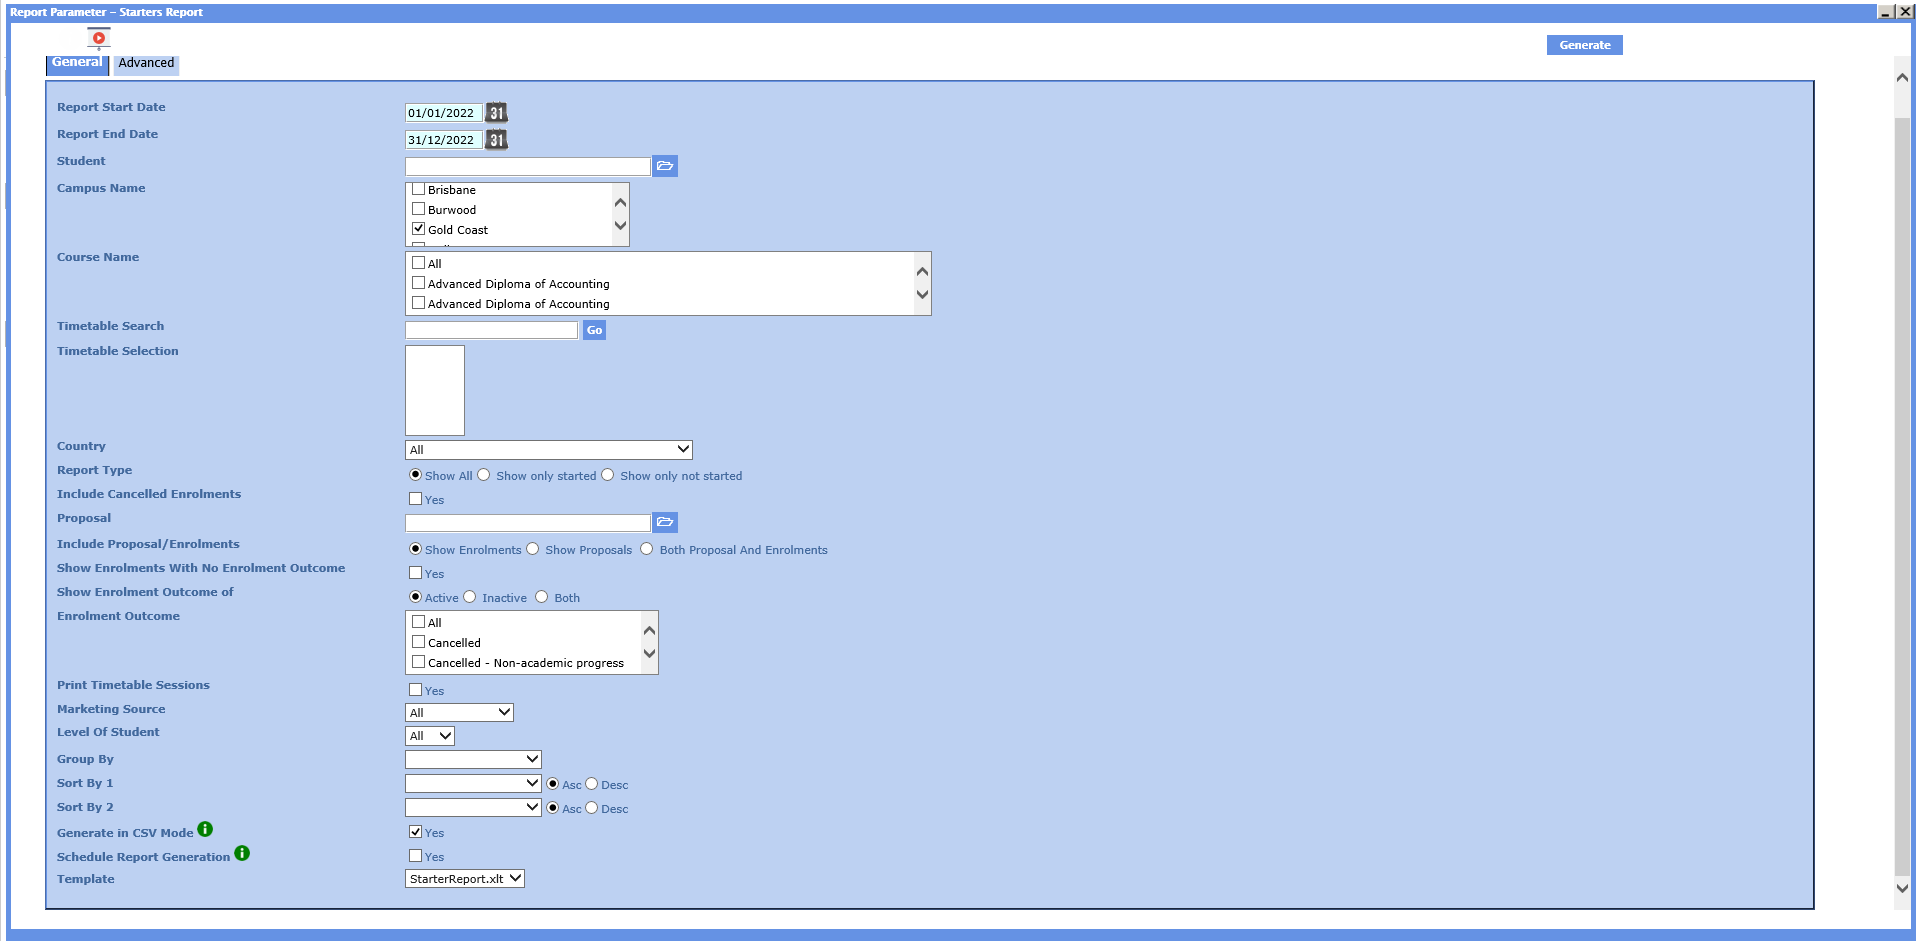
Recommended Report Parameters to use
Using the example that you are preparing for a student data submission for 2022, the below recommended parameters should be used for this report.
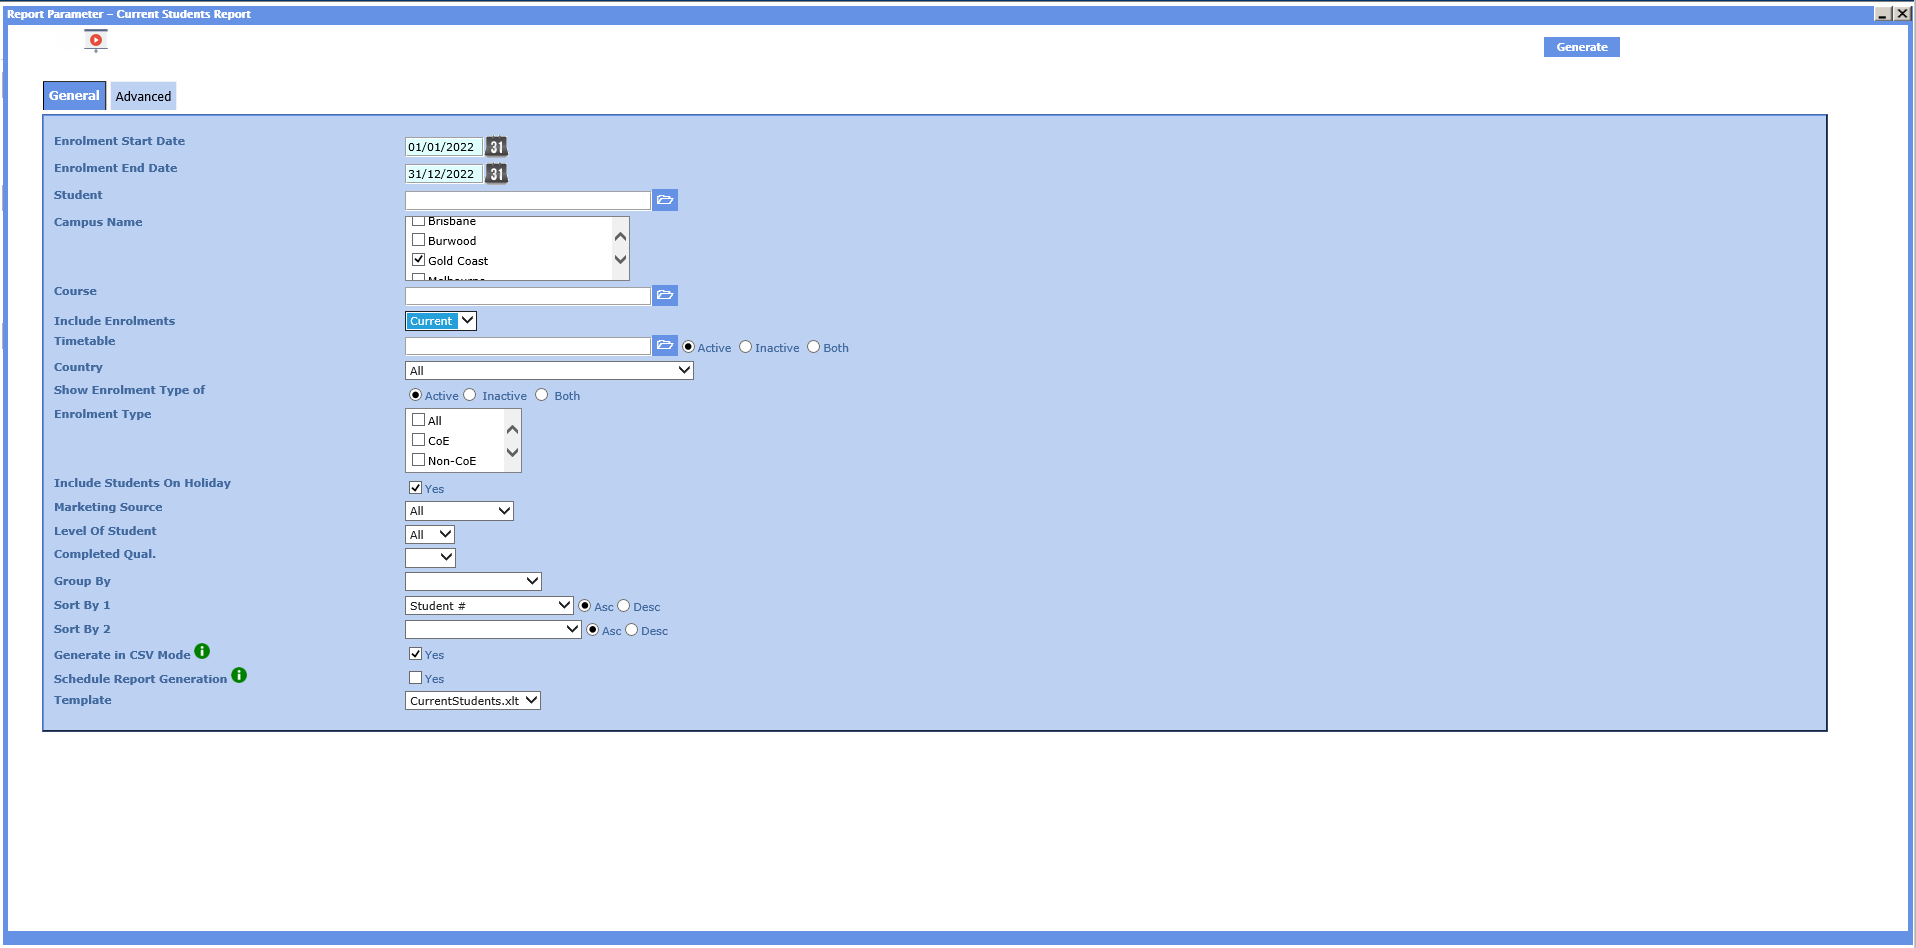
In the report parameter image above we have selected only one campus for the Gold Coast. Where you have multiple campuses, you will have to select all the campuses where you have VET enrolments for this report. You must also select the option for the parameter of Include Enrolments to Current as this will show you all enrolments that are flagged as started and considered a current/continuing enrolment in the calendar year and then you can review in future steps, if the enrolment data is correct or not.
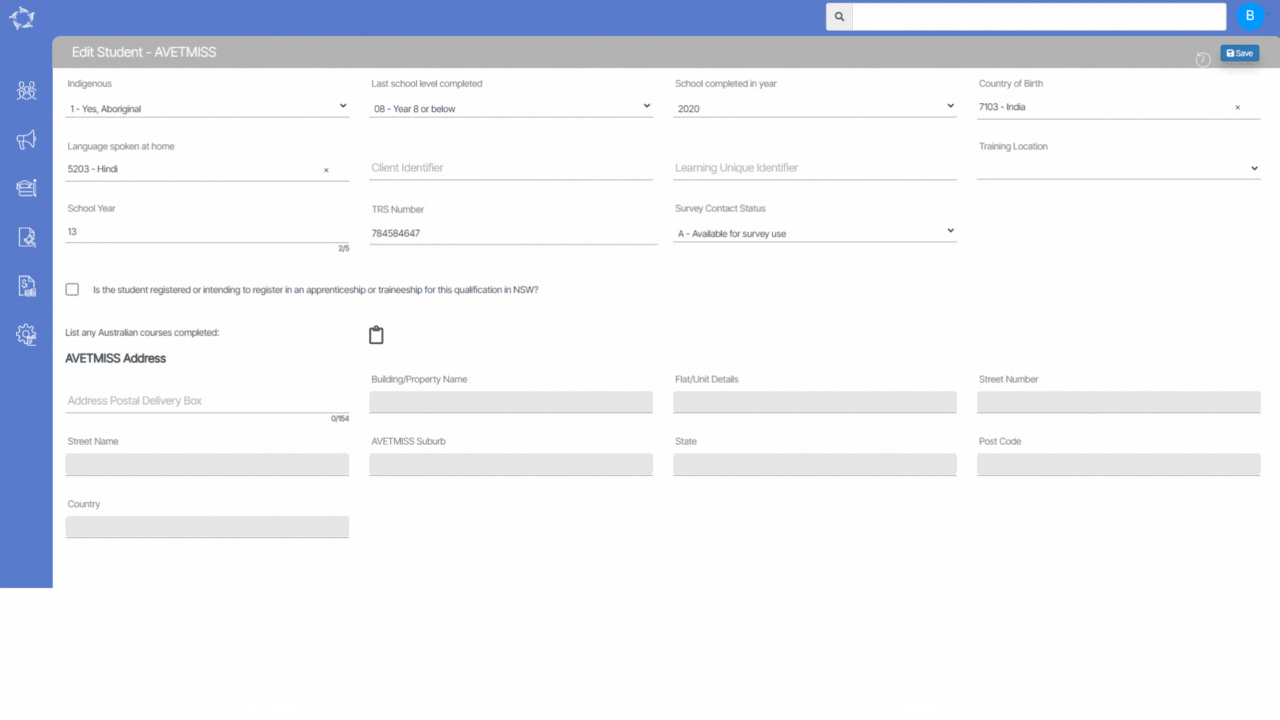
- Student Name – it is mandatory to have the student’s name in both the First Name and Last name fields in the Student Entry screen. This report does not have columns to show the break down of the student’s name such as a column for First Name and another for Last Name. However, where a student only has one name OR in their passport their full name is considered one name such as Ramneet Kaur, then you must enter the entire name in both the First Name and Last Name fields in the Student Entry screen. Where you have done this then you should see in this column something like Ramneet Kaur Ramneet Kaur or RAMNEET KAUR, Ramneet Kaur. Note: this is column B in the report.
- DOB – this is mandatory, if you do not have a Date of birth (DOB) for a student you will get errors in your submission. Note: this is in column C.
- AVETMISS Student – it is important to set a student as an AVETMISS student where they have an enrolment in a VET qualification and/or competency in the system. If you do not do this, the system will ignore that student and their enrolments in the export. Note: this is in column Y.
- Gender – this is mandatory, if you do not have a Gender for the student you will get errors in your submission. Note: this is in column AD and is labelled as Sex.
- USI No – you need to confirm if each of your starting students in this report have a USI Number or not, where they are enrolled in a VET qualification/competency. If they are and you do not have a USI Number for them, then you must start contacting student’s and have them supply you with this number. Important: there is a maximum number of students that you can have without a USI No, however it is based on a percentage that NCVER do not give out. We also do not know this percentage, so it is best that you have a USI entered for all your students. If you do not meet the maximum percentage of students without a USI then you will NOT have a successful submission. Note: this is in column BJ.
Important: all of the above fields are in the Student Entry screen in Class TEAMS. Once you have a list of student’s with missing data or incorrect data from the report you will need to open each one in this screen and update the information. You can update the AVETMISS Student setting in bulk by using the Bulk Student AVETMISS and Other Settings screen in Classic TEAMS. Also, one very important field that is not in the report but mandatory is the Student Survey Status. You can also update this in bulk using the same Bulk Student AVETMISS and Other Settings screen.
REMEMBER: keep this report for future steps of the Student Data submission process.